I would like you to imagine a young lad who, at the age of 15, buys an MGB and spends the next 5 years building a Sebring replica with a BMC T16 4 cylinder engine and workmanship that goes far beyond perfection. The day comes when the car is as good as finished and young Harvey takes it for a test drive down a private lane near where he lives. He is travelling along and comes to an S bend.
According to Mark, his father, Harvey doesn’t notice but the road is covered with diesel and he skids on this and takes to the ditch. The offside front wheel hits a concrete culvert in the ditch and the offside front suspension is ripped off and driven into the body. The body is badly distorted, and Harvey is taken to hospital with a broken leg. His father, after returning from the hospital gets the car back to their workshop and examines it. Harvey is at university and has no real income to pay for the body to be rejigged and all the new panels and suspension etc needed.
Can you imagine how that 19 year old lad feels with his amazing car is written off through a freak accident. He reckons he was only doing 30 mph and Mark confirms, as he knows the lane, that he couldn’t have been doing much more.
A few of those in the MG Owners Club who have been following the 5 year progress of Harvey’s build feel that Harvey deserves some help.
You can buy a raffle ticket at https://www.collectionpot.com/pot/148206/ and the price is £10 a ticket.
If you wish to contribute more than £10, we will increase the tickets you’ve purchased to the correct amount in units of £10. If you don’t want to enter the raffle email norman@frenchblat.com and your name will be removed.
The prizes are :
First: A Shorrocks supercharger for an MGB (1), used but in good condition valued at £2000
Second: A bottle of Ballantine’s 25 year old whisky valued at £650
Third: A bottle of Johnnie Walker 150th Anniversary black label whisky valued at £180.
Fourth: A pair of gas struts for an MGB bonnet.
(1) probably can get fitting kits for other models.
(2) The organisers of the raffle cannot arrange for delivery of the large items, the winner will have to collect from an address in the North Midlands or pay for carriage.
(3) Tickets can be purchased from outside the UK by using a credit card and selecting £10 on the raffle website. The credit card will do the exchange.
(Should the money raised be more than is required to get Harvey back on the road the excess will be donated to CUK (Cancer Research))
I hear you ask why should we buy a ticket to help this lad. Well, many of us have been entertained by the progress of the project and now it’s time to pay for that entertainment, just as you would pay to see a film at the cinema, Then there’s the point about keeping our old cars on the road in the future, we need lads like Harvey to make sure our cars are around long after we’re gone.
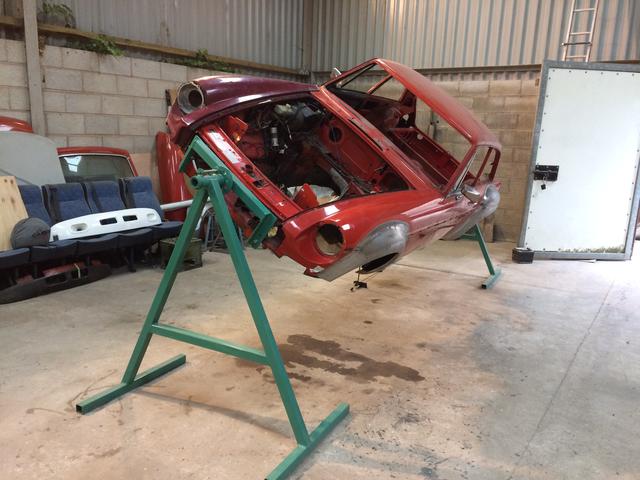
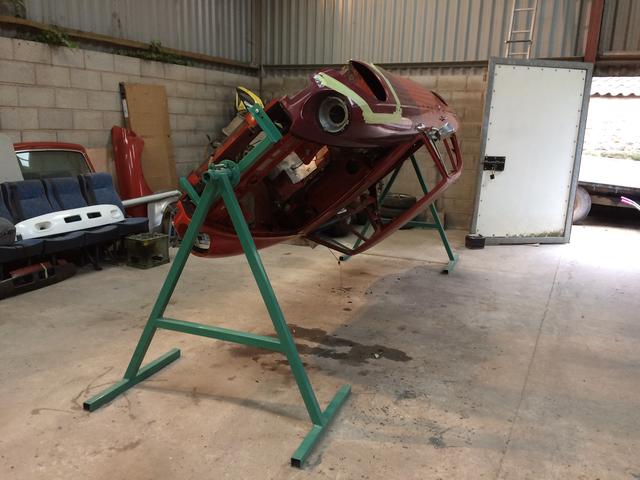
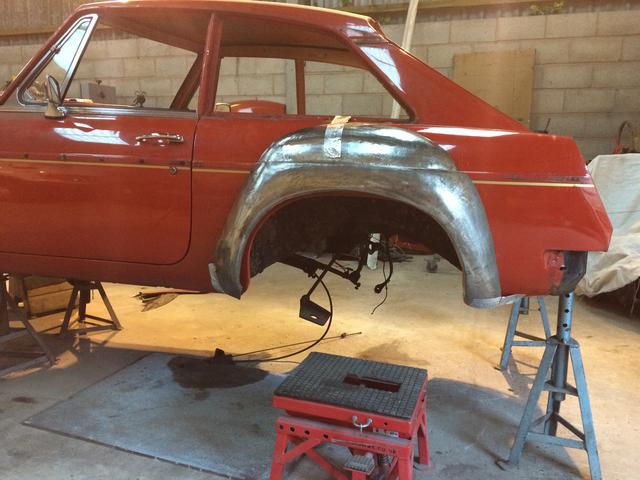
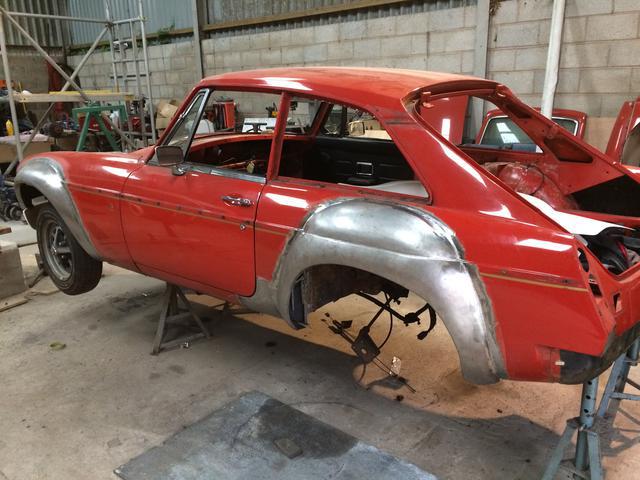
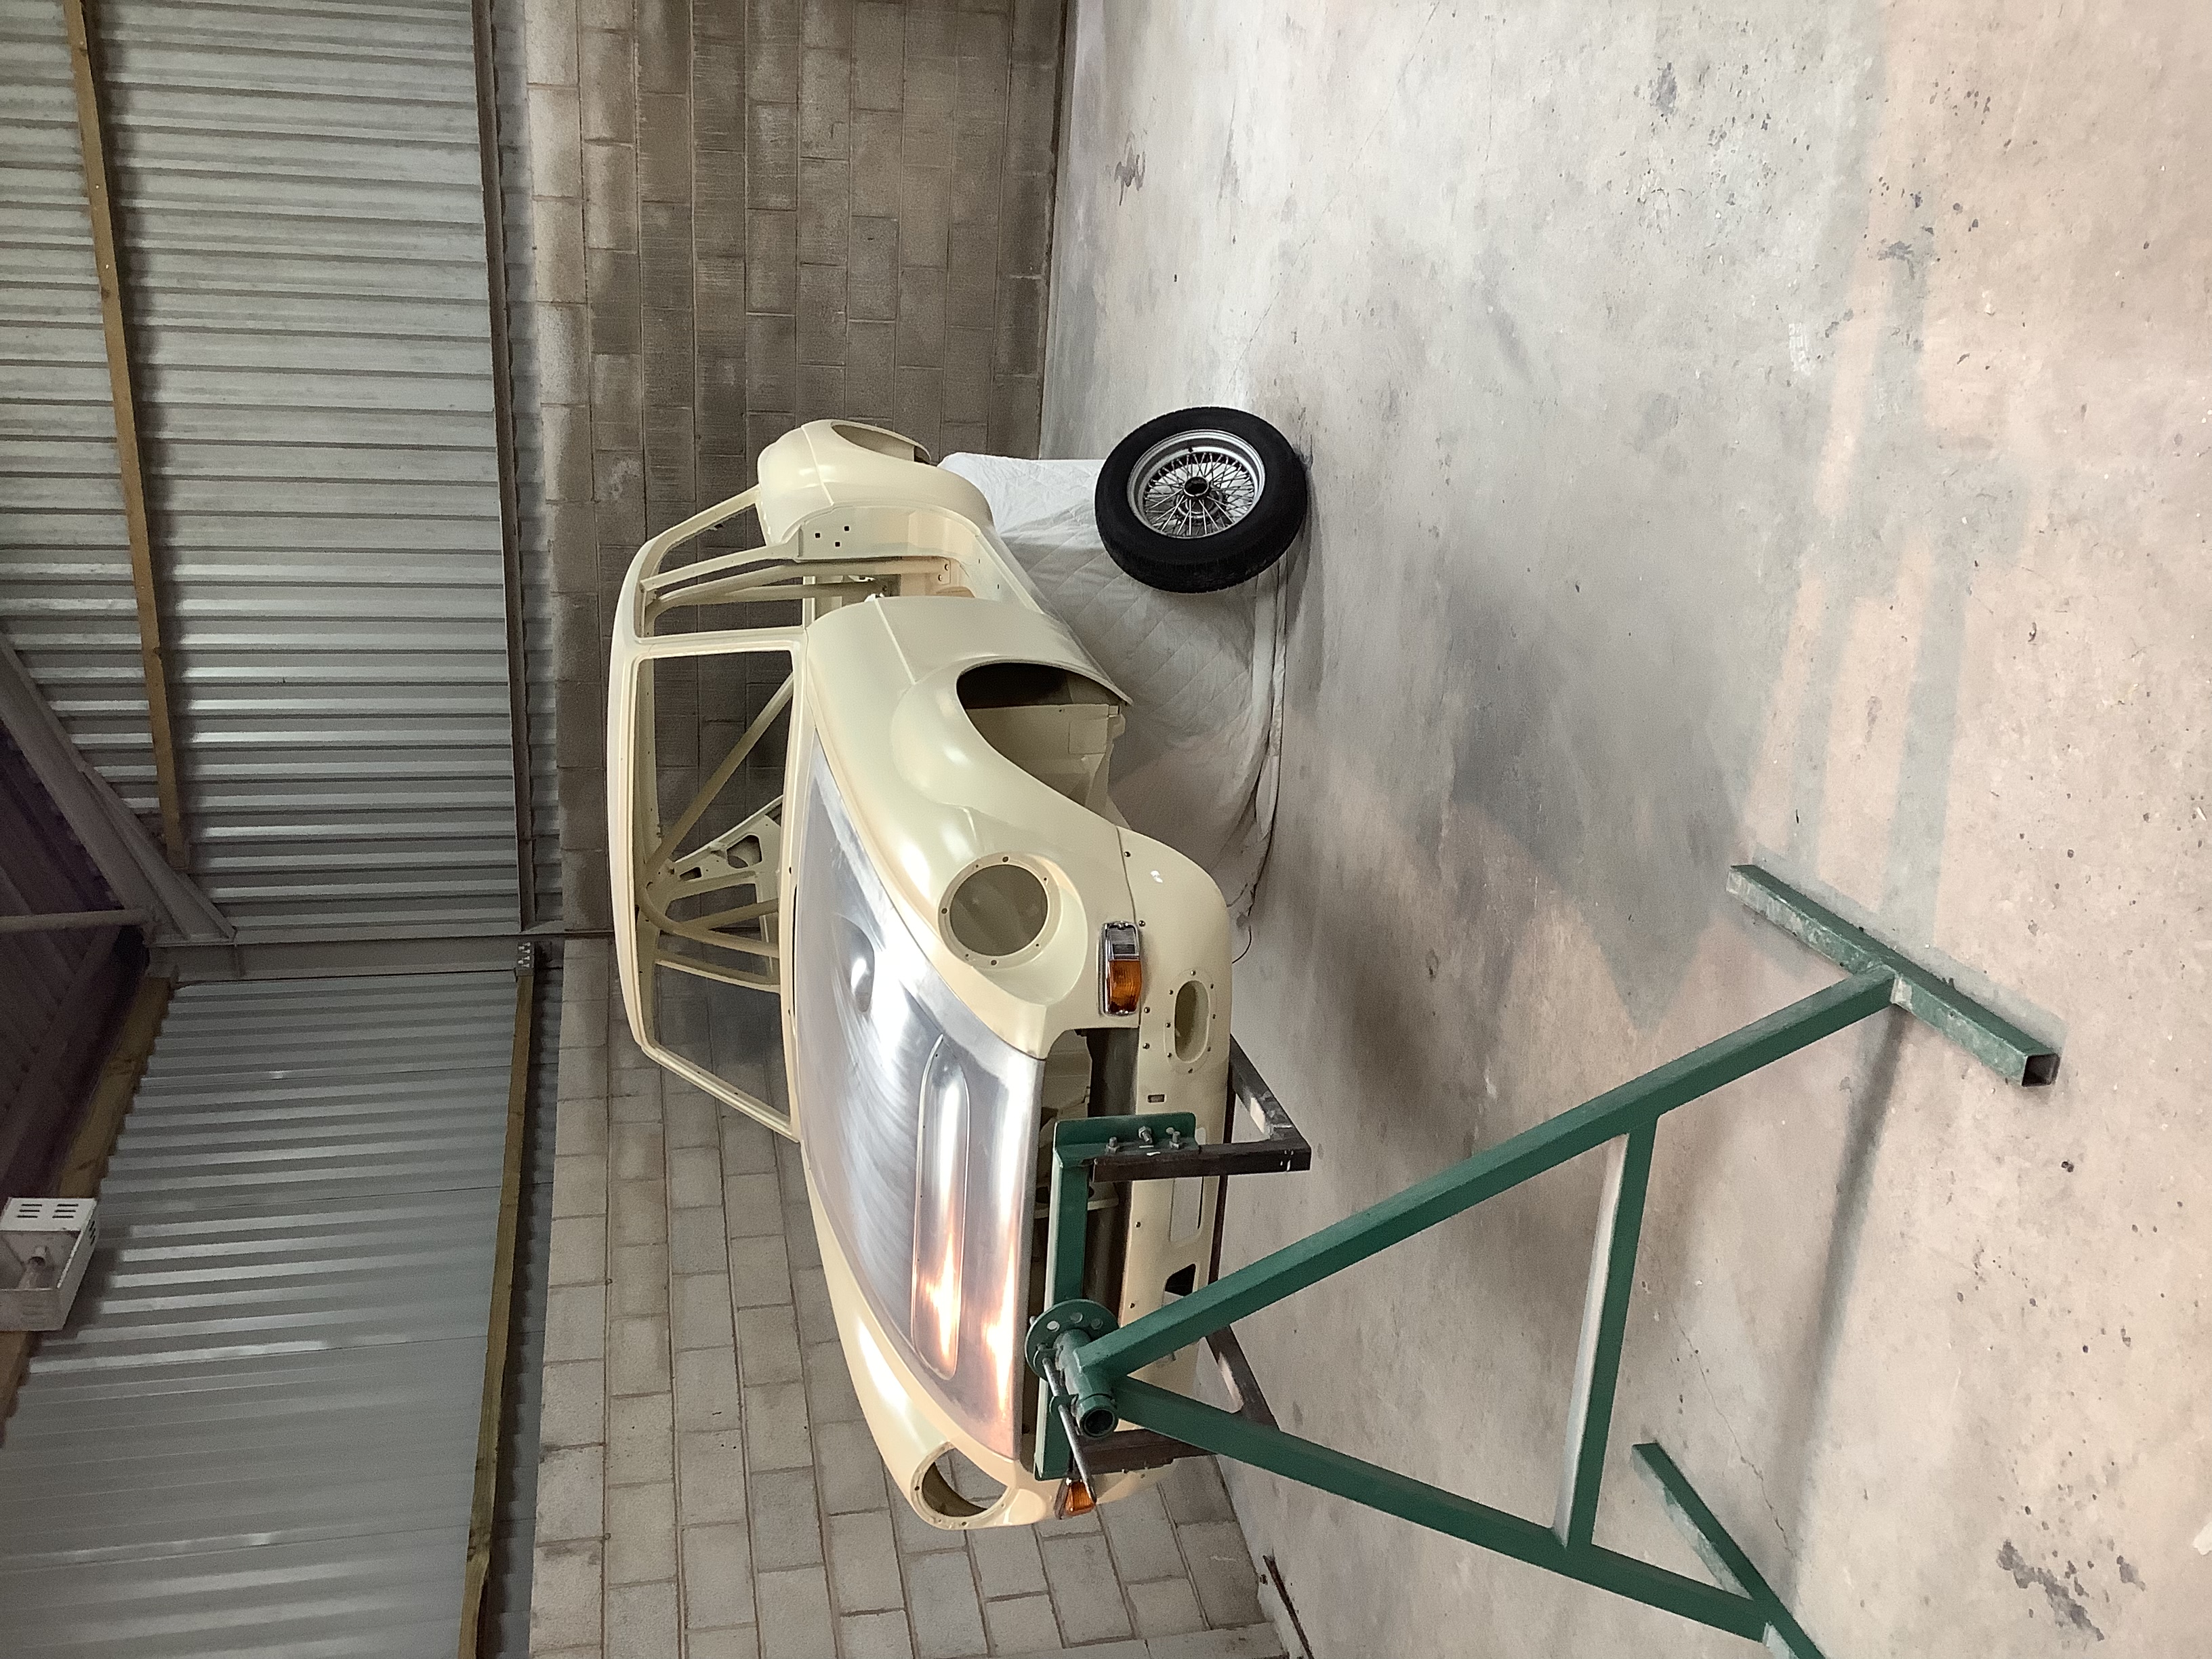
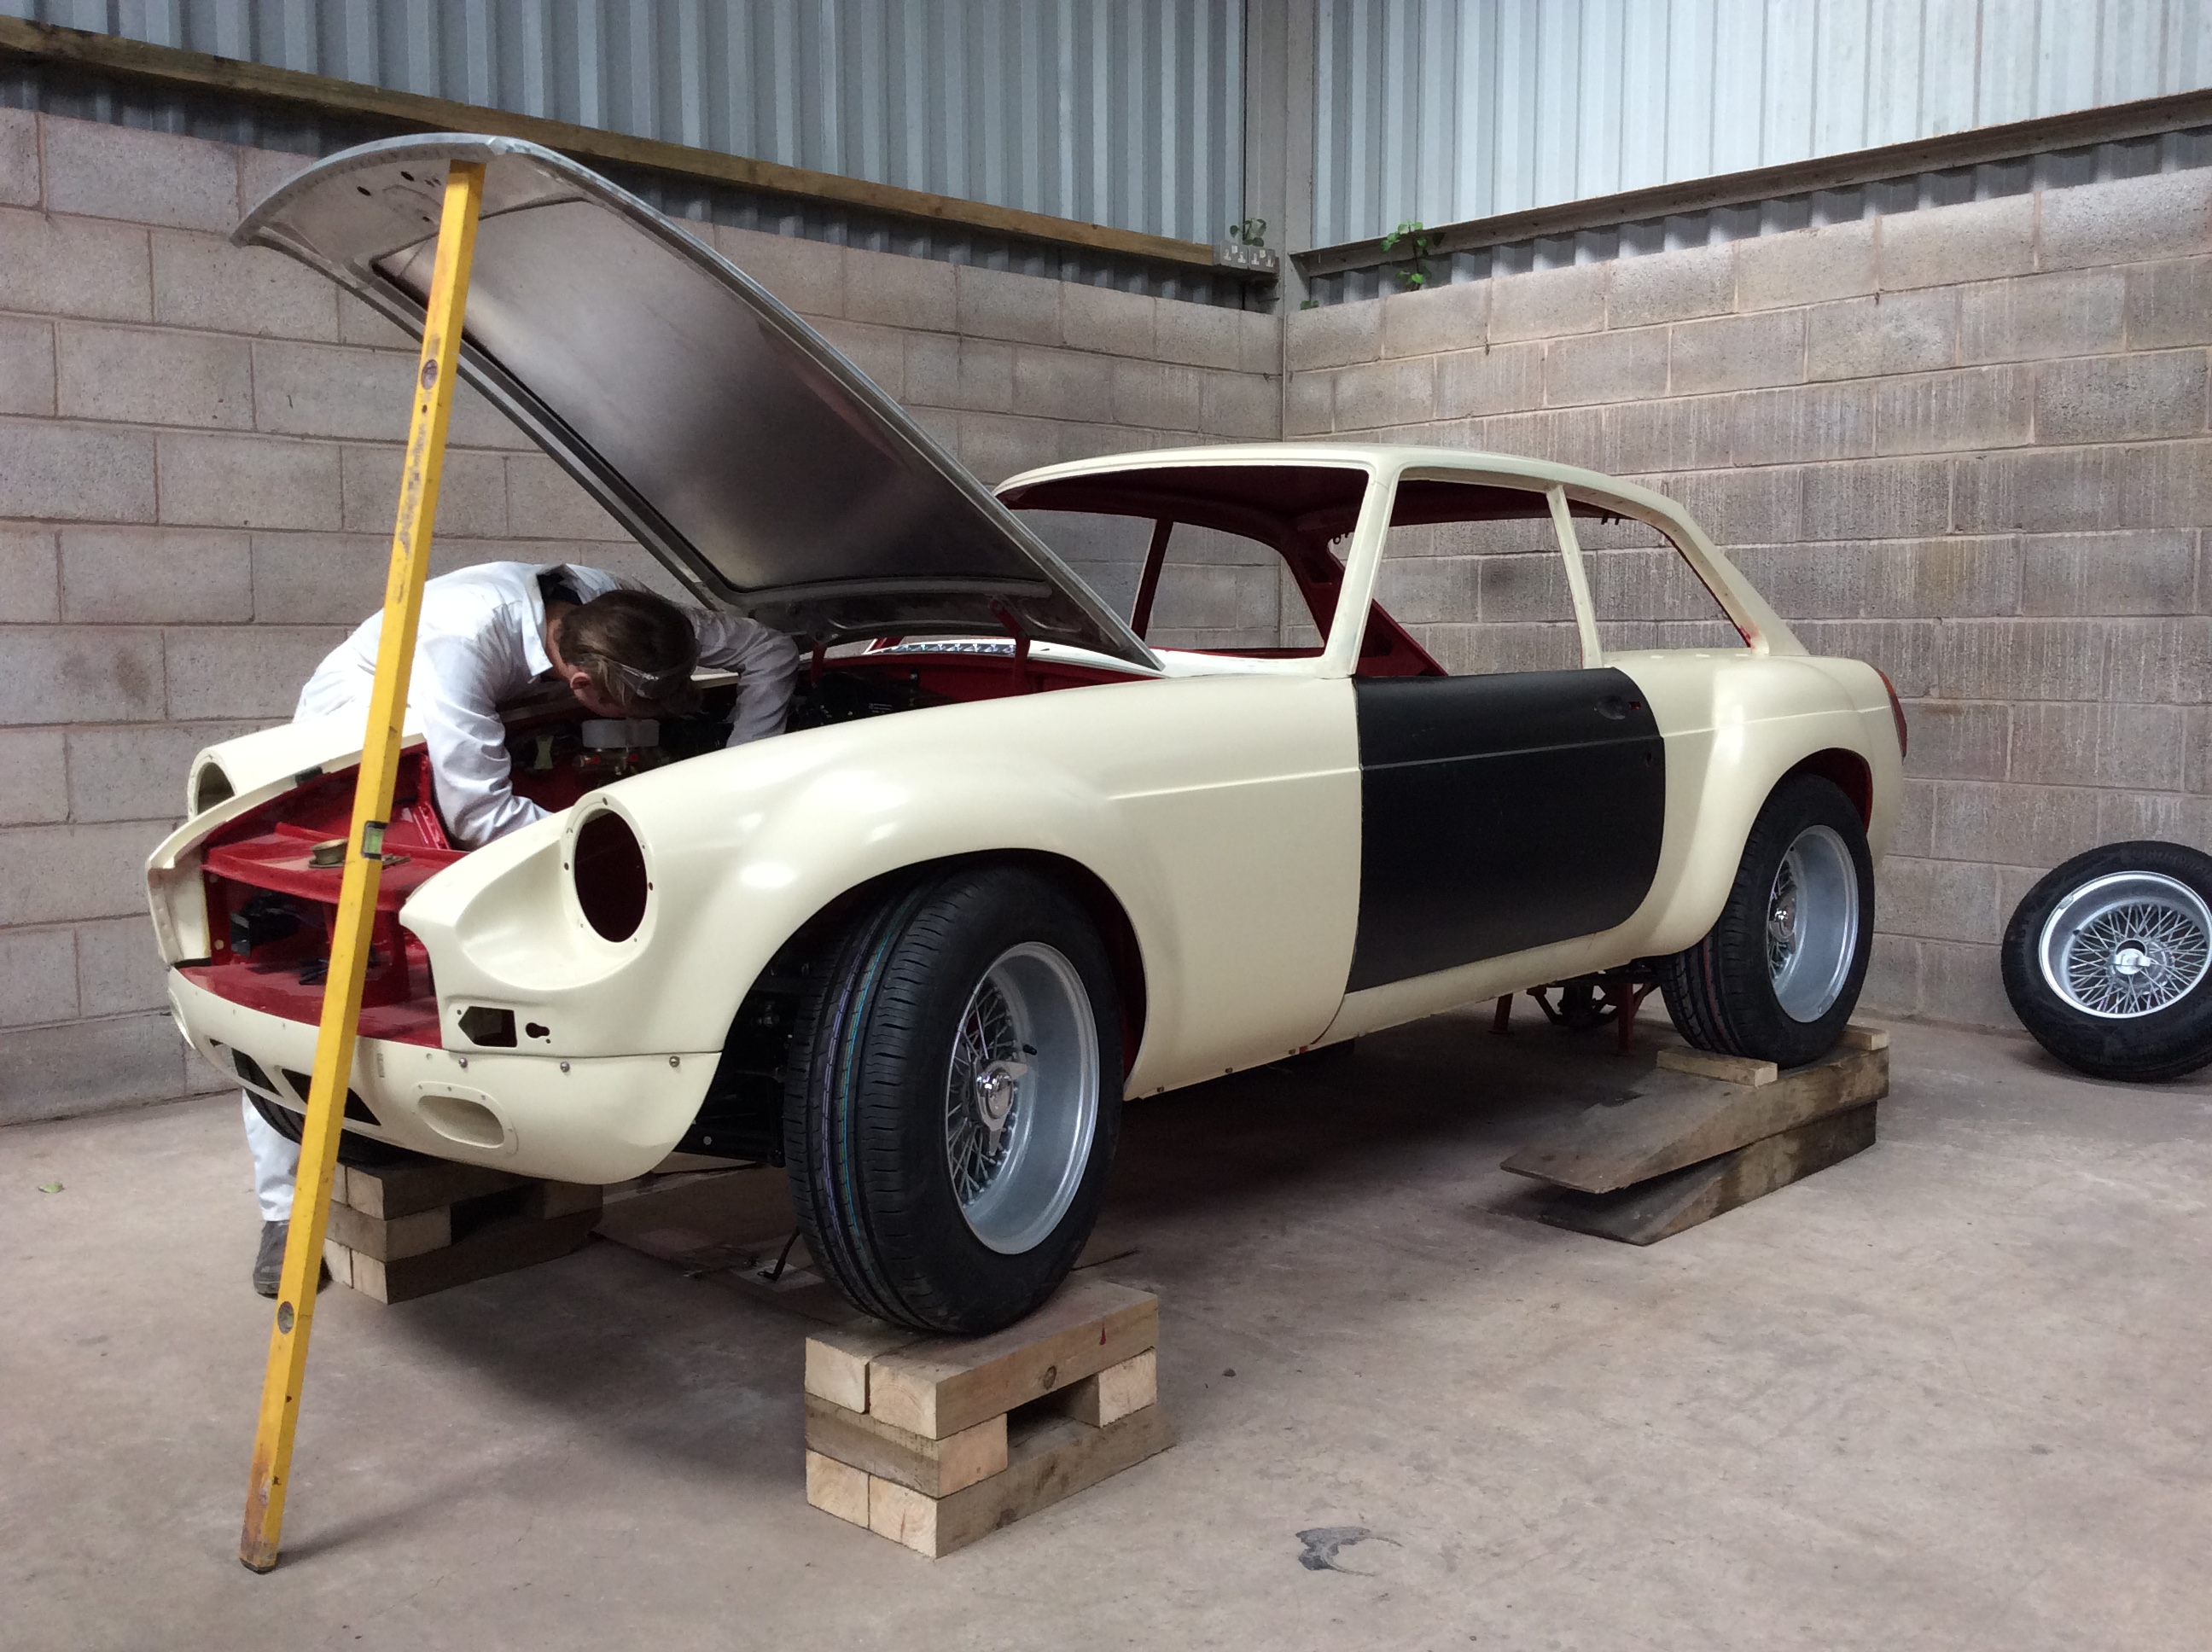
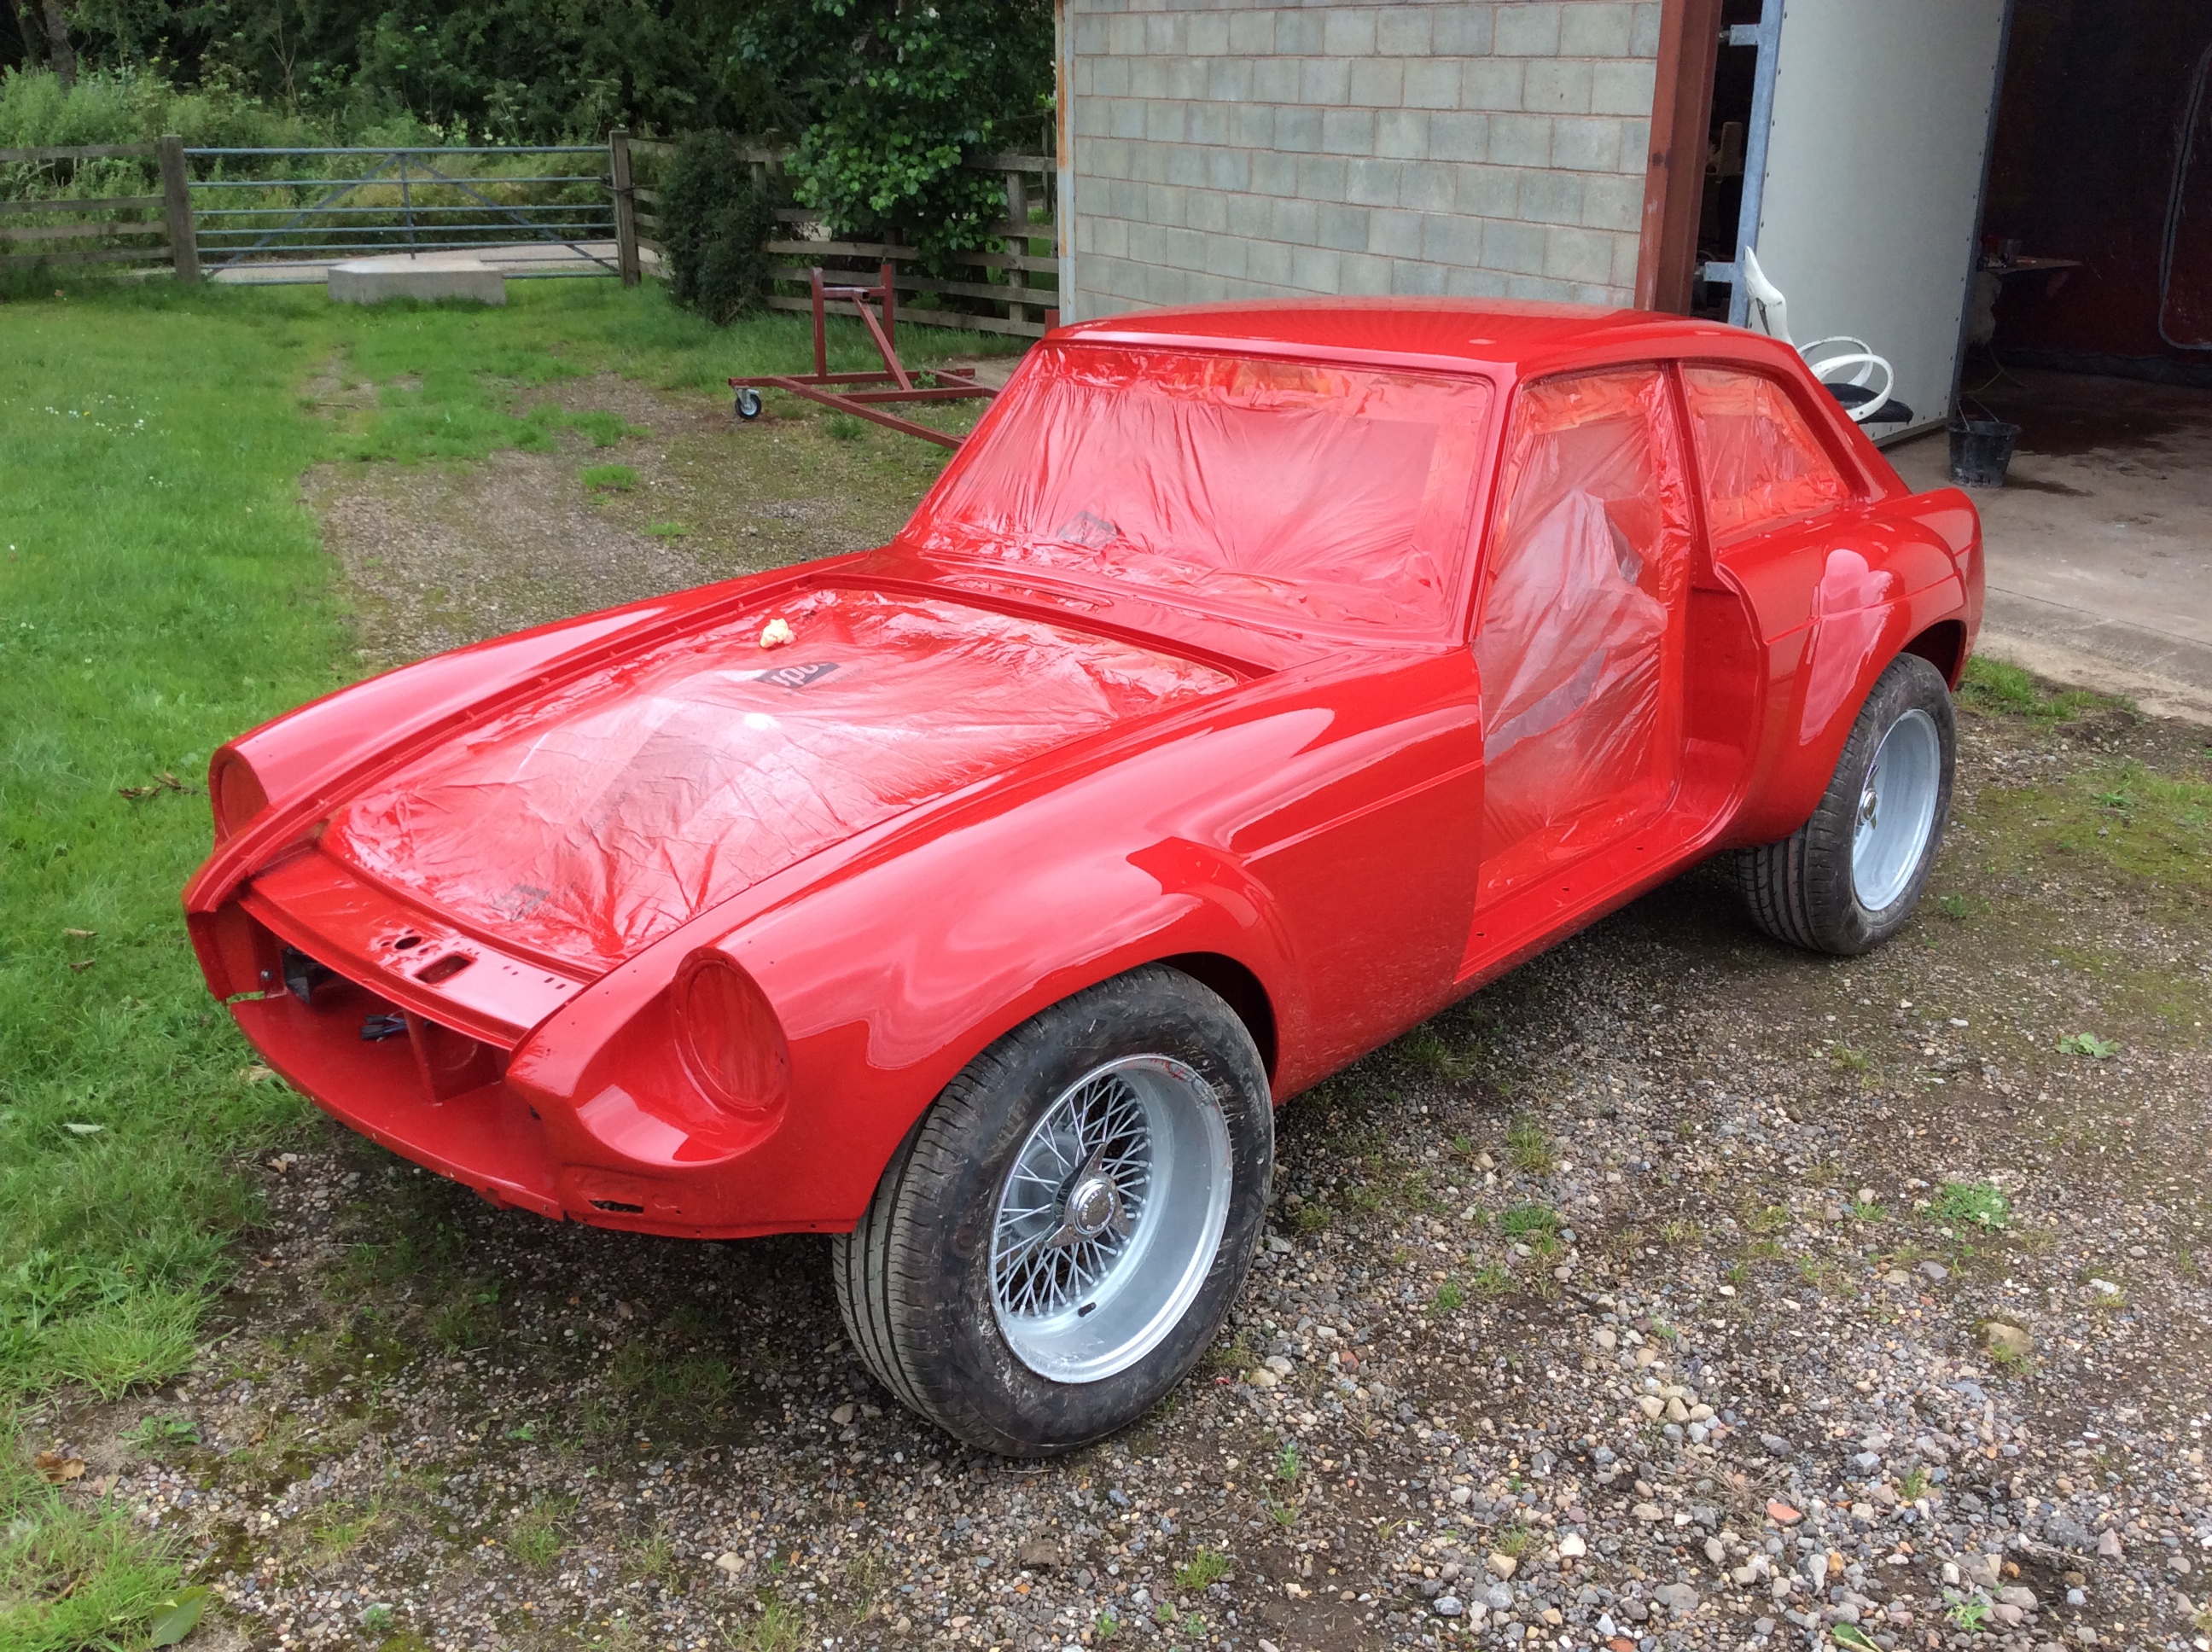
This is harvey's car a day before the accident.
The story starts on 8th June 2018, almost 4 years ago (wriiten on 31st March 2021) but the project is now 5 years on,
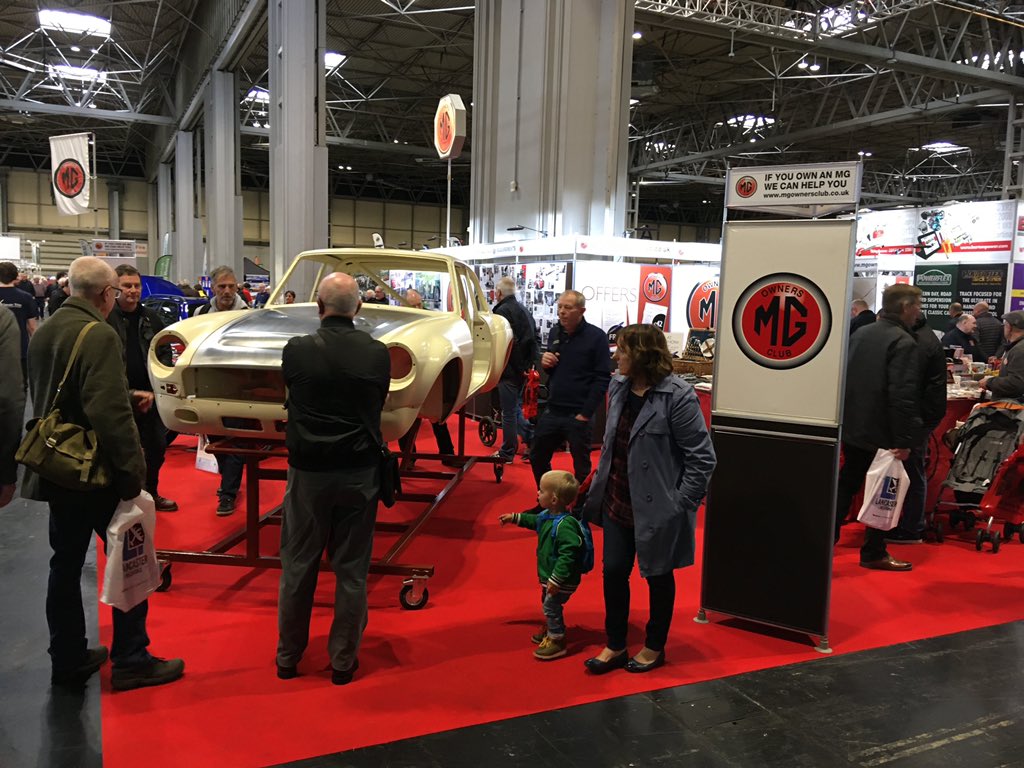
The following are a selection of posts from the MG Owners Club Forum, where Mark, Harvey's father posted the progress. The car was also on the MGOC stand at the 2019 Classic Car show. The project is widely known about in the MG community. The blog on the MG Owners Club Forum is 1243 posts long so the following is just a short selection. Apologies for the quality but we've put this together rather quickly.
The thread on the MGOC forum is titled "Steel arched Sebring"
==========================================================================================
8th June 2018
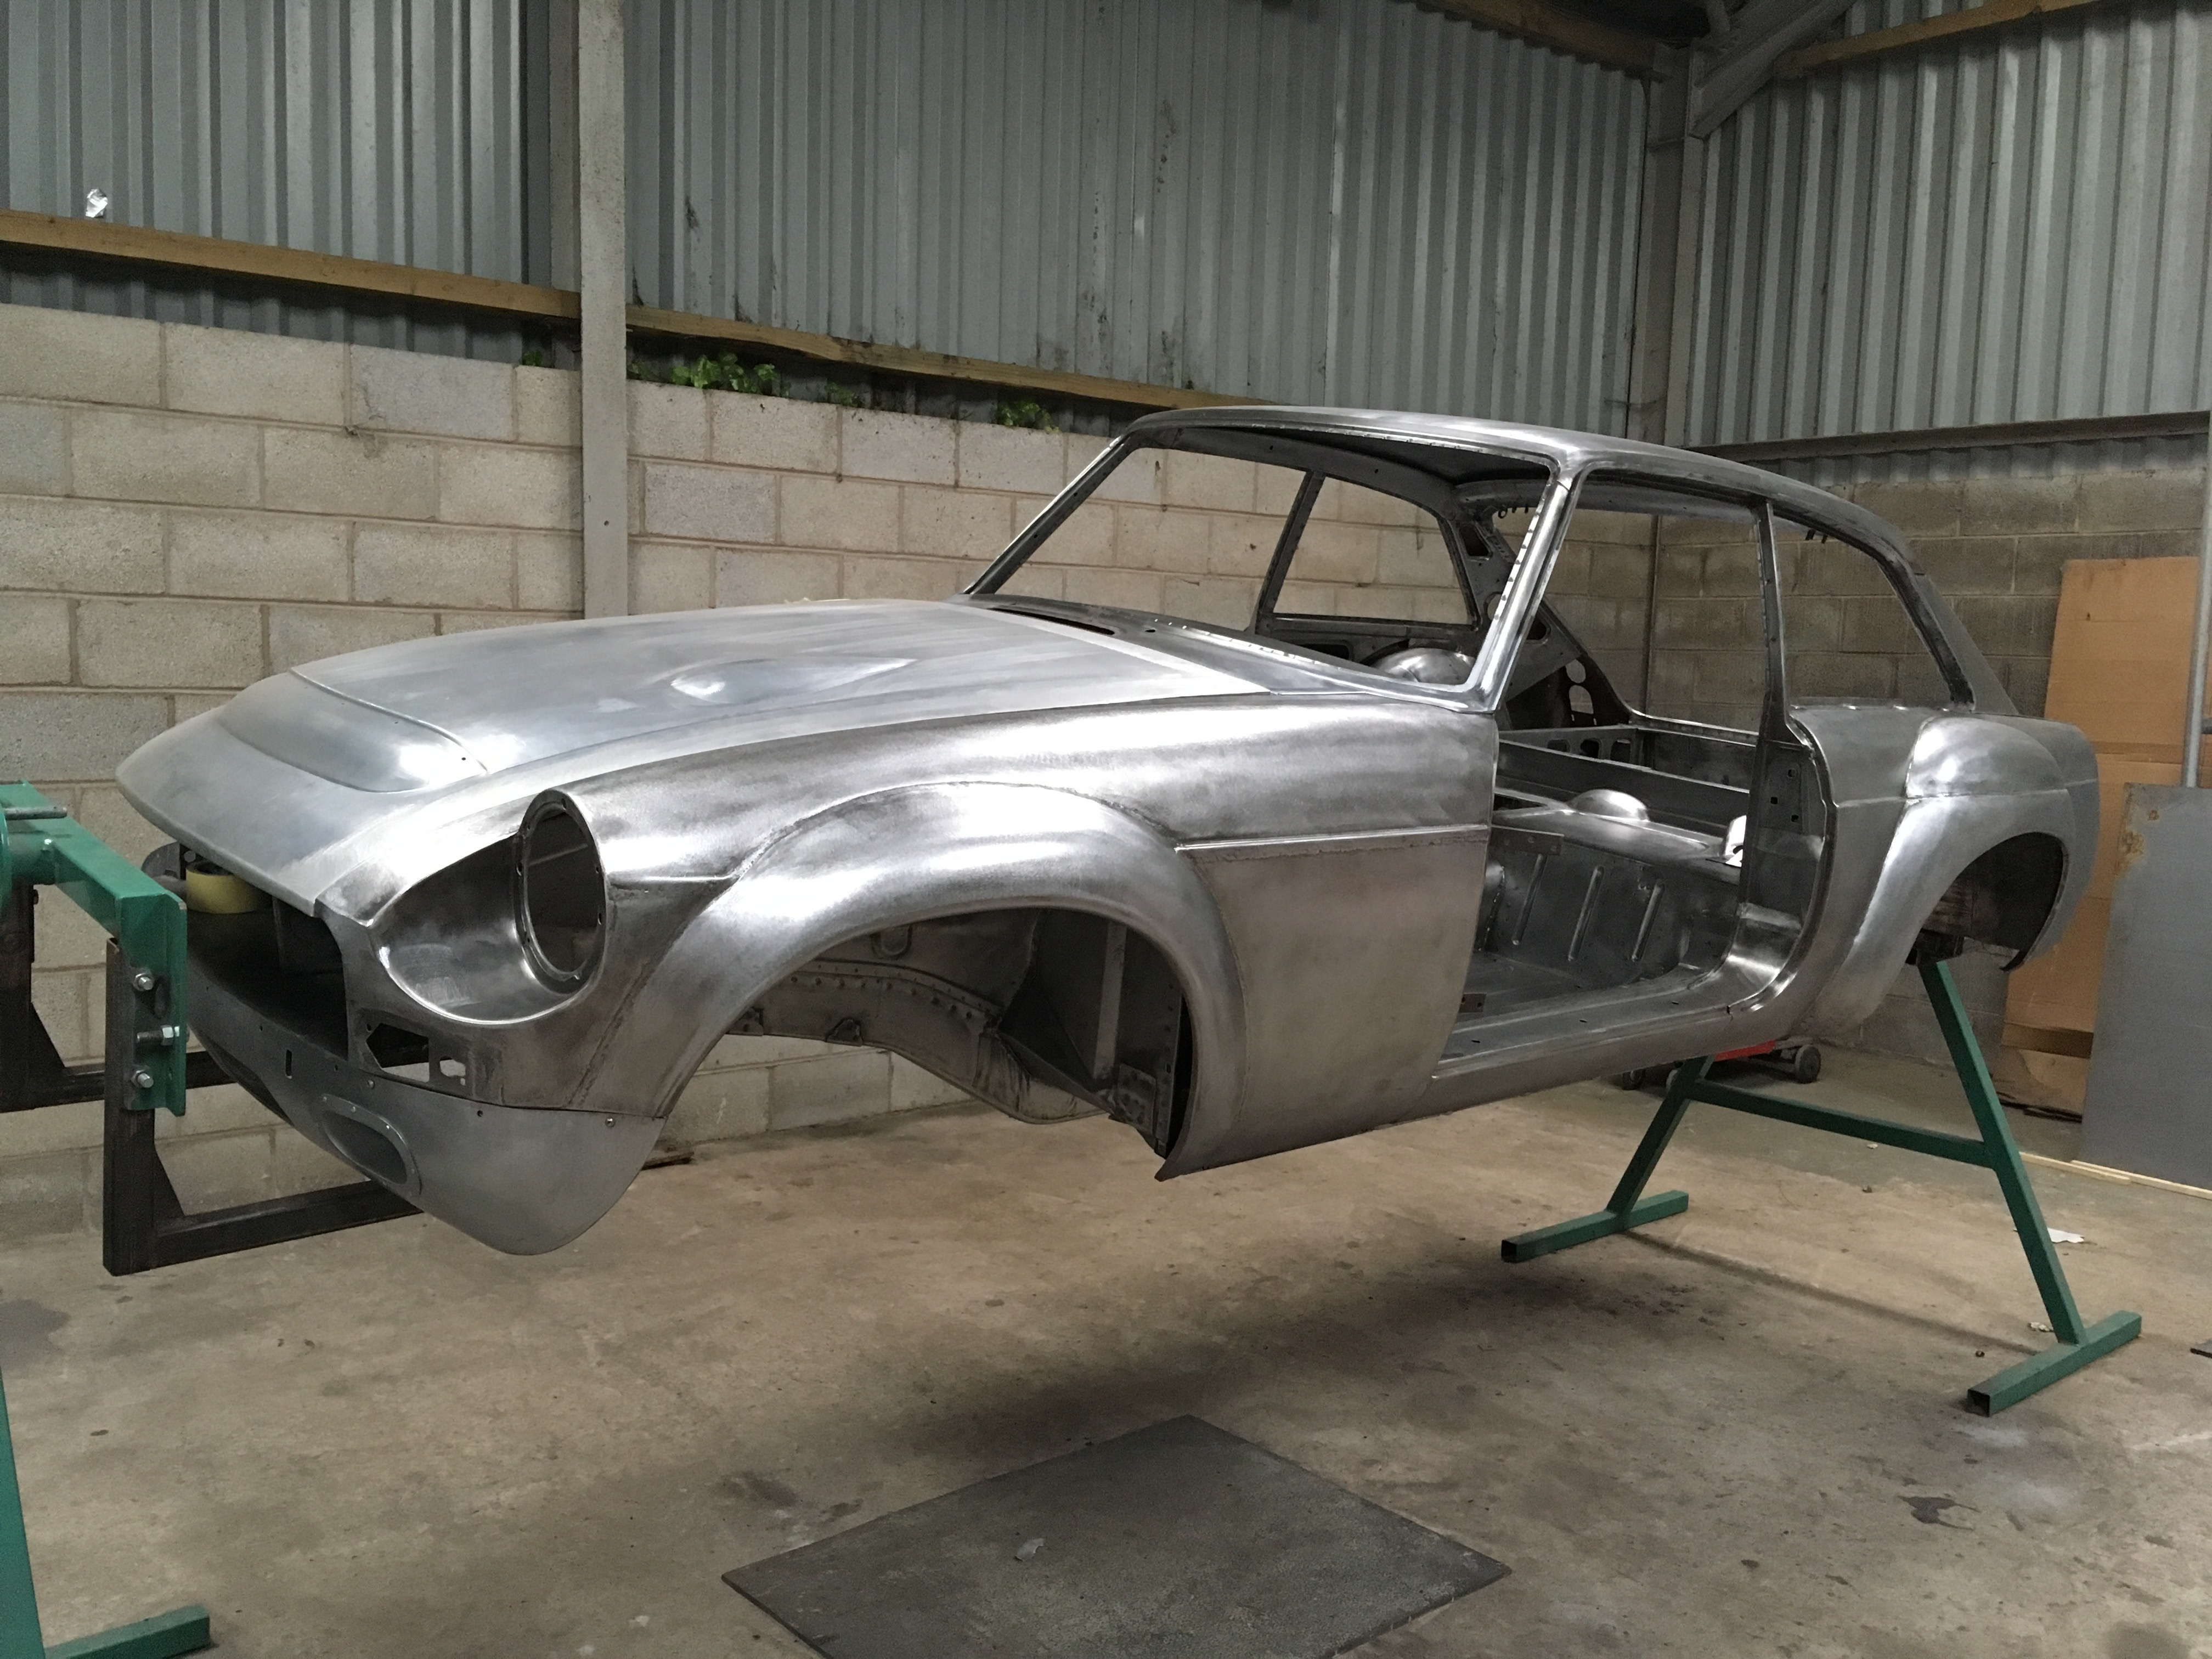
Only recently joined the MGOC, but here is where we are up to with some of the panelwork our Sebring type conversion. Rear arches also have a corresponding inner wheel well made with a spot welded lip around the outer section.
I’m doing this project with my son and we aim to have it completed for summer of 2020, so no hurry to get it finished 

===============================================================================================================================================
8th June 2018
My son was 15 when we bought the car. He sold his motocross bike to pay for it, so it’s going to be his first car. He’s now 16, but very hands on and picking up skills as we go along - also got a part time job and is paying for most of the parts we’re using.
One of his first projects was cutting up steel on a chop saw to make a rotisserie. Great tools these things are and we made it with new steel for less than £60. Access to the underside and being able to work at a comfortable height makes life easier.
=========================================================================================================
7th September 2018
===========================================================================================
7th September 2018
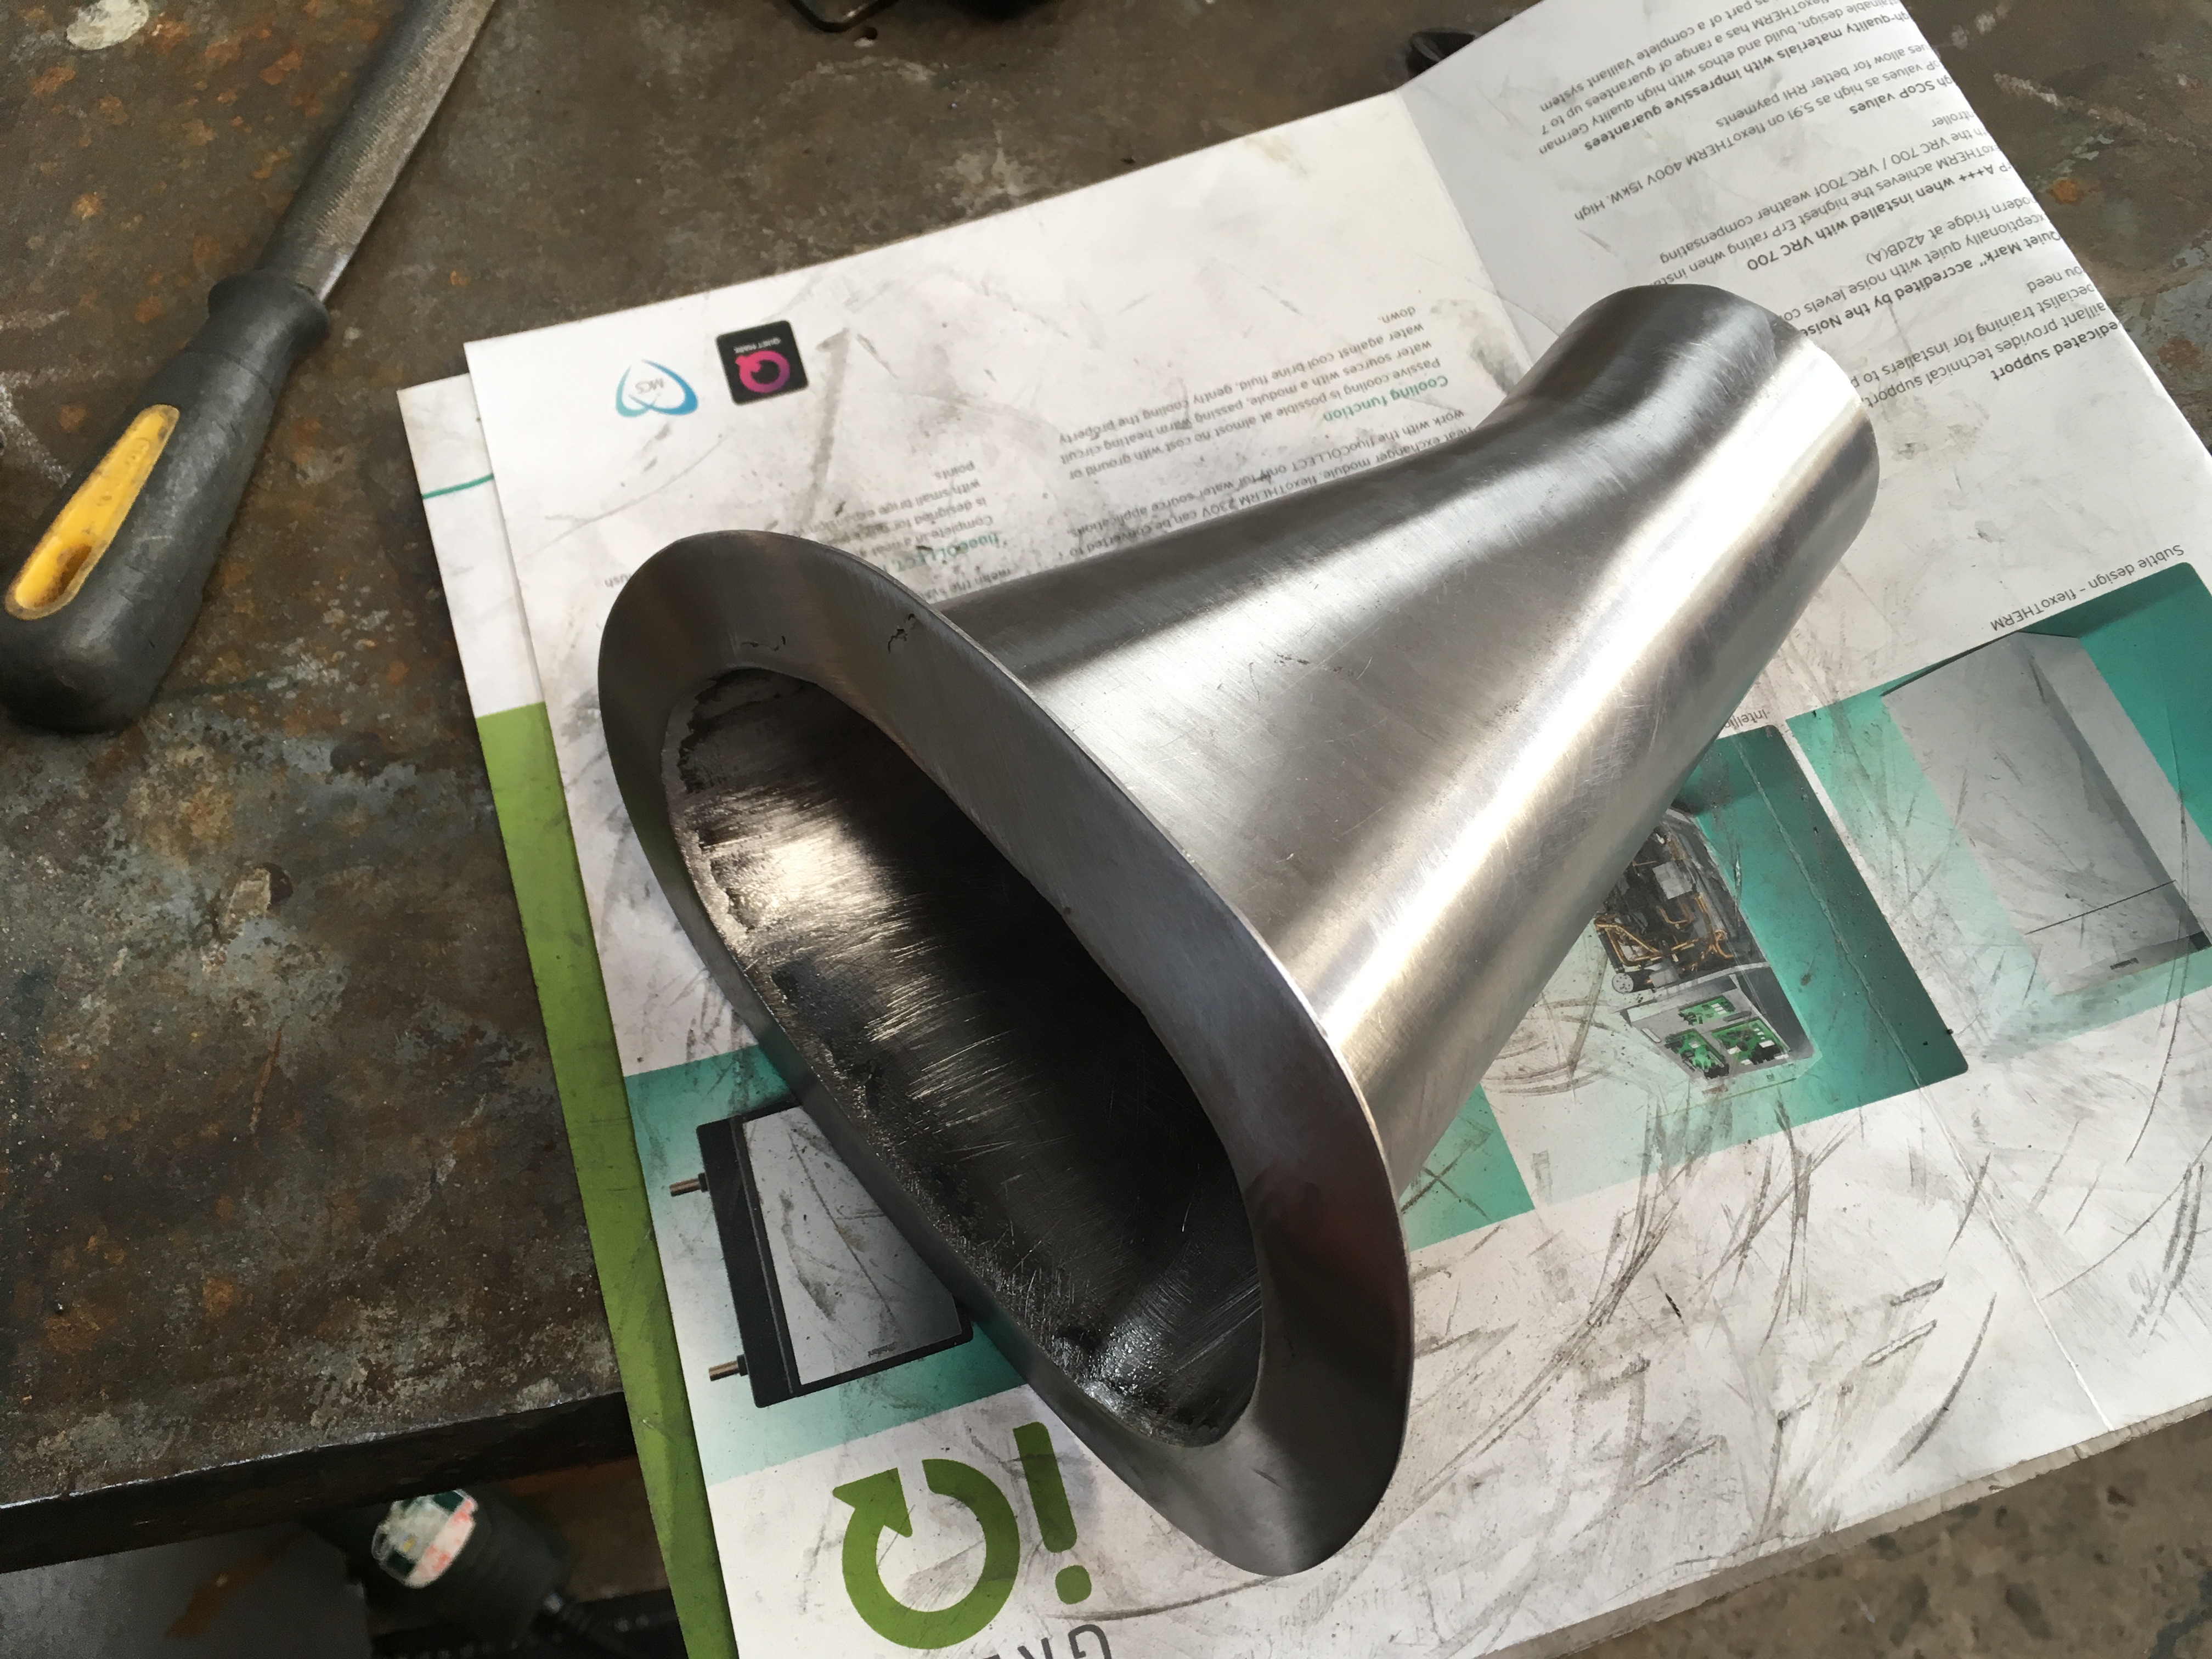
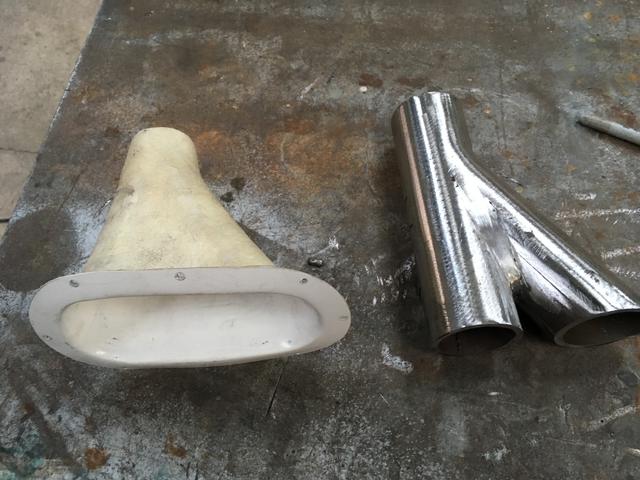
We actually bought a fibreglass front valance, but decided not to use it. I did use the air scoops for reference to make steel versions. Heavy wall tubing welded together makes a former to bend sheet around. Here’s the pics......


===========================================================================================================================================
9th June 2018
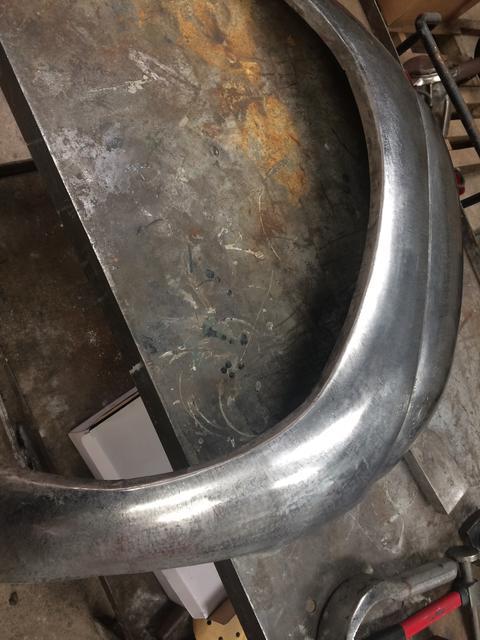
Here’s the rear arched roughed out, but very accurate in relation to shape of the fibreglass arches as I used one as a pattern. After a load of planishing, it shaped up pretty well. The inner arch is a huge panel and spot welds onto the original factory joint - over a hundred plug welds in here.
================================================================
10th June 2018
Today, I spent 5 hours on the inlet manifold for our replacement engine. Looks like it’s going to need at least a couple of solid days to finish it. I fettled up the mould lines of the casting and started sanding with different grades of glass paper so I can have a polished finish.
Lot of work, but worth the effort I think.
============================================================
15th June 2018
=========================================================================================================
1st July 2018
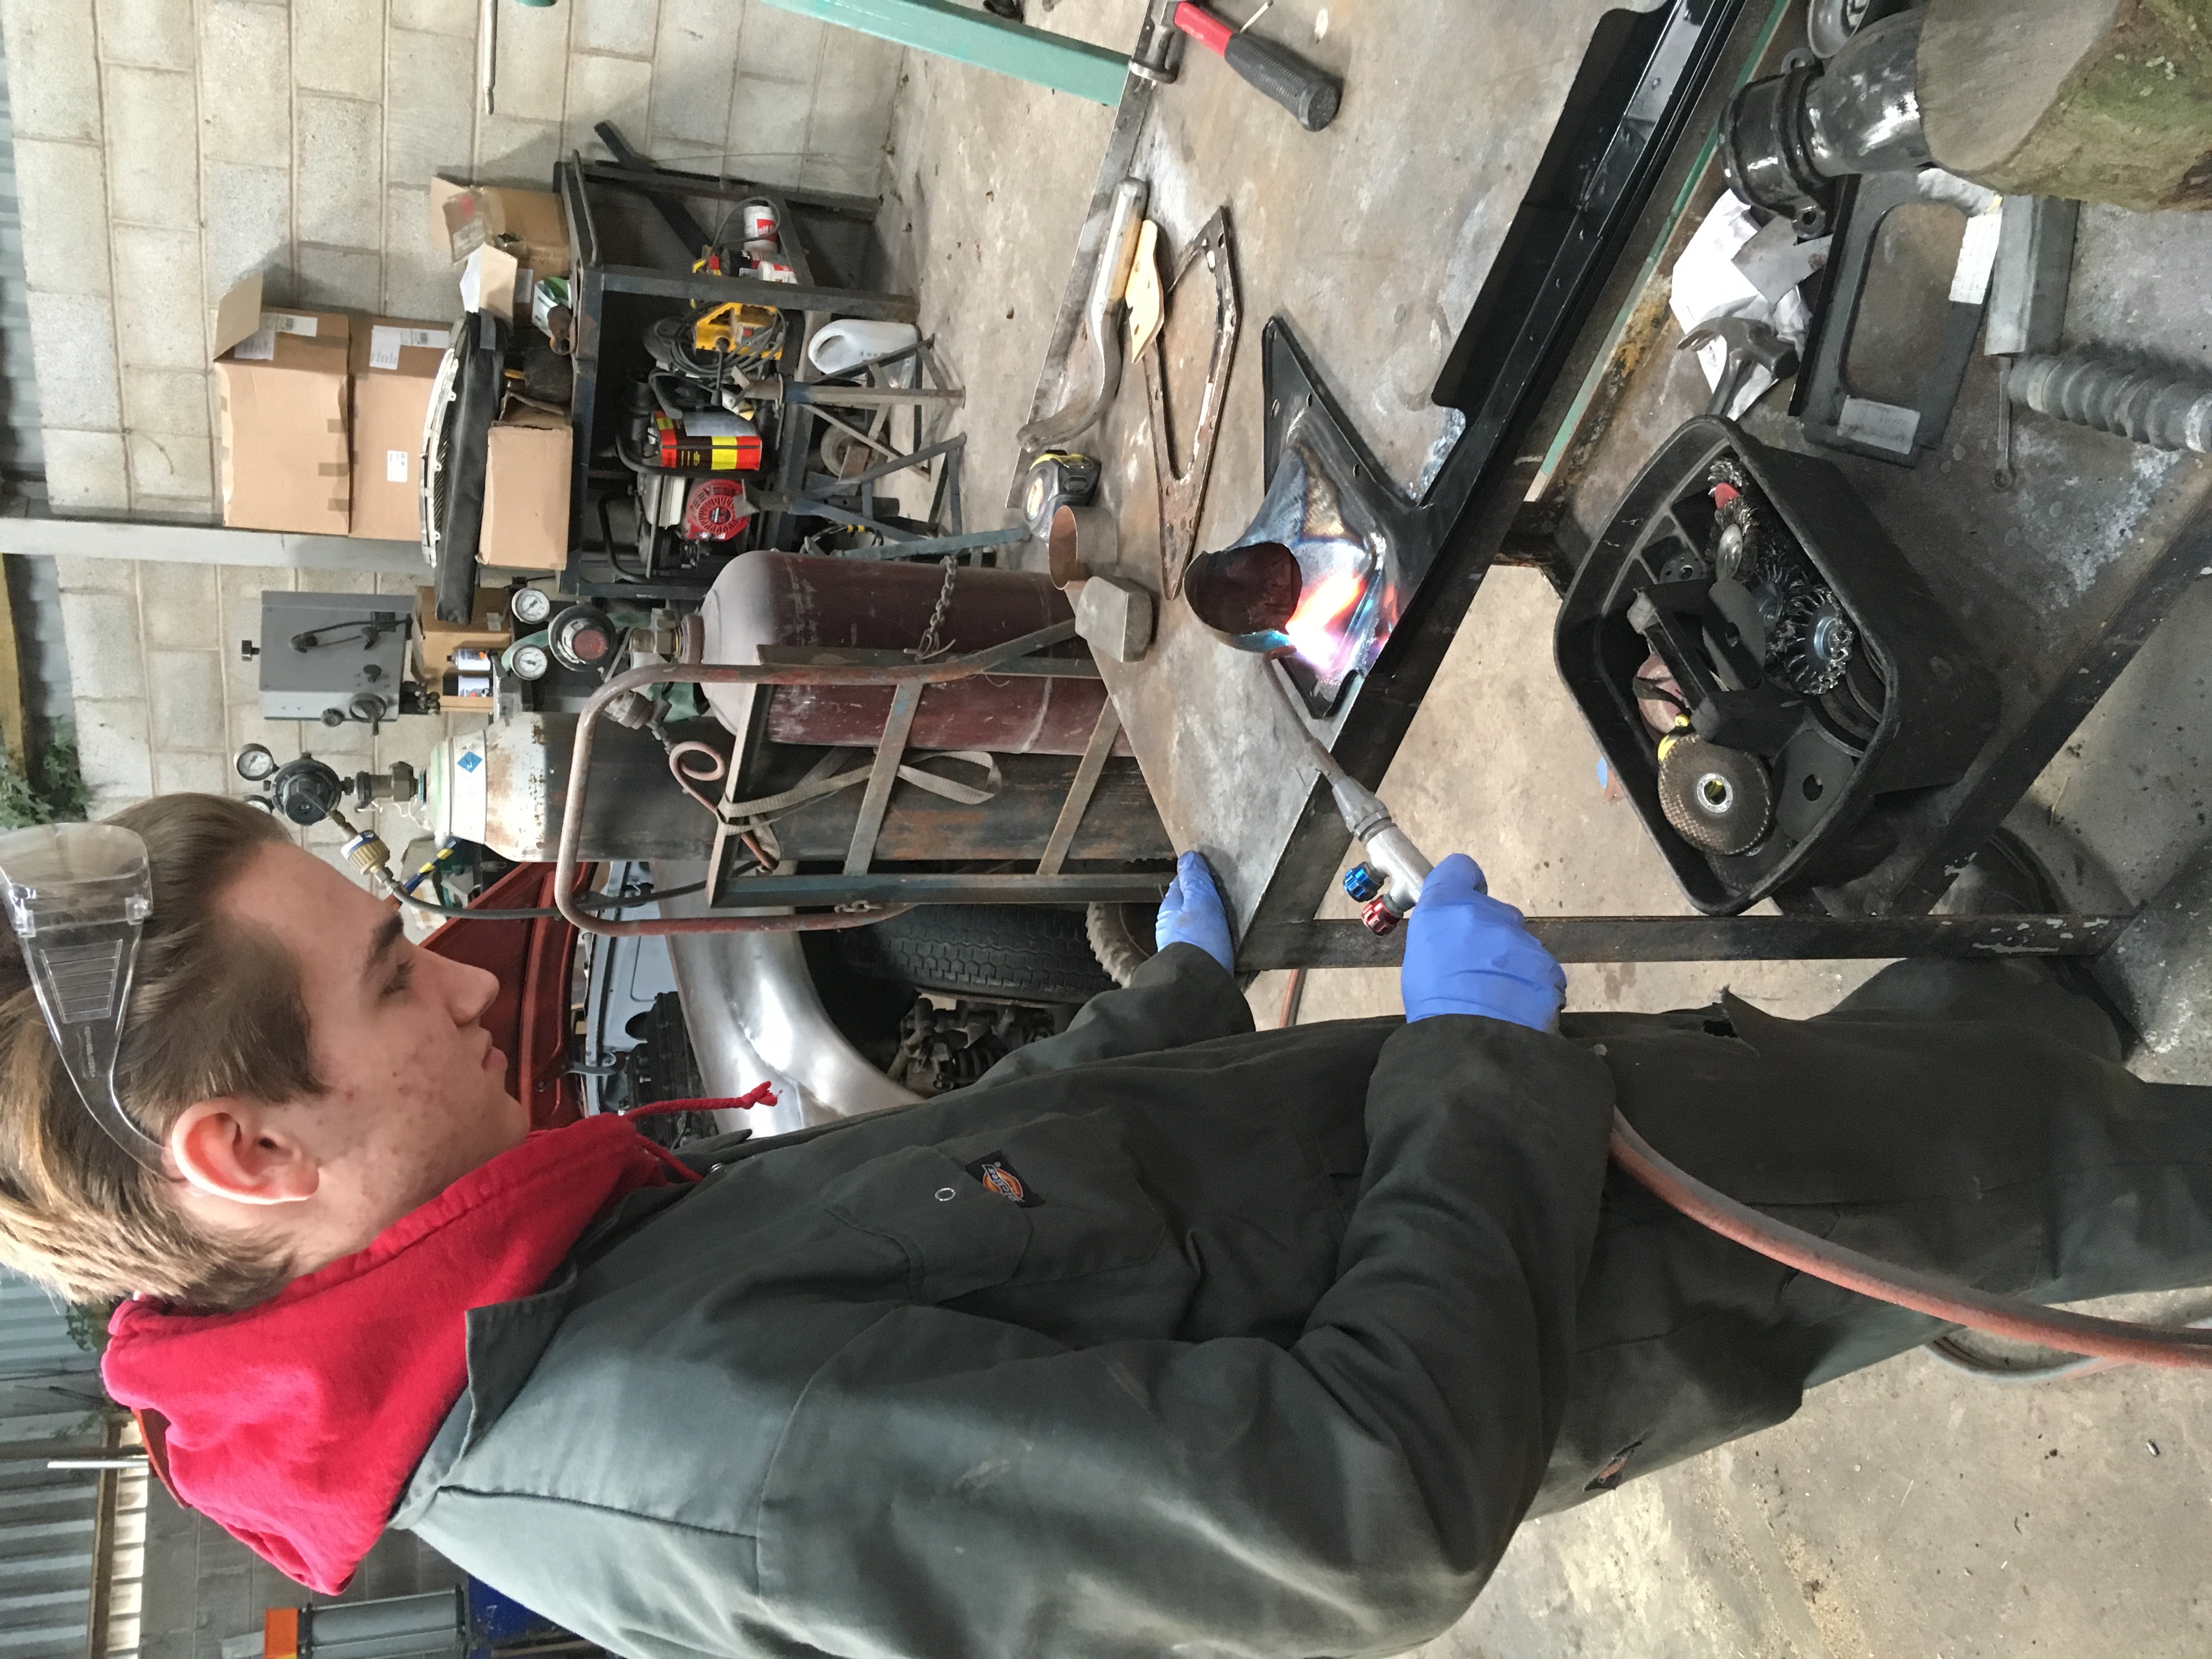
This weather isn’t too good for working in the barn, but while I’ve been busy on something else Harvey made this neat little towing eye for the front end. It’s in 3/8th Dural plate and will slot through the front valance and then bolt onto the near side chassis leg.
We’re progressing with a few other bits so I’ll post when there’s enough to see, but the reason for making this now is that I’ll be welding a couple of nuts onto a captive plate that will fit inside the chassis leg and that will get plug welded into place. We can fish this through with some wire, while the centre crossmember is removed. Otherwise, I’ll have to cut open the front capping section of the chassis leg which I don’t want to do.

=========================================================================================
8th July 2018
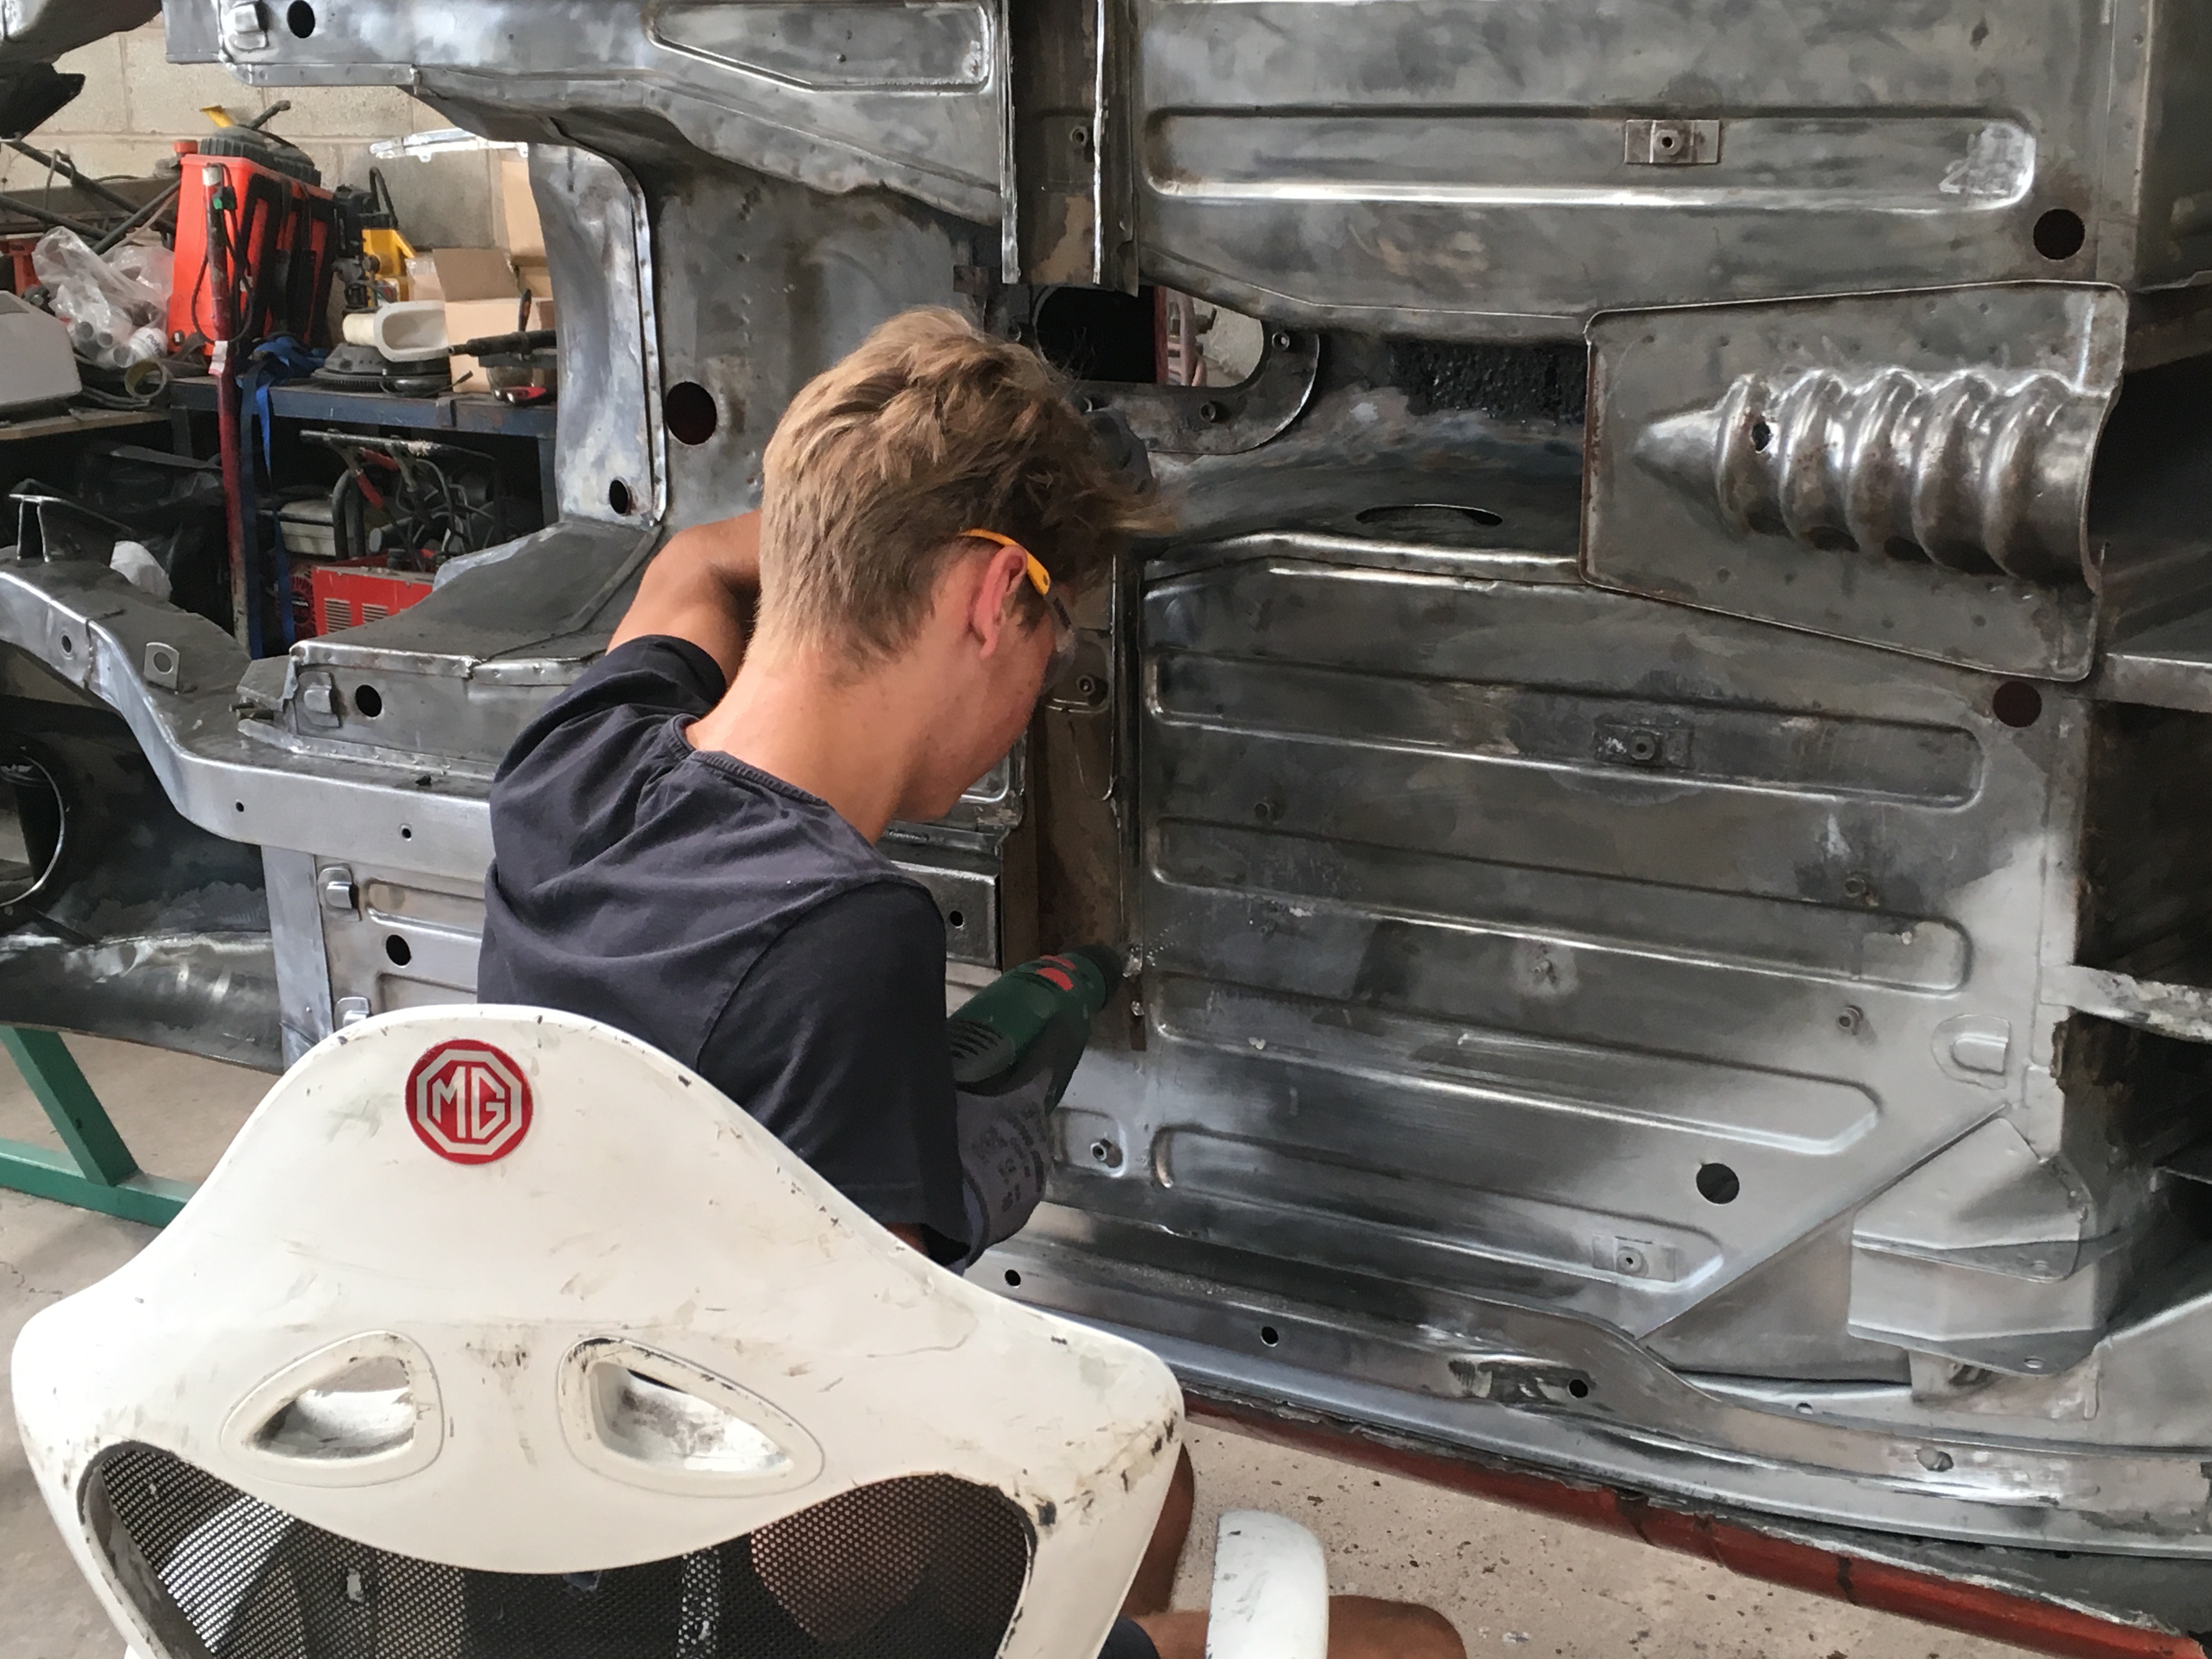
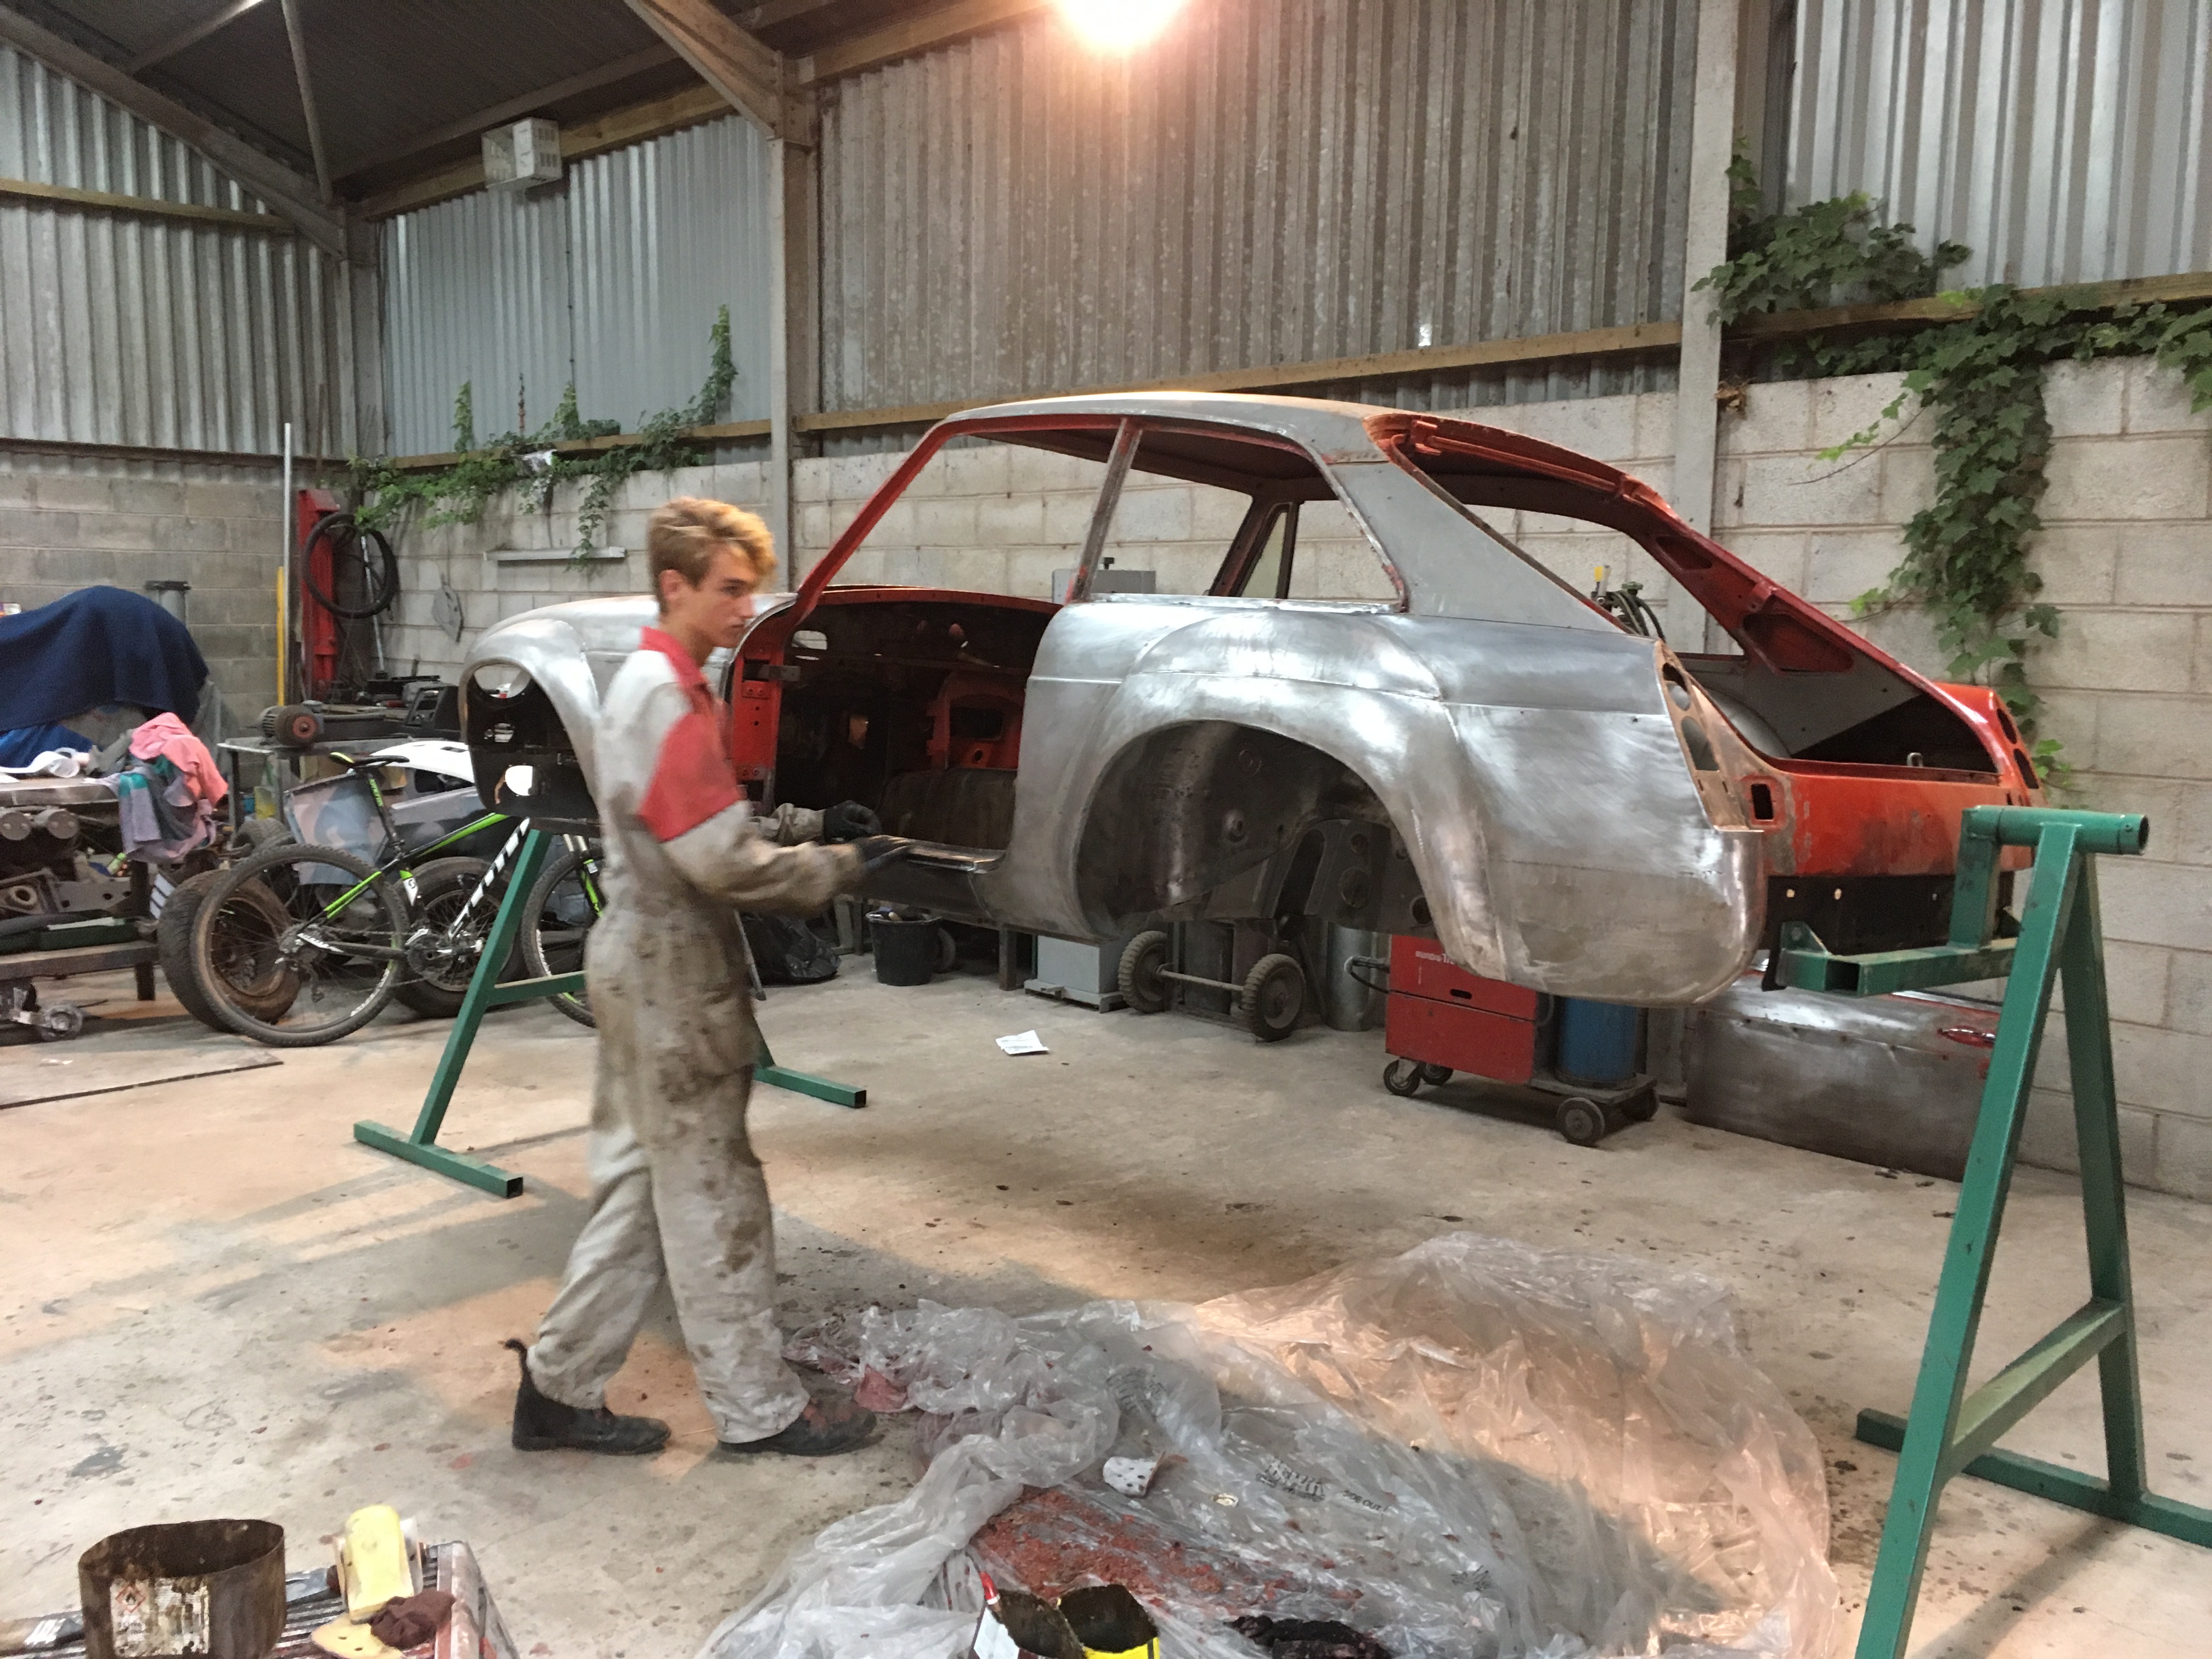
If only steel would stay shiney like that. Here’s the person (Harvey) responsible for the main work so far, removing the centre crossmember which is next on the ‘to do list’. He passed his driving test a couple of weeks ago, but as he’s only 16 can only drive our Tractor. He paid for this MGB, which was purchased a year ago and the main bulk of parts by himself, so this is his very first car.
I’ll keep doing my part to help get it finished, but he really is managing the project and is keen to have a quality looking Sebring type MGB when it’s completed. We could probably get it finished next year, but the deal is he has to pay for most of the parts by himself. Wheels, tyres, trim, ancillaries and any amount of consumables ££’s means he won’t be able to do this until 2020, so that’s our target for a finished car. I’m sure I’ll help with a few items, so let’s see how it turns out.
There might be something about this project in the coming MGOC magazine, so if anyone would like to know more about any particular aspect let us know.
=============================================================================================
16th July 2018
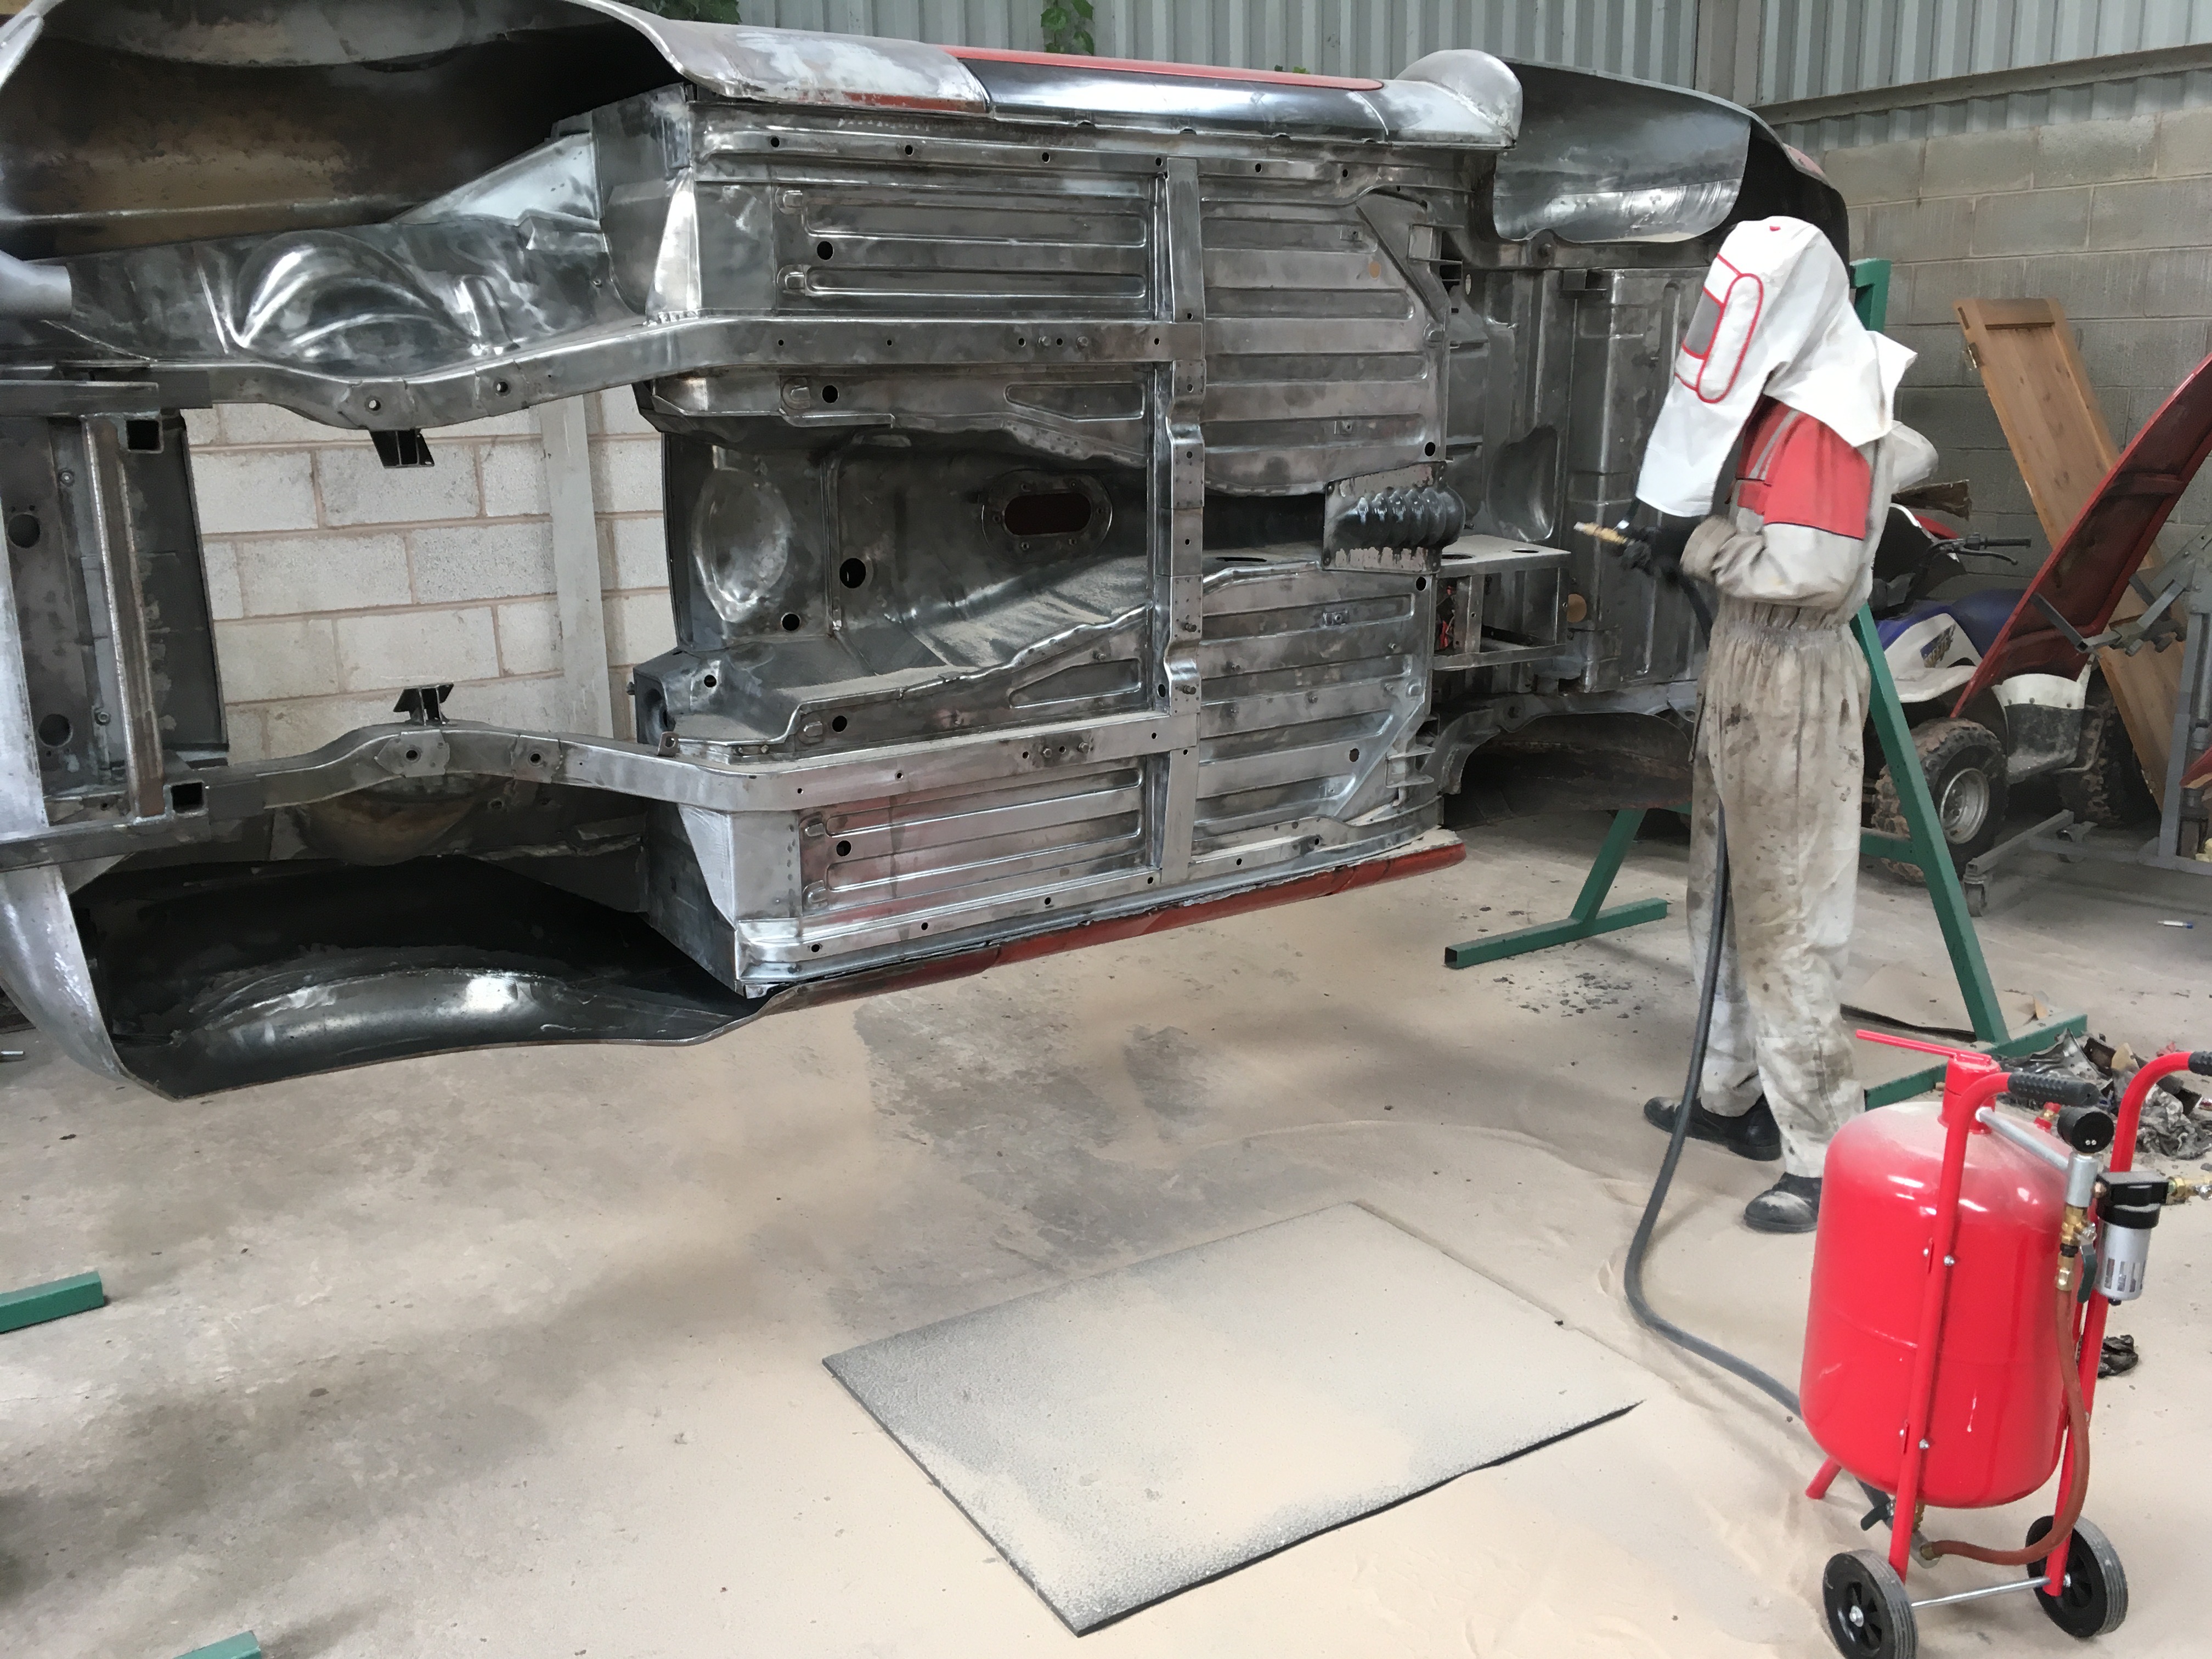
The underside coating is horrible to remove, but Harvey finally got the last bit off today. We used a combination of heavy duty paint stripper and wire wheels in the drill and grinder so far, which is tedious work. What you can’t do though, is get into all the little nooks and crannies. I’ve had a little spot blaster for years - I remember buying it in 1994 and although this has been handy, we needed something a bit better.
I looked at any amount of these sand blasting pots, all of which have varying reports for quality of operation and bought this one for around £80. They all look the same and I’m actually rather impressed, as is Harvey with the results so far.
You can regulate the amount of grit or sand running through the nozzle easily, so there’s no sand shooting all over the place. You wouldn’t want to blast the paint off a car with one of these, but for cleaning up where we are it’s perfect.
The hood / visor that comes with these things aren’t very good, but I have an old full faced motorcycle helmet so tried that instead and it was much better. We used a good dust mask under either and this is the result around the rear axle area.
================================================================
30th July 2018
Harvey had the paint stripper out on the outside today, but forgot we’re fitting new doorskins and got carried away. I need to pick another can of stripper up, but it’s nearly all bare steel now. As a gauge for how much stripper will have been used, it will be around two and a half gallons in total.
===============================================================
9th September 2018
Pleased to say that the paint stripping work is finished on the main bodyshell. We also did the footwell and dash area, which was rather messy and awkward to get into.
I cleared the workshop space around the car and got the pressure washer out on Saturday morning, so jet washed any loose residue or remaining gunk off the Bodyshell. We soon had it dried off using a compressed air line, but then used red scotch pads with gun wash thinners so there’s no flash rusting taken place.
There’s a beige coloured primer on the MGB and with a combination of the stripper we used, followed by a scotch down with a splash of thinners from an atomiser, bare steel is as the footwell panel to A pillar and sill section below. Final media blasting will only be local to the areas or nooks and crannies I can’t get into. Wire wheels in the angle grinder helped a lot too, but I’d rather use stripper to remove as much of the paint as possible.
Might order a couple of pairs of MGOC MG overalls now, seeing as ours have seen better days.
==============================================================
27th September 2018
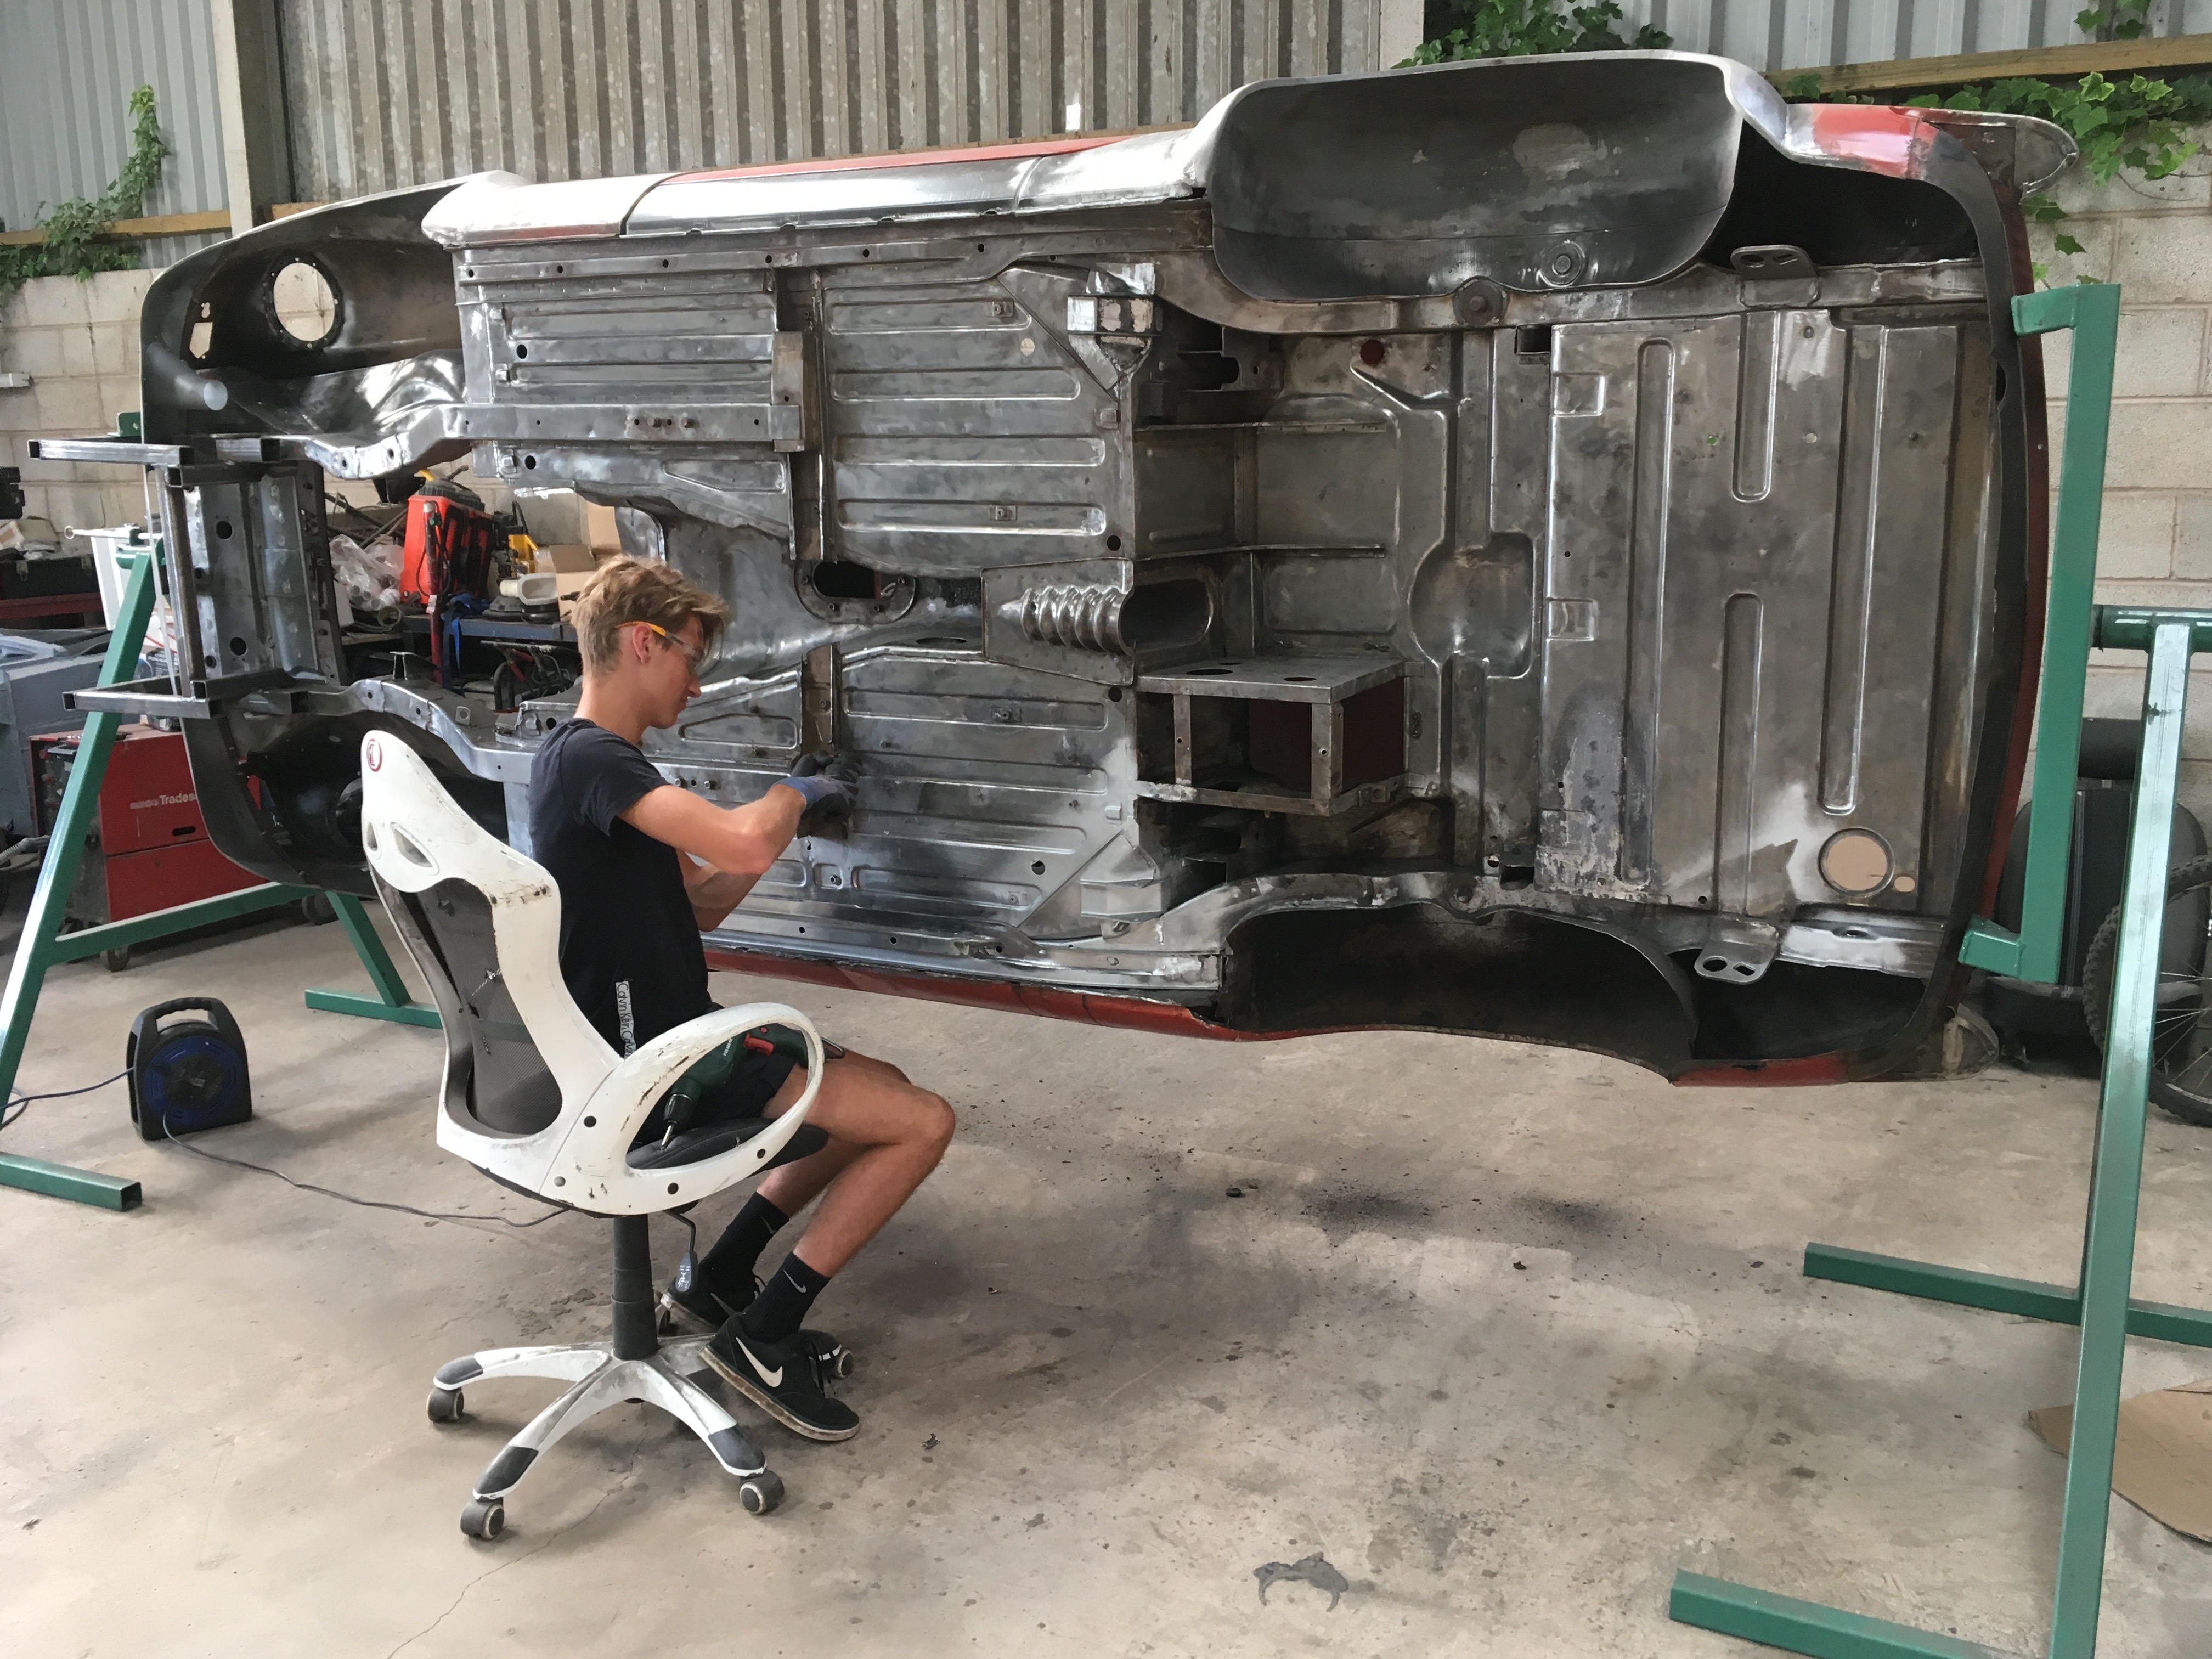
Seem to have a couple of panel work jobs on the go at the same time here, but we’re back on track now. To finish the work to the rear valance, we had to temporarily remove the rear rotisserie frame and make a new mounting which picks up the rear spring mounting as it won’t be possible to use the current fixing point once the valance is on.
Before we get the shell hitched onto its new mounting, we’ve just set it onto a steel work bench to give full access around the rear panel.
As the Midget rear panel is going to be spot welded on its bottom edge to an inner skin - which will be the original rear panel with some slight modification, I thought we ought to blank off the slotted bumper mountings to stop any dirt getting in.
The three flat plates which are spot welded onto the rear panel around the bumper mountings got unpicked and duplicate pieces then made out of the same gauge sheet. Plug welding these in place with a few extra around the slotted holes got a nice tight seal on the panel and it’s blanked them off nicely.
Next is to attach the lower corner section on the right hand side and then extend the Midget rear panel to fit. Harvey trimmed the original rear panel back as I’ll make a new piece to match the outer valance and spot weld them together. Also got the fuel filler hole blanked off as a new one will be positioned on the rear quarter pillar.
22nd November 2018
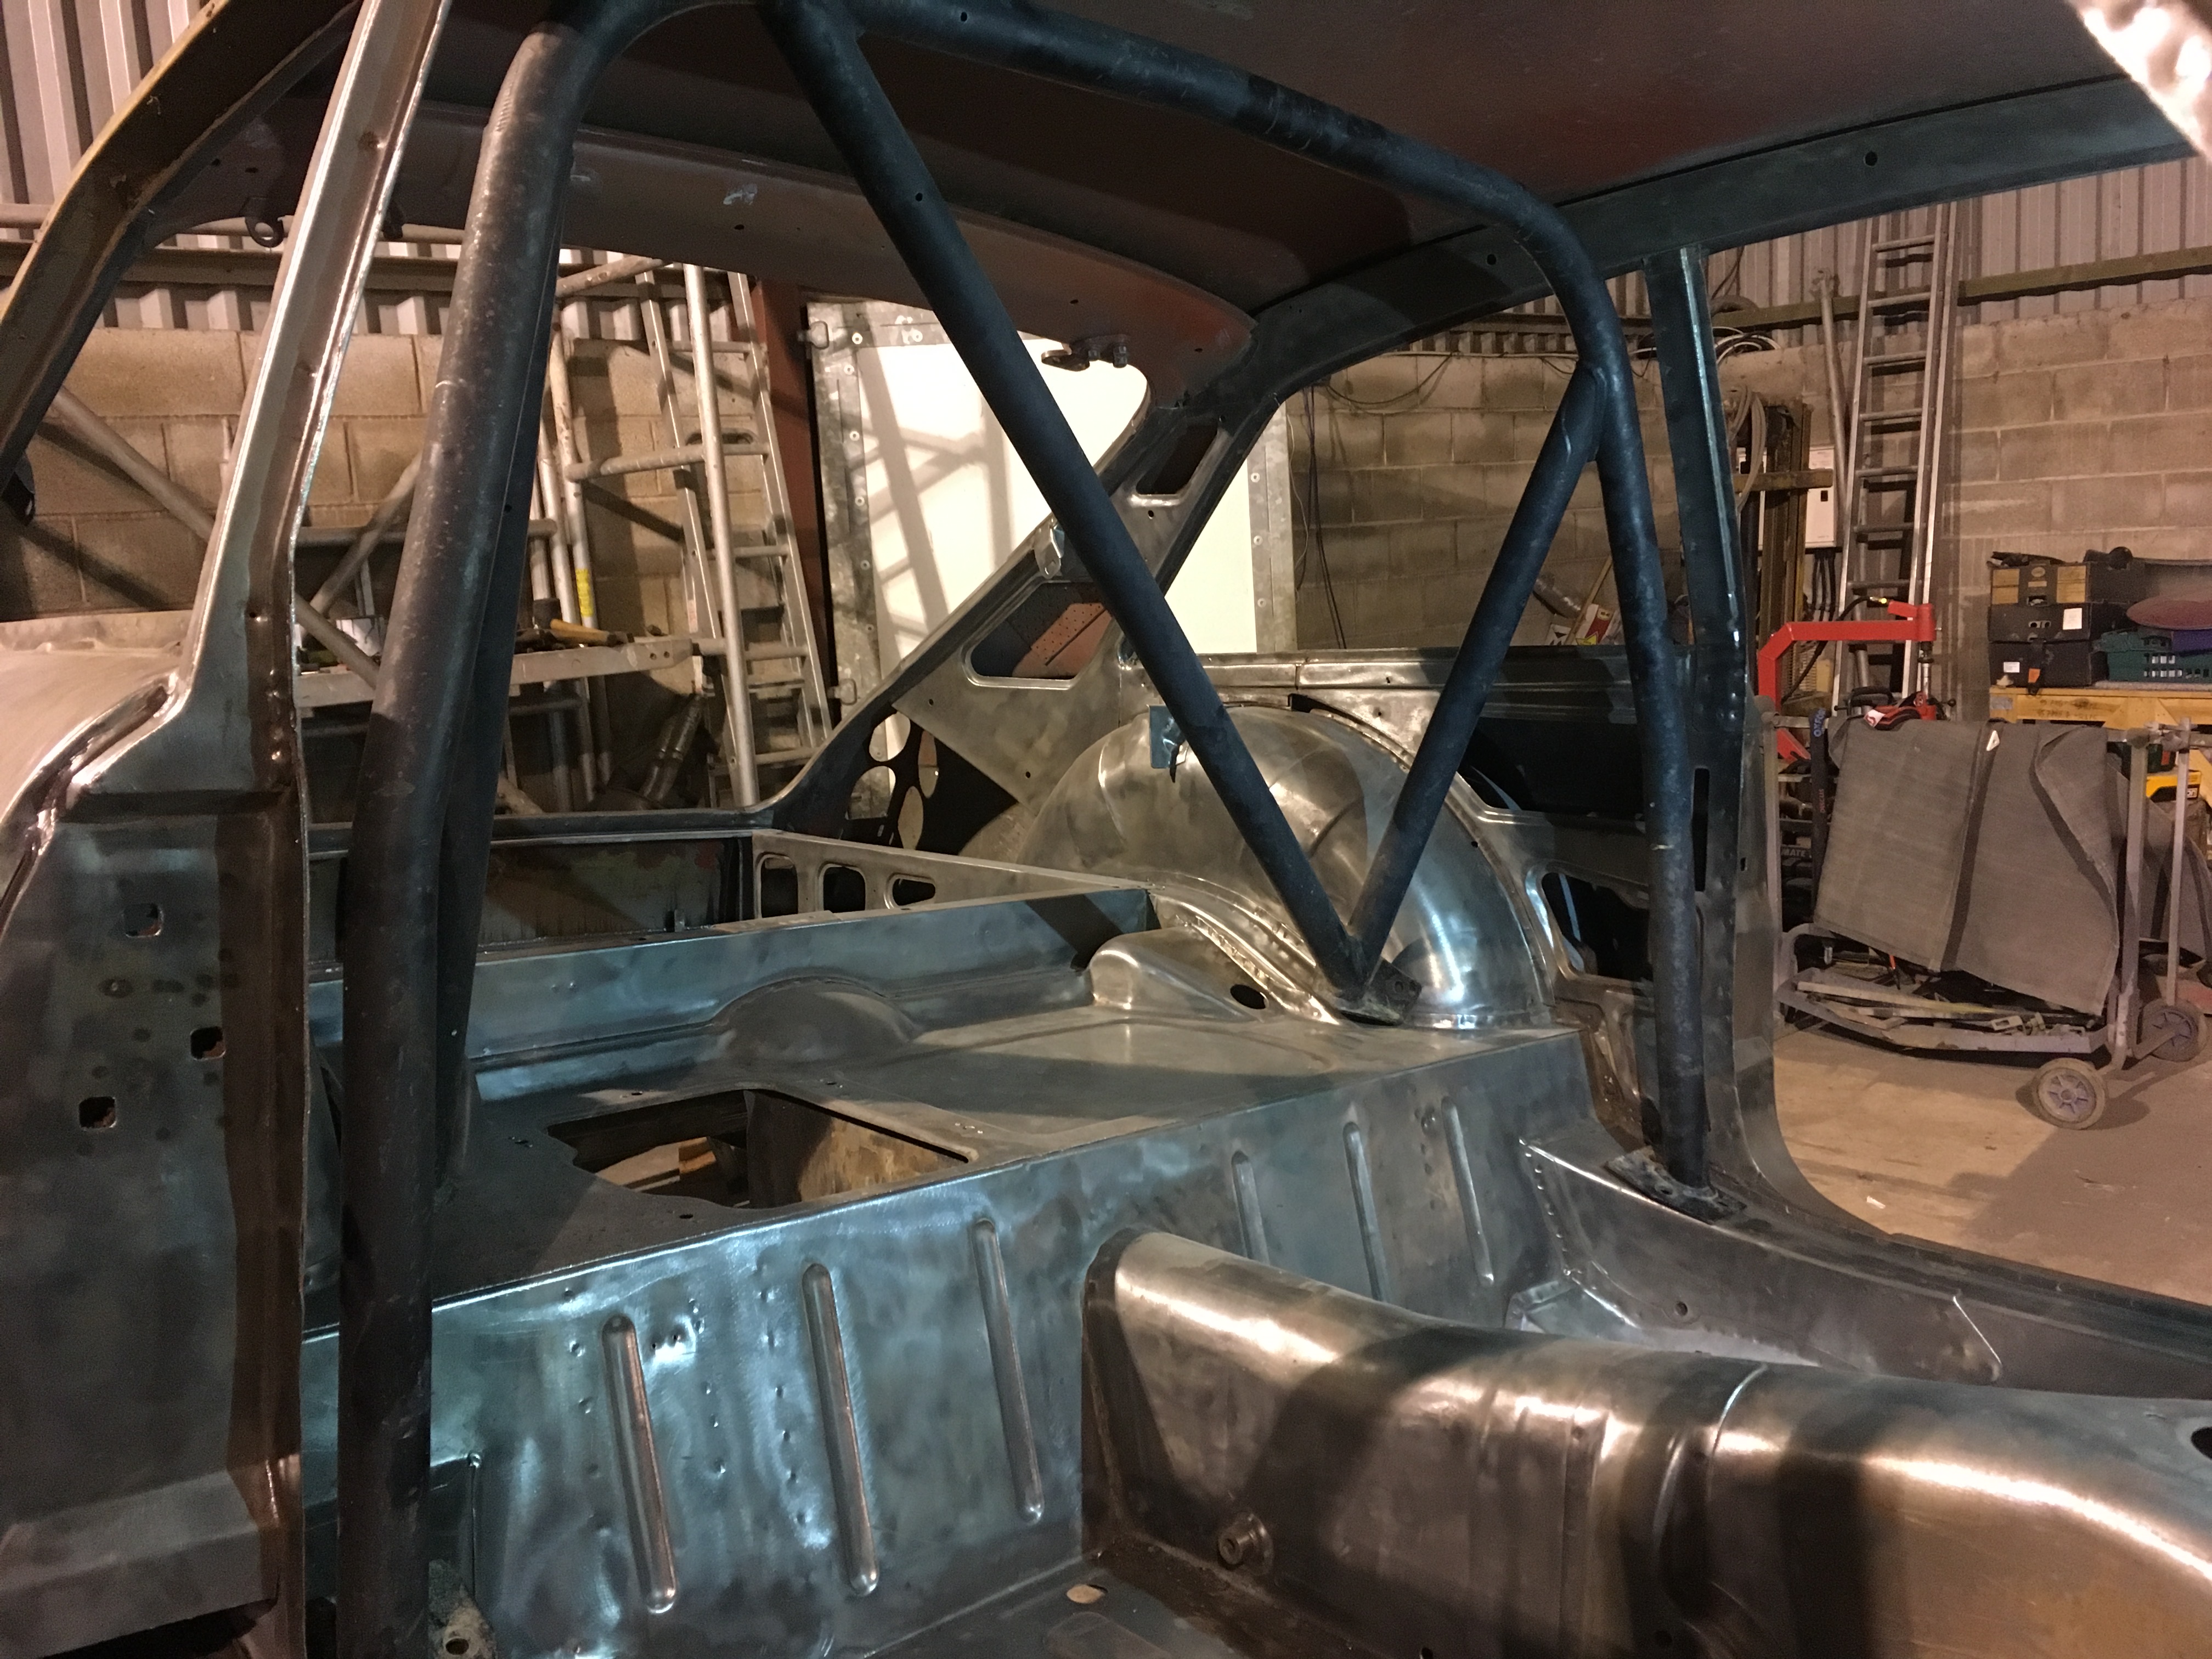
Picked this used, but tidy roll bar up yesterday. Harvey will be making plates to weld into the car with captivated nuts for it to bolt onto while I’m doing other little jobs. It’ll then get stripped back to bare steel and refinished some time later during assembly of the car.
============================================================================================================
27th December 2018
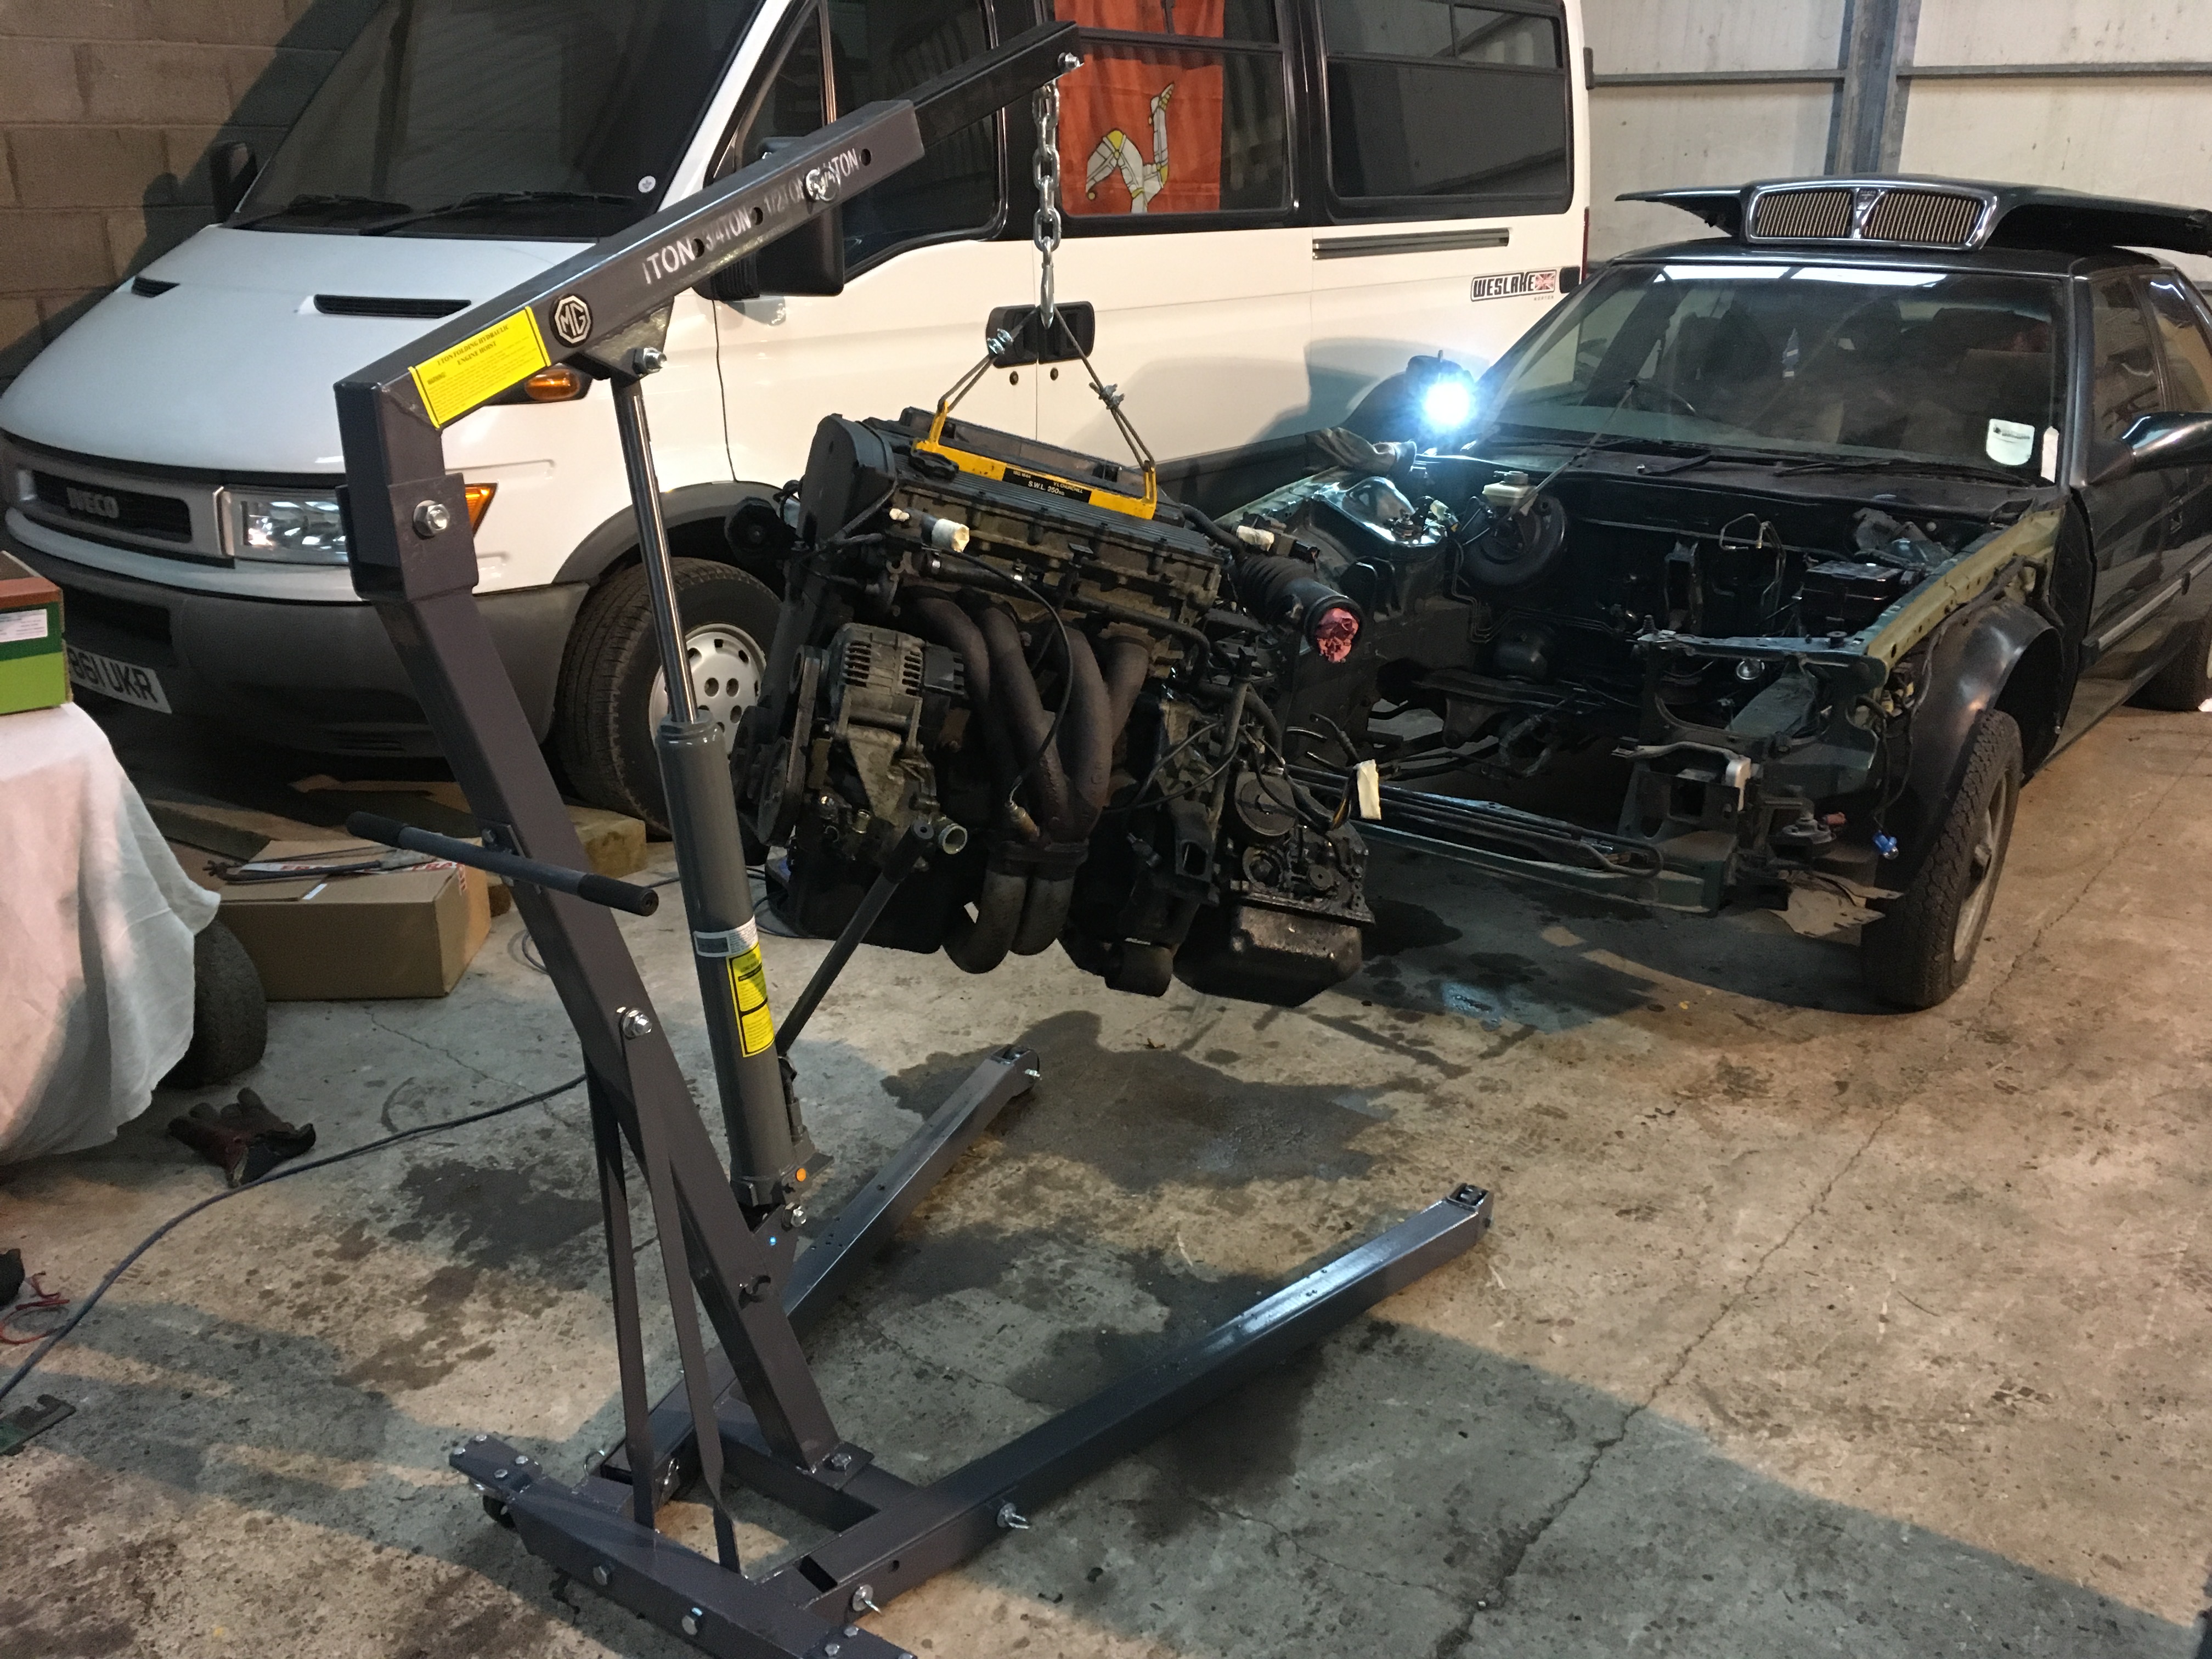
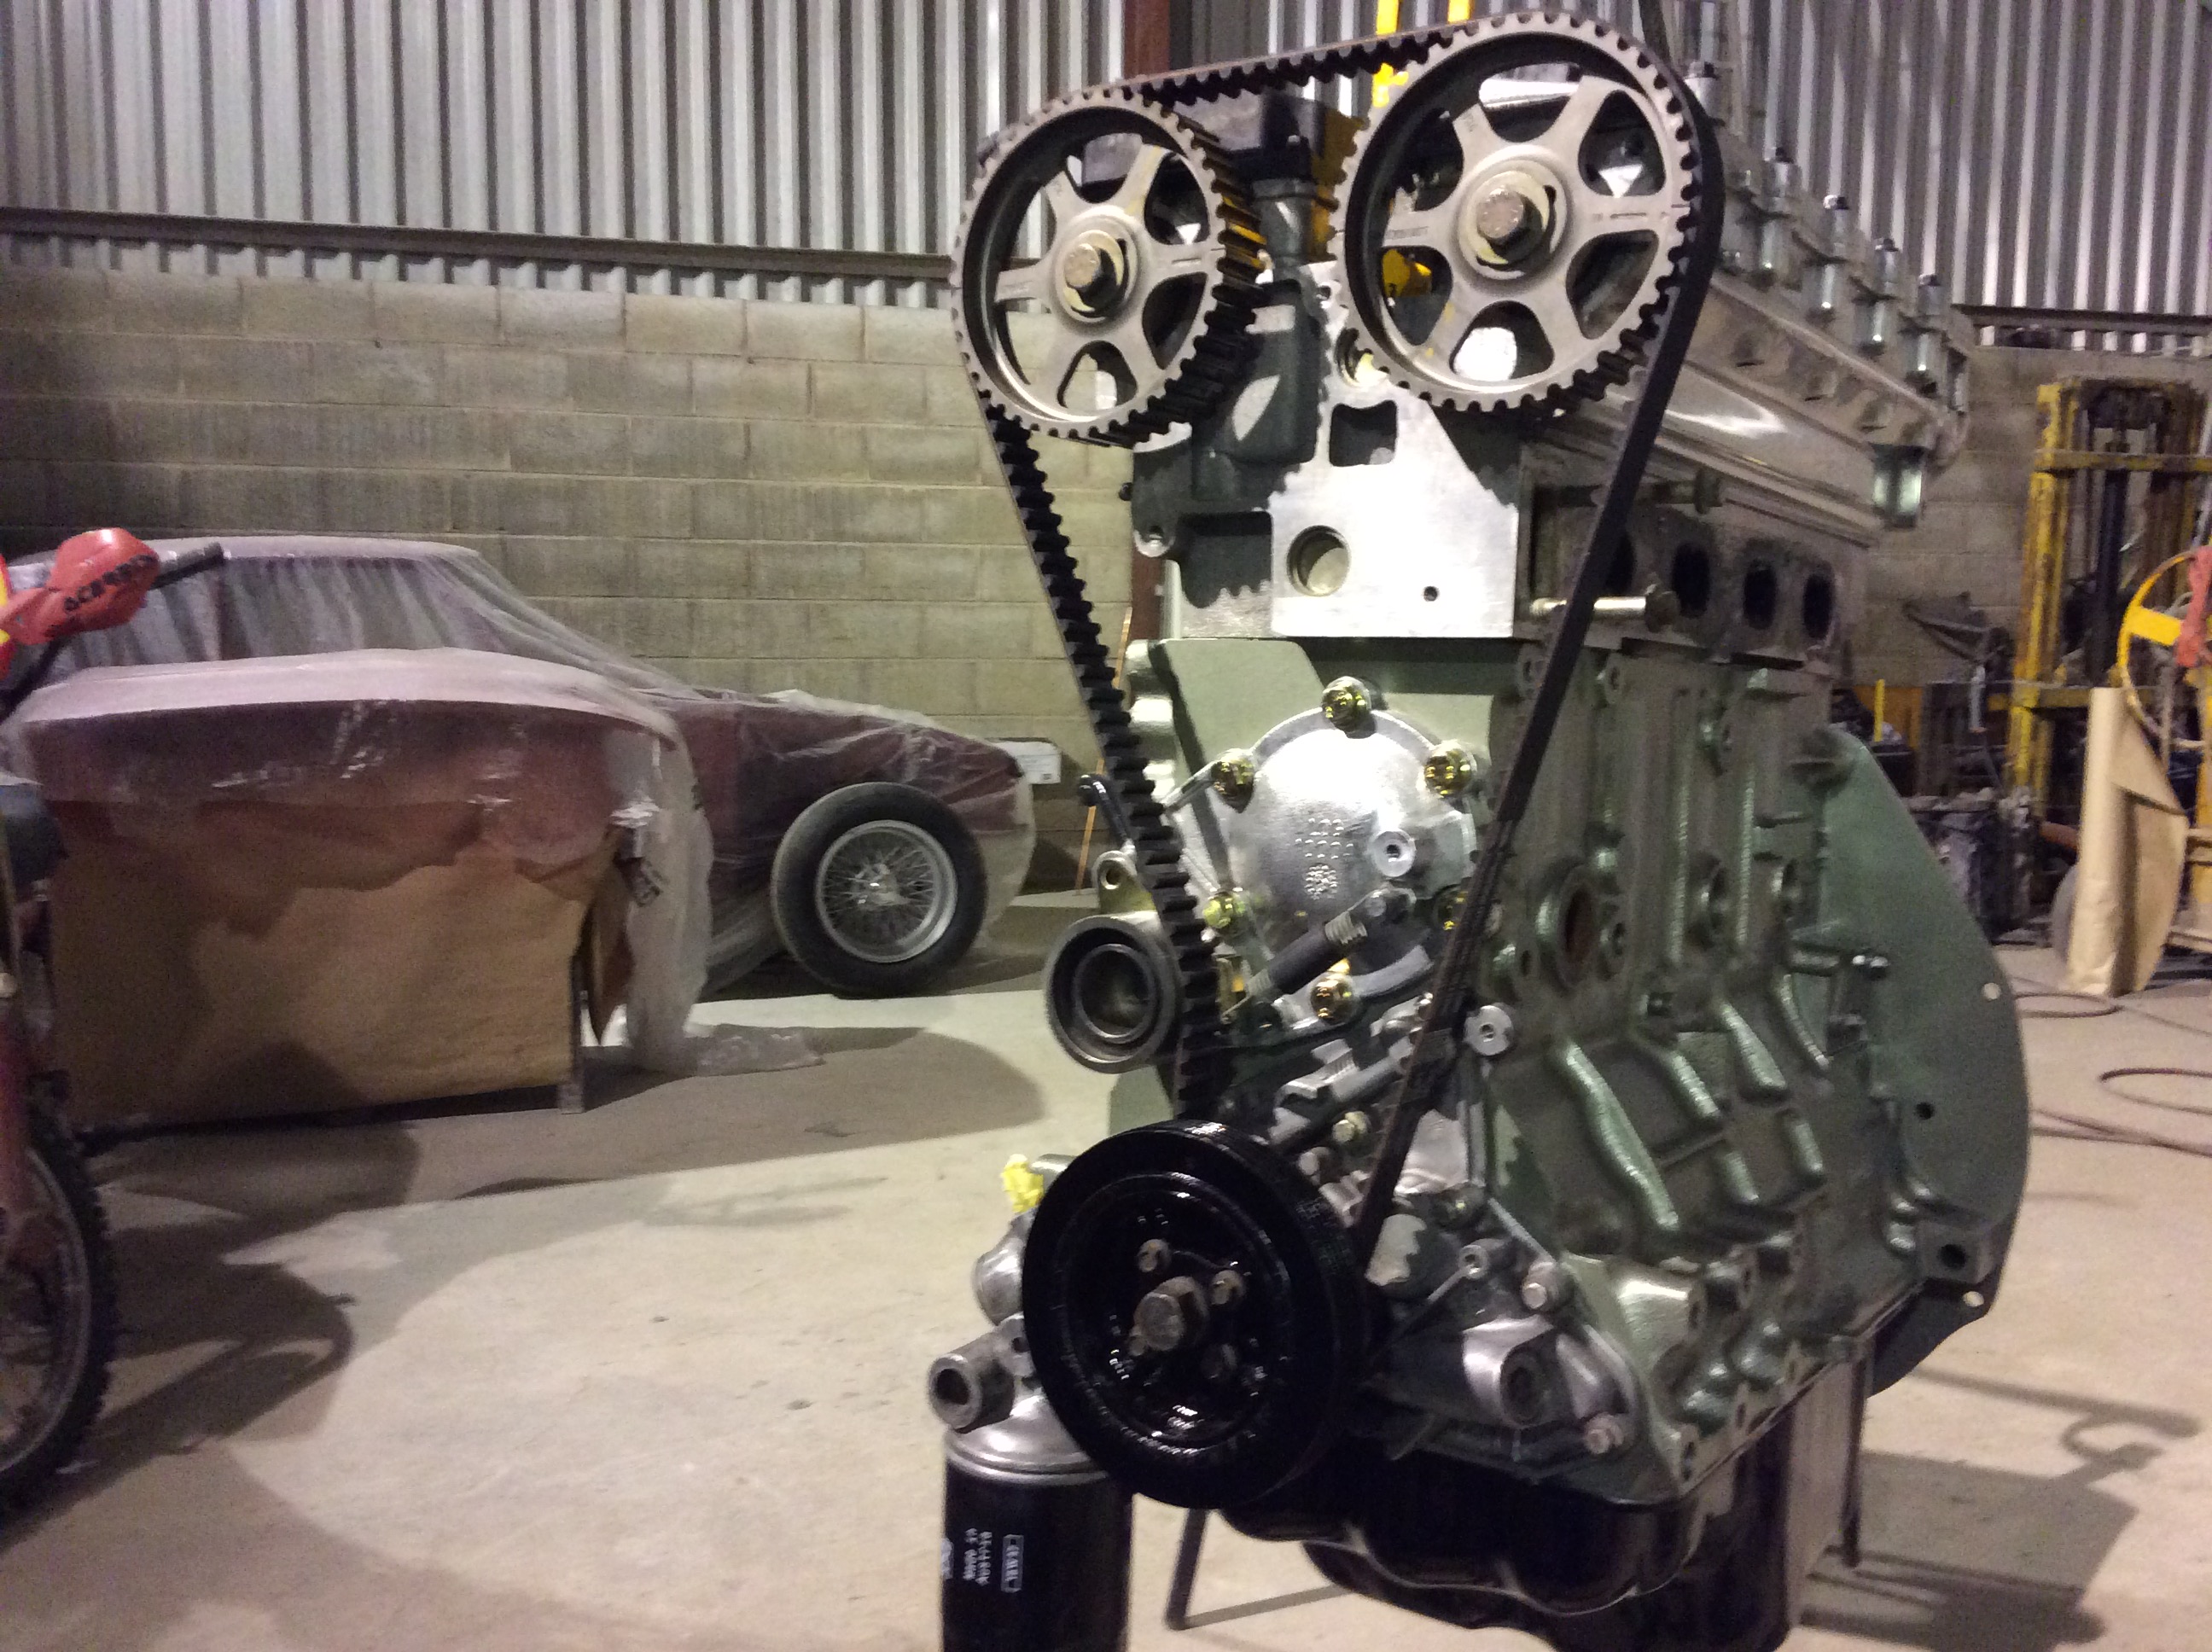
We had a day in the workshop today and pulled the T Series engine out of the Rover. That lifting bracket was handy and we ought to have used the levelling attachment I have laying around with the hoist, but it worked out nicely with my rope wire.
The automatic gearbox and front water pump housing are now removed, so we’ll get it ready for mocking up in the parts car soon. Not only is the front water pump assembly a little too large for fitment into the MGB, it also utilises the points which need using for engine mountings so it really does have to go. Harvey picked up a load of bits for this conversion some time ago, which also includes a decent electric water pump too.
============================================================
26th January 2018
=============================================================
24th February 2018
.......after having a relatively modern bodyshop not that long ago, this certainly feels like going back in time.
Harvey trimmed out the new diaphragm panel for the duct to fit into and we got it tacked into place. It needed some adjustment, no surprise with being such a small thing to get accurate, but once it was tacked into the panel we could get a bit of gentle heat around the bits needing tweaking. Harvey also made the round section that the rubber sleeve will clamp up to. Making short sections like this is easy and you can get it exactly the right diameter for what you need.
The fourth picture is after a fair bit of fettling up, but the part came out nicely. There’s a half inch gap to the throttle body and the original, but shortened hose will likely be retained.
A lot of pictures from this weekend on this small area, but it’s not finished just yet - it needs something on the other side for an air filter to connect to.
==============================================================
17th March 2019
Finally, fair play to anyone in a regular sized garage doing a full restoration. I take my hat off to them for organising space. Here’s how much room Harvey is taking up in here.

============================================================
23rd March 2019
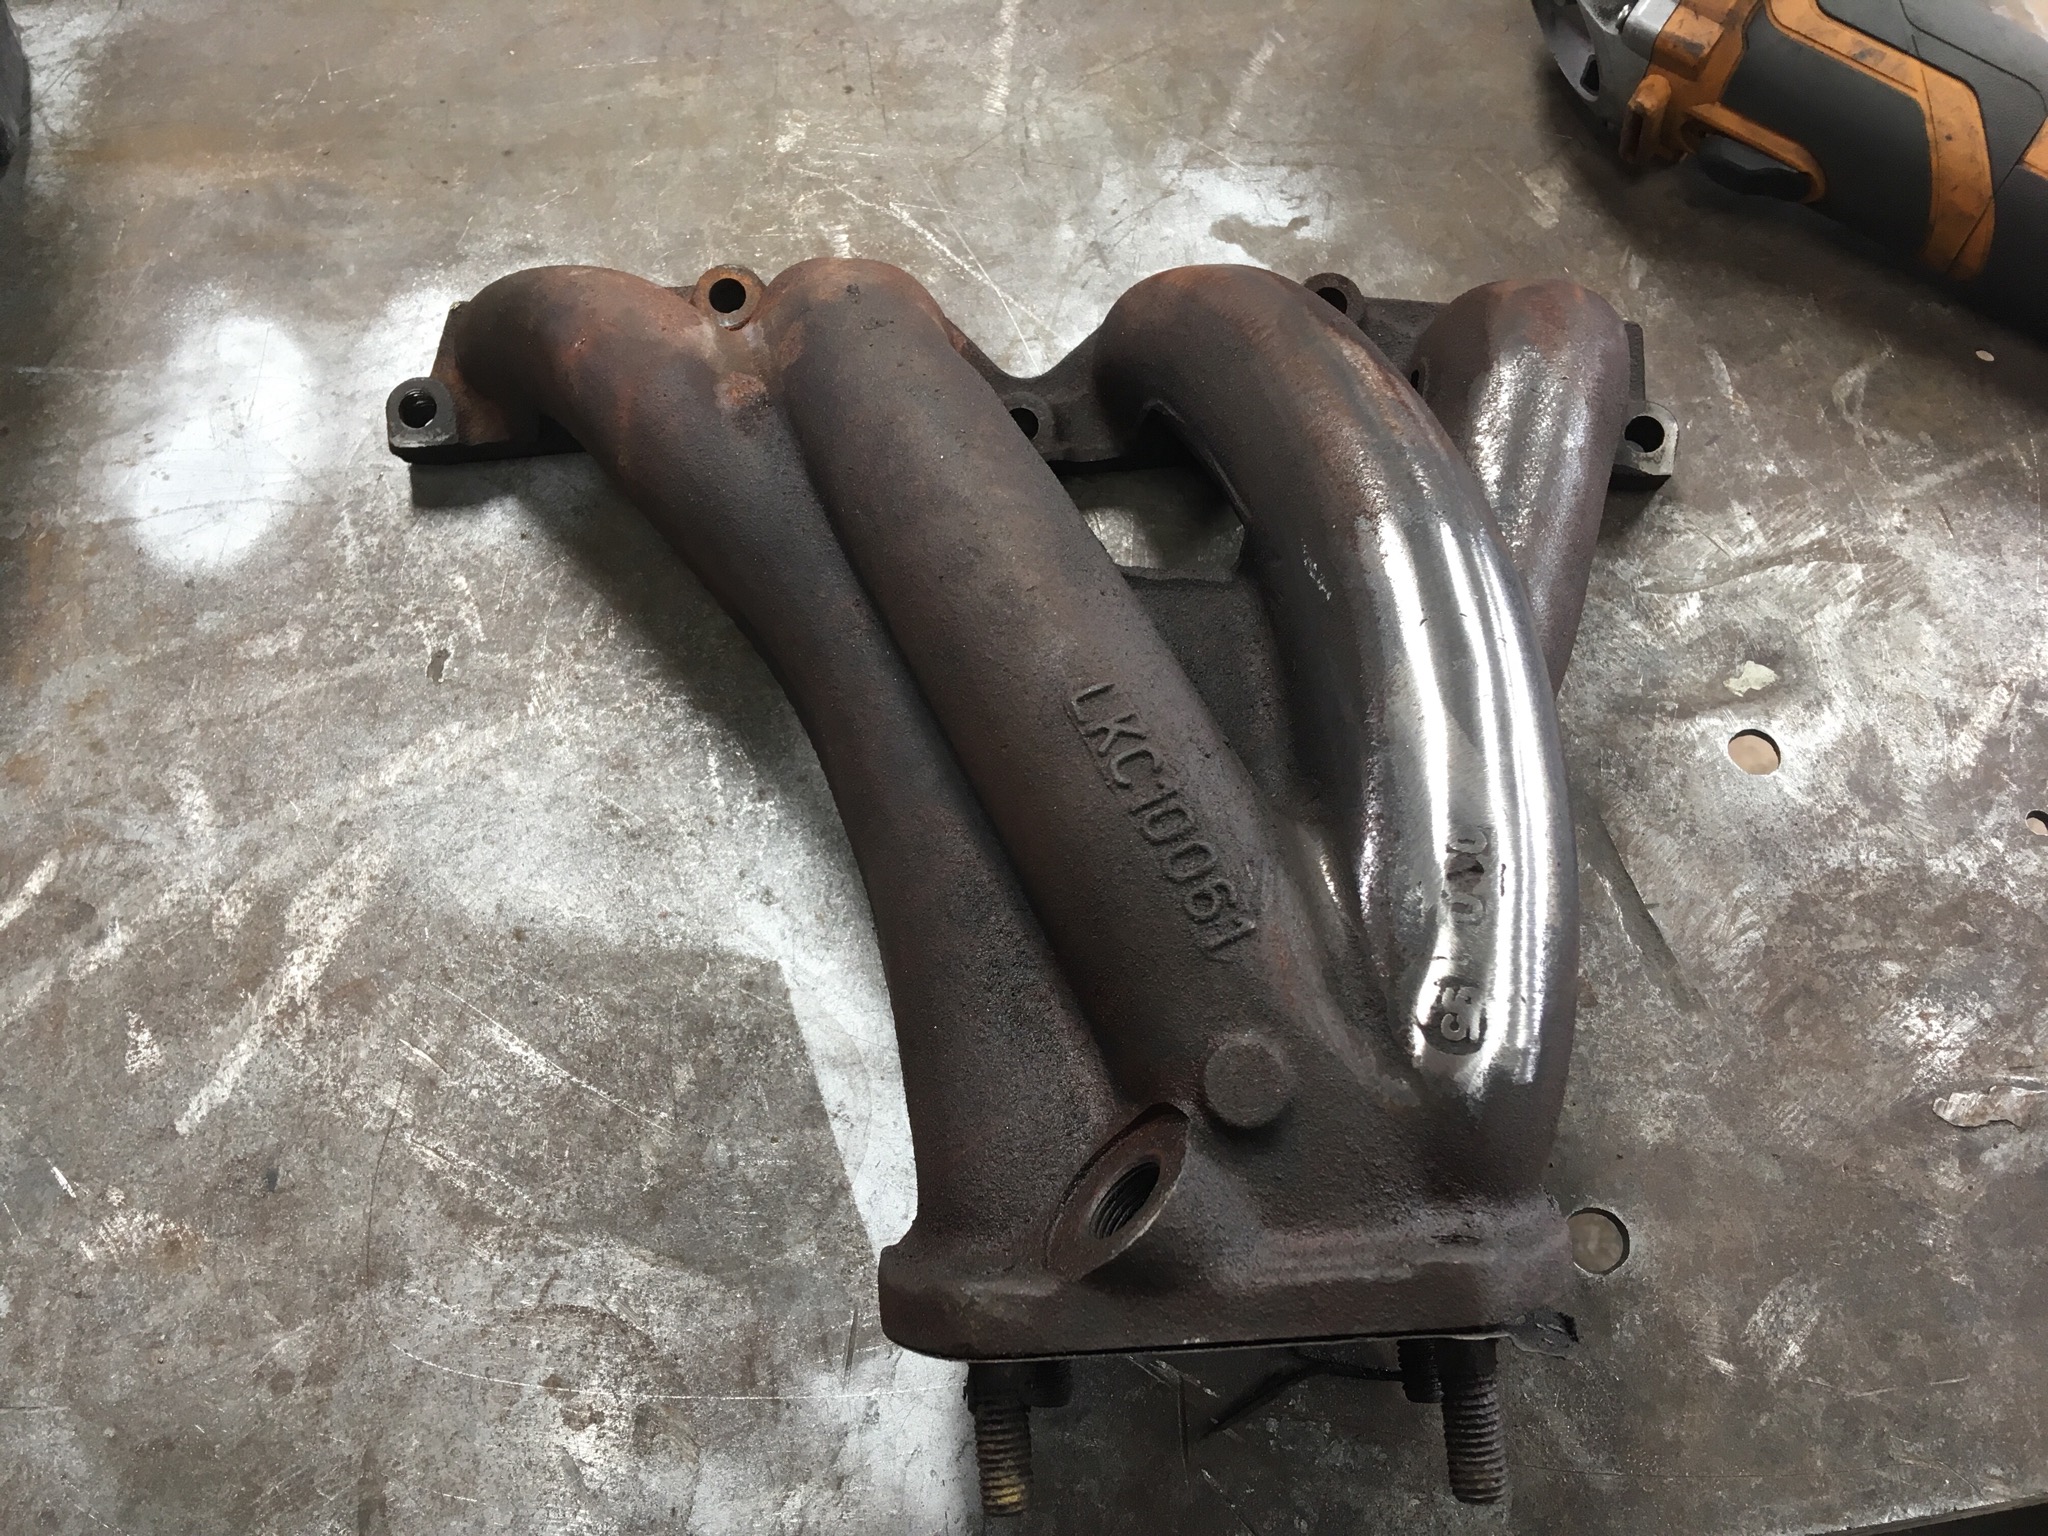
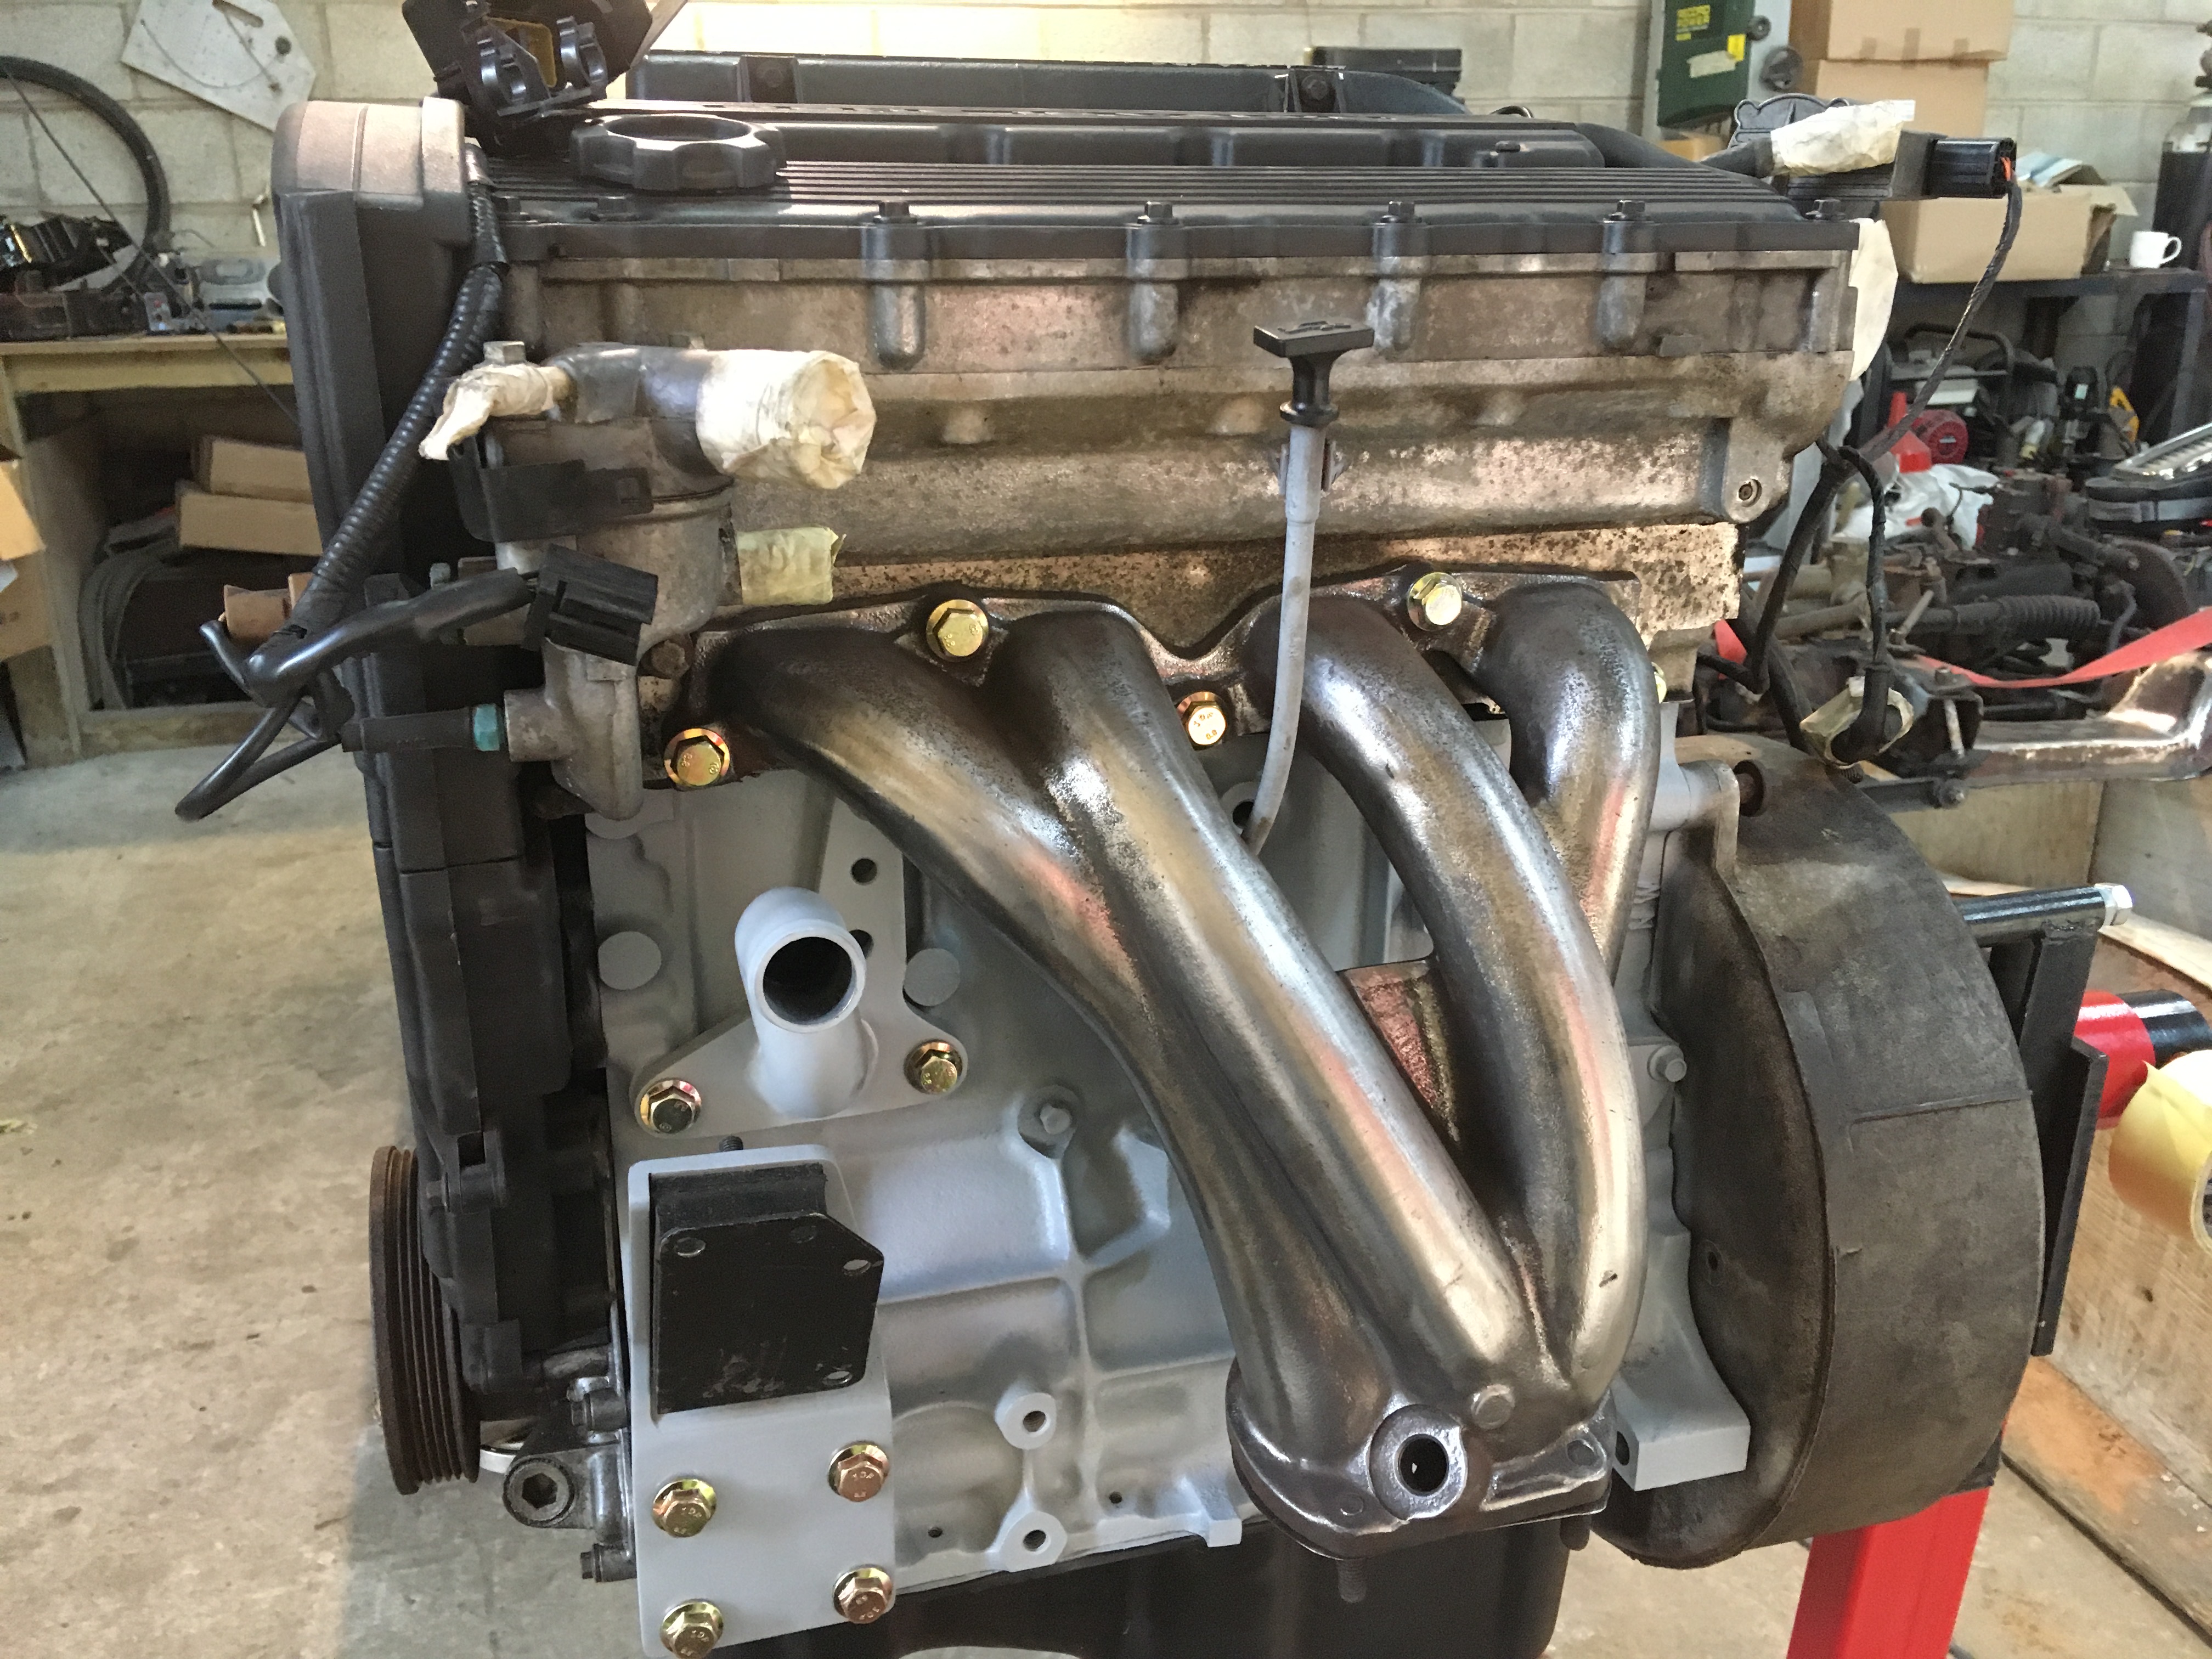
We got the exhaust manifold back yesterday. It had 4mm machined off the bottom of the face (angled up to the top ) which bolts up to the head and this kicks the bottom of the manifold in by 14mm. In essence, it gives sufficient clearance away from the Nearside chassis leg.
Harvey wasn’t keen on the casting numbers remaining on the manifold, so one thing led to another today. We also thought the flash lines and rough factory fettling could do with tidying up while we were at it too.
The difference is chalk and cheese comparing a pair of manifolds side by side and after it gets sand blasted and coated in some high temp paint, it won’t look out of place.
The water pump pipe got welded onto its plate and along with the engine brackets, they all got prepped followed by a splash of acid etch primer.
We need to get this mounted into that mock-up front end now as I don’t think much else needs doing - apart from the alternator.
================================================================
3rd April 2019
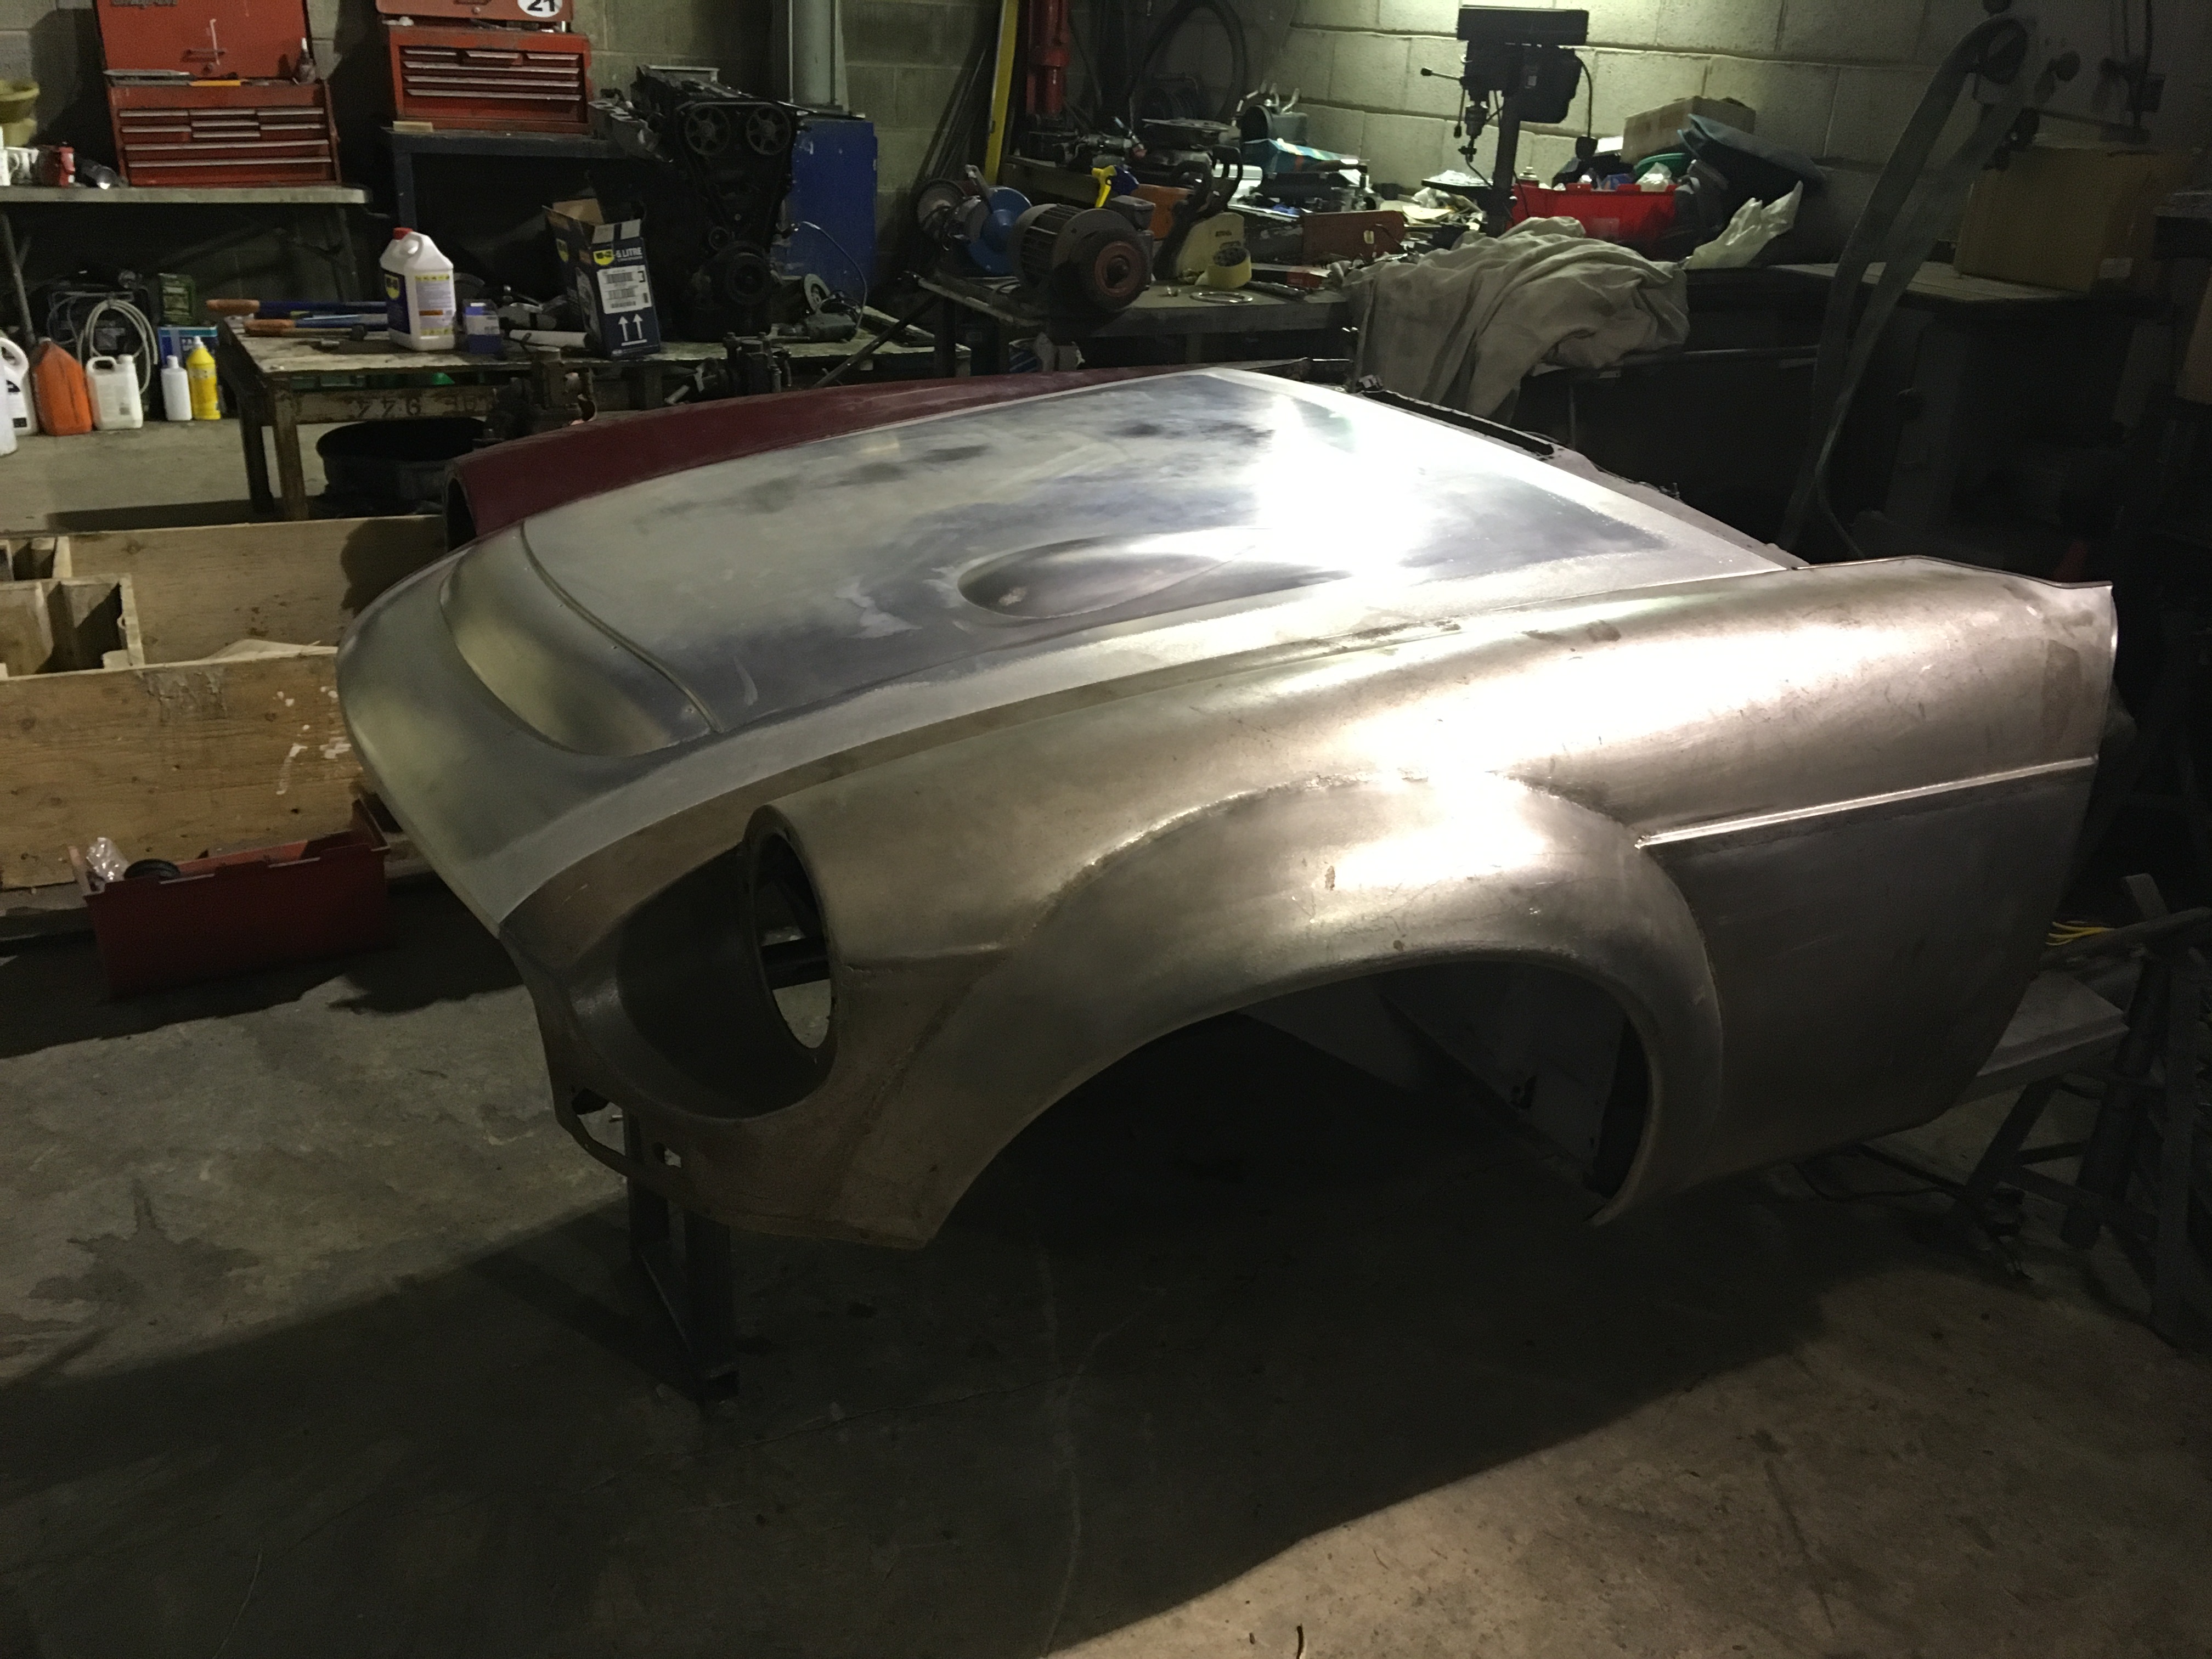
I collected that MGC Bonnet today and the quality of it is superb. It’s also really straight with no damage at all, so won’t need much preparation for paint.
After positioning it between these wings, it looks to be a good fit too. What I was really surprised about is how light it is - naturally, it’s not going to be anywhere near the weight of a steel bonnet, but it’s really, really light.
Harveys bank balance took a big hit from this, but on reflection its a perfect bonnet that wasn’t far off the price of a used one. It’s a Heritage panel supposedly before they ceased making them, but it’s very nice quality which Myself and Harvey are both really pleased with.
==============================================================
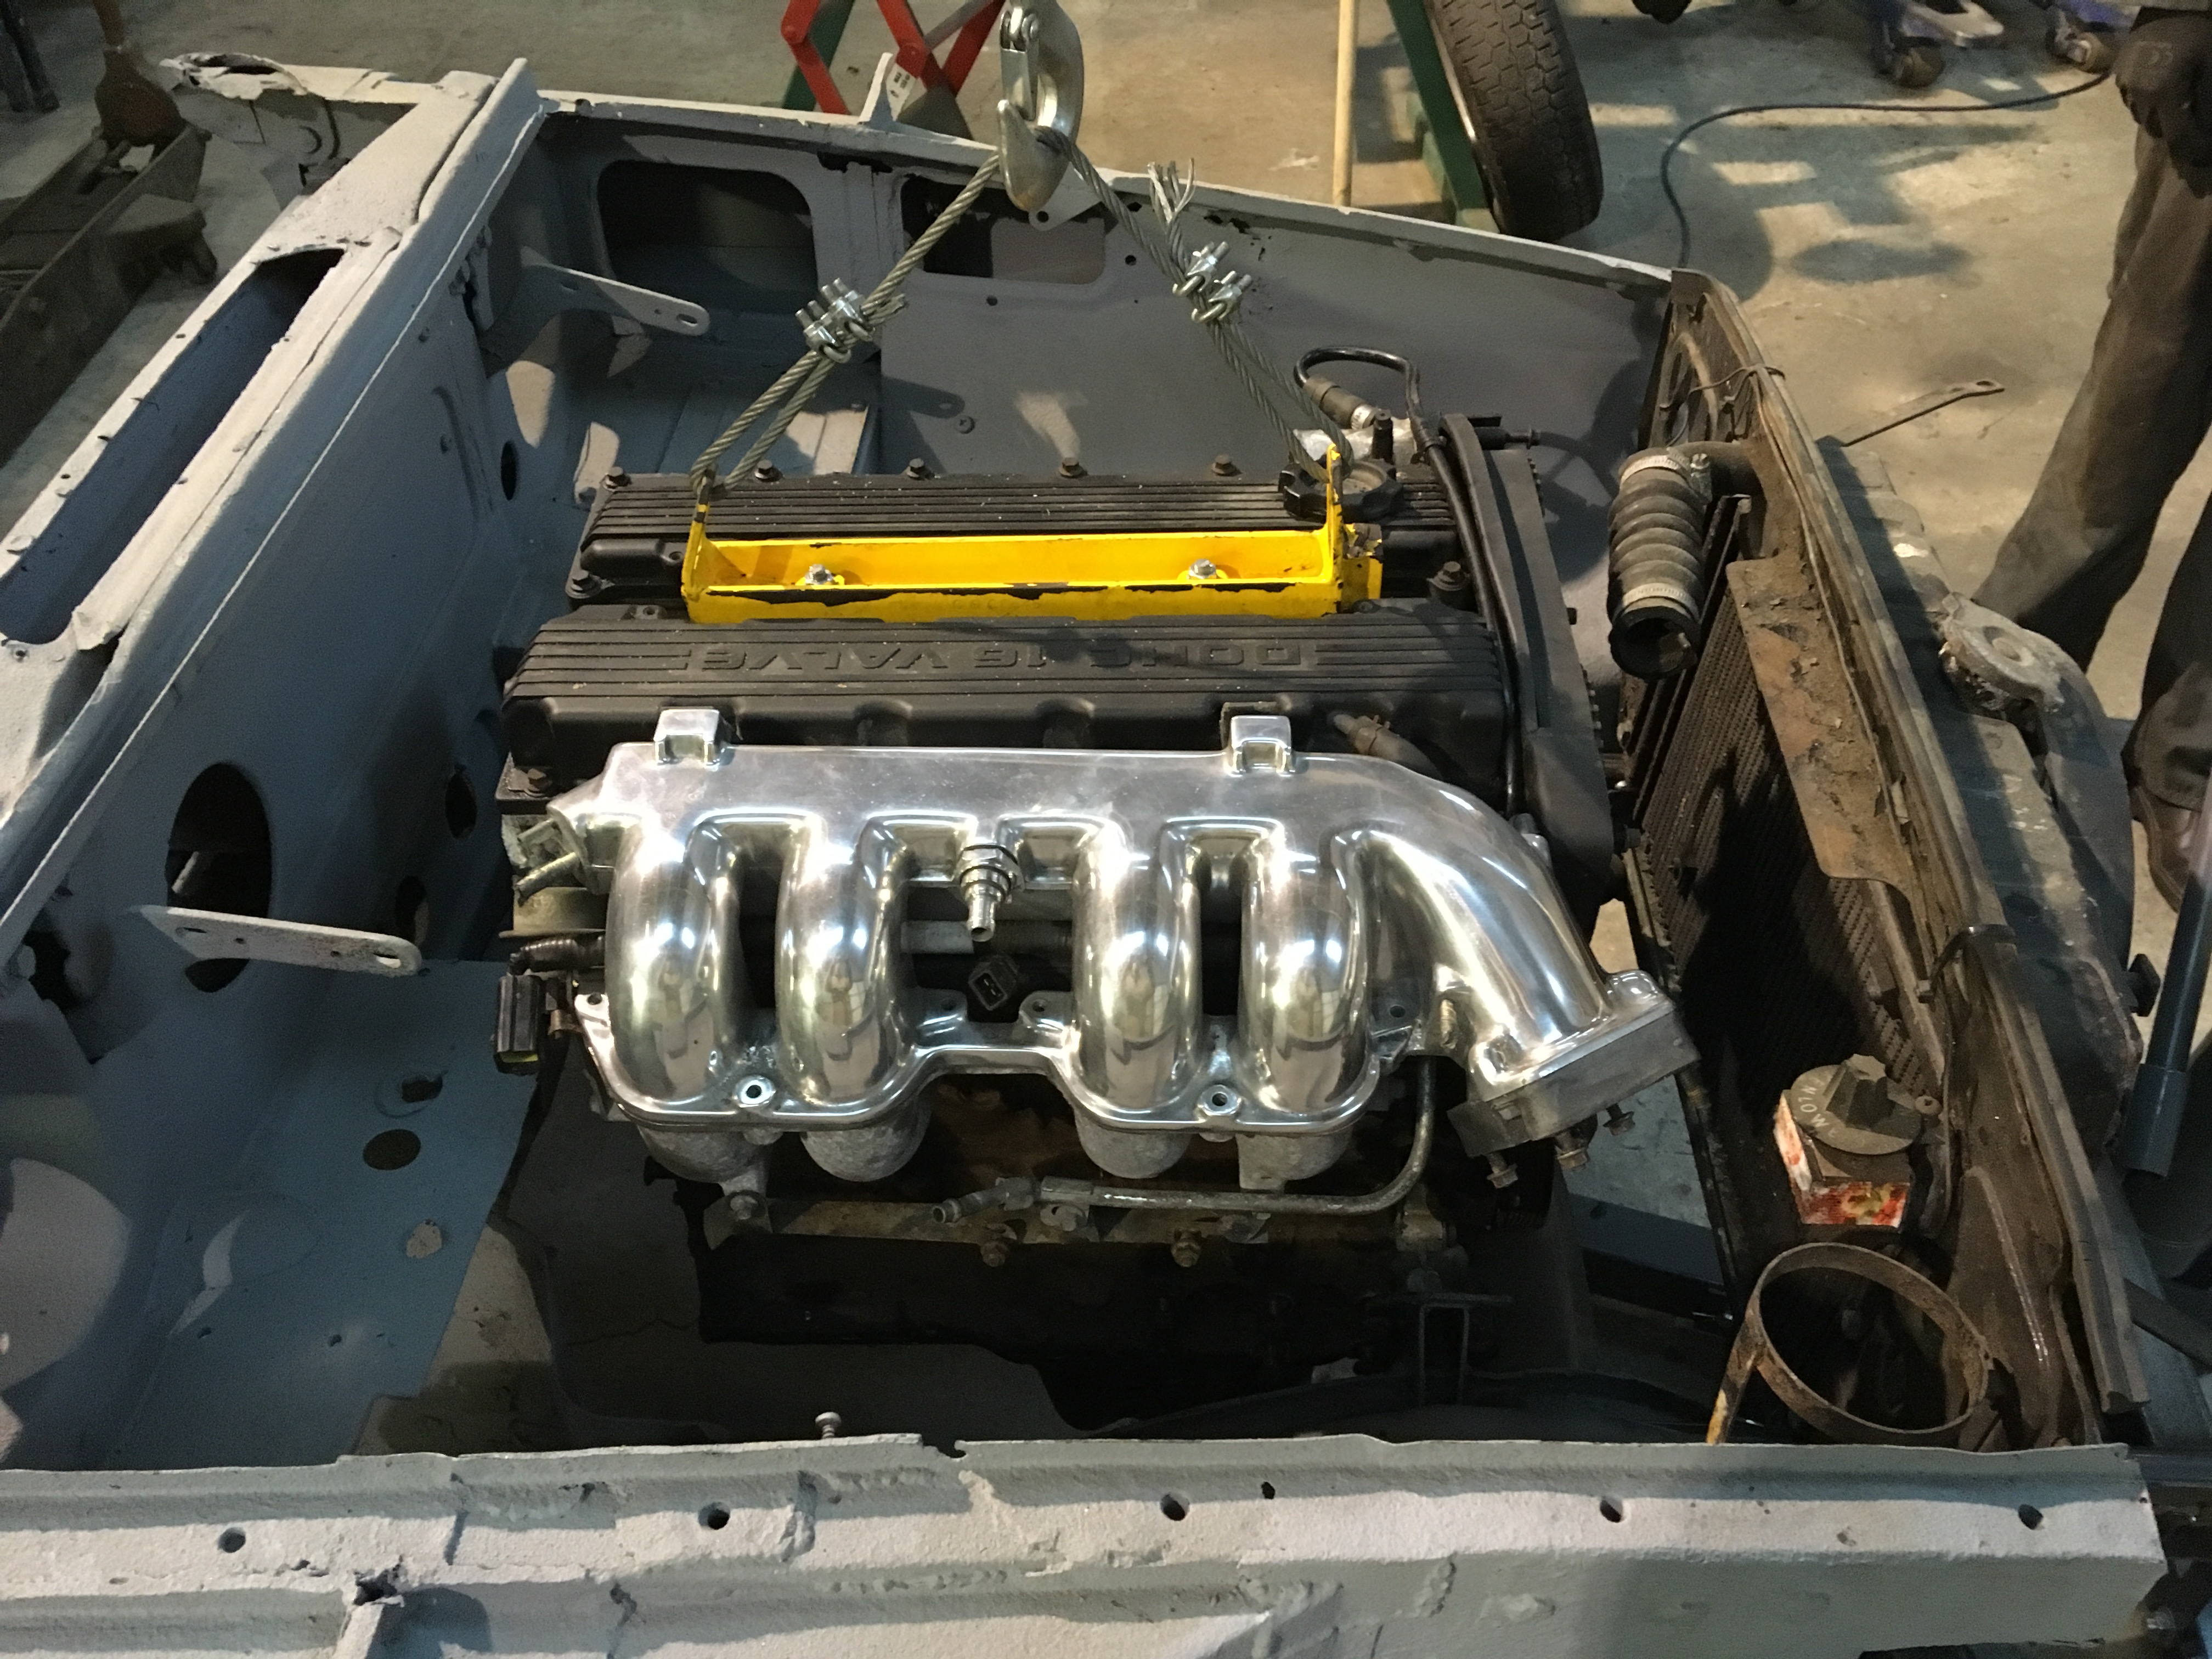
8th April 2019
After getting the Rover engine fired up, we swapped over the inlet manifold for the forward facing Land Rover version and checked the heater box would fit ok. I also changed the fuel rail that feeds the injectors for one that came with the Land Rover engine. Flow enters at the new throttle body location with this, so I’m sure it will make a difference.
Fiddly things these heater boxes seem to be to fit, but it slotted into place with plenty of clearance to the back of the engine. For the flow and return needed for the heater to work, the standard Rover top tube just needed extending with a 90 degree bend and that gets us nicely to the same fitting the MGB engine would connect to. Harvey stripped this back to bare metal and it’s in really good condition. It also has a nice bracket that tags onto the exhaust manifold and has a mounting to secure the oil dipstick.
The second pipe I made using a steel tube of the same diameter and this inserts into a reducing Tee between the water pump and engine block. I’ll add a couple of tabs that will join the two steel pipes together and braze these. That small valve that arrived the other day, will fit between this second pipe and straight onto the other heater Matrix connection.
The Rover coil pack will fix onto the bulkhead next to the heater box, but we need to get a set if longer leads made up.
Alternator is underway too, so we’re nearly done on this bit.
The brake servo also got mounted to see how much space there is around there too.
===========================================================
22nd April 2019
Too hot for me to sit out this bank holiday weekend and it’s not welding weather either, so I unpicked the wiring harness from the Rover and stripped it back to basics for the engine only to run. We removed the entire loom from the donor car and after connecting all the neutrals onto the scrap MGB front end, the engine started up, just as it would before.
The reason we removed the full loom, which didn’t take very long, was that it would be clear if the reluctor ring or pick up sensor fitted onto the MGB wasn’t correct. As it started and ran fine, we know this is all good and the wiring can now be made ready for merging with the MGB loom.
I’ve got wiring details from various places for the T-Series engine on a basic engine harness or loom, but I’m not that great on electrics. Now its stripped back, I can see what each relay and supplies to the ECU do, I feel confident in doing this. A few people that have done this already, said it’s easy but it didn’t look so easy to me. I’ll see what connections I need and get a decent set of crimping pliers with suitable terminals and automotive type connection blocks.

===============================================================
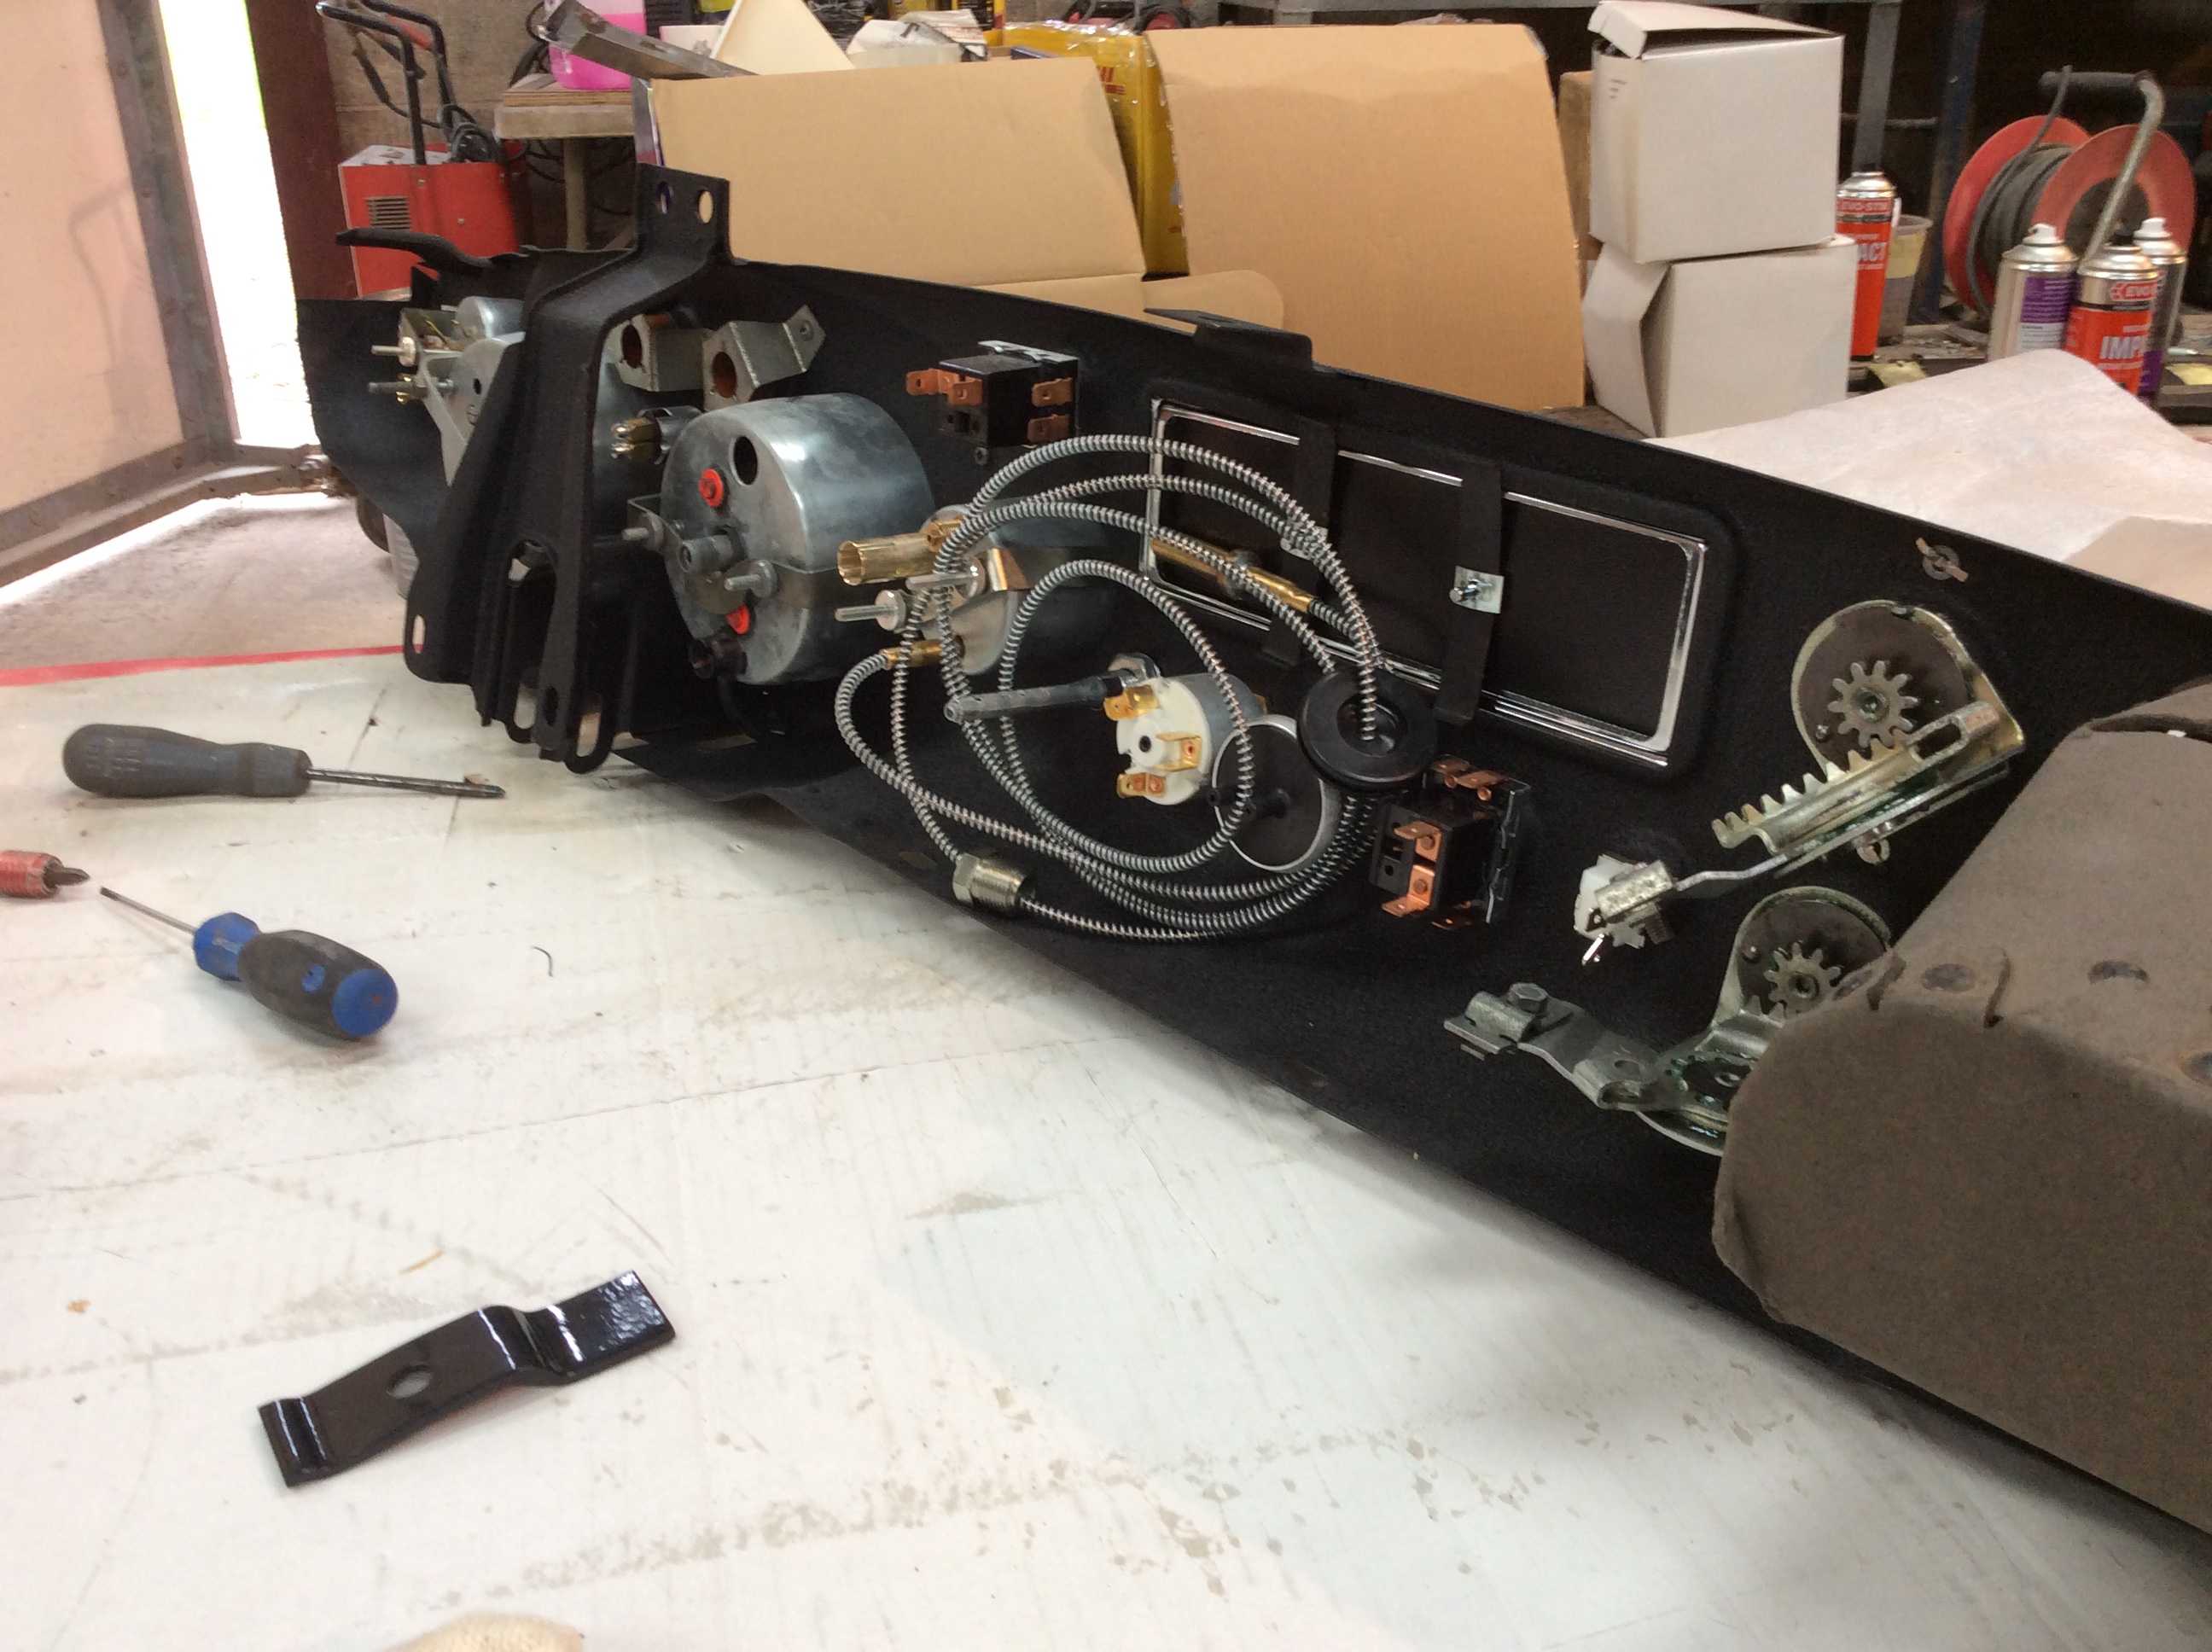
18th May 2019
Here’s Harvey doing the last modification needed to fit the earlier steel dash to our project shell. The only thing in this area to change is the bracket found on the square tube that runs inbetween either inner A Pillar. After carefully removing the later bracket, so not to damage the tube - the earlier bracket was also carefully removed from the donor shell.
This is spot and seam welded into place, so a bit of care is needed to remove it without causing damage. The earlier bracket is also mounted at a slight angle, so a spare piece of steel plate was bolted up to this and another, flush up to the old tube. Tacking these two pieces of plate together then gives a jig that will accurately transfer this angle onto the project shells later tube.
Measuring inwards from the drivers side inner A pillar gives an exact position for this as all shells are the same between these points. Clamping, using mole grips and then plug welding / seam welding finishes this job. The front section of the bulkhead where the steering column enters the engine bay has also been changed, so the early dash and steering column will now bolt straight on.
We just about got the roll cage finished too, so I’ll update on that tomorrow. Something I have picked up is a beige coloured 2k primer that is almost identical in colour to the original, so we’re looking forward to getting the inside or cabin area primed and sealed shortly.
===============================================================
31st May 2019
The inside of the car is totally cleaned up and ready for some primer followed by a holding coat now. Harveys been cracking on with this and made a really good job.
He’s now fettling up the rest of the car and we will hit the entire shell with a coating in a couple of weeks. I’ll post everything to do with the process and show what materials we are using on this.
To get this finish, it was just the paint stripper we showed earlier to remove pretty much most of the original coating, followed by wire wheels in an angle grinder and also smaller types in a drill. Then it was just a tickle over with 80 and 120 grit sandpaper. Harvey would you say it took more than a tickle, but that’s the process to achieve this.


=============================================================
23rd June 2019
Last of the main sanding now finished and Harvey stripped the inner roofskin back to bare metal using just 6 x 80grit DA discs. Hardly any paint here and I’d say this is the better was to strip this.. no mess to clear from paint stripper, just a dusty job.
A good whizz over with 120 grit paper in the DA Sander and the inside is ready for primer. We got most of the outer shell done with the same, so it’s just the awkward to reach parts where the blasting pot is being used now.
========================================================
26th June 2019
Last assembled picture before epoxy on the main shell. I really like it in bare steel though
===============================================================================================
2nd July 2019
I bet we had 4 hours between myself and Harvey panel wiping the shell clean in preparation for this epoxy coating to be applied.
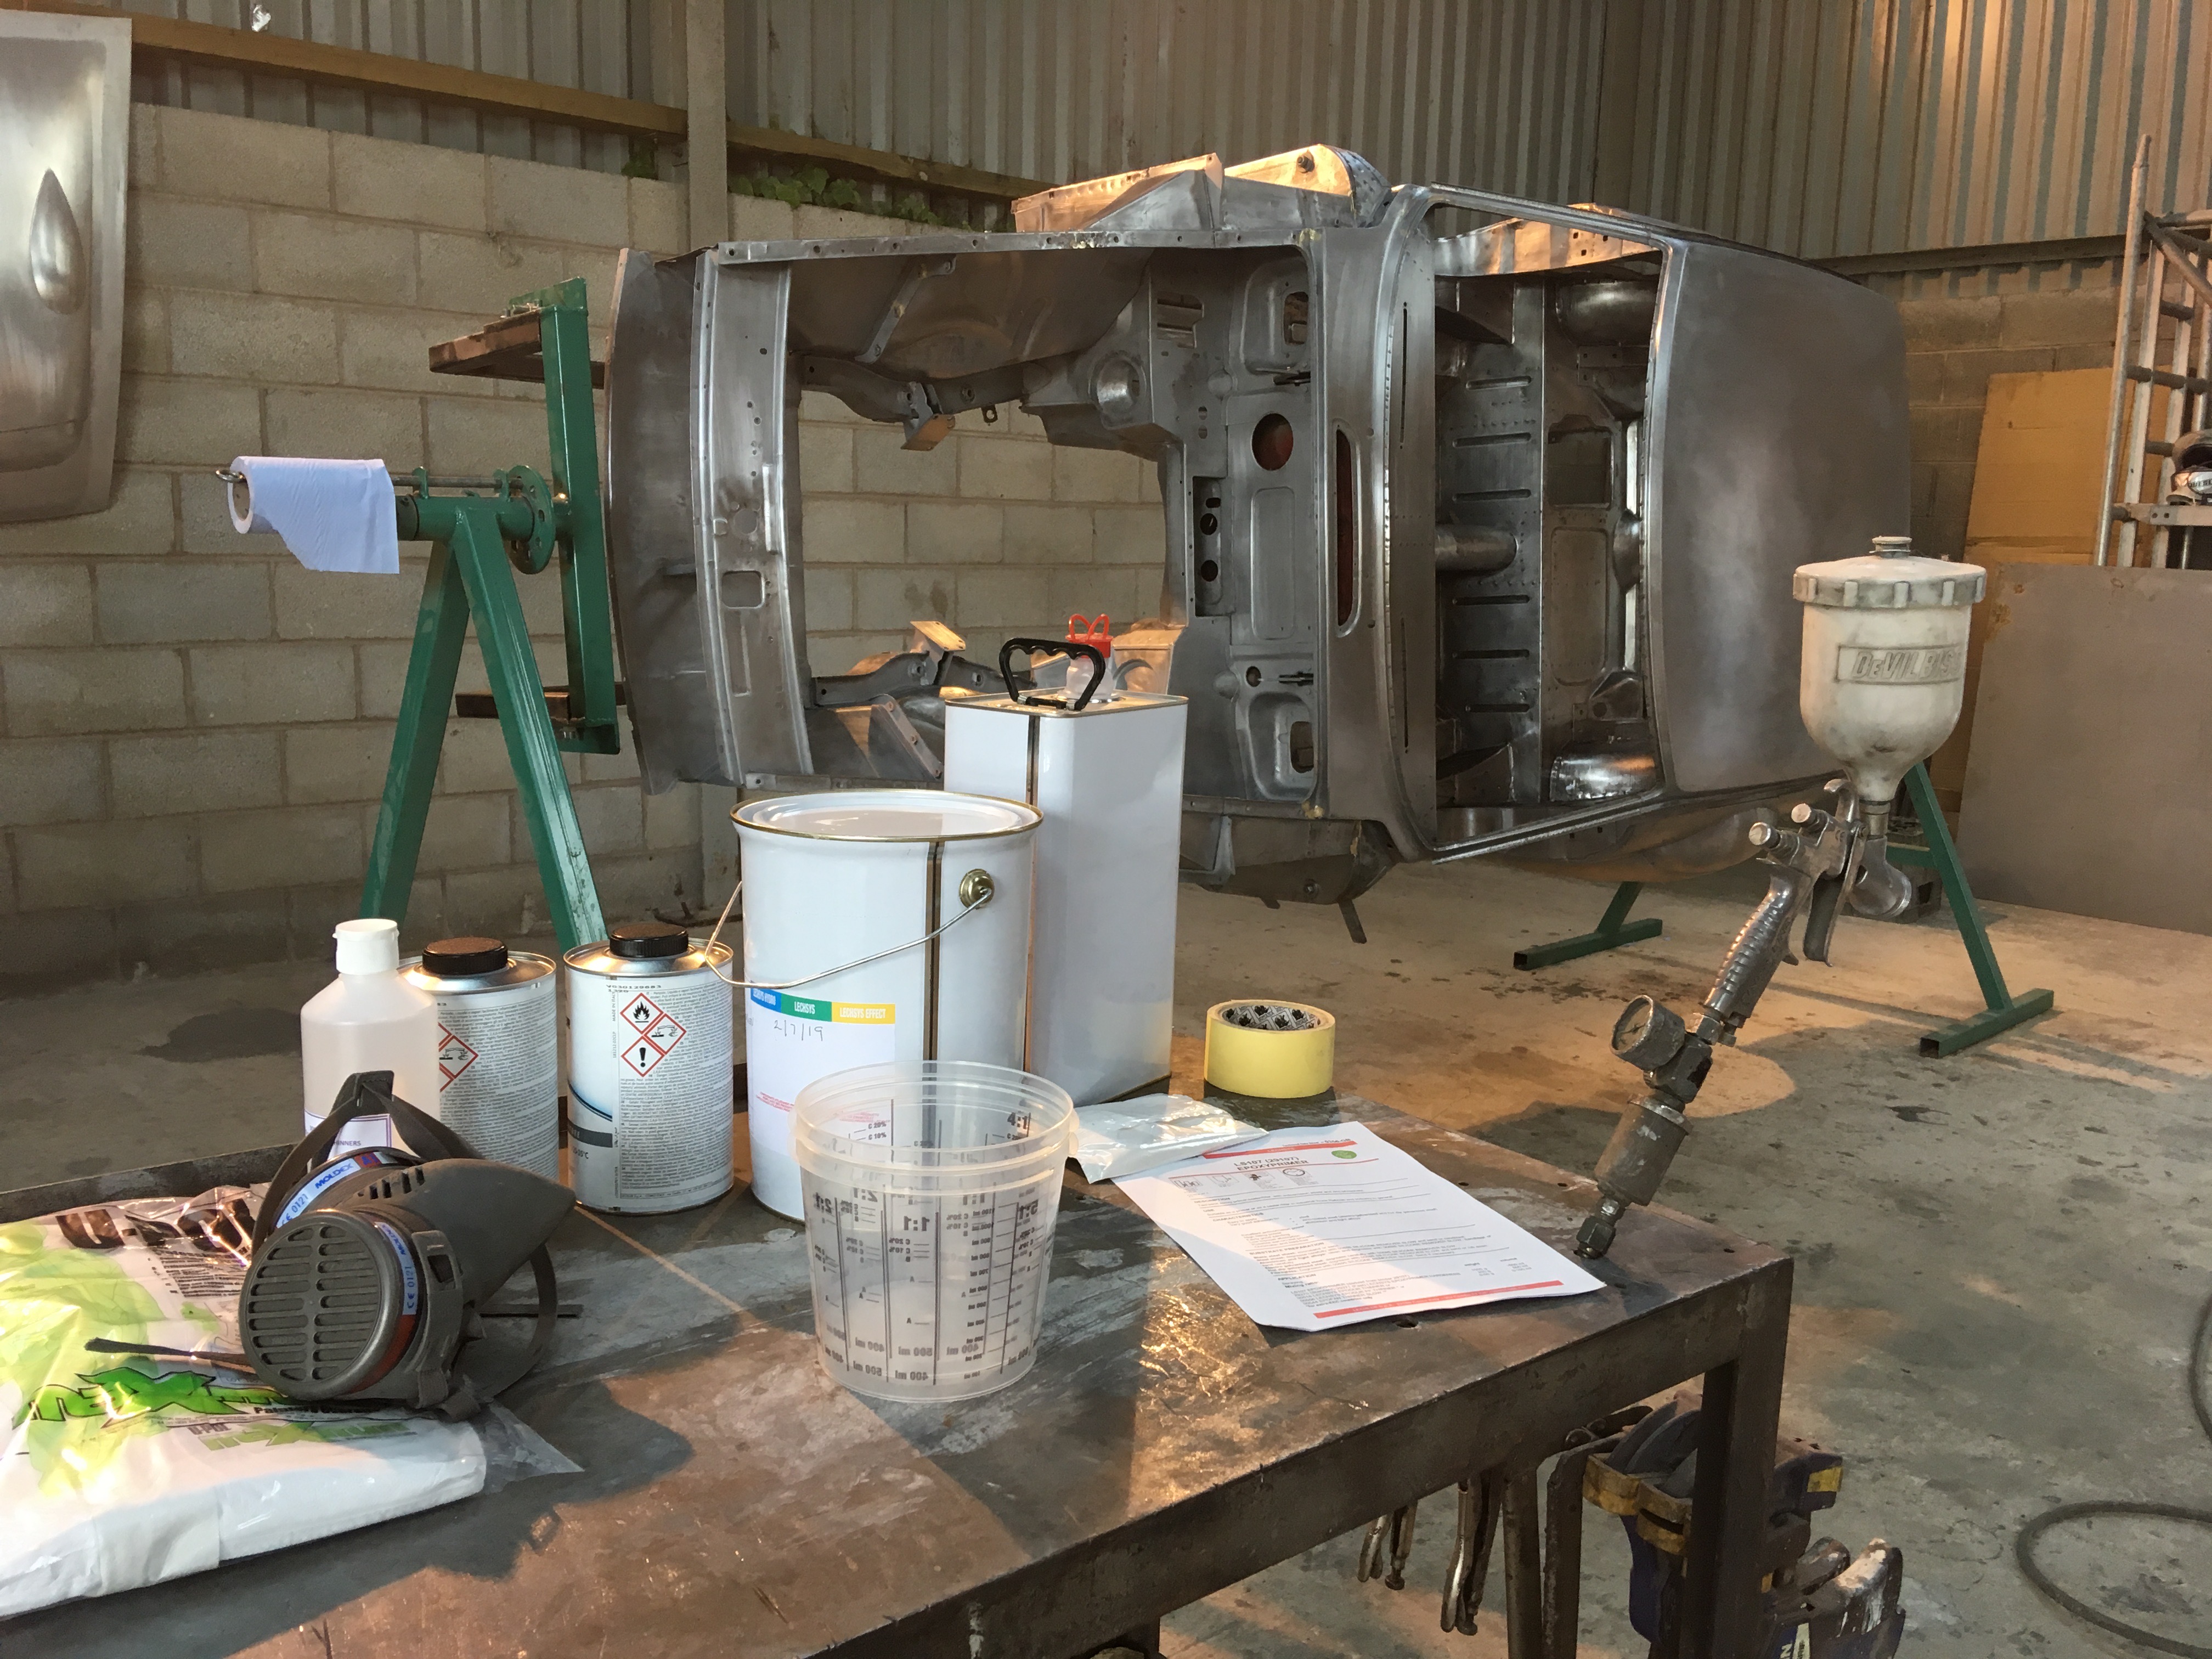
For reference, we used 3 litres of epoxy primer with 1.5 litres of activator and 300ml of thinners. This gave the shell two good coats on all surfaces. I also got the epoxy tinted to match the MGB original beige primer just for the heck of it.
Preparation for this primer is a bit different to a traditional etch and high build type as the bond is mechanical, so needs 80 / 120 grit abrasive for a key. Etch or wash primers have a chemical bond, so don’t need such a coarse surface to adhere to. It lays down really well and is nice to spray on...... in all my years, we never used epoxy so this is a first for me.
It’s surprising how fiddly it is to get into all the nooks and crannies while maintaining a consistent thickness of coating - not that it’s too critical here, but it’s good to try to maintain an even or consistent paint film. Reducing the guns fan width and screwing the fluid tip in helps get a nice finish in the hollows without causing runs, so it takes a while to get these two coats on. I think around 4 hours from start to finish and I didn’t have time to stop.
=======================================================
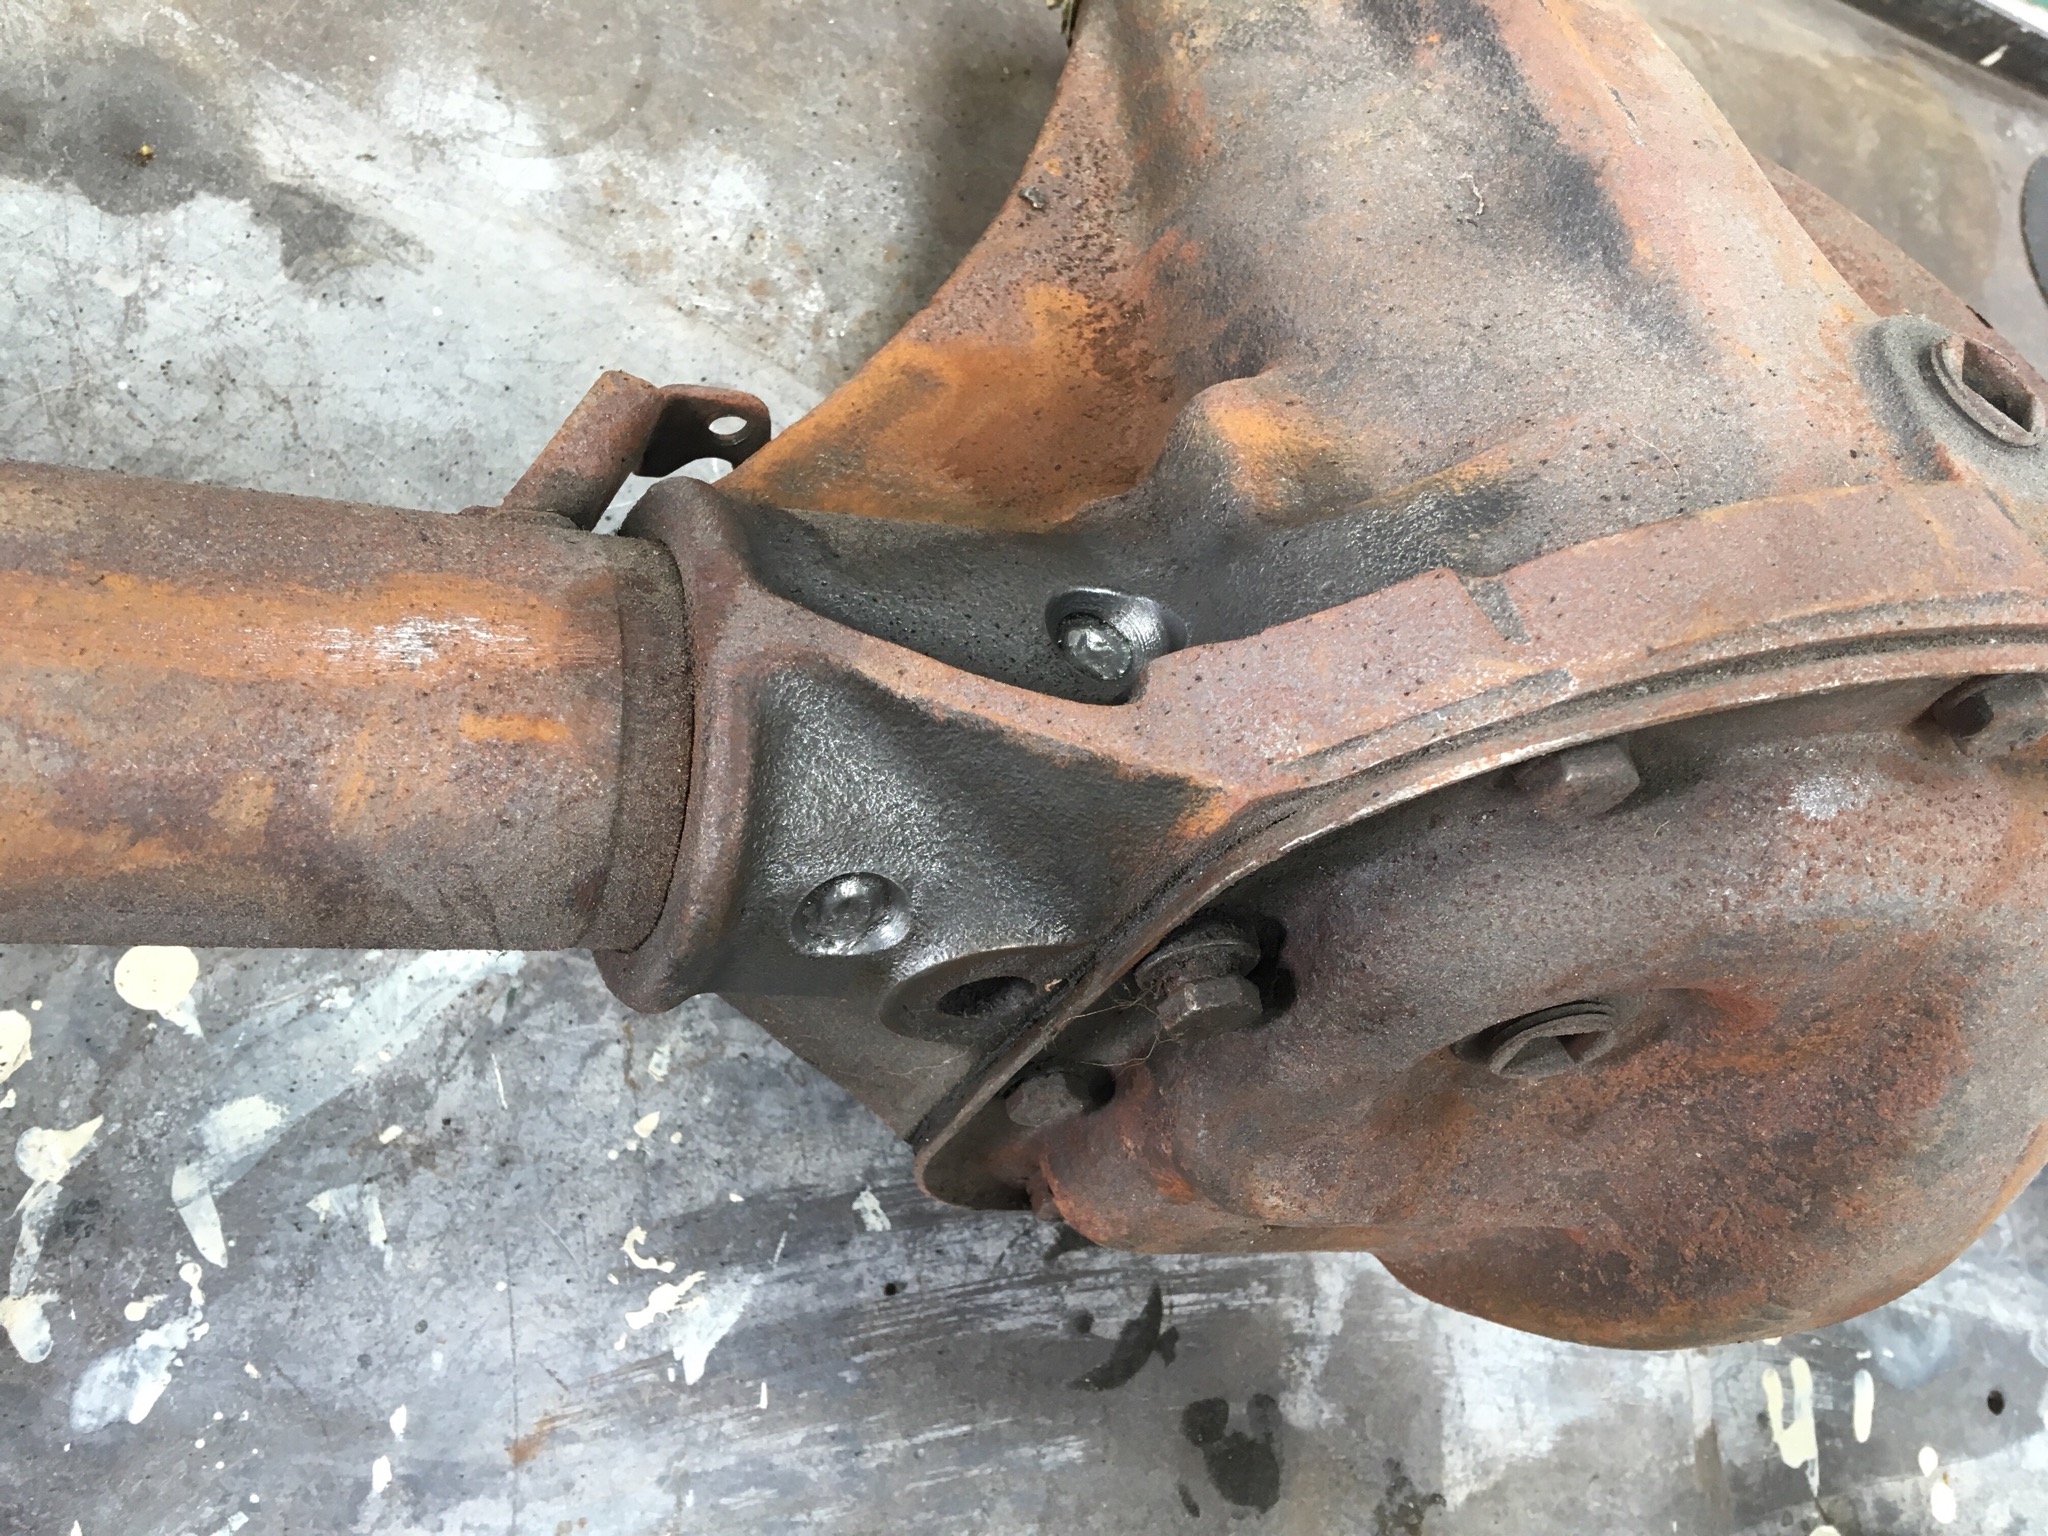
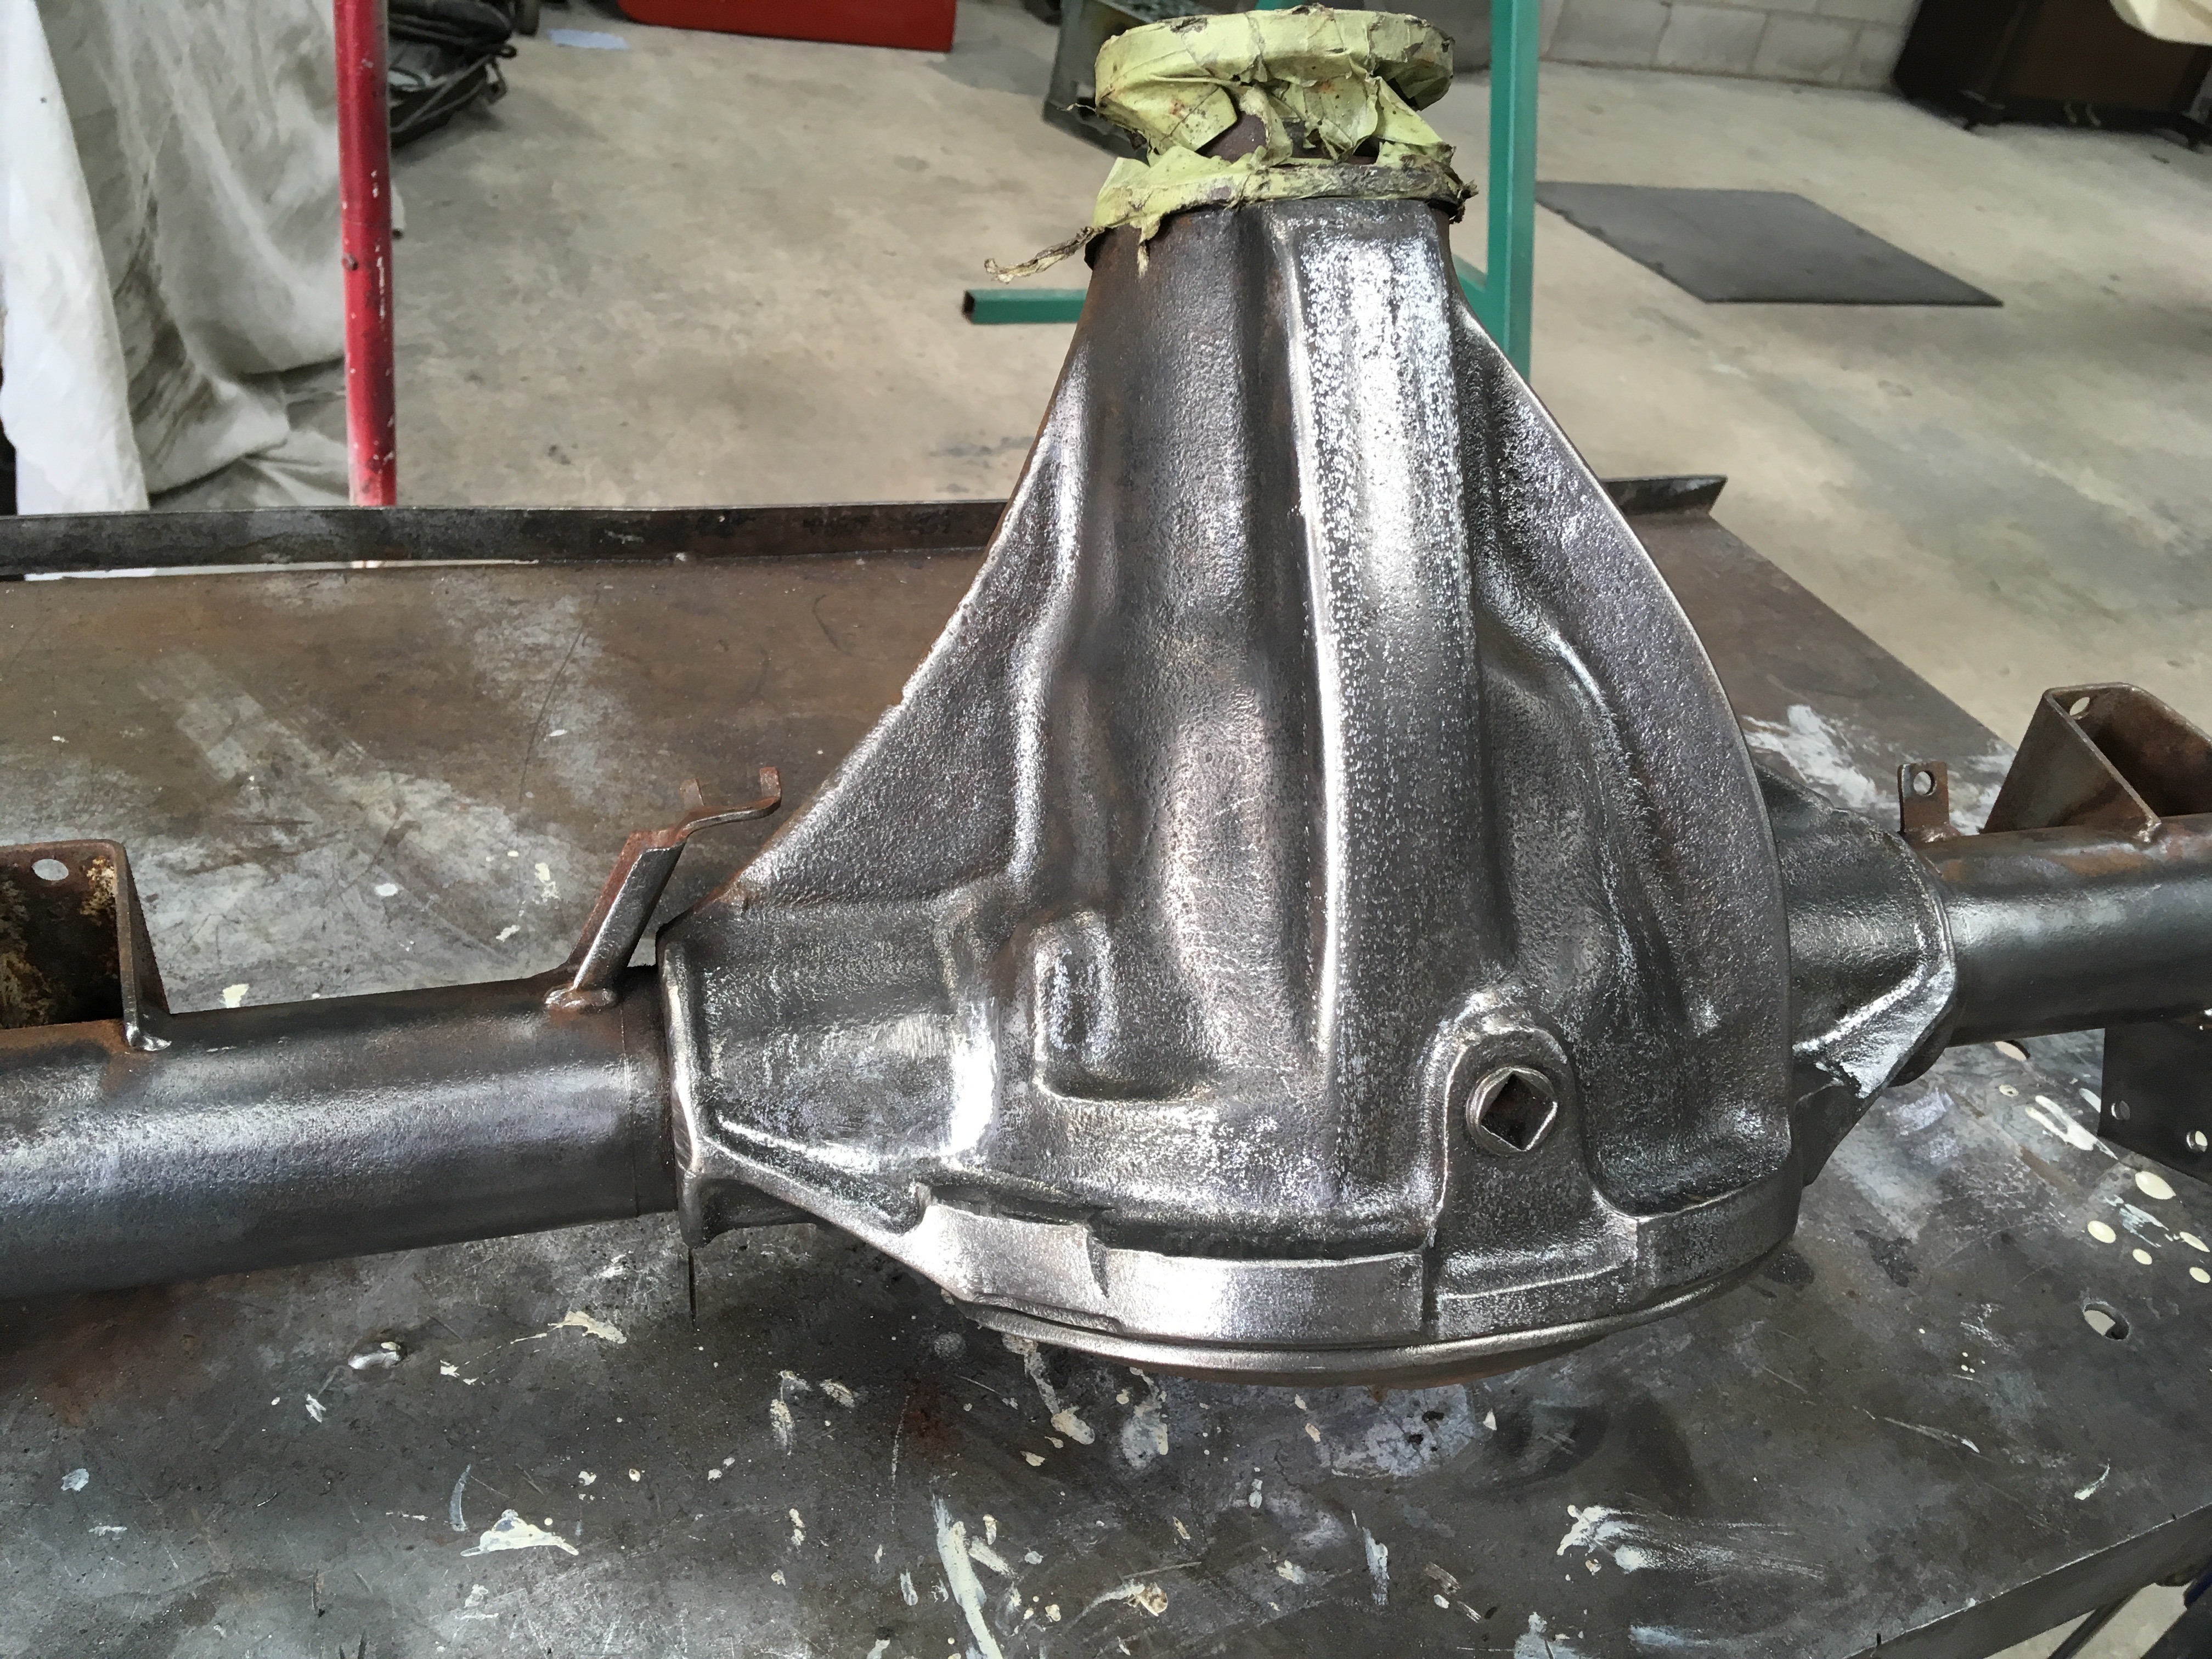
6th July 2019
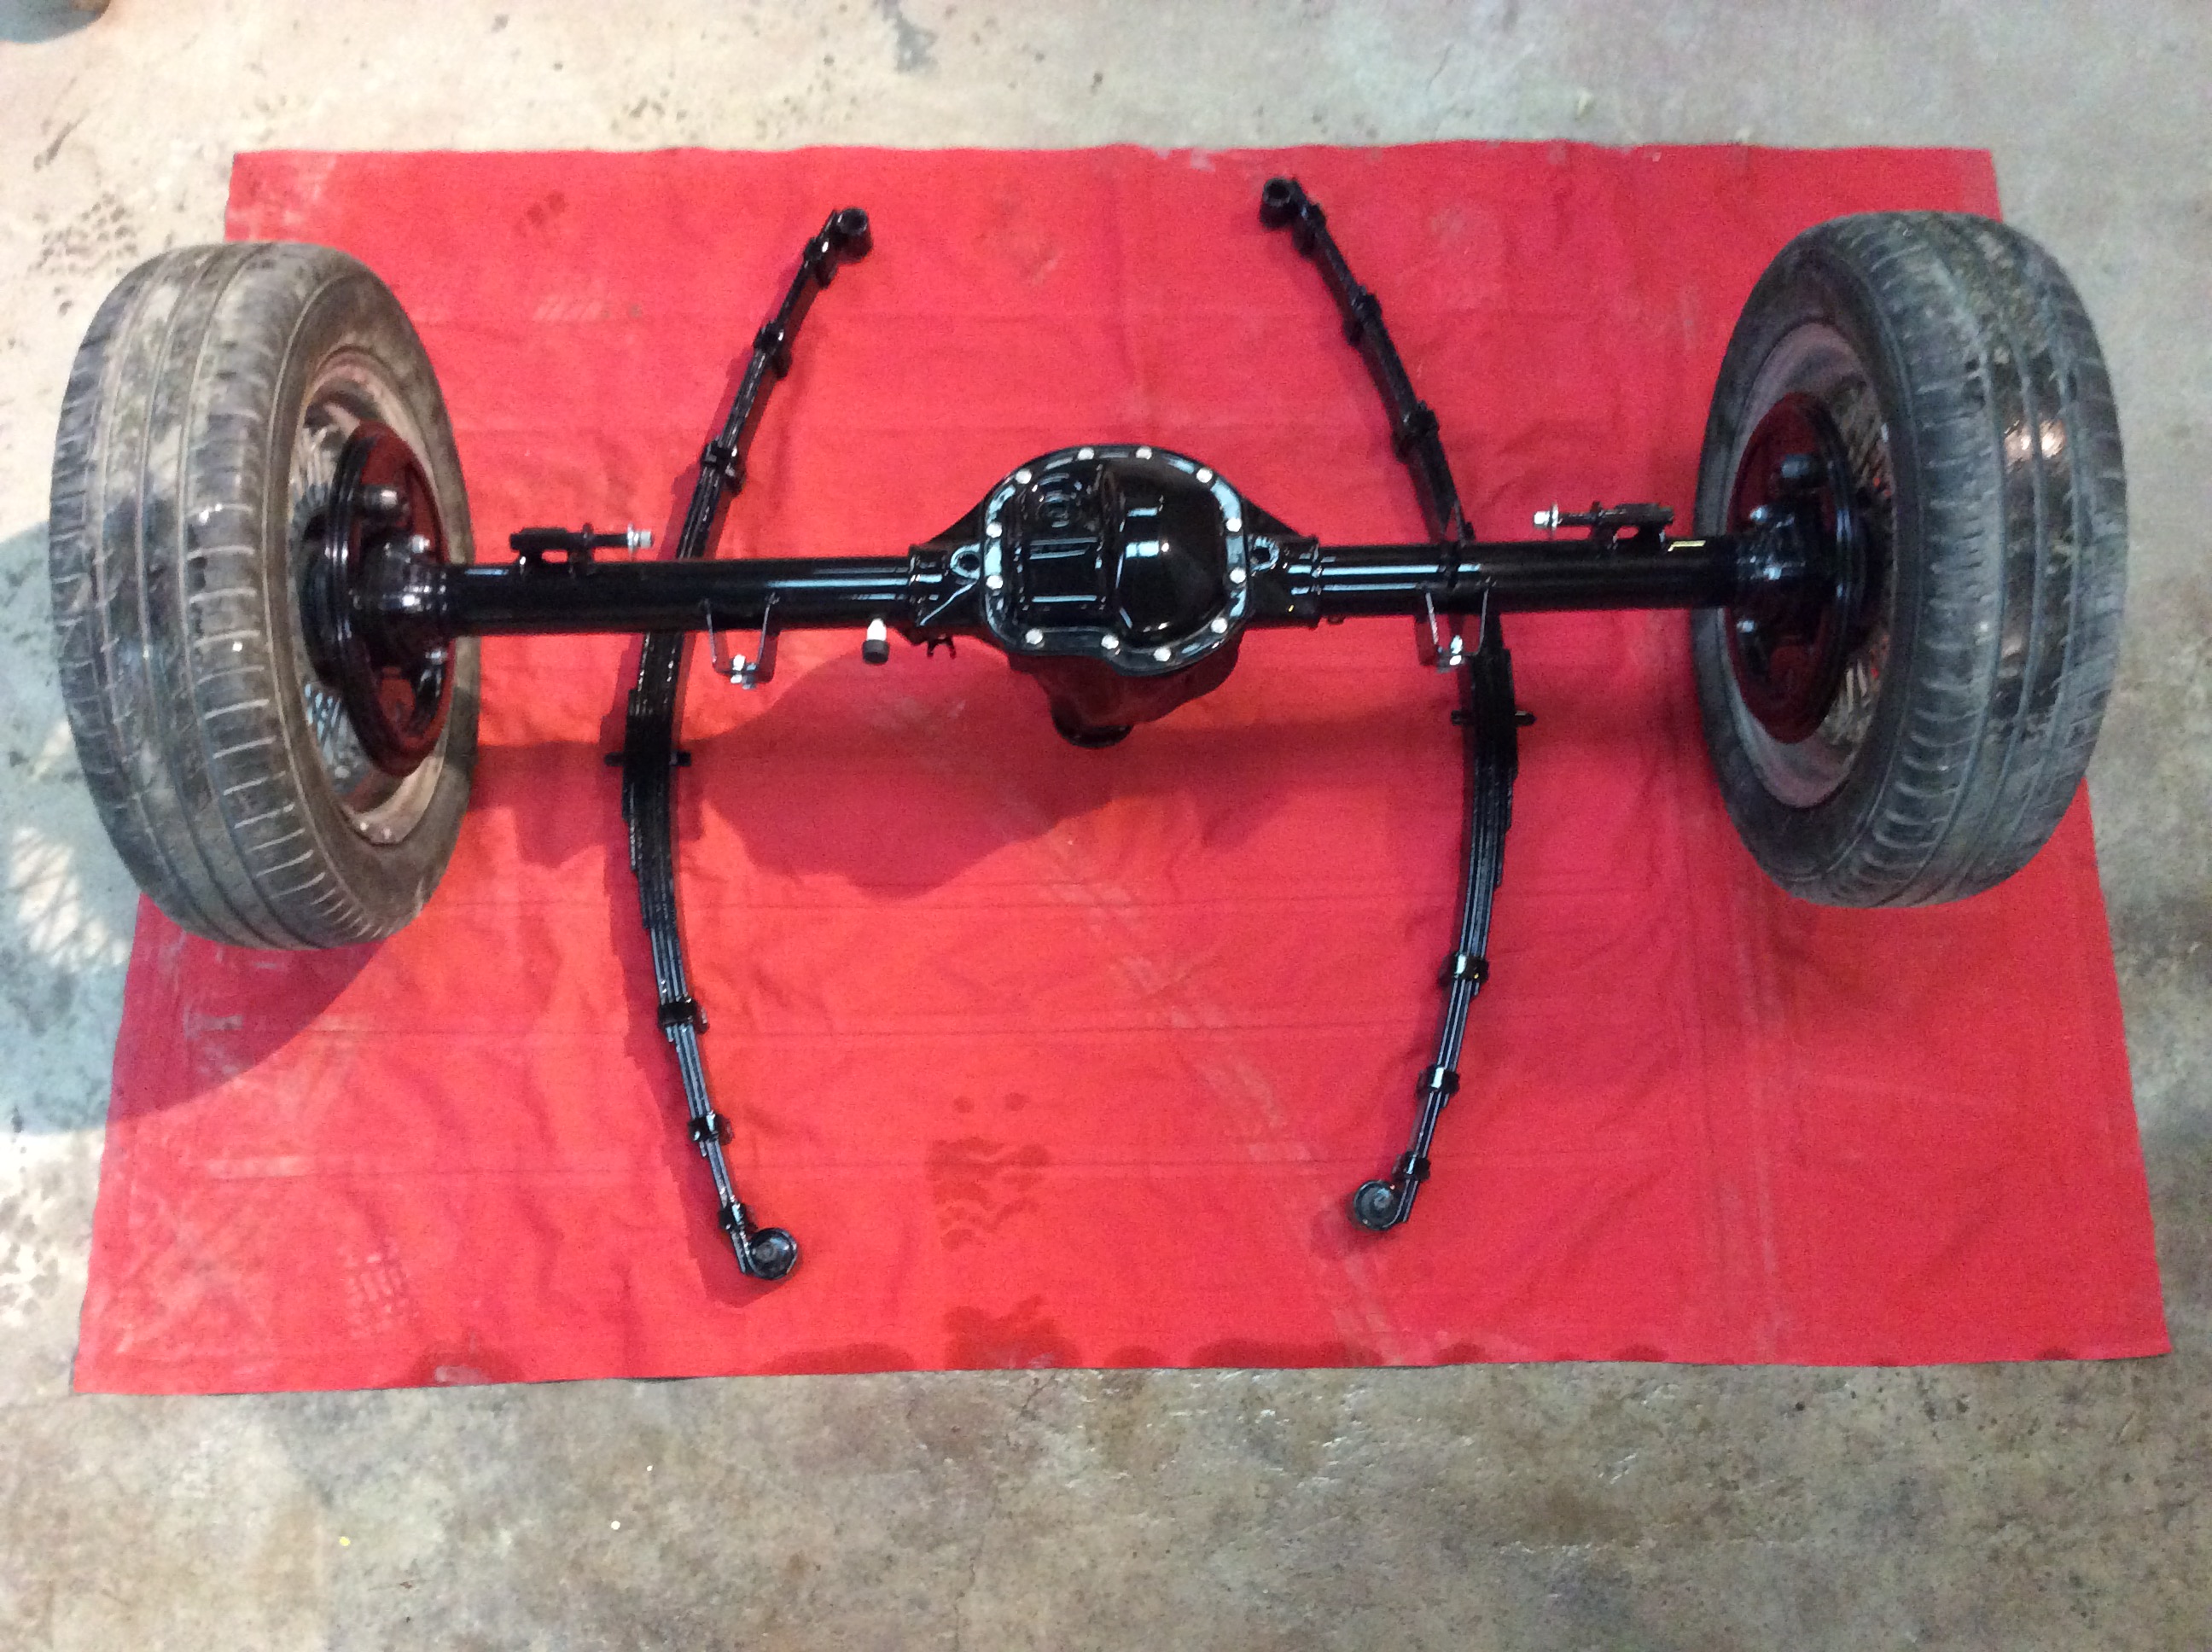
Harvey has starting to clean the rear axle up now. He de-greased it and got the main gunk off ages ago, so it’s mainly light surface rust to remove now. The 4 x plug welds either side of the differential Housing that secure the tubes in place had signs of oil around them. We cleaned around these with some thinners a while ago and noticed a very light trace of oil surfacing around these welds so I wire wheeled them and die Ground the areas up before dropping a new weld in level to the surface of the diff casting.
Still used .9mm wire in the Mig for this, but it should solve that problem. Just need to do the other pair, either side on the top while I’m at it and Harvey can finish cleaning this up.
It also had the factory fettling tidied up on the bottom of the diff Housing with a disc in the angle grinder. He will remove the brake back plates and we will fit new service items and seals where needed and then get it painted black.
============================================================
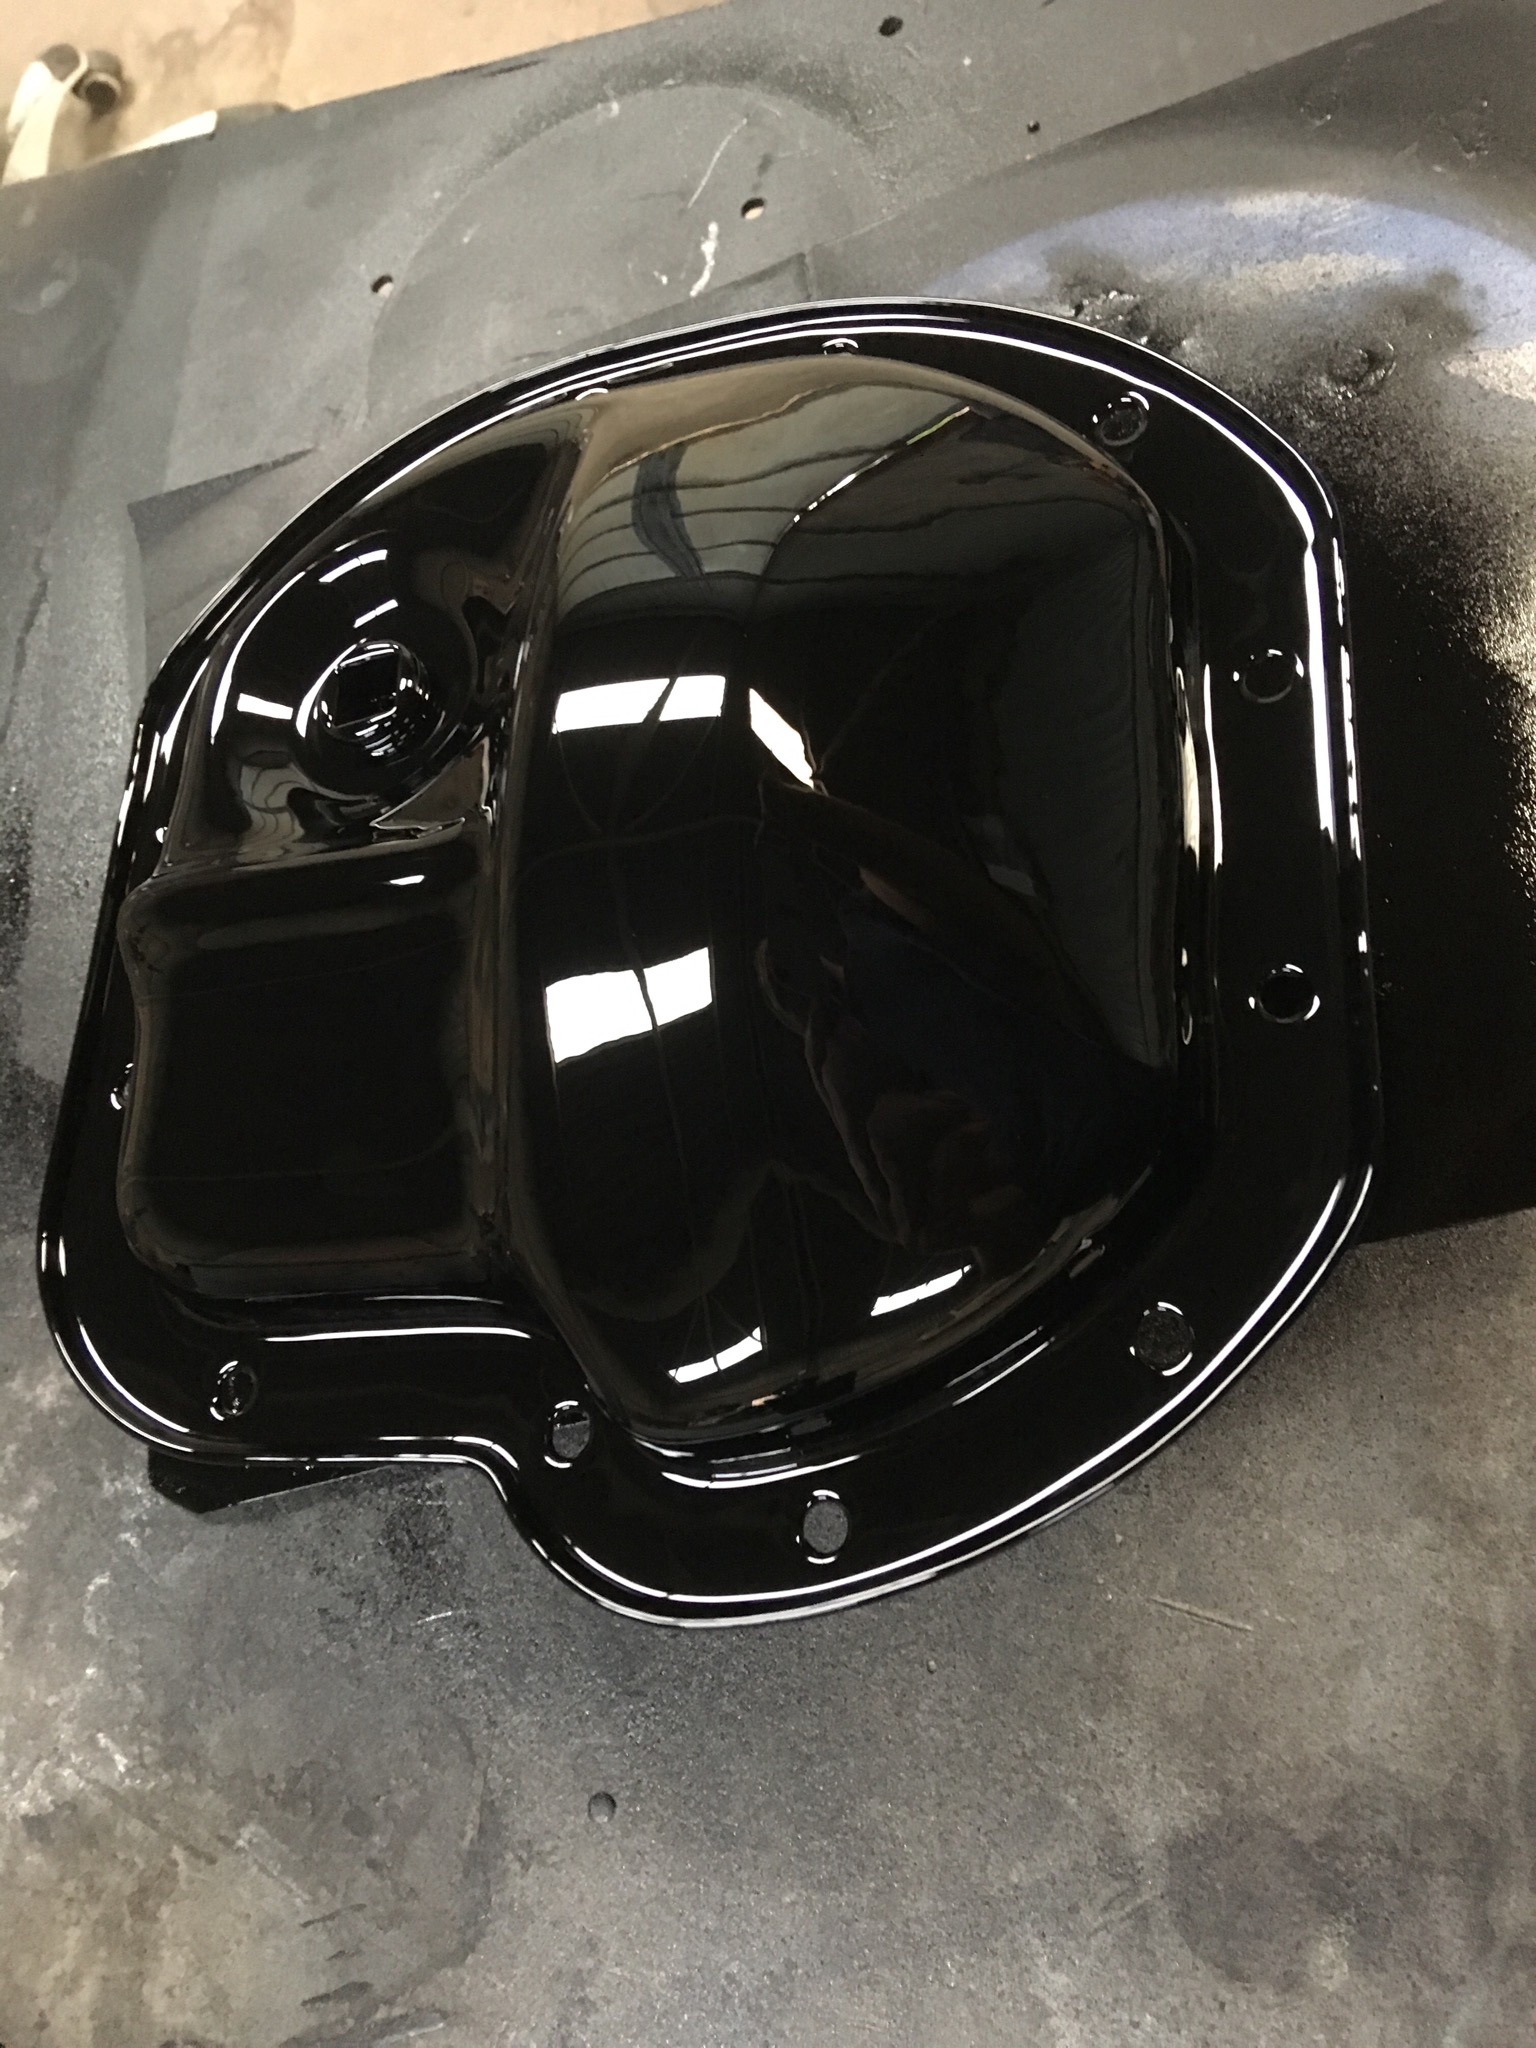
12th July 2019
Let’s hope this level of paint is worth it. We could do with a little blasting cabinet really, but here’s Harvey blasting the Diff cover outside wearing suitable ppe. After a sand down and a couple of coats of primer, the finish needed a bit more work.
Pitted surfaces can be fixed by primering, then sanding back followed by another couple of coats of primer. The last picture shows the first coats of primer - looks like the surface of the moon, but shiney. The other half of this has been sanded with 320 grit paper and just enough to leave primer in the pitted areas.
I finished sanding this plus the brake plates, which only had light pitting and re-primed them earlier. You won’t believe the difference it makes, so I’ll show this with also the top coat applied.
The rear axle got blocked down after that epoxy primer cured...... totally unnecessary, but it looks fab.
===============================================================
20th July 2019
We replaced both rear wheel bearings and oil seals on the rear axle today. Nice steady job doing those and Harvey did most of the work.
There’s a few good ‘how to’ guides on YouTube for this, so it’s really worth having a look on there. With the oil seal covers removed from the axle, we used 2 out of the 4 bolts that secure this and the brake plate, by winding the nuts right down onto the bolts making them a spacer to prize the half shaft and bearing away. By fitting the hub up to these bolts and whizzing the retaining nut down, it pulls the half shaft out. Just need to be careful not to tighten the nut too much as the hub will tighten onto the tapered collar - we drew most of the bearing away by this method and then just undid the pair of bolts which had the same effect until the bearing and half shaft where free.
Pulling the bearing off the halfshaft was easy using a £16 bearing puller. Little tip for this is to pop a bit of grease into the end of the half shaft as it reduces friction when winding in the bearing puller. Changing the bearings was more of a precautionary thing really, so it’s a job done for peace of mind. They aren’t expensive, so we thought it would be worth doing. The oil seals where looking tired though and they’re really easy to pop out and replace.
================================================================
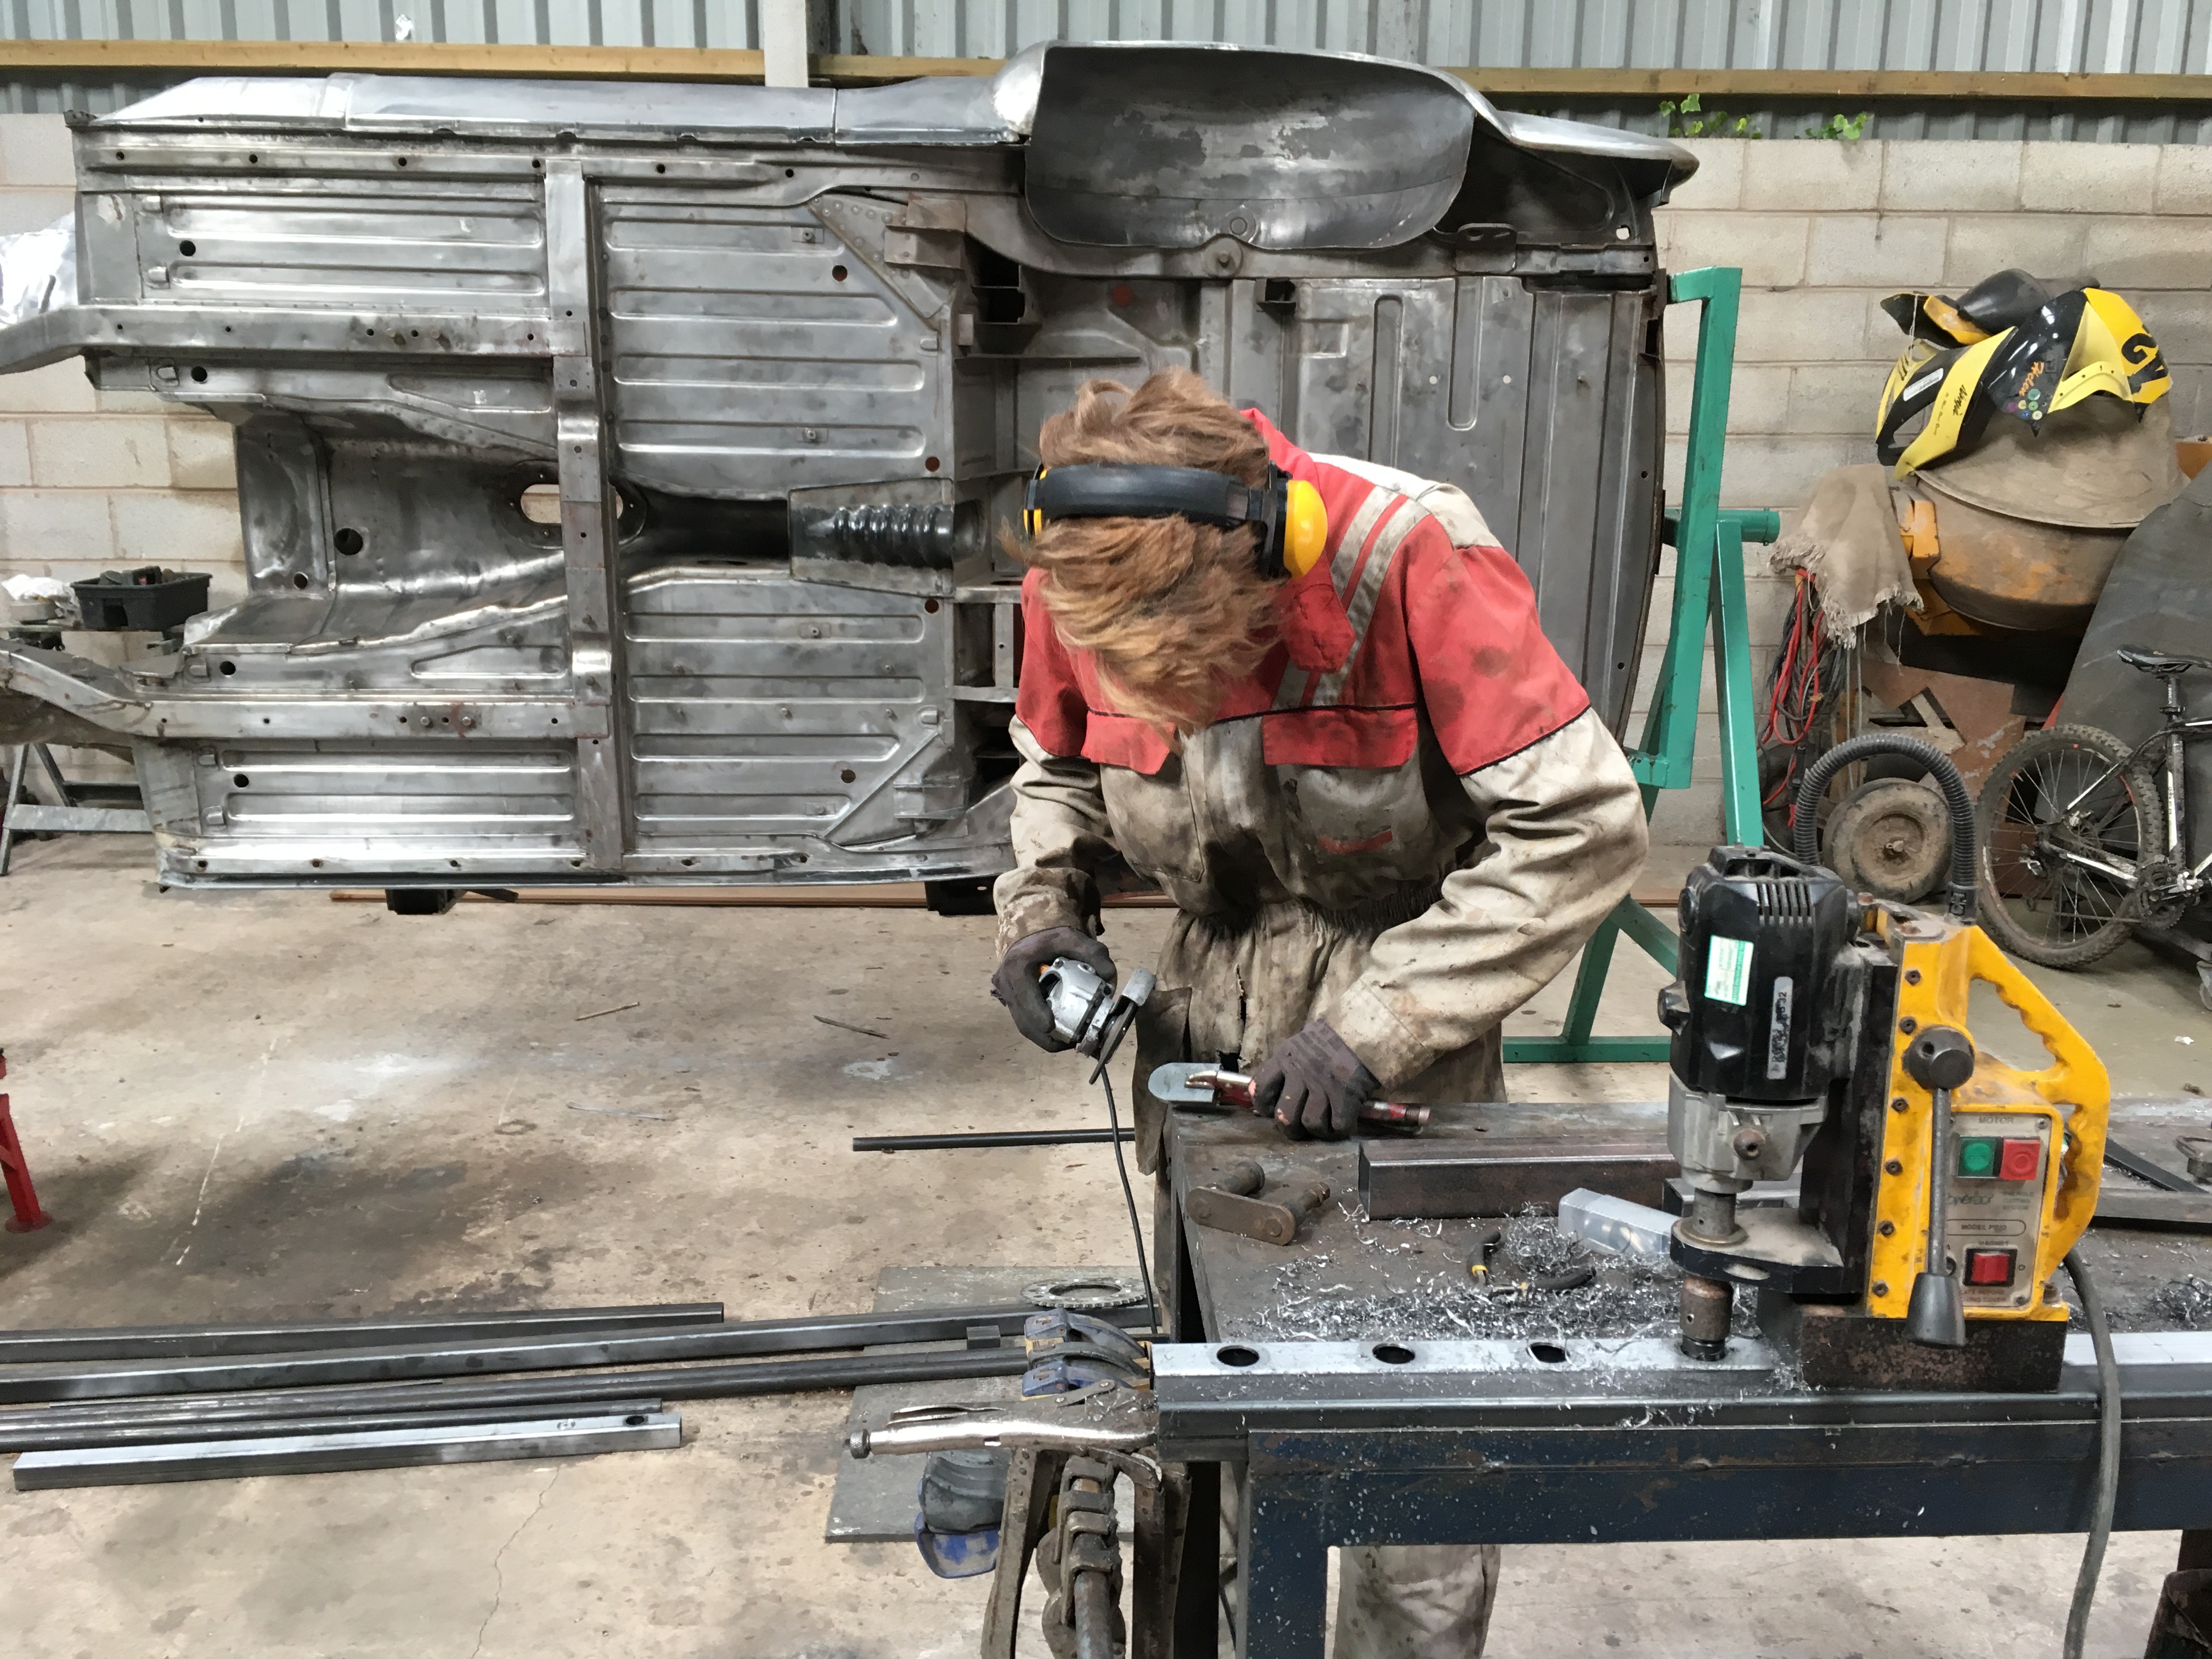
28th July 2019
Harveys job now is stripping down the front crossmember for re-furbishment. A few weeks and this should be done, but he’s talking about longer A frame bars (not sure if that’s the correct name for them). Apparently work better with wider tyres or make steering easier?
I picked up half a dozen of these steel work benches from a Rover Dealership that closed down in Chesterfield during the early 1990’s. You can wheel them around easily and set them back on the legs when you’re happy with the position for whatever you’re working on. They where literally just scrapping and throwing them away, so I bagged a few. Brilliant design for a bench really.
===============================================================
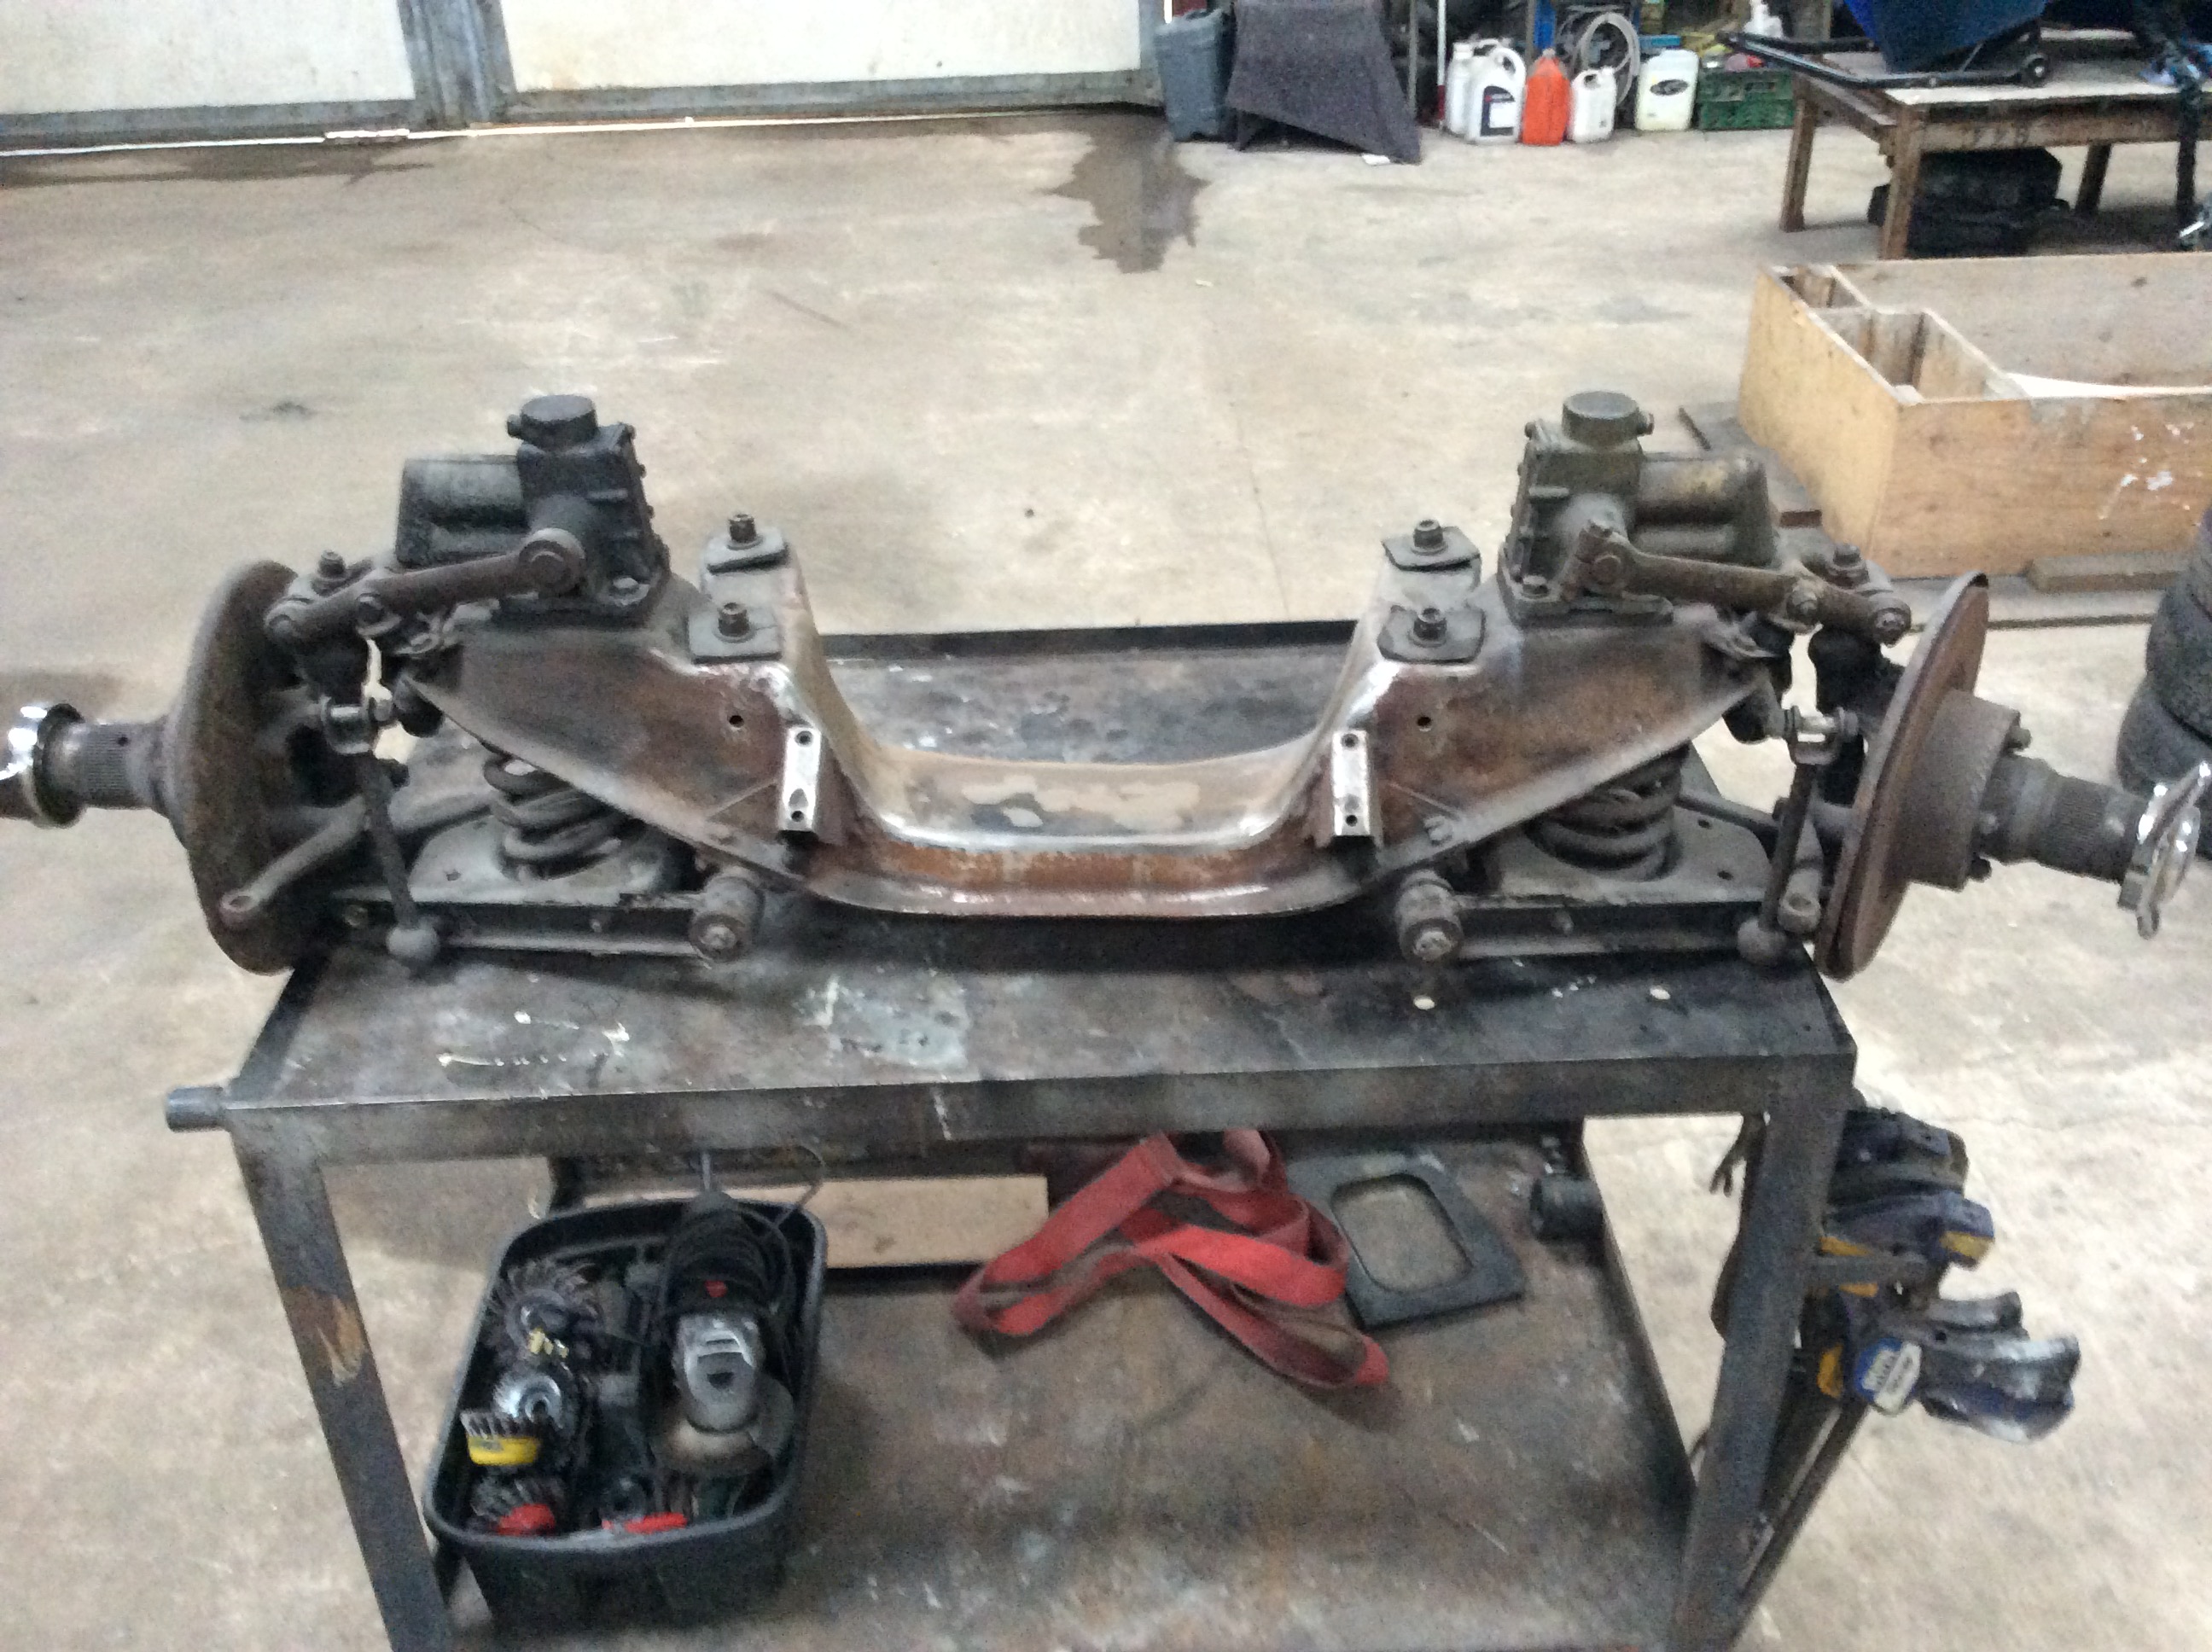
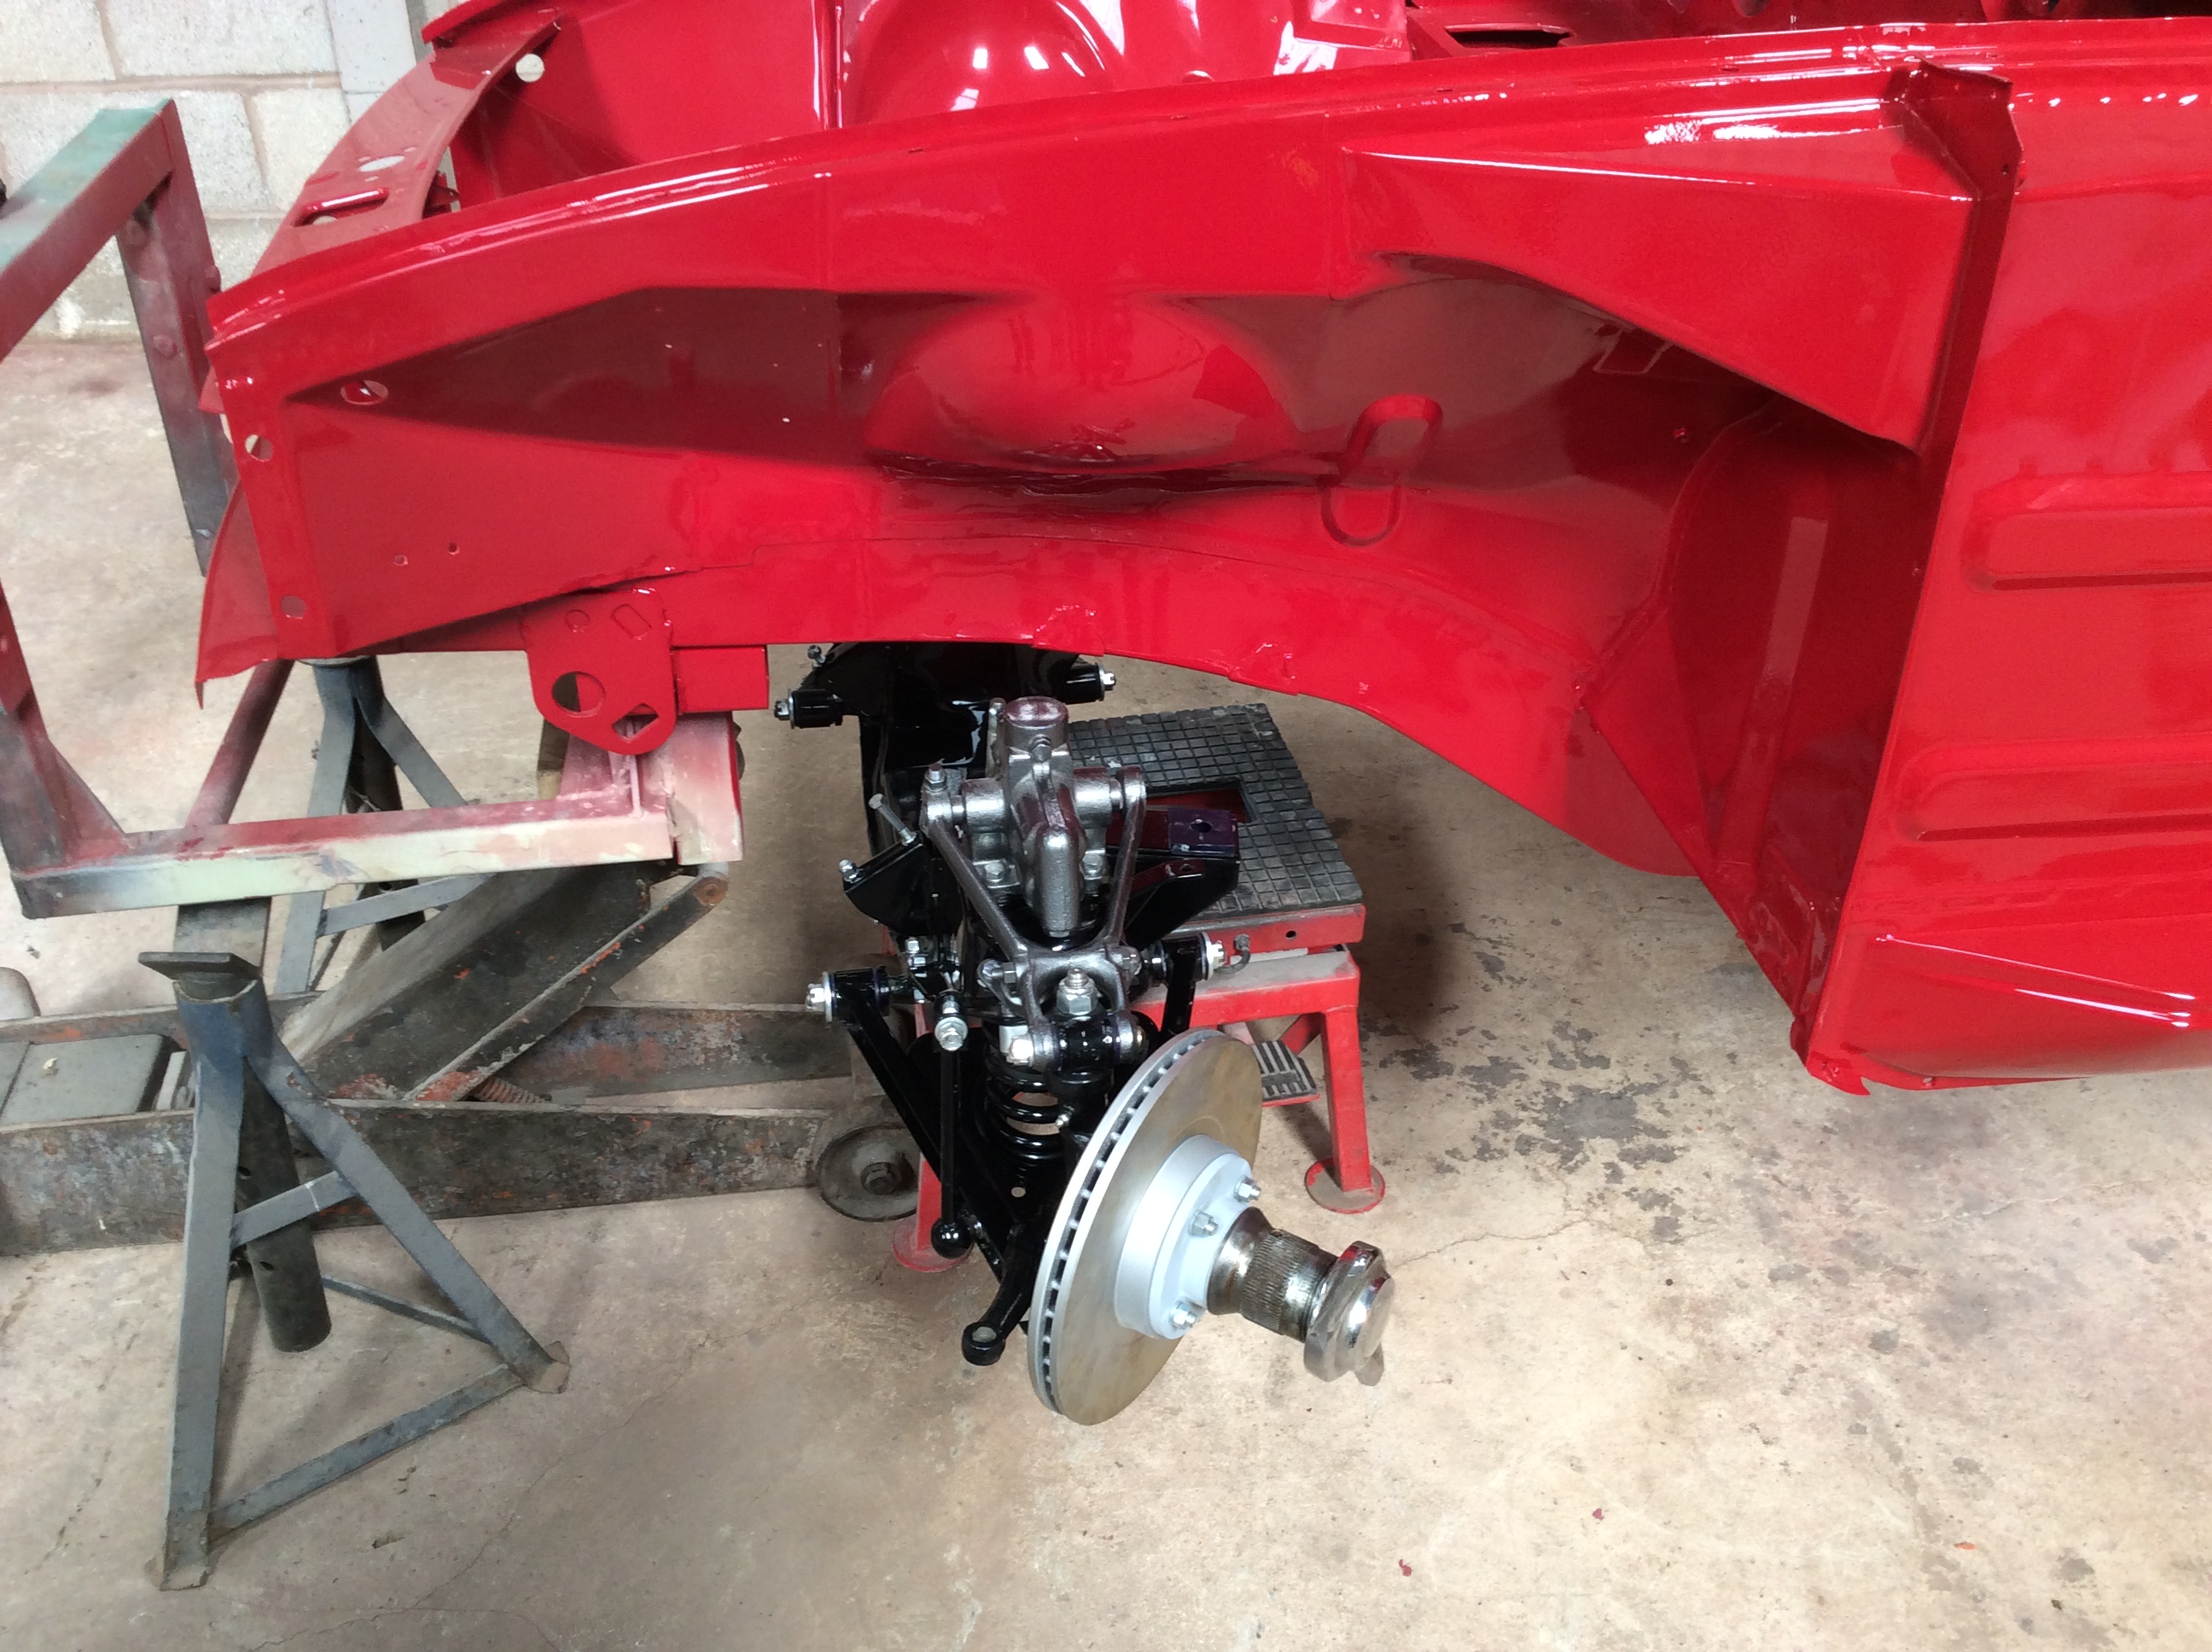
24th August 2019
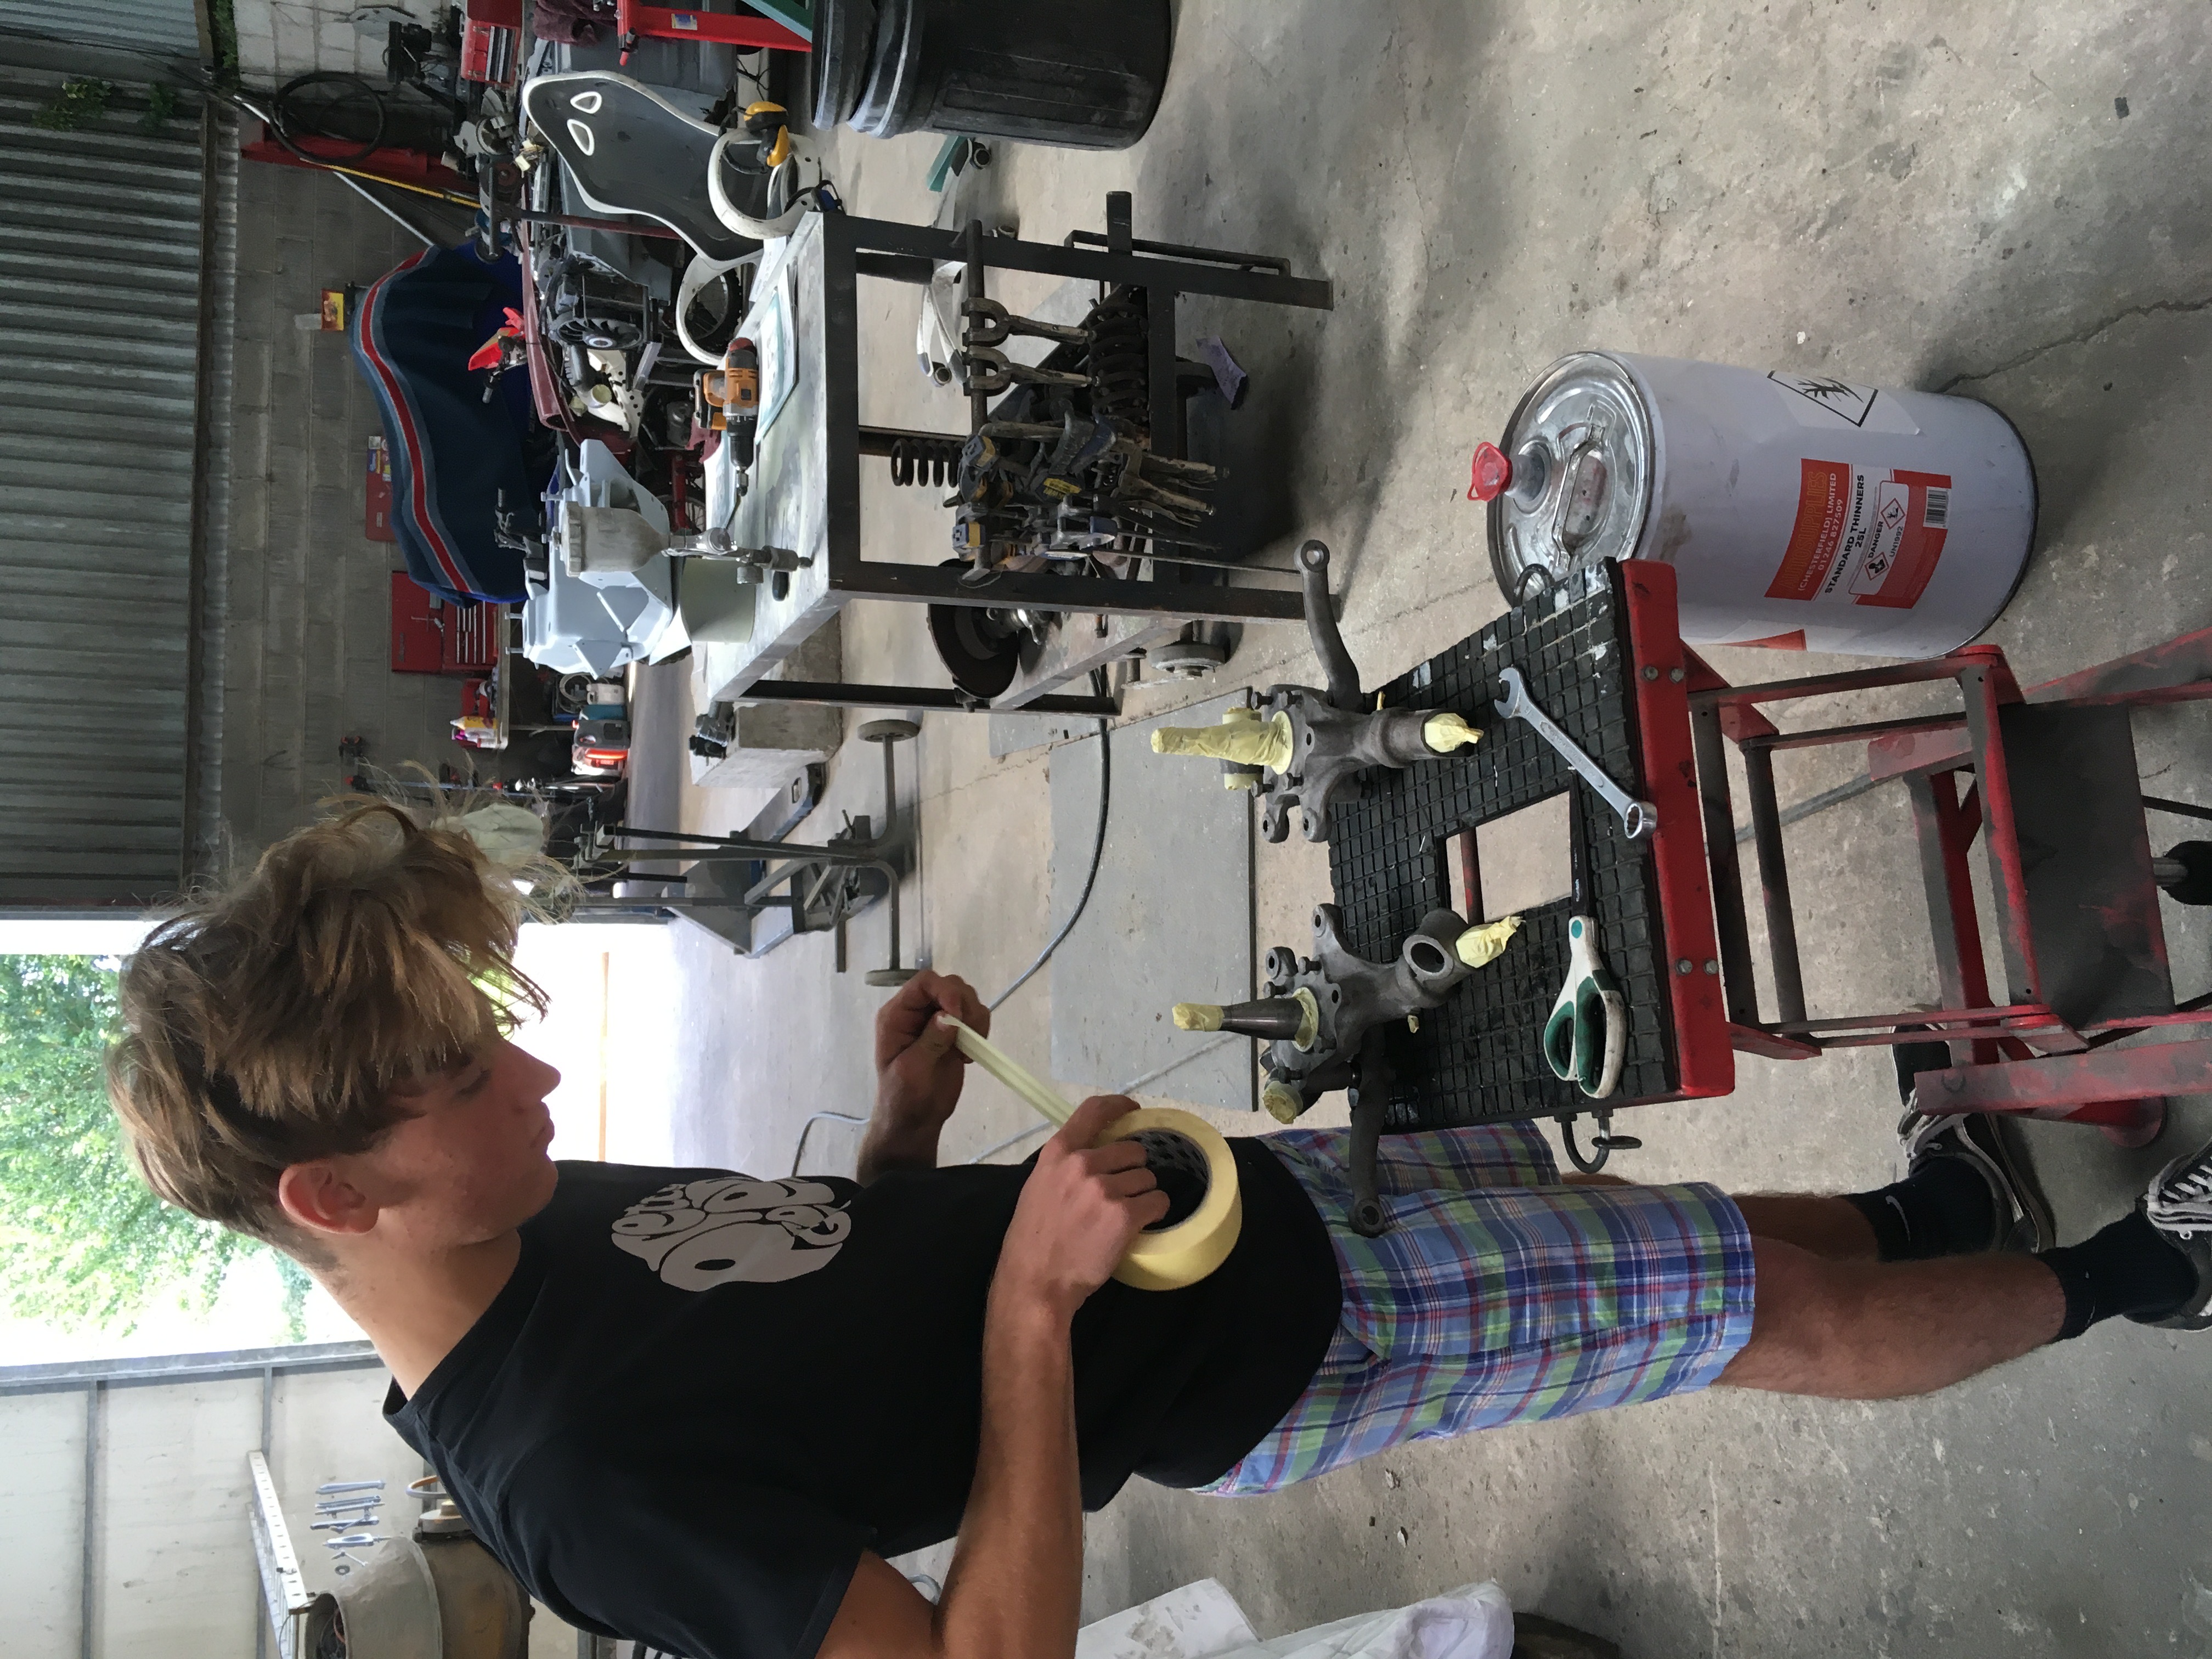
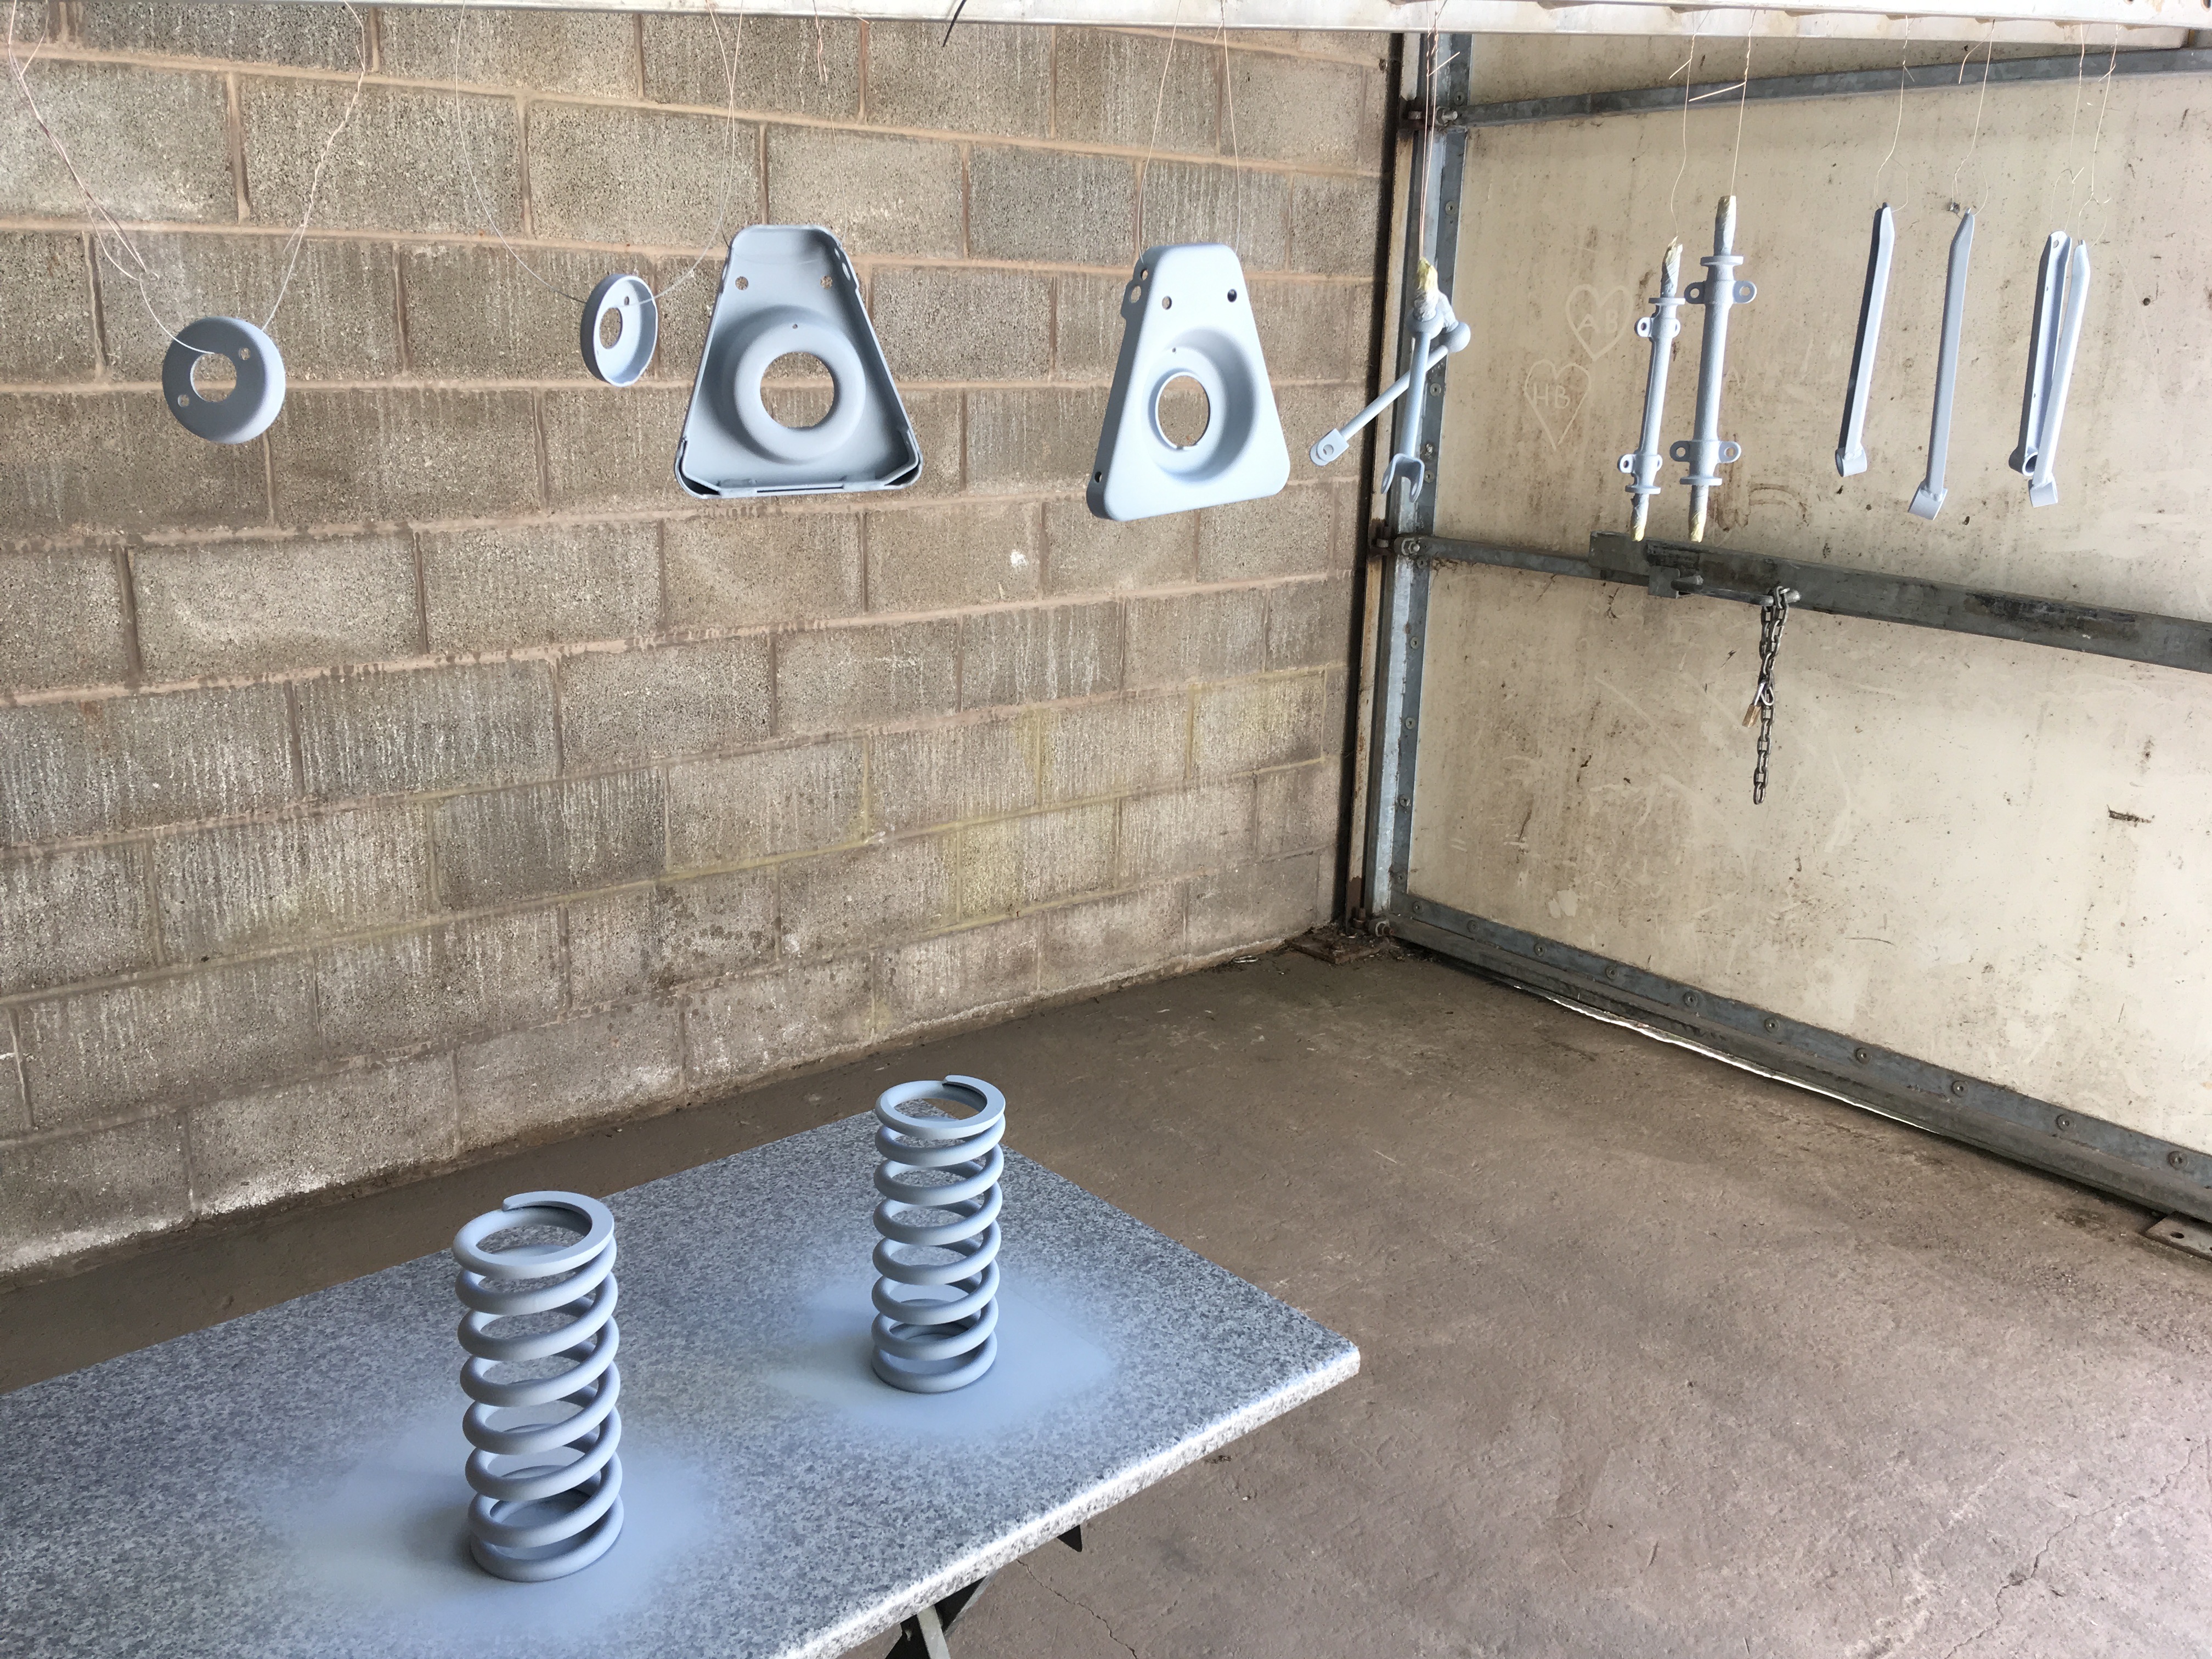
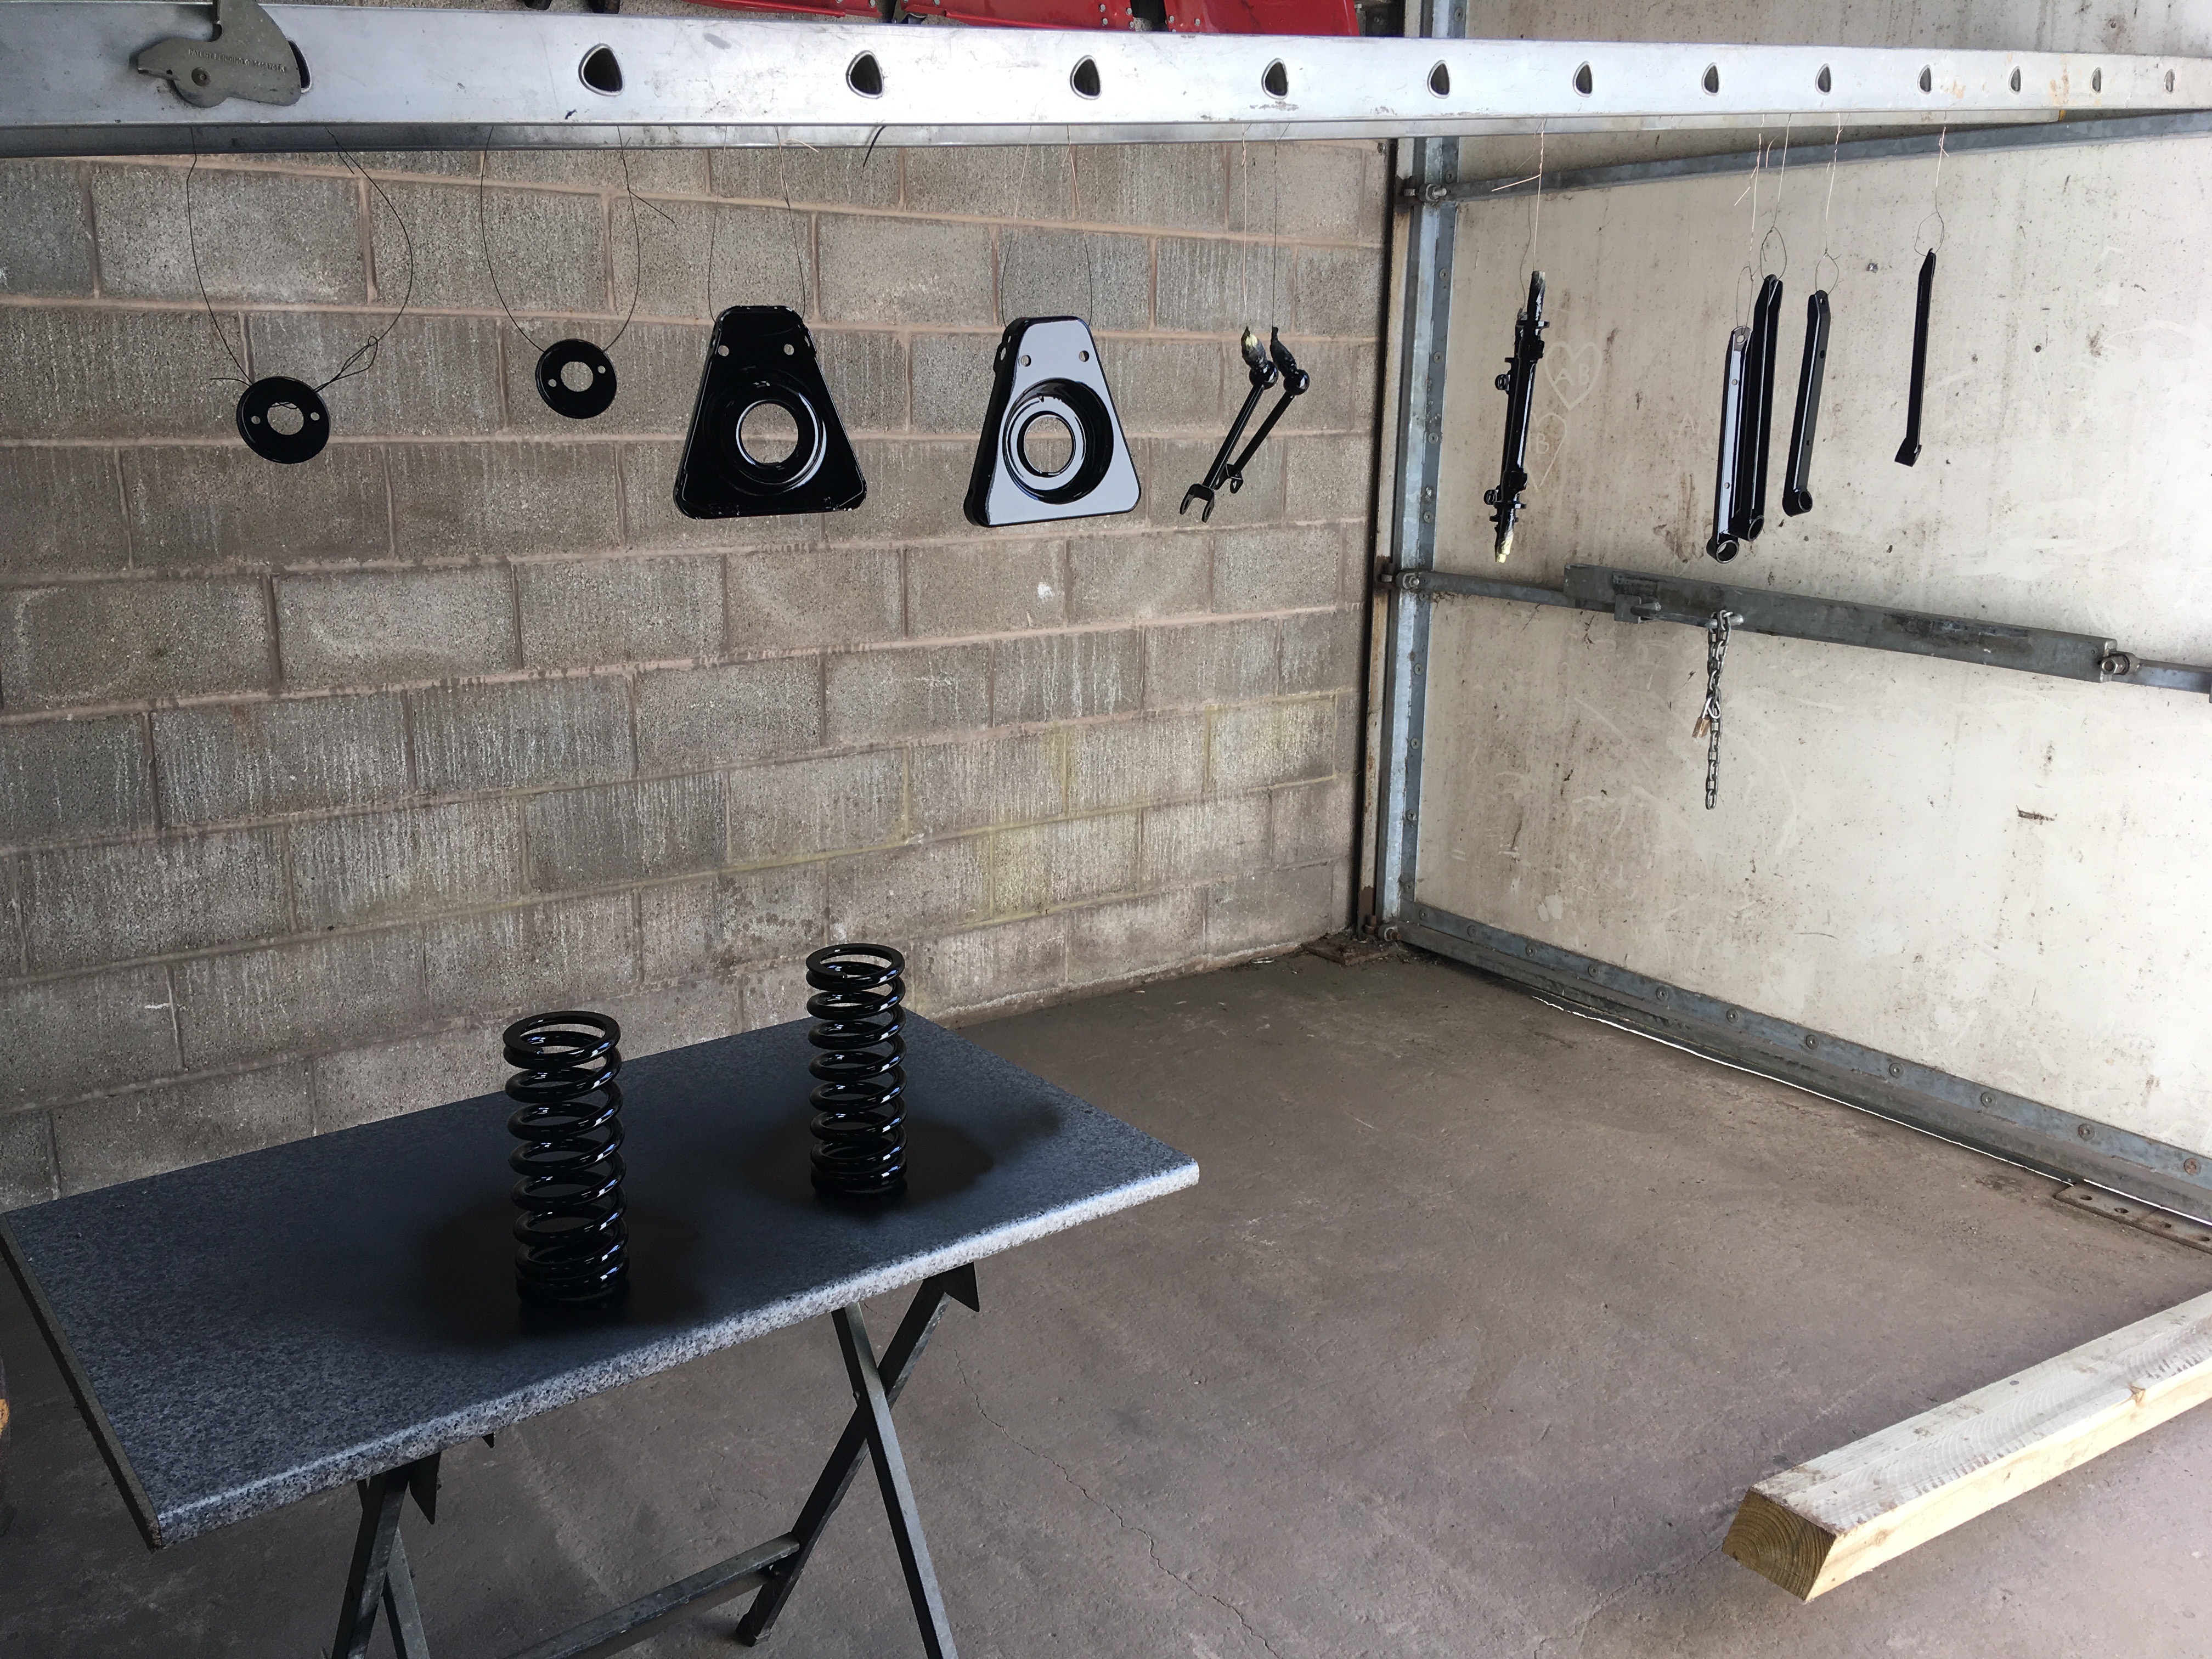
We took advantage of this hot weather and got all the front suspension parts painted today. The front king pins got refurbished and shimmed up at Mech Spec last week. Dave and Steve are really helpful there and they did a nice job in turning them around so quickly. I asked if they could just leave them with a blasted finish so we could paint them with our stuff.
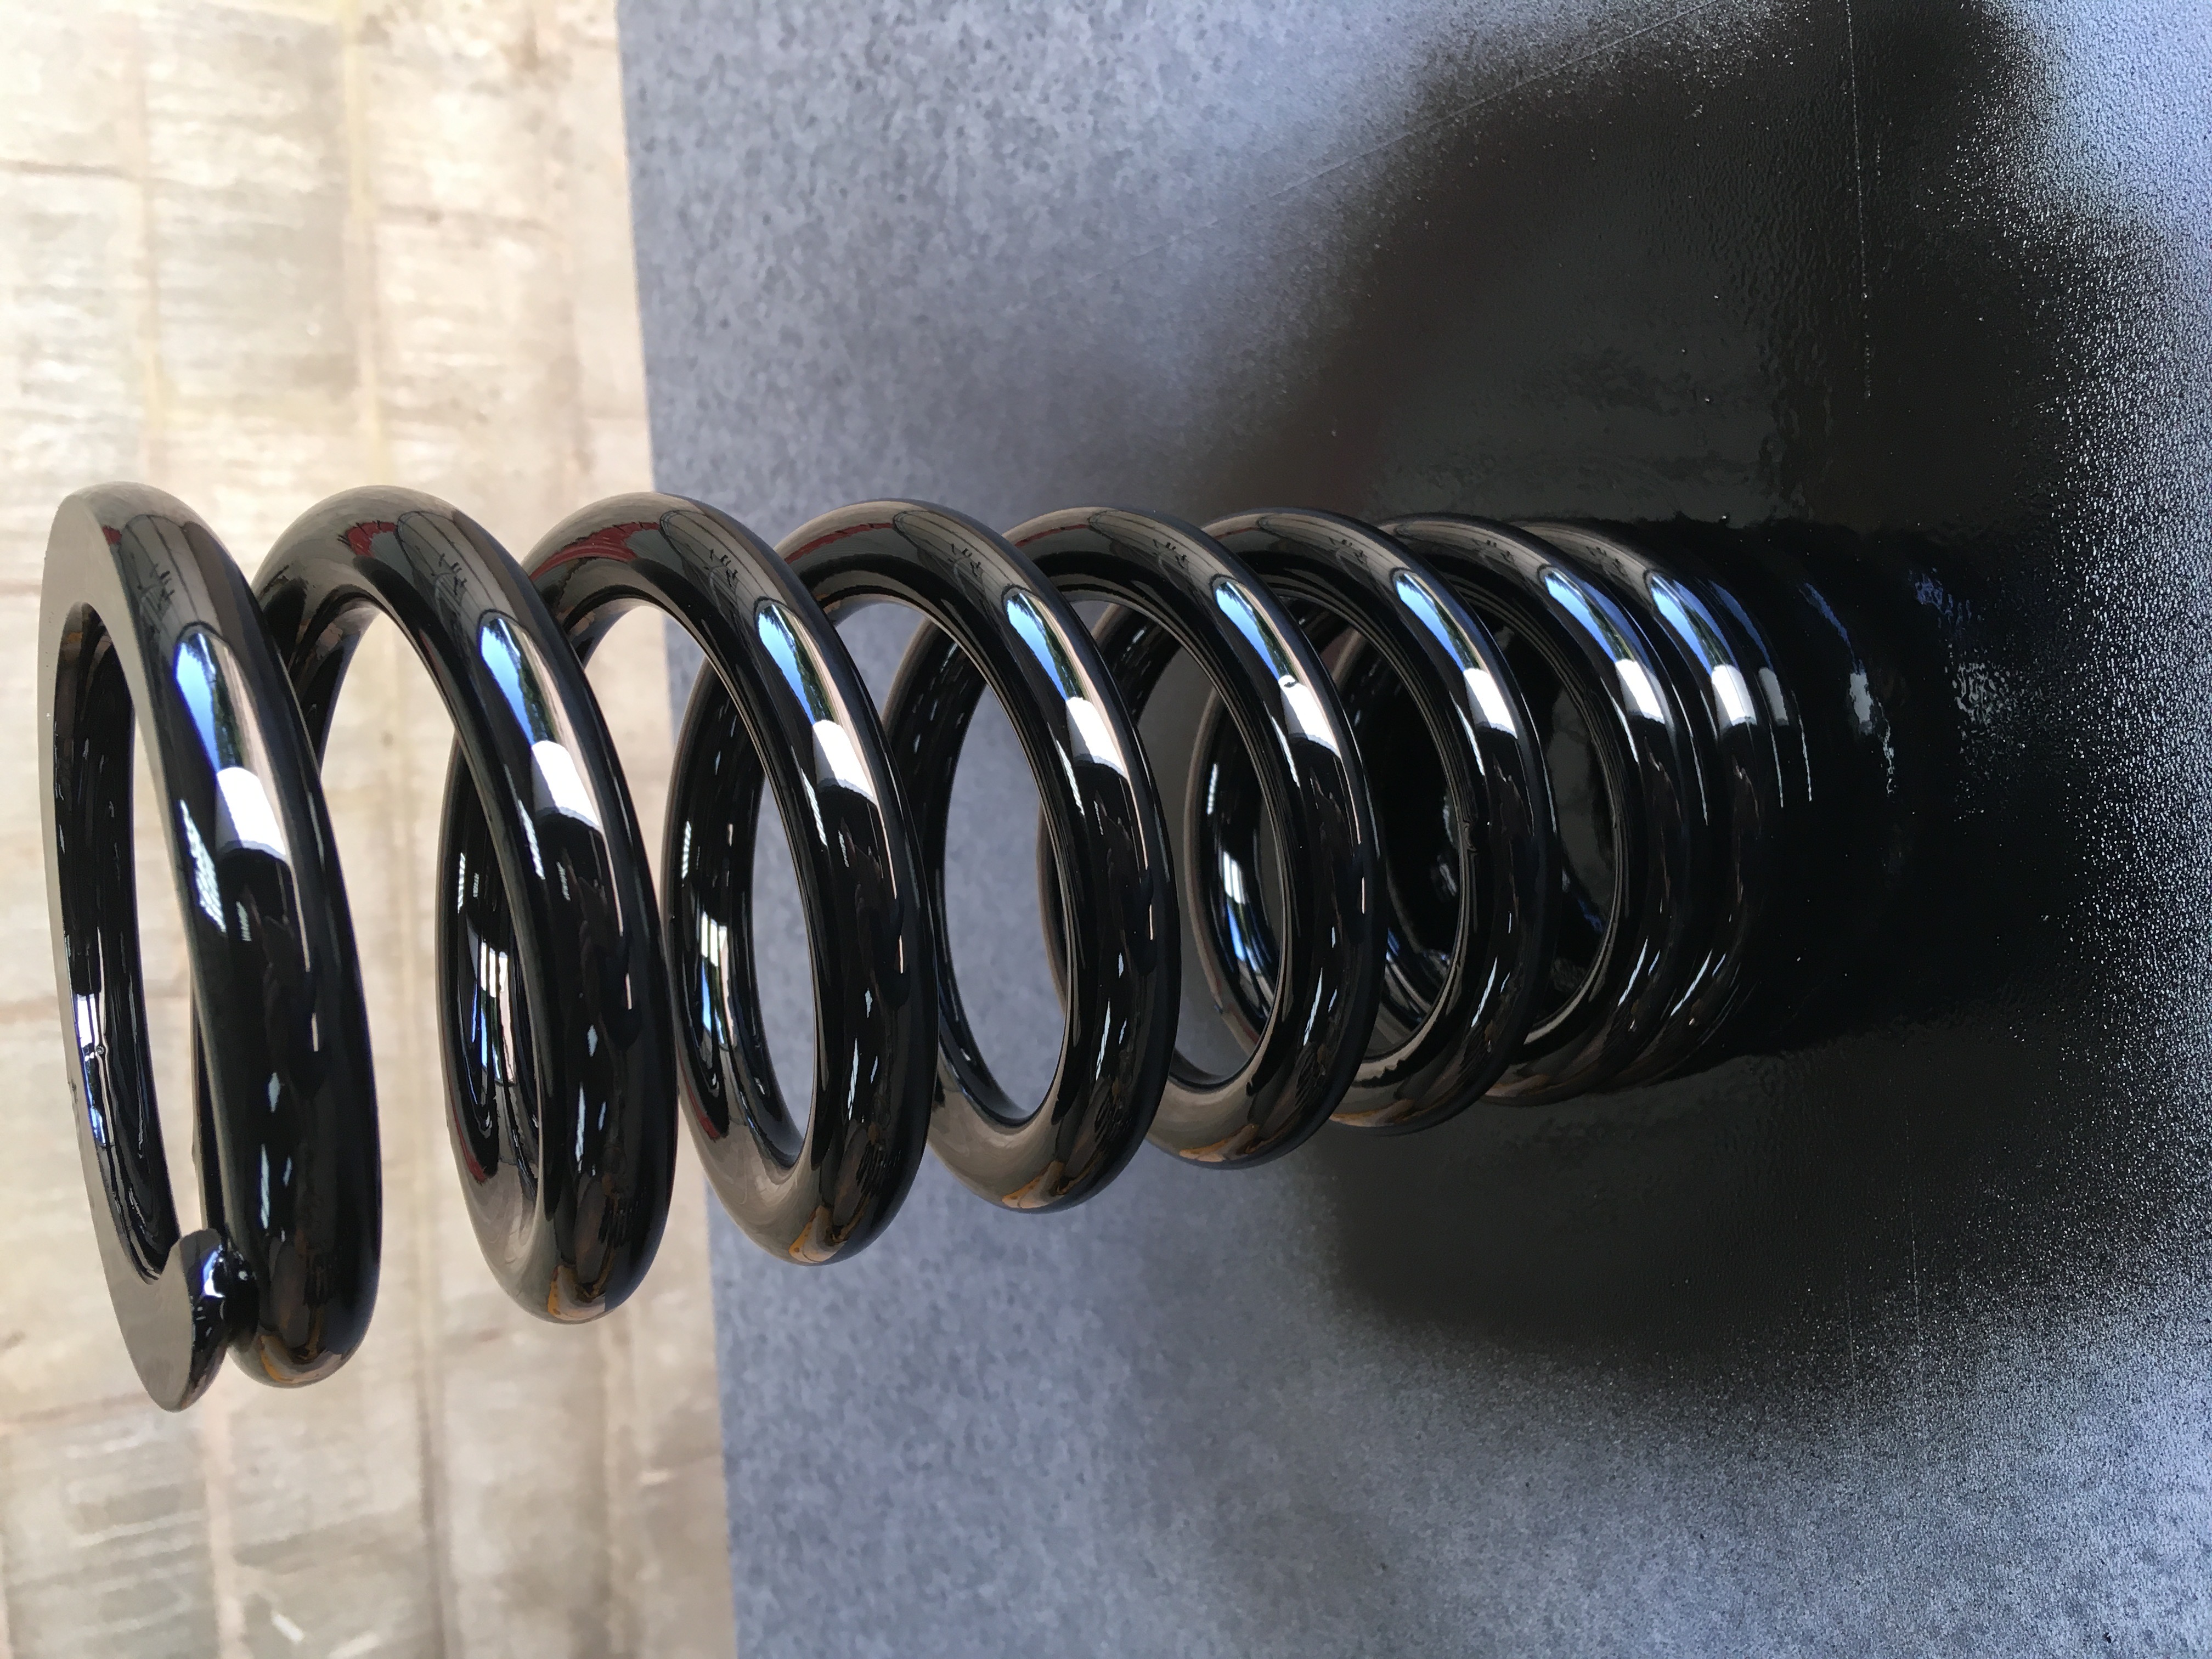
The springs, pans, wishbone arms and link rods are new, but the coating they have is really thin. These all got a sand down and then a coat of etch primer, followed by the 2k black gloss we used on the rear axle . I spooled off a length of wire out of the mig welder and used that to hang the parts off a ladder suspended on the workshop door and cement mixer. Works really well this does, especially with bits like this.
Springs aren’t so bad to paint, you need to aim a narrow fan in the centre of the spring to coat the inner surface, then do the outside and flip them over and repeat. Really thin coating on these and no wonder they start to rust so quickly.
The crossmember painted up nicely and were rather pleased with how that came out. I screwed in a couple of bolts that secure the dampers on either side and this allowed me to paint the top side and then flip it over as something to rest on while I did the underneath. Last picture shows the gloss level, plus also where I stamped the chassis number onto this too.
By the time I’d cleaned the spraygun out, these were almost dry to the touch. Should be able to start re-assembly of these parts tomorrow, so looking forward to that bit.
=======================================================================================================
26th August 2019
n the end, the front crossmember and suspension parts went together nicely. I etch primed, basecoated and 2k cleared (lacquer) the dampers with a metallic grey colour I had left over from another project. It looks better than the bronze / gold we intended to use - we think so anyway.
Poly bushes and new bolts etc throughout with plenty of grease made for a steady day re-assembling it all back together. Its all tightened up with split pins in place.
Harvey needs to clean up the old front hubs and with a set of new wheel bearings, we can shim these if need be and finish this off. I mentioned the word `brakes` earlier so we need to look at either standard type calipers or the RV8 types. £470 gone into this front crossmember on parts so far - money soon goes on the mechanical bits doesn't it.
================================================================
5th October 2019
Need to order a new fitting kit for either wing, but bolted the front end up so we can adjust here and there.
=============================================================
14th November 2019
Good to meet John J, Keith and Martin at the show. There was a bit of effort in knocking up the trolley to make it mobile and get it there, but well worthwhile after seeing so much interest in Harvey`s project.
We lost count for how many people actually tapped on the arches to work out if they were fiberglass which we didn't really mind. The best comment we overheard was `it looks like heritage are making Sebring shells`..... that made Harveys day.
back in the cold workshop now and will be having a long holiday over Christmas, so will get cracking again.
==========================================================
30th January 2020
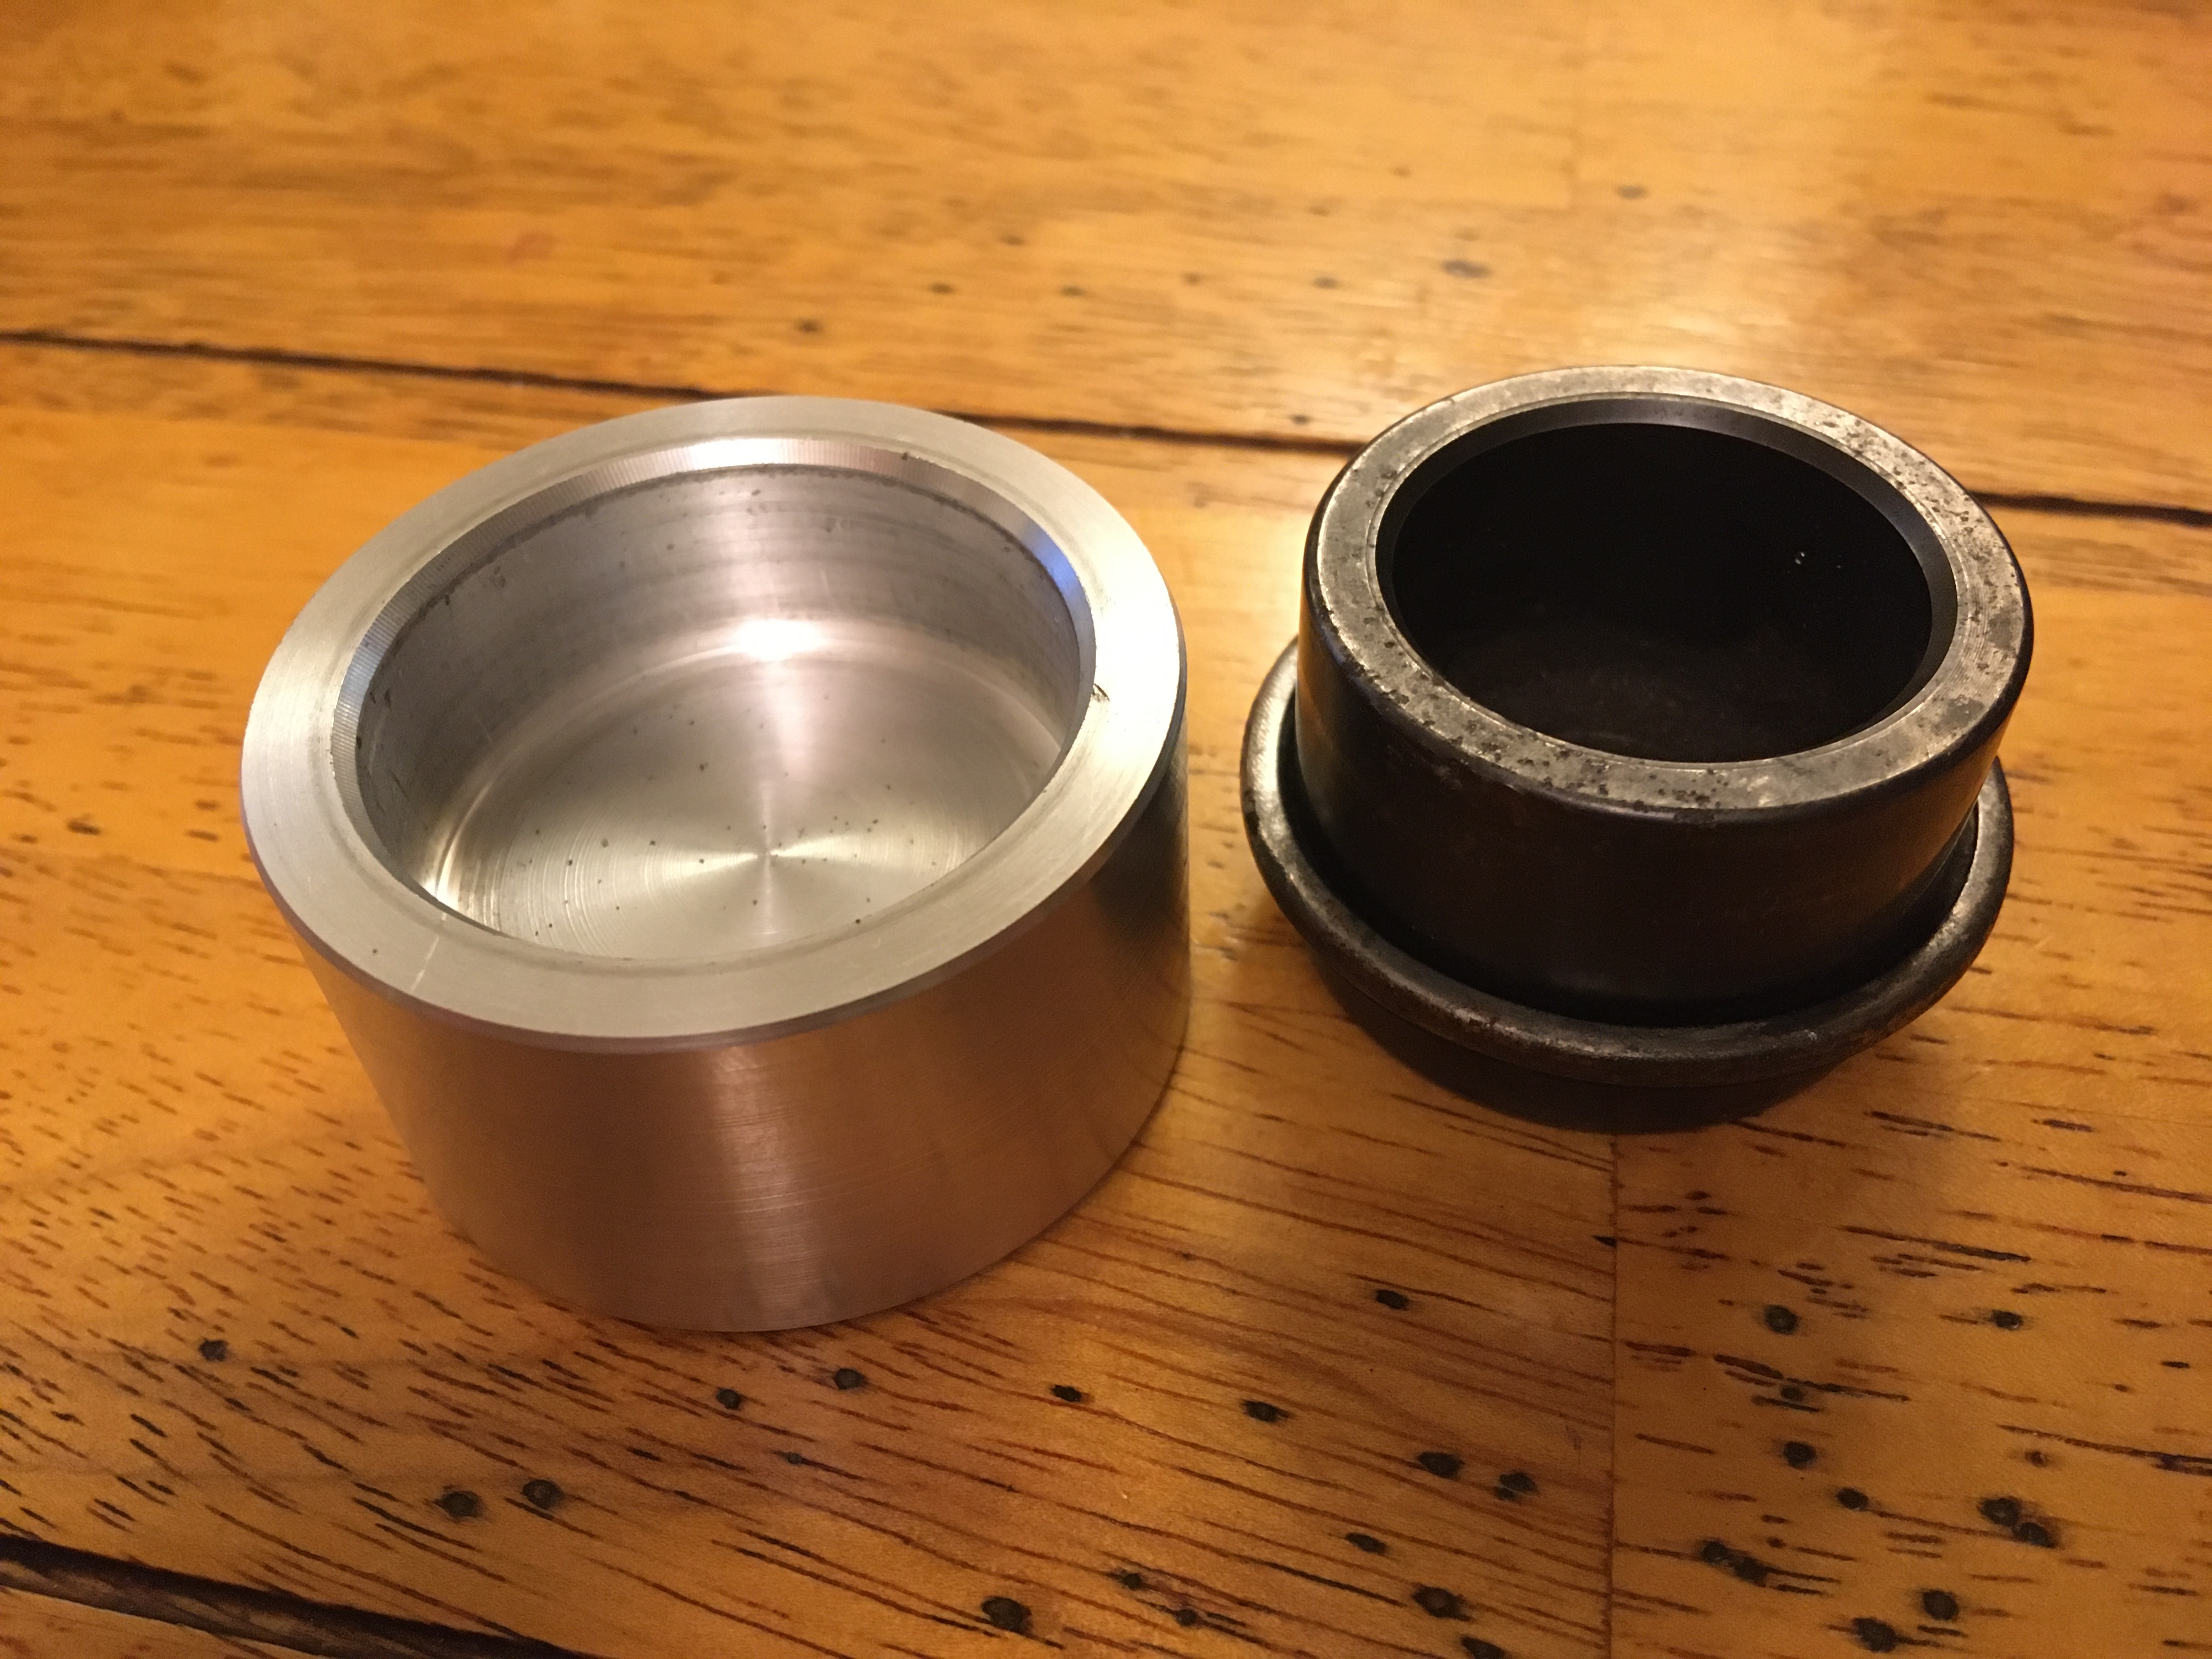
Harvey knocked this thing up at school today in the engineering class during a free period. It’s to evenly drive home the securing ring that holds in the rubber scraper seal on the brakes calipers. It sleeves onto the piston, so lands nice and square for driving the seal into its recess.
=====================================================
8th February 2020
We also got the bodyshell off the frame that was made to get it to the classic car show in November and back on the rotisserie today.
A nice steady job for Harvey to get done while I was doing something else really. He just had to raise the frame we’d made so it reached the arms on the rotisserie and we welded them back on. Once they were welded up, it was just a case of cutting through the uprights that mounted the bodyshell brackets to the frame and job done.
The mobile frame thing is now redundant and will get recycled as it’s no use for anything else. If anyone in the Midlands area would like it, let us know.
=================================================
29th February 2020
Pressing a button on a hydraulic press would be loads faster and much easier John.
We got this last arch fettled up to a point where we could get it positioned onto the rear quarter panel for trimming and a bit of final adjustment. After lots of measuring and reference points taken from the other side, we are happy this is where it should be. It would be much better to have the rear axle on and work around the wheels, but I think we are ok with all the setting out we have done.
Once we had it profiled, as in projecting out exactly the same as the opposite side, Harvey used a marker pen to scribe around the edge of the arch and then cut out the rear quarter panel for it to butt up to. It’s a big amount of section removed from the rear wing, but after a whizz round with a wire wheel to clean off the epoxy primer where it would be welded, it got tacked into place.
This one seemed to be easier than the first, but it’s all tacked into place and ready for full seam welding and then an inner arch making. Can’t wait to have this done as it’s the last big job to do on the shell. We’re fitting new door skins, but they aren’t so bad to do, especially compared to knocking these things up.


=========================================================
11th March 2020
Harvey ordered a Panhard rod kit the other day and soon made a start in offering up the main bracket to the body shell. These seem really straightforward to fit, although it will be while we are able to roll the shell over.
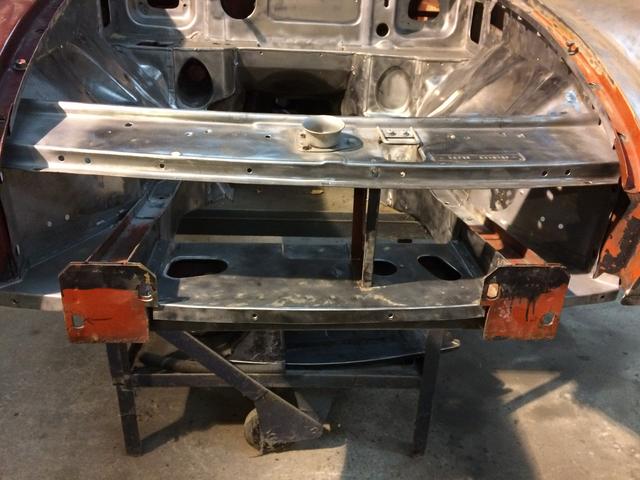
There’s just a bunch of holes needing drilling to nut and bolt the panhard body mounting bracket to the boot floor, but we’re permanently attaching this by other means.
It’s currently bolted in place, but the boot floor has a number of 8mm holes drilled where it will get plug welded from the inside and onto the bracket. Once they’re all welded up, the bolts will be removed and the remaining holes welded through to the boot floor.
When they’re all fettled up, Harvey made a bracket / plate that will mount in the boot area and this will get welded in, making a sandwich around the panhard mounting area. No real benefit from this, other than looking neater opposed to ten nuts & bolts. The plate Harvey made is actually lighter than the fixings too. Talk about making a simple job more involved.

=====================================================
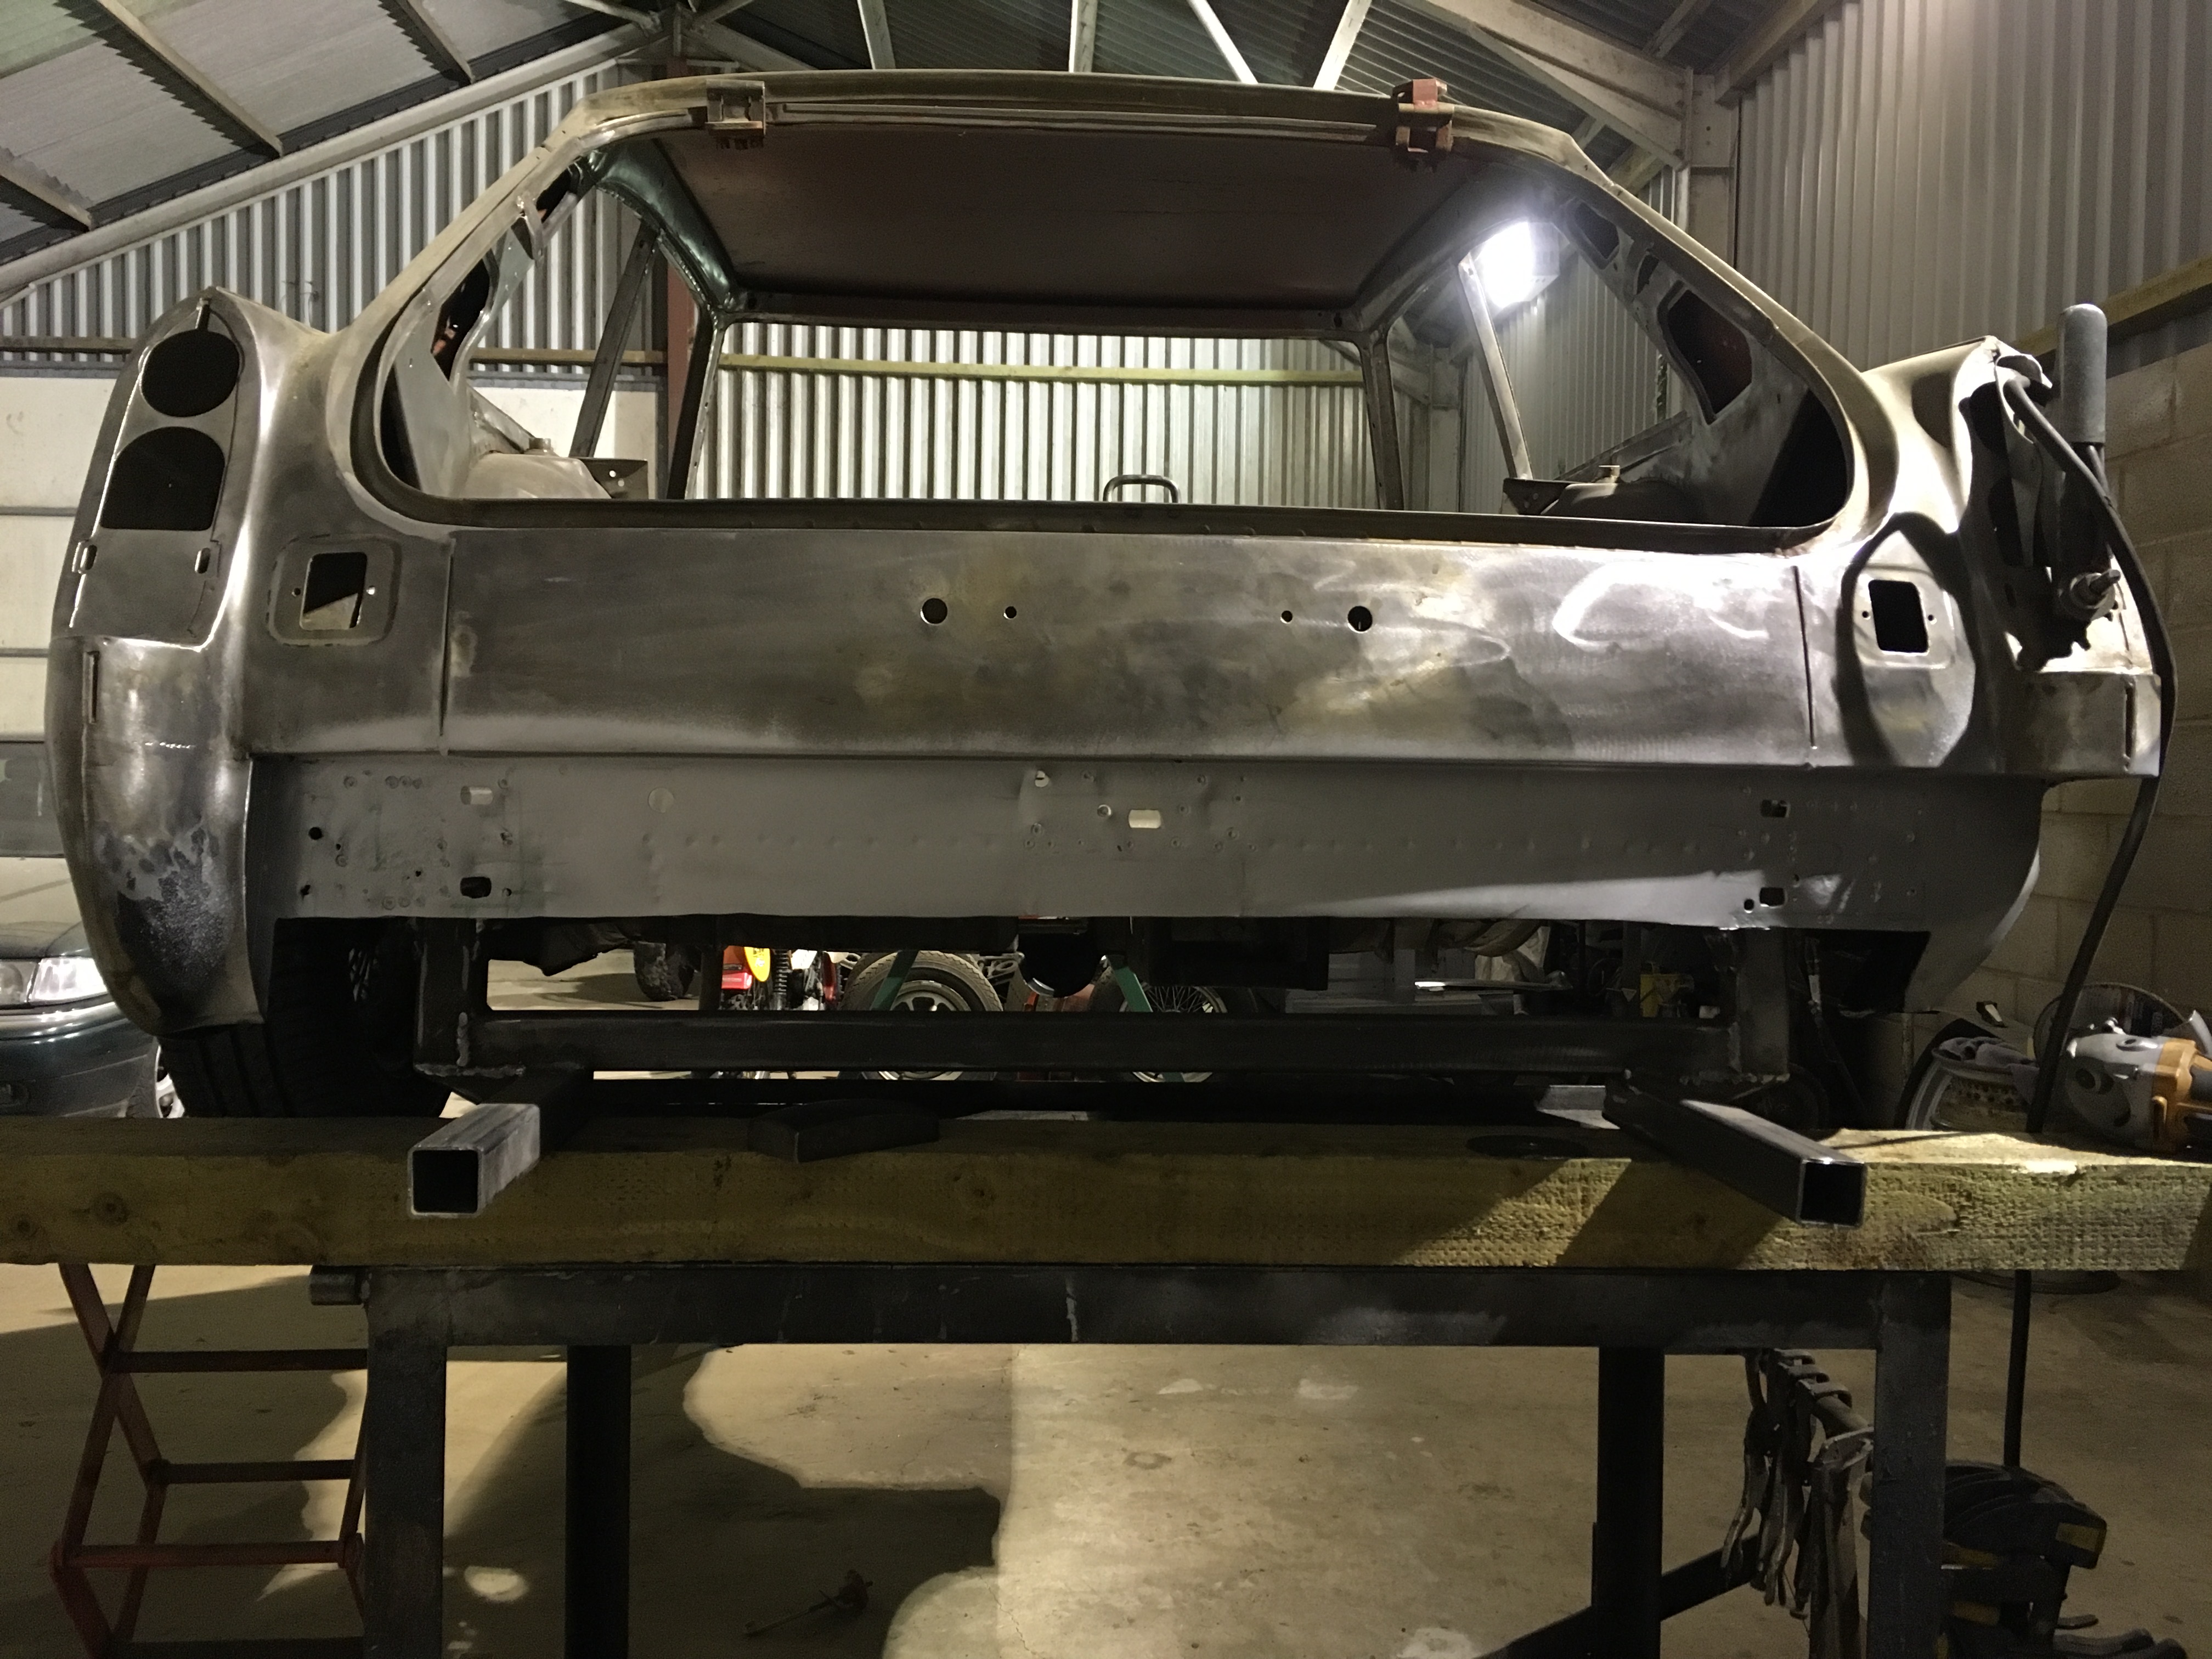
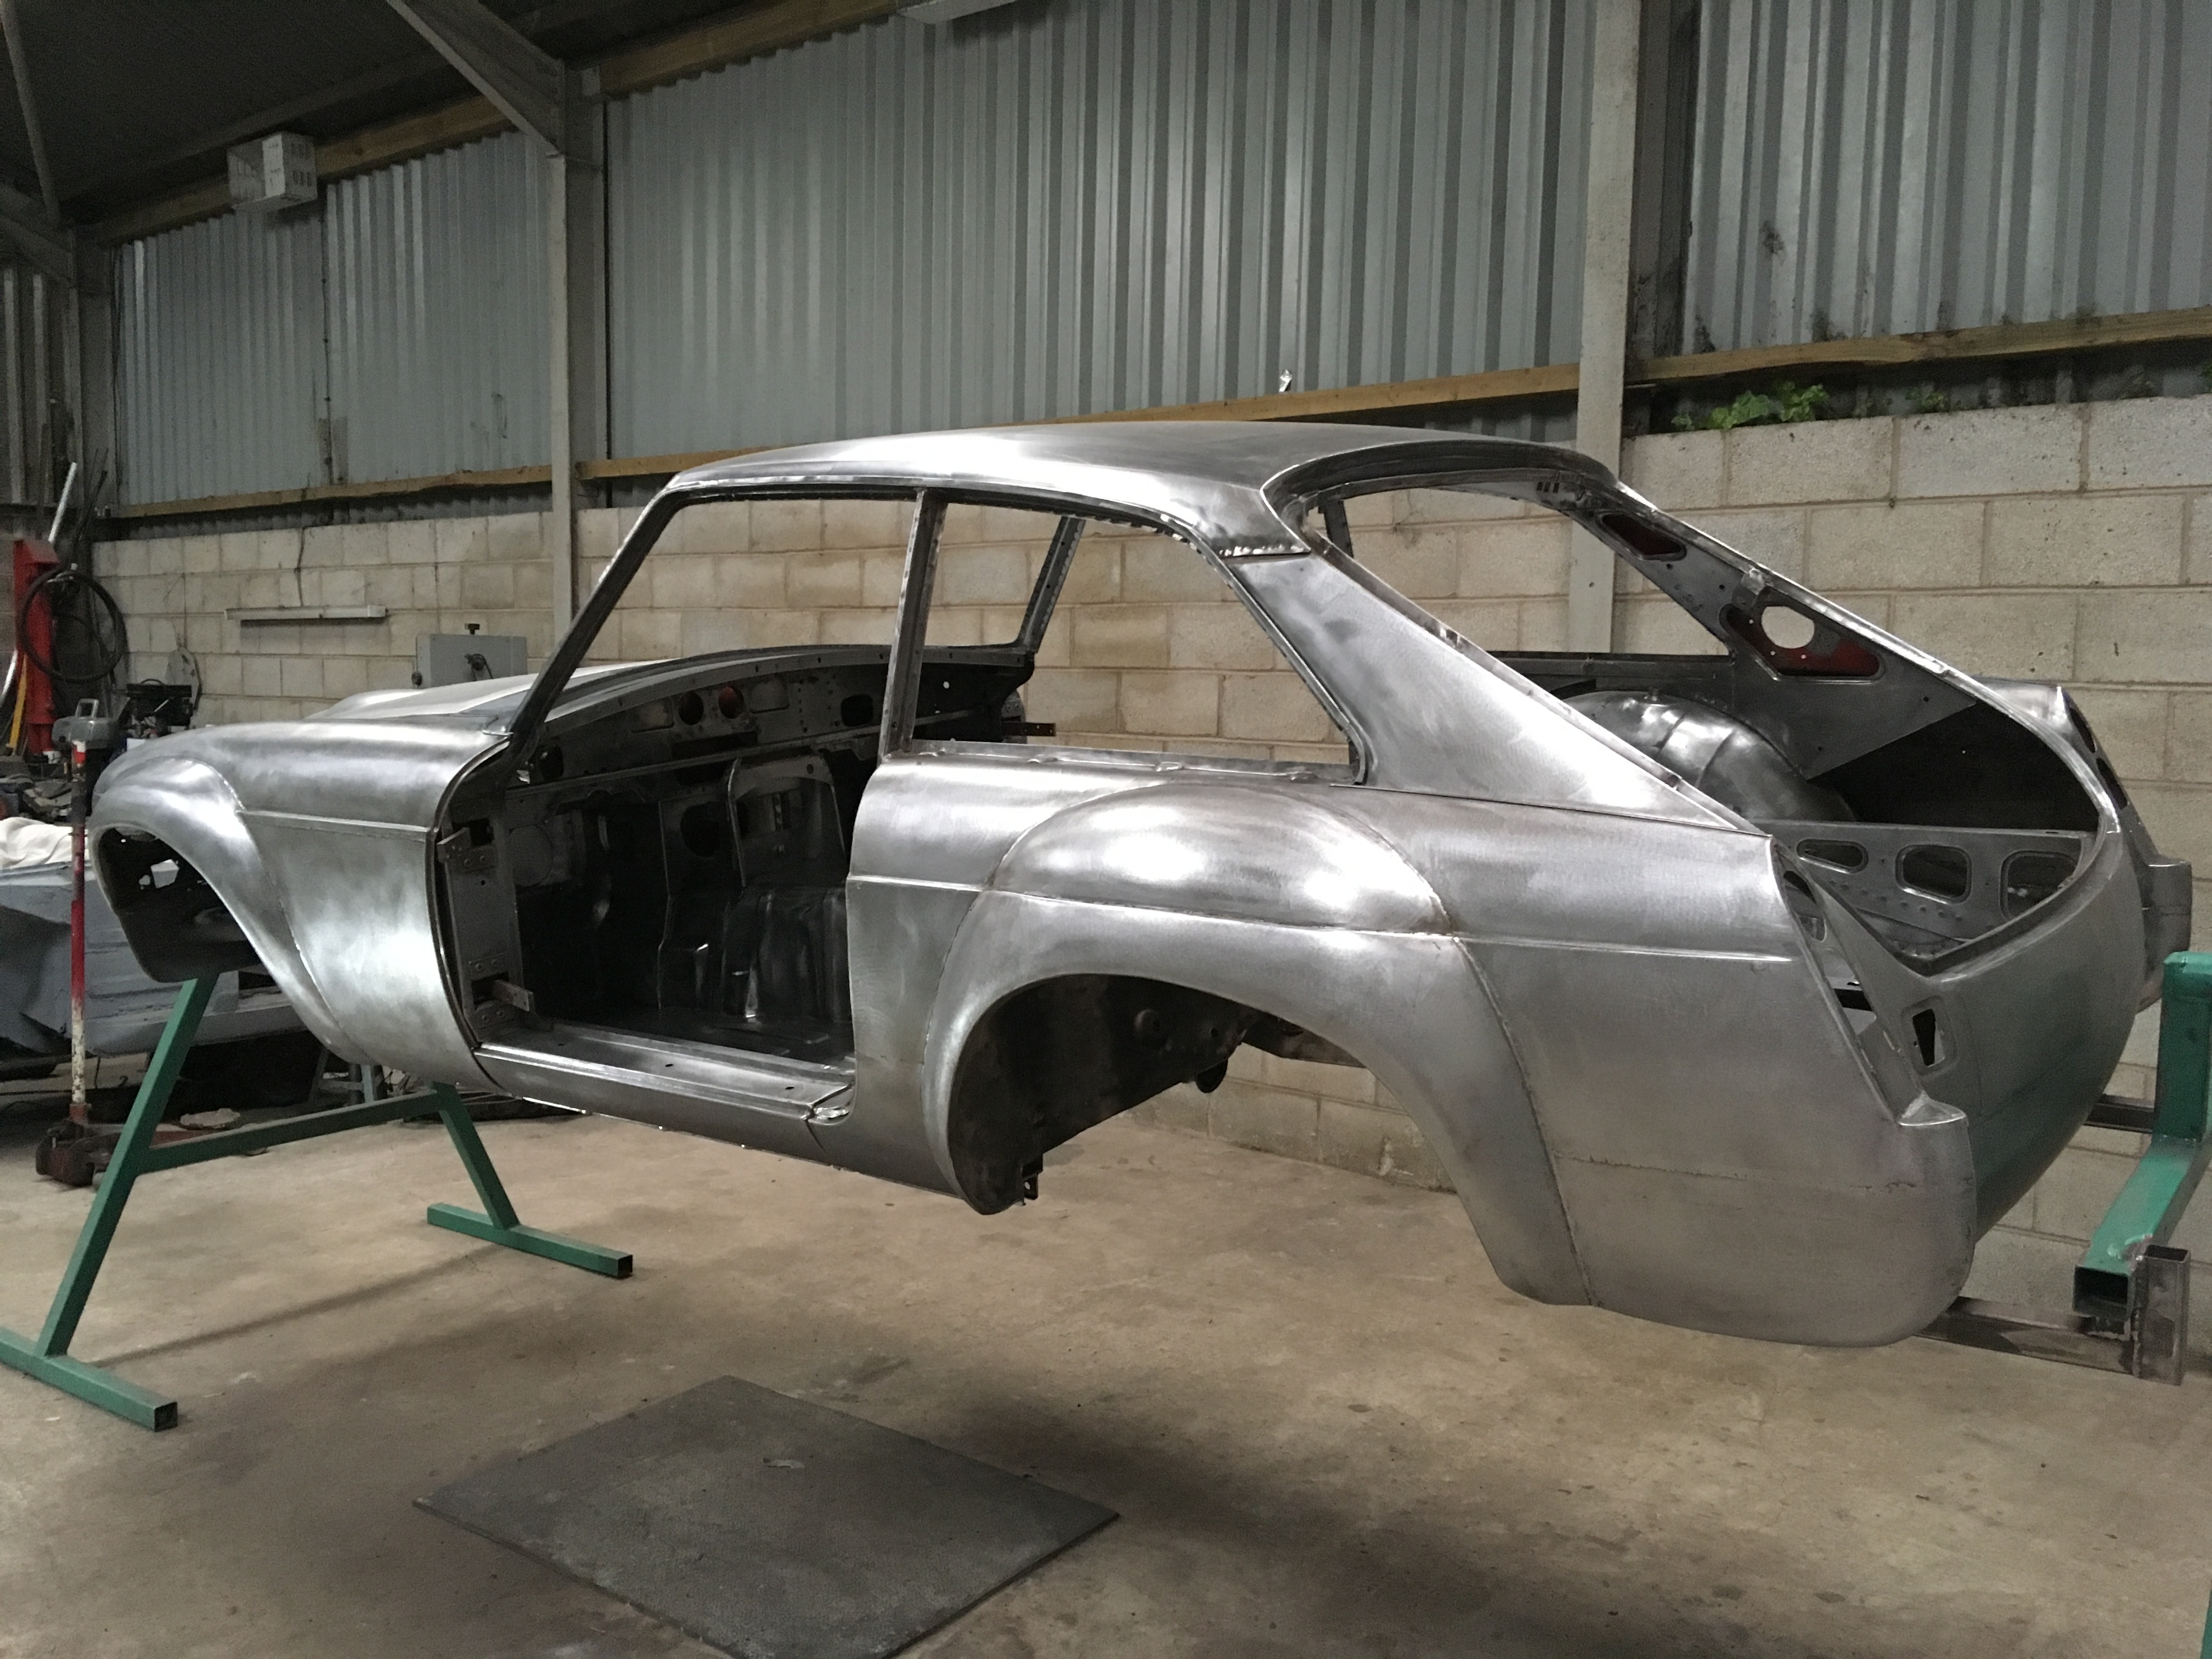
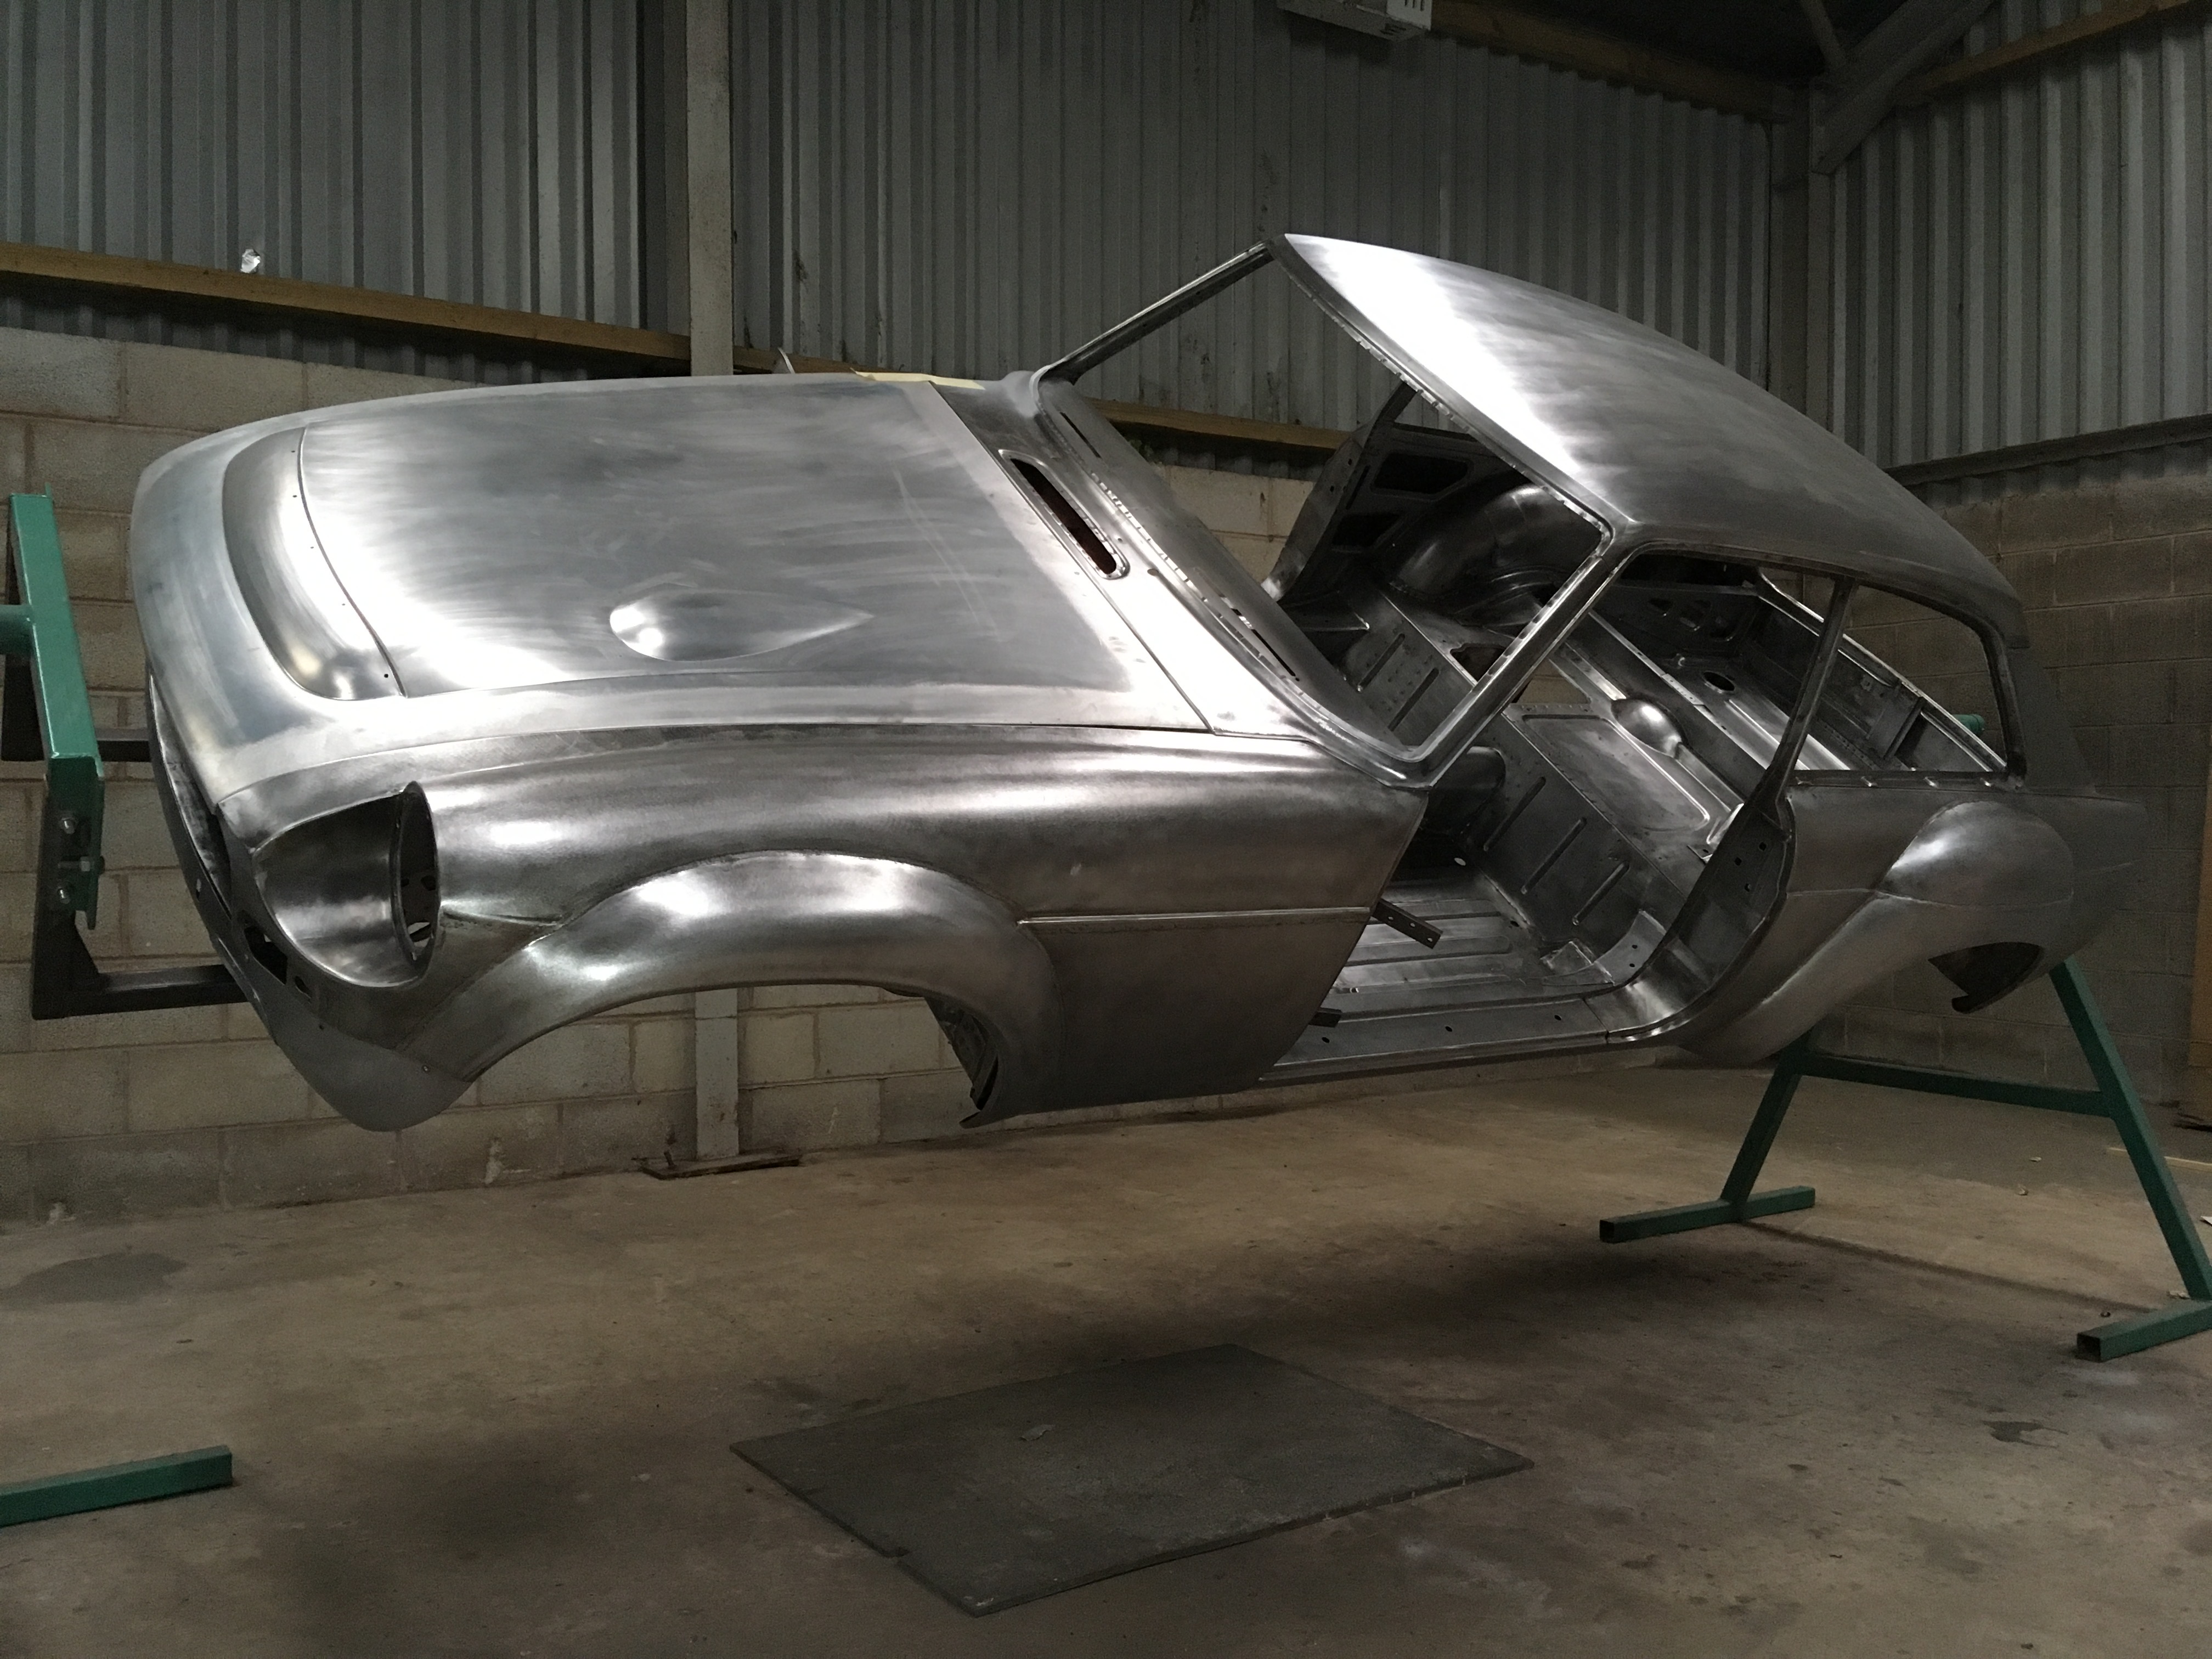
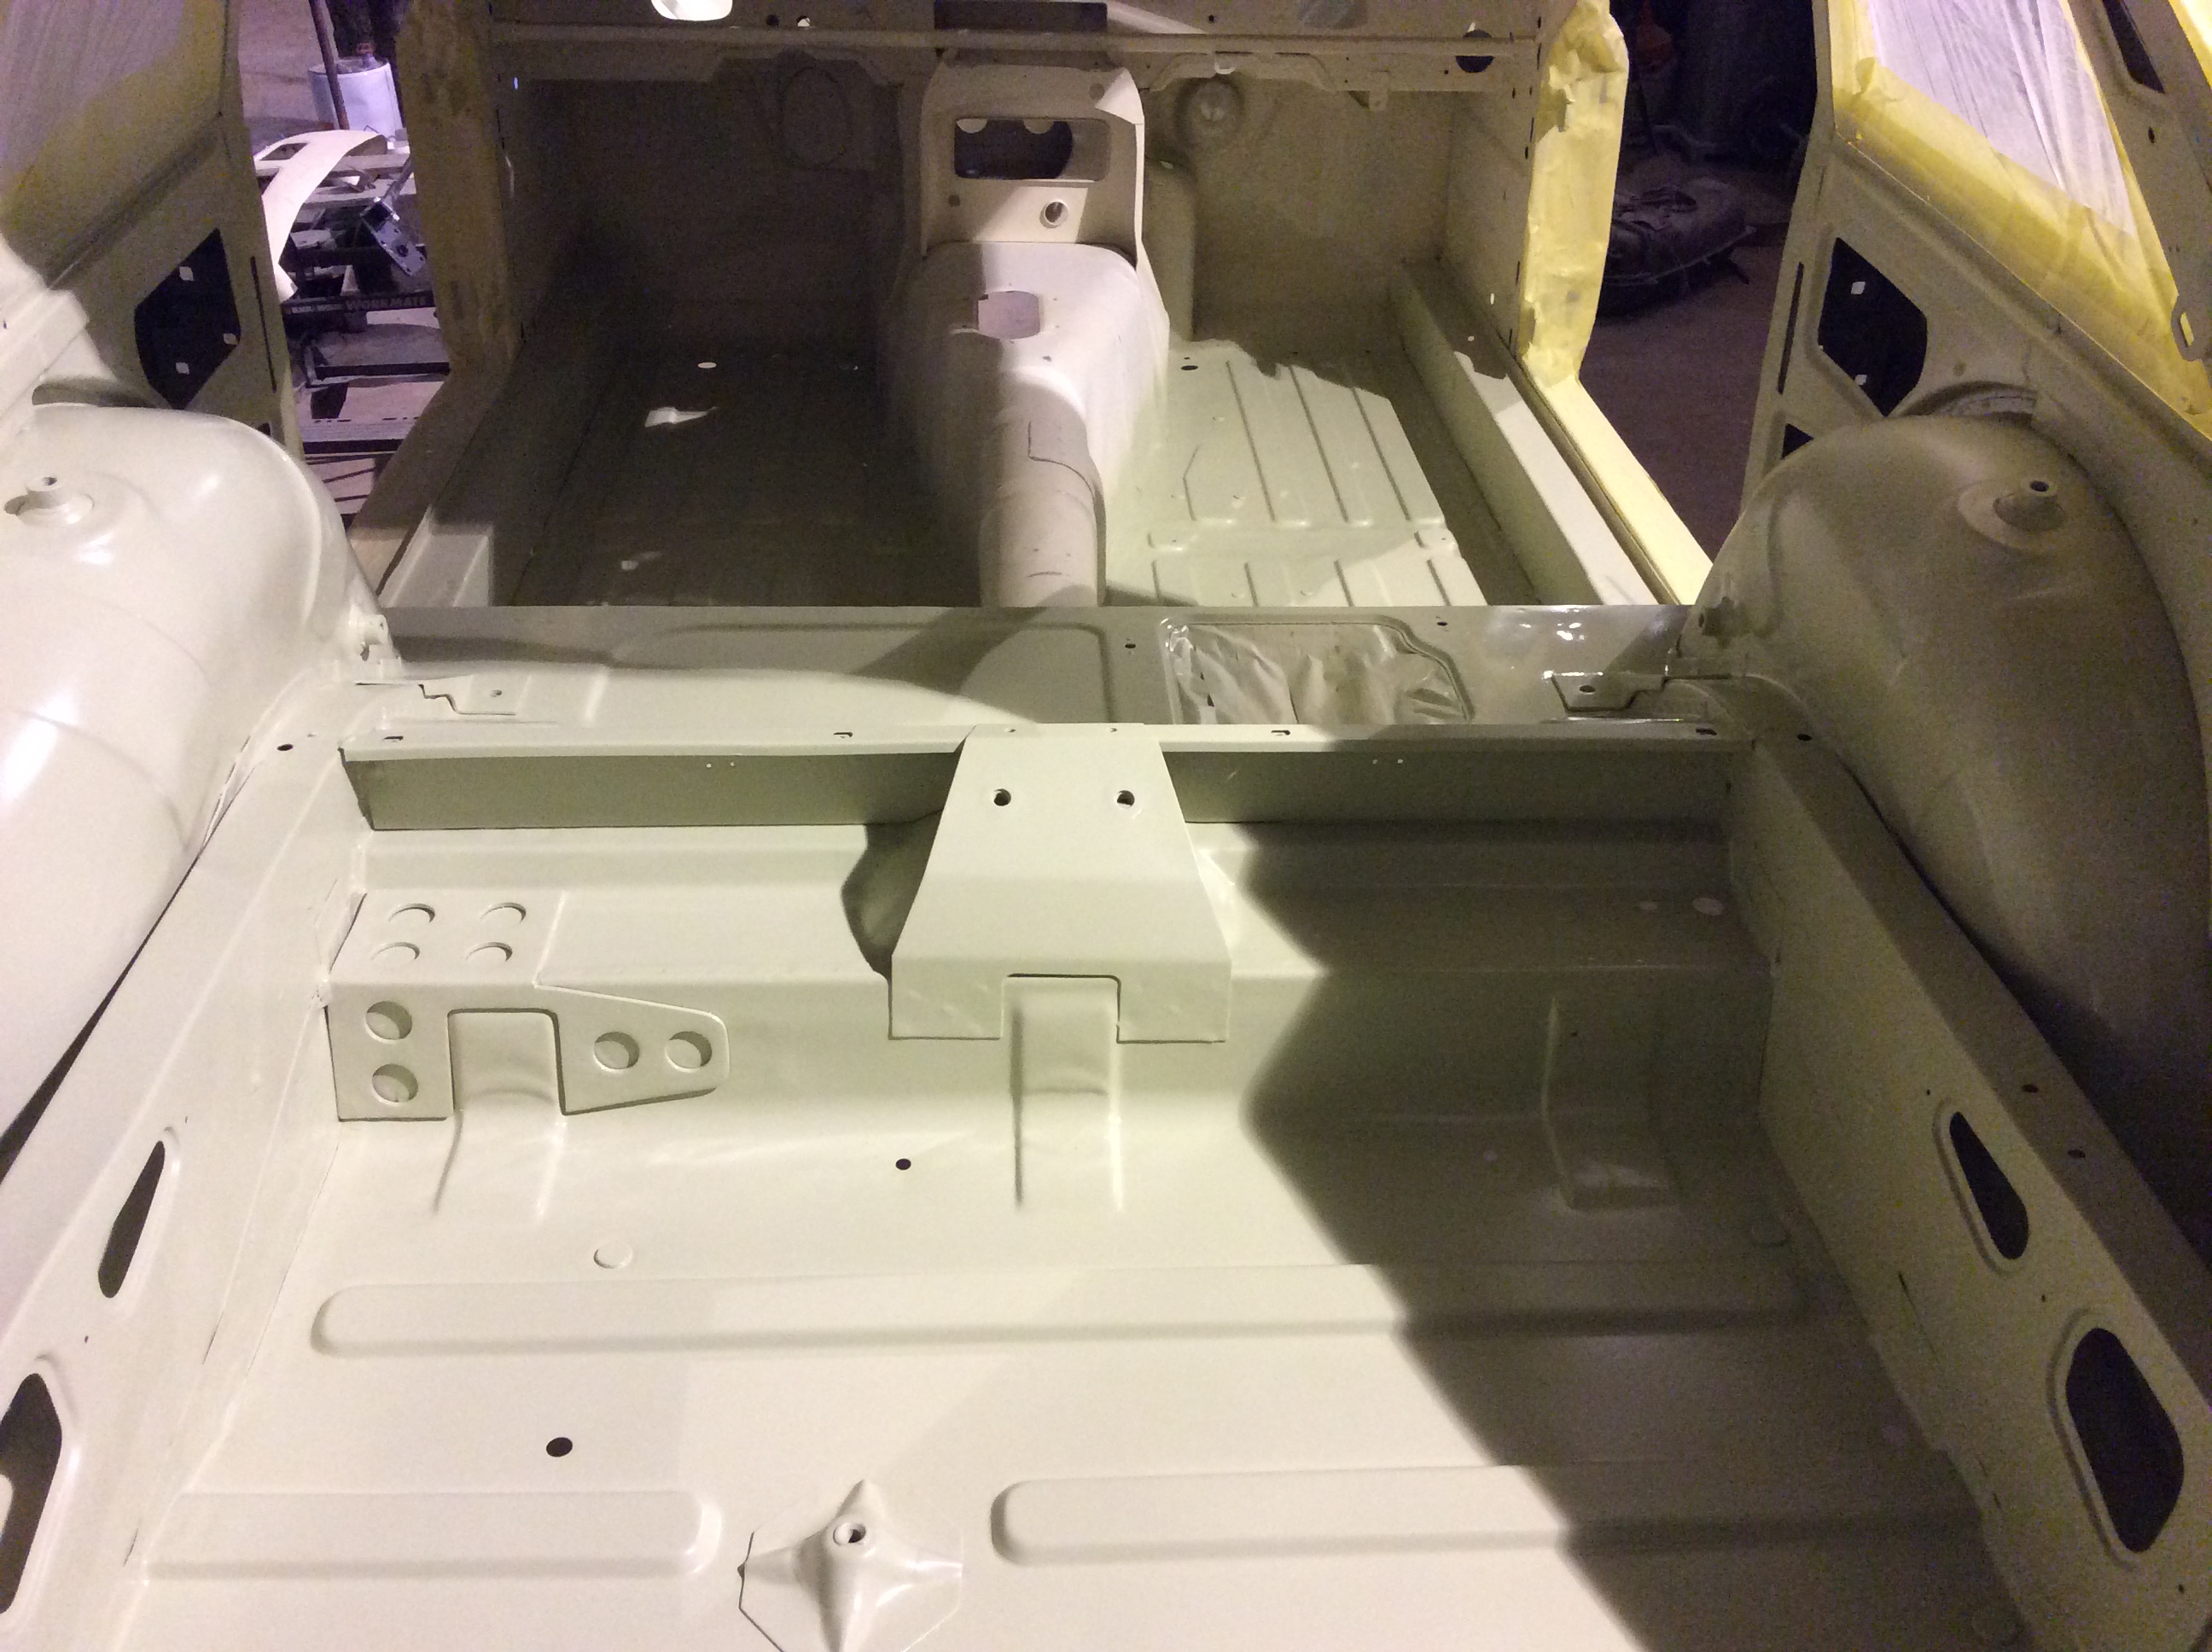
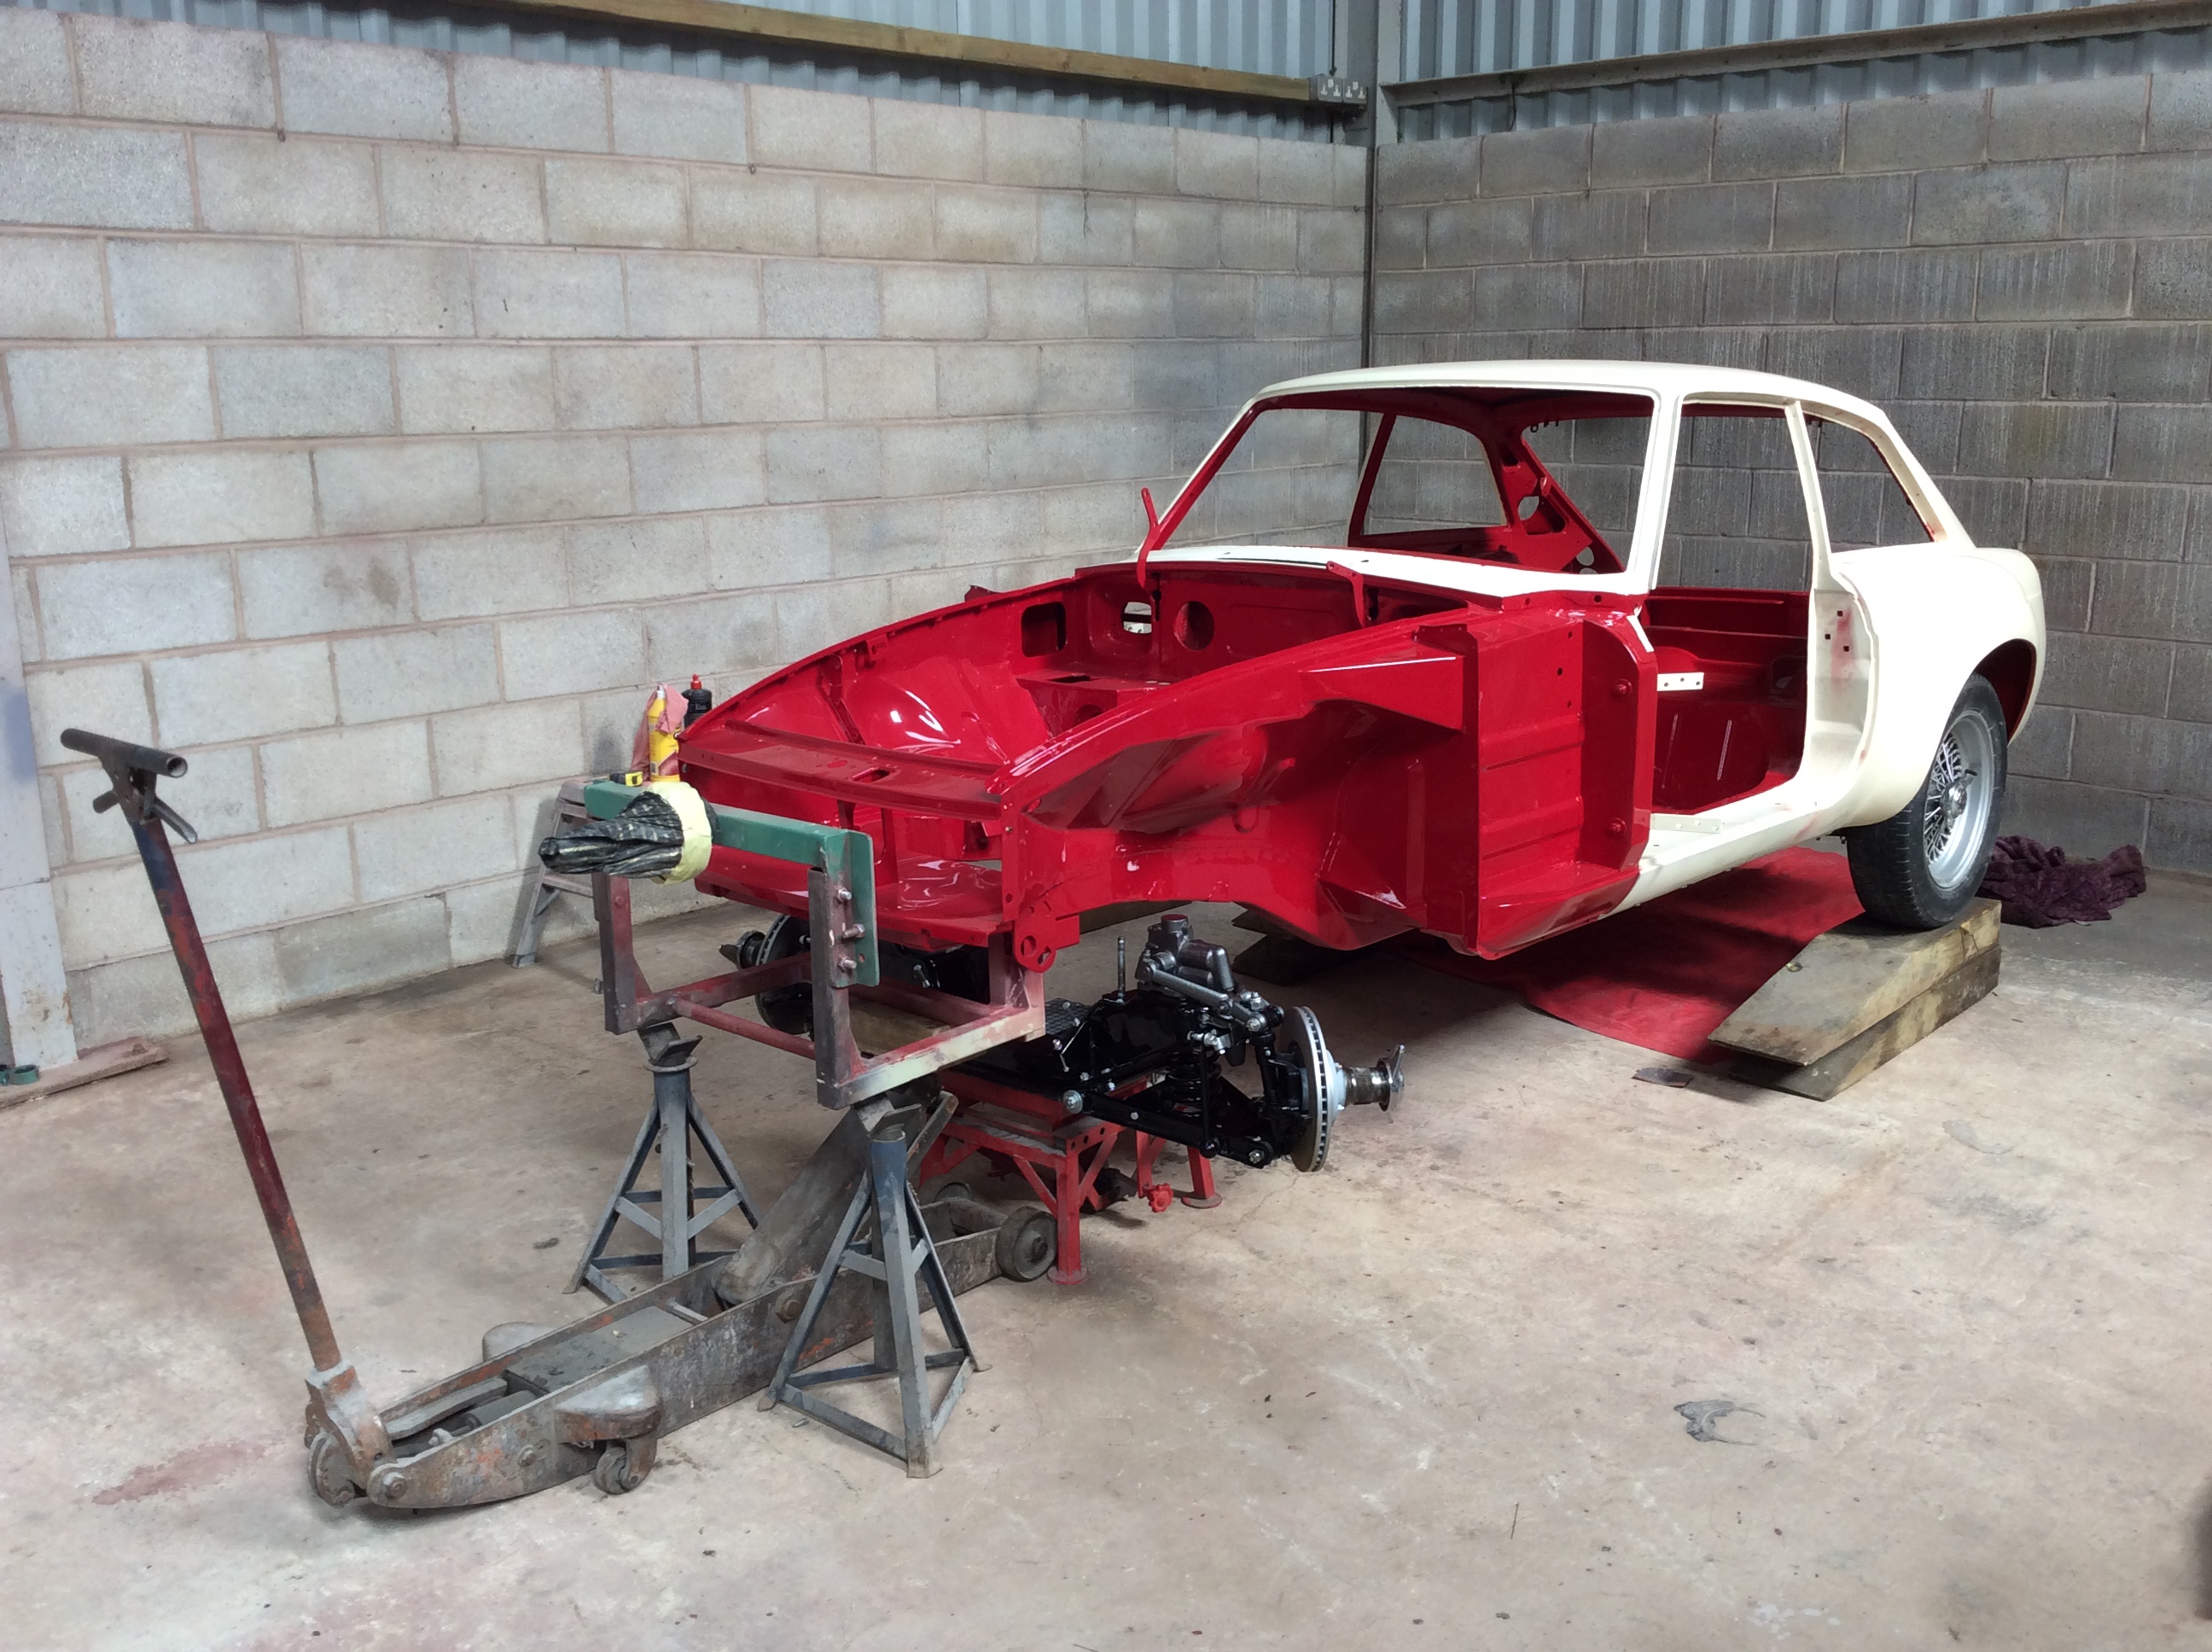
16th March 2020
It’s a good feeling reaching this stage as there isn’t any more welding or panel work to do on the main shell from now on. I’m as happy as Harvey about this as it was June 2017 when we started and we can crack on now.
All the epoxy primer on the inside, underside and engine bay is being sanded down and this really has grabbed hold and sands back to a feather edge nicely. Absolutely no flaking off or any sign of corrosion around any areas too, so we’re really pleased with this product. There’s a few areas needing a bit of stopper or filler which will need spot priming and then there’s a load of seam sealer work to do on the joints.
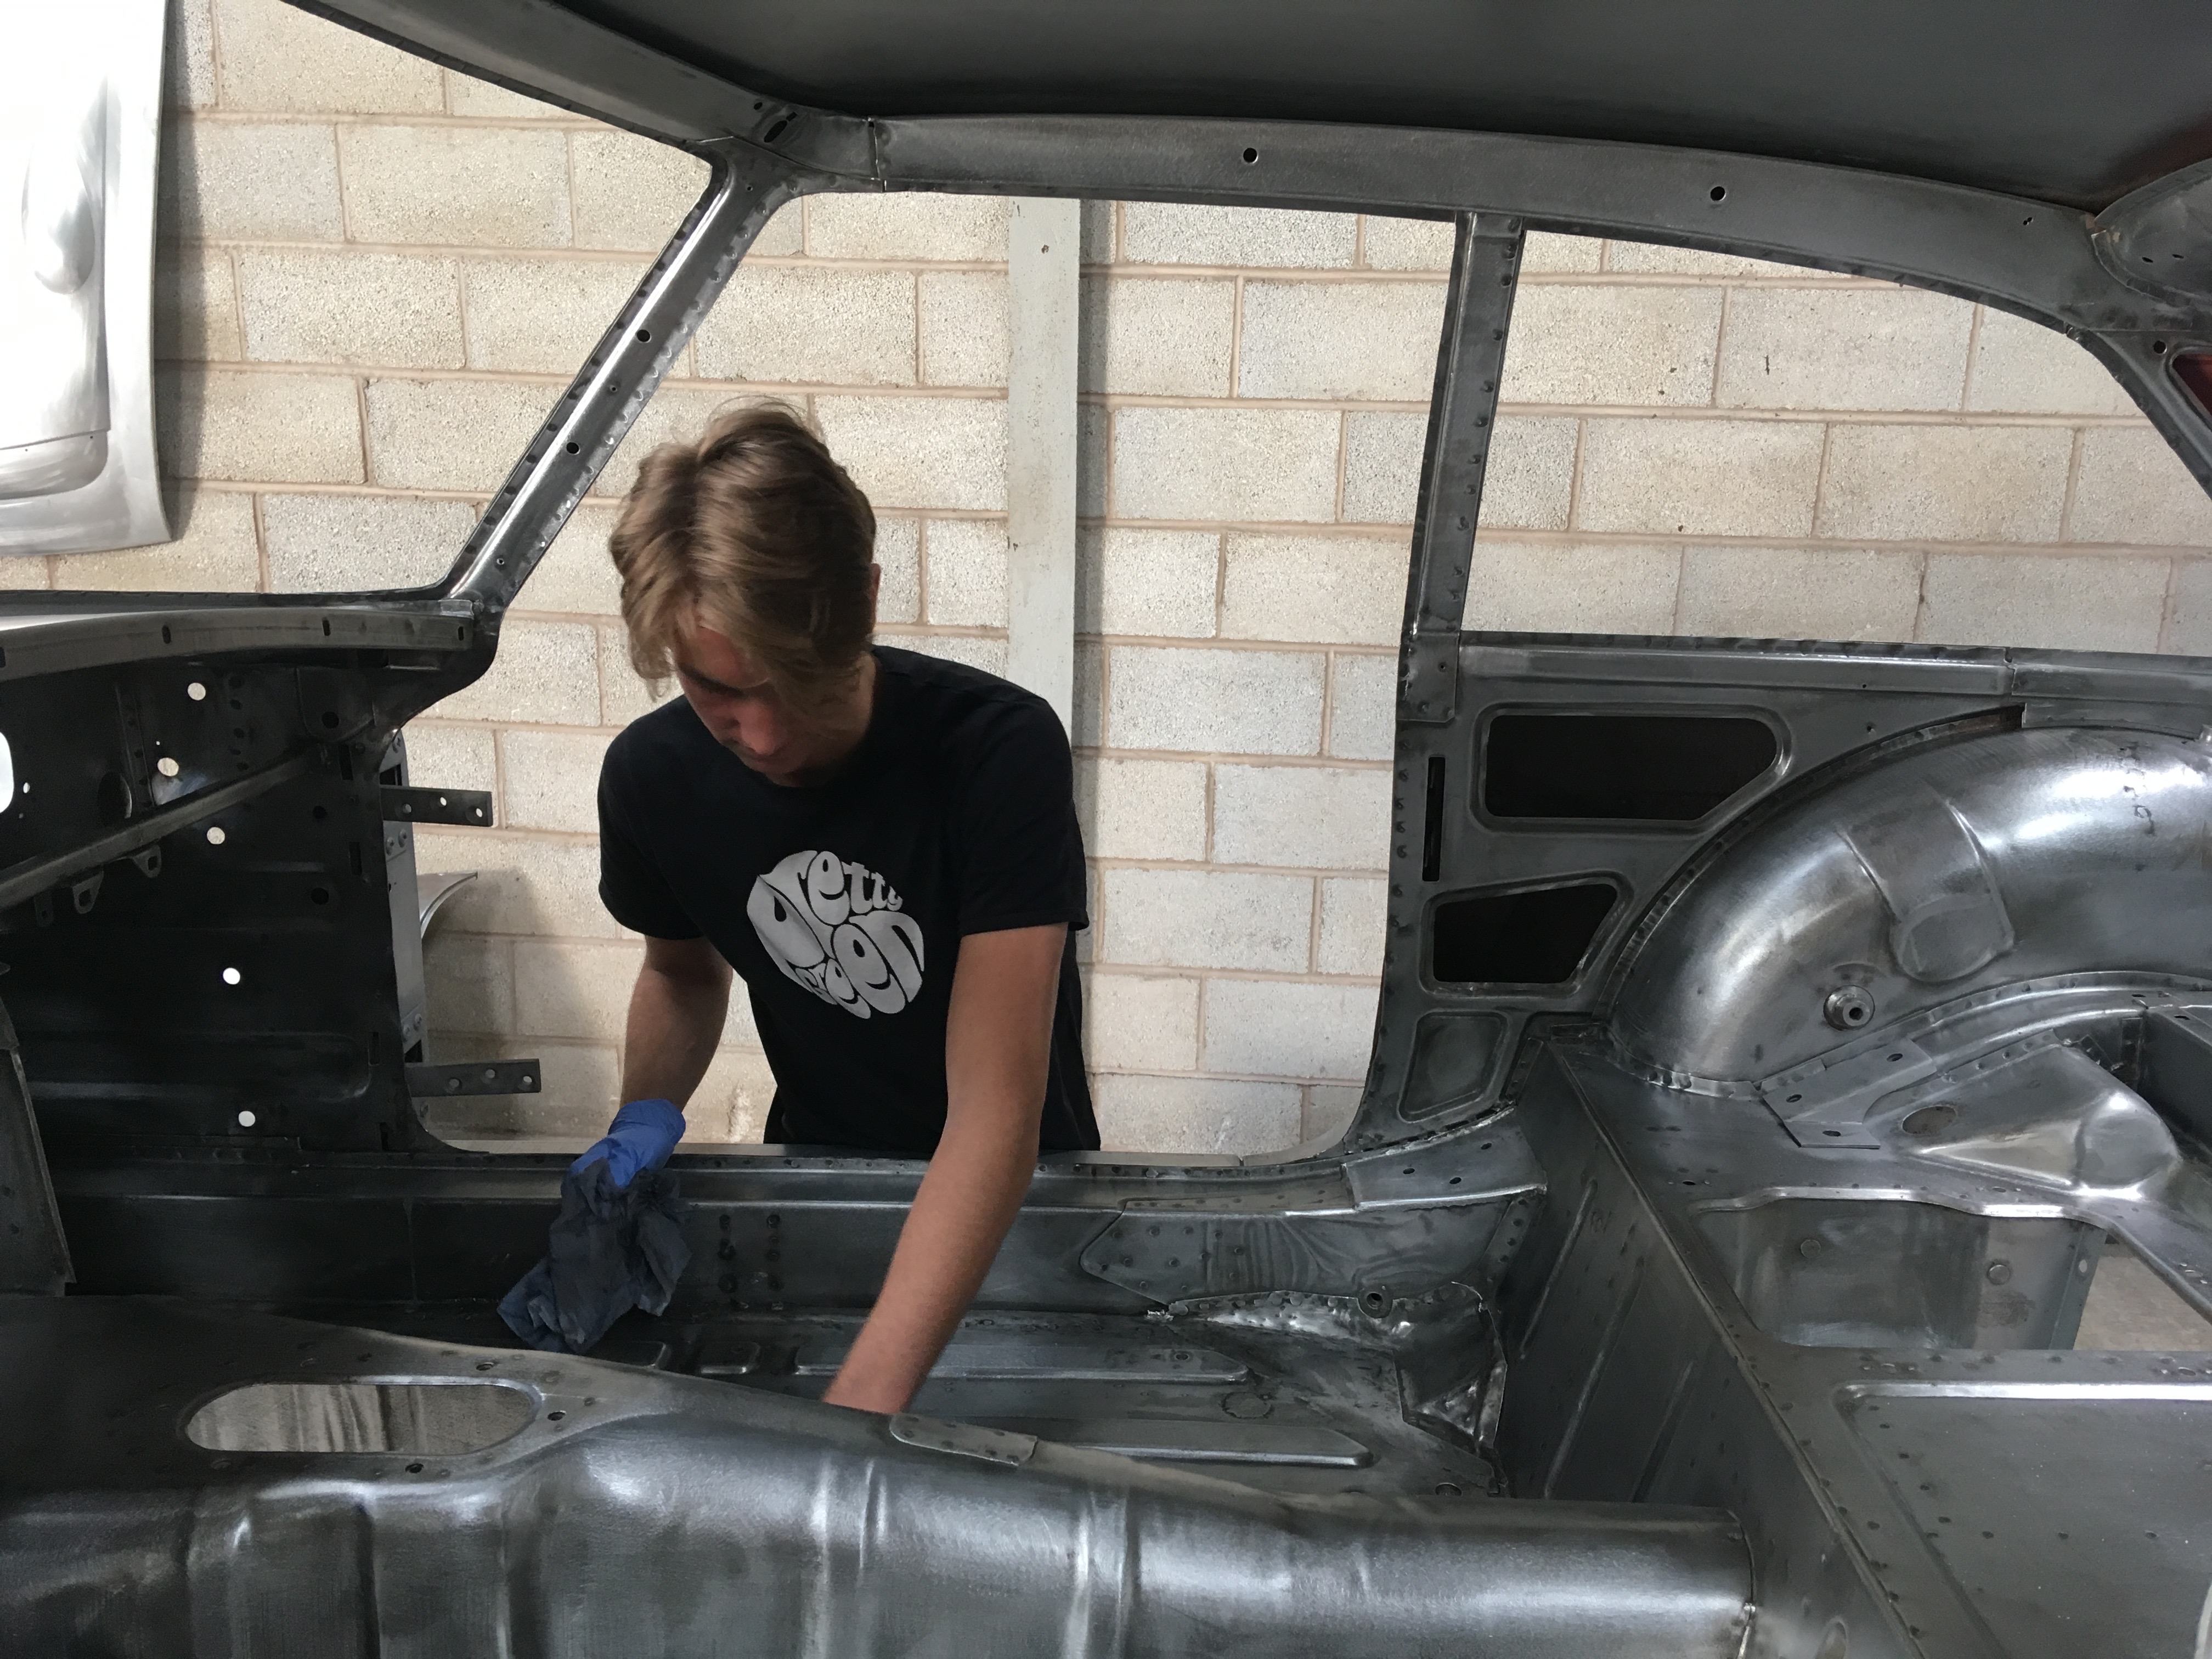
I picked up some materials for this the other day and as Harvey has a few spare periods from school, he is getting all the sanding done.
Final colour is still Tartan red, so it won’t be long before we have the underside and cabin area done in order to get the shell back on its wheels. Final gap work on all the panels then - we do have a pair of door skins to fit, and the body can be prepped for paint too.
==============================================================
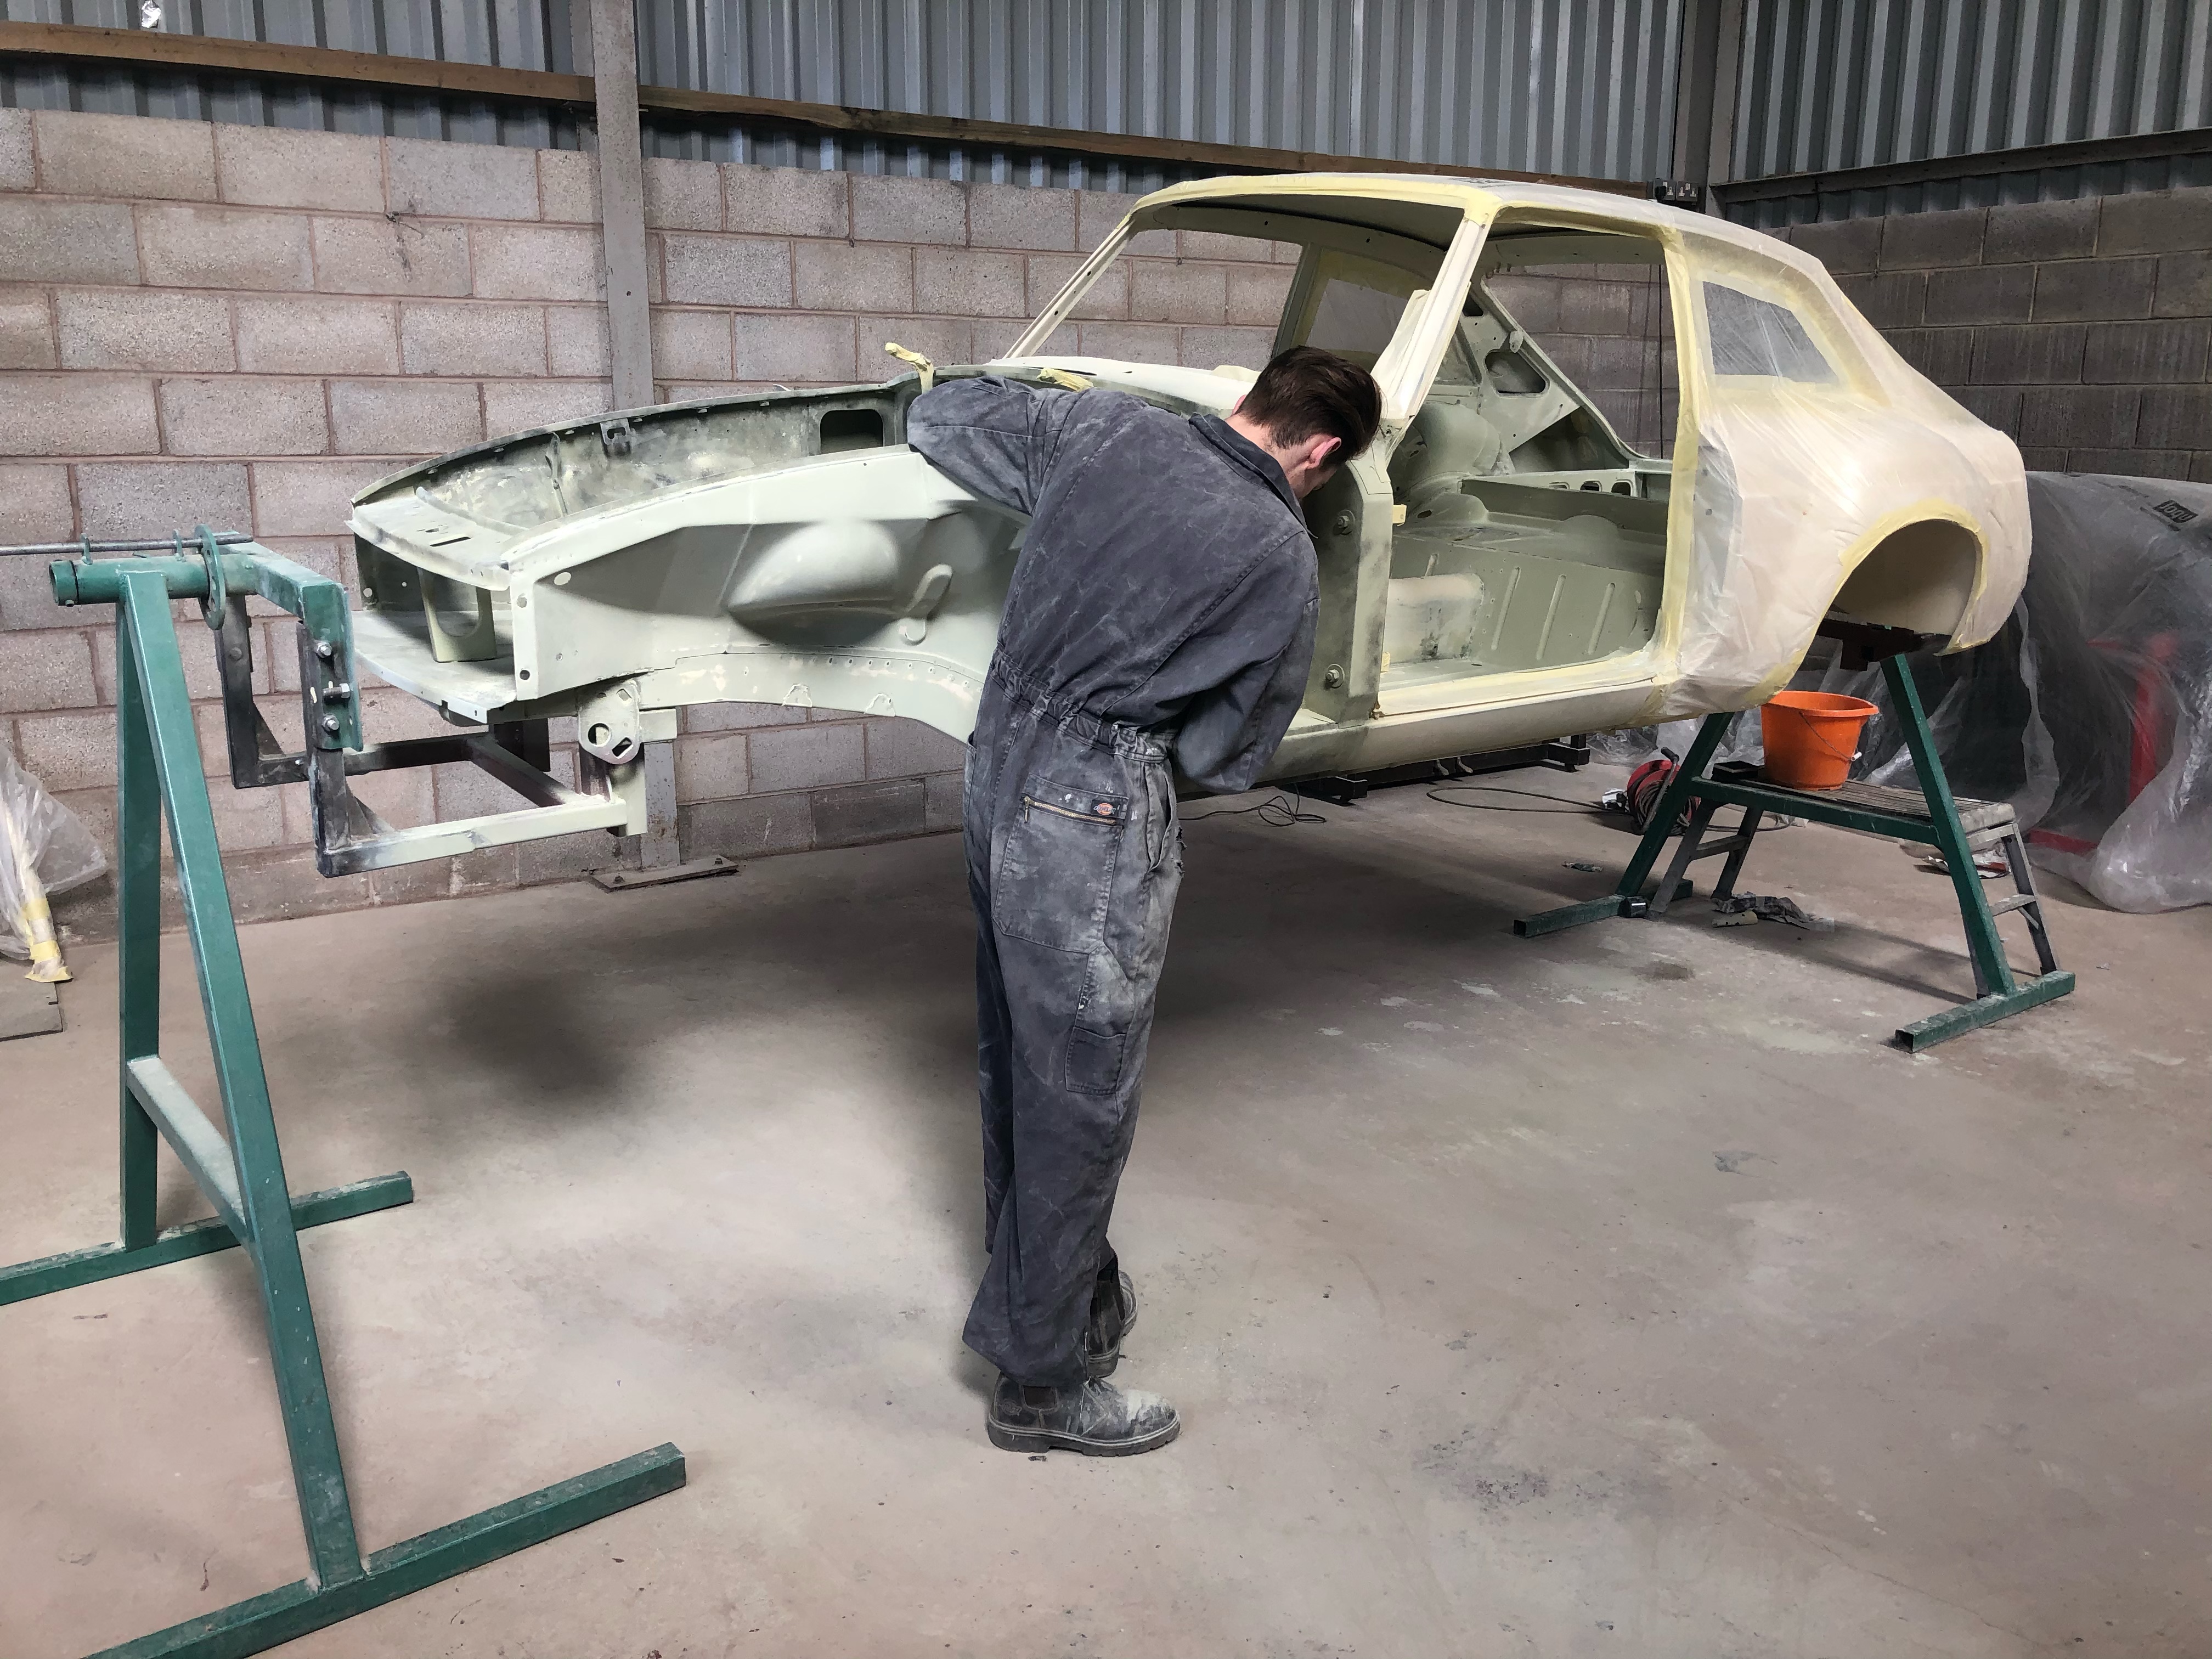
22nd March 2020
Harvey managed to get the entire underside, engine bay, inner wings and inside of the shell sanded down and after a days worth of tidying small sections up with a bit of filler work, today felt like ground hog day.
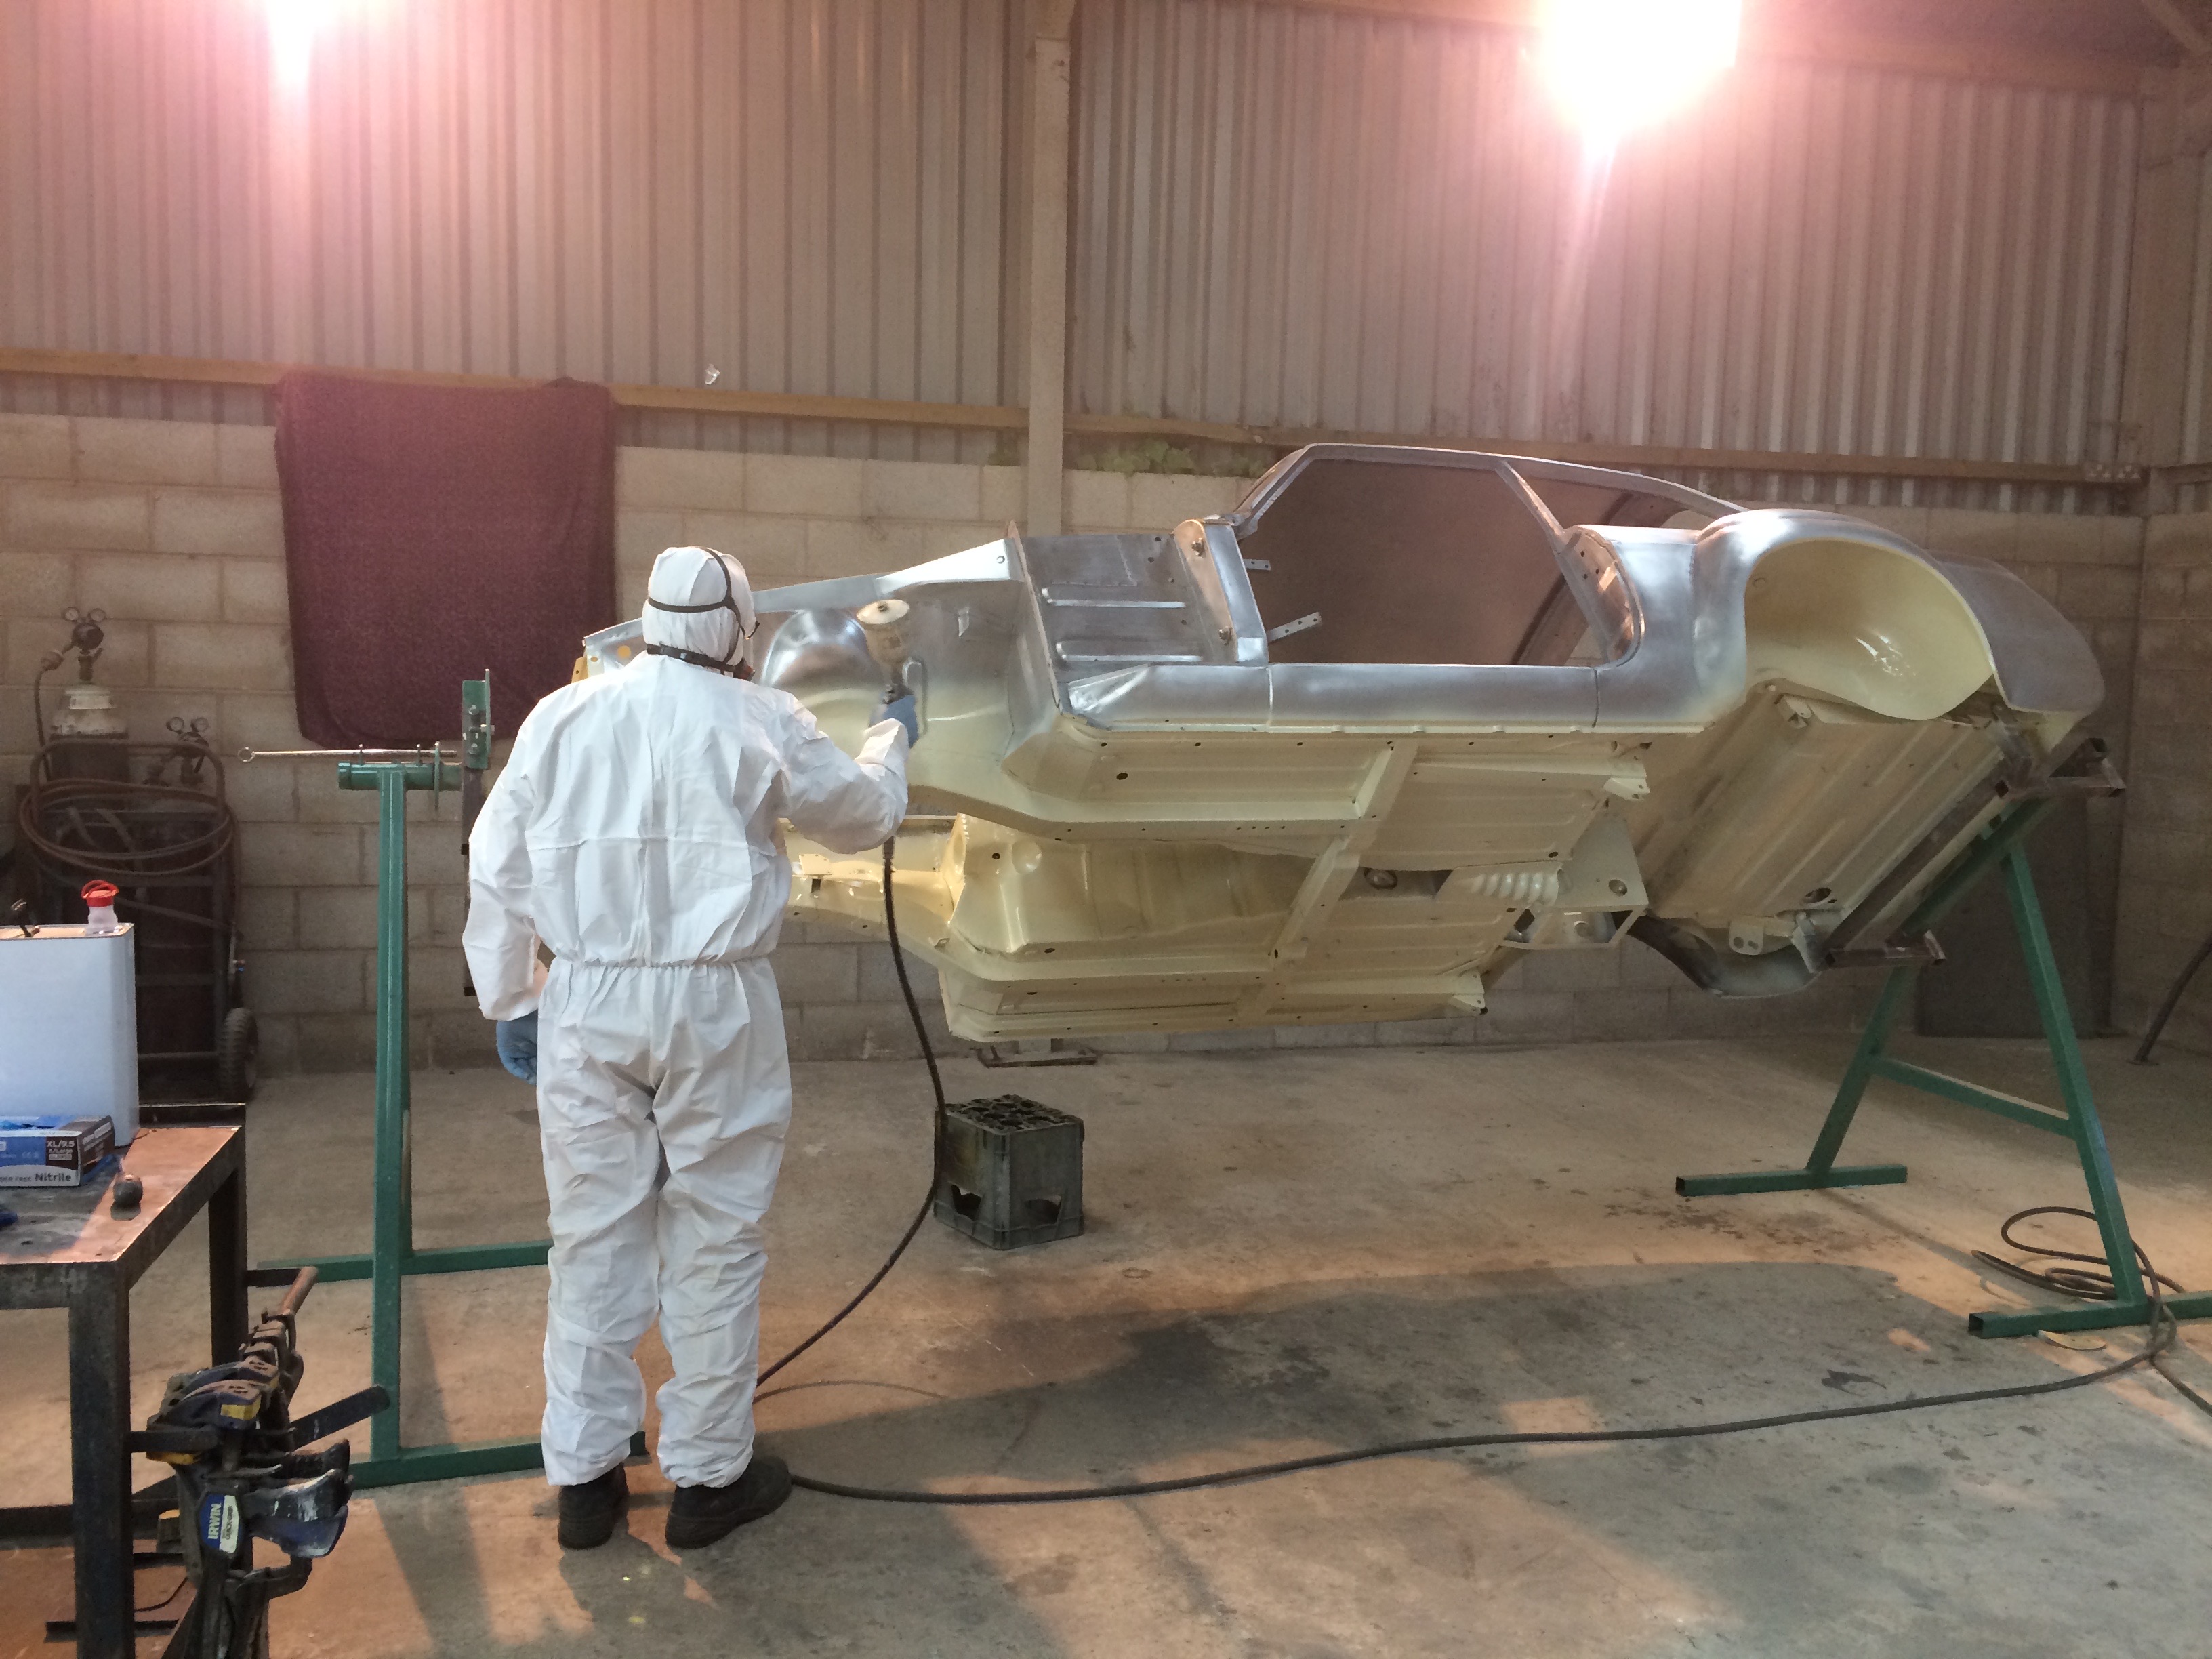
We applied a single coat of the same Lechler 2k epoxy as used last summer to seal the repairs and any areas rubbed back to bare steel. After giving this an hour to flash off (to dry a bit) I put on 3 coats of 2k high build primer also made by Lechler. There’s hardly any overspray using either of these and they go on lovely.
The 2k high build filler primer is a very light green colour, but it lays down nice and flat so when we start wet sanding with 600 grit paper it shouldn’t be such a job to do. Dry spray or thick orange peal would be a real pain.
Next job to do is mist on some aerosol satin black over the entire area that’s been primed and once it’s fully cured, we can start sanding. Tempted to leave it a good few days, but I’ll need to do this with Harvey to show him what to do. His prep work in getting it to this stage was pretty good, so I’ll set him off on the sanding here and keep an eye on how he’s getting on.
Regarding using 2k primer on the rear boot area and inner rear quarter panels and wet flatting, it’s totally over board but it will look great once it’s got a coat of colour on.
Still busying away with the sanding and he’s slowly getting there. I gave him a hand yesterday evening and it’s blocking down nicely. There’s so many areas that have had some sort of repair or alteration and although we made them as neat and discreet as possible, primer with a guide coat is like a magnifying glass and shows any slight imperfections. Much better to identify this sort of thing during this stage, rather than later. Don’t get me wrong, I’m being particularly fussy with this though.
We first used 320 grit DA Discs on a pad to get the surface of the primer to the point where the guide coat is still just visible and then wet sanded with warm water and a drop of washing up liquid with 600 grit paper and also red scotch pads to get any surfaces really smooth and flat.
We could paint onto the second and third picture by using an etch or surface primer - we will show what we’re using, and then tack it off, followed by straight on with top coat...... but the bootfloor and most of the cabin area will or may be exposed. With that in mind, I’m dropping another two coats of 2k primer on this area to make it 100% as the final paint will show any minor imperfections. Harvey thought I was joking, but it’s a necessary thing if you want to be spot on
===========================================================
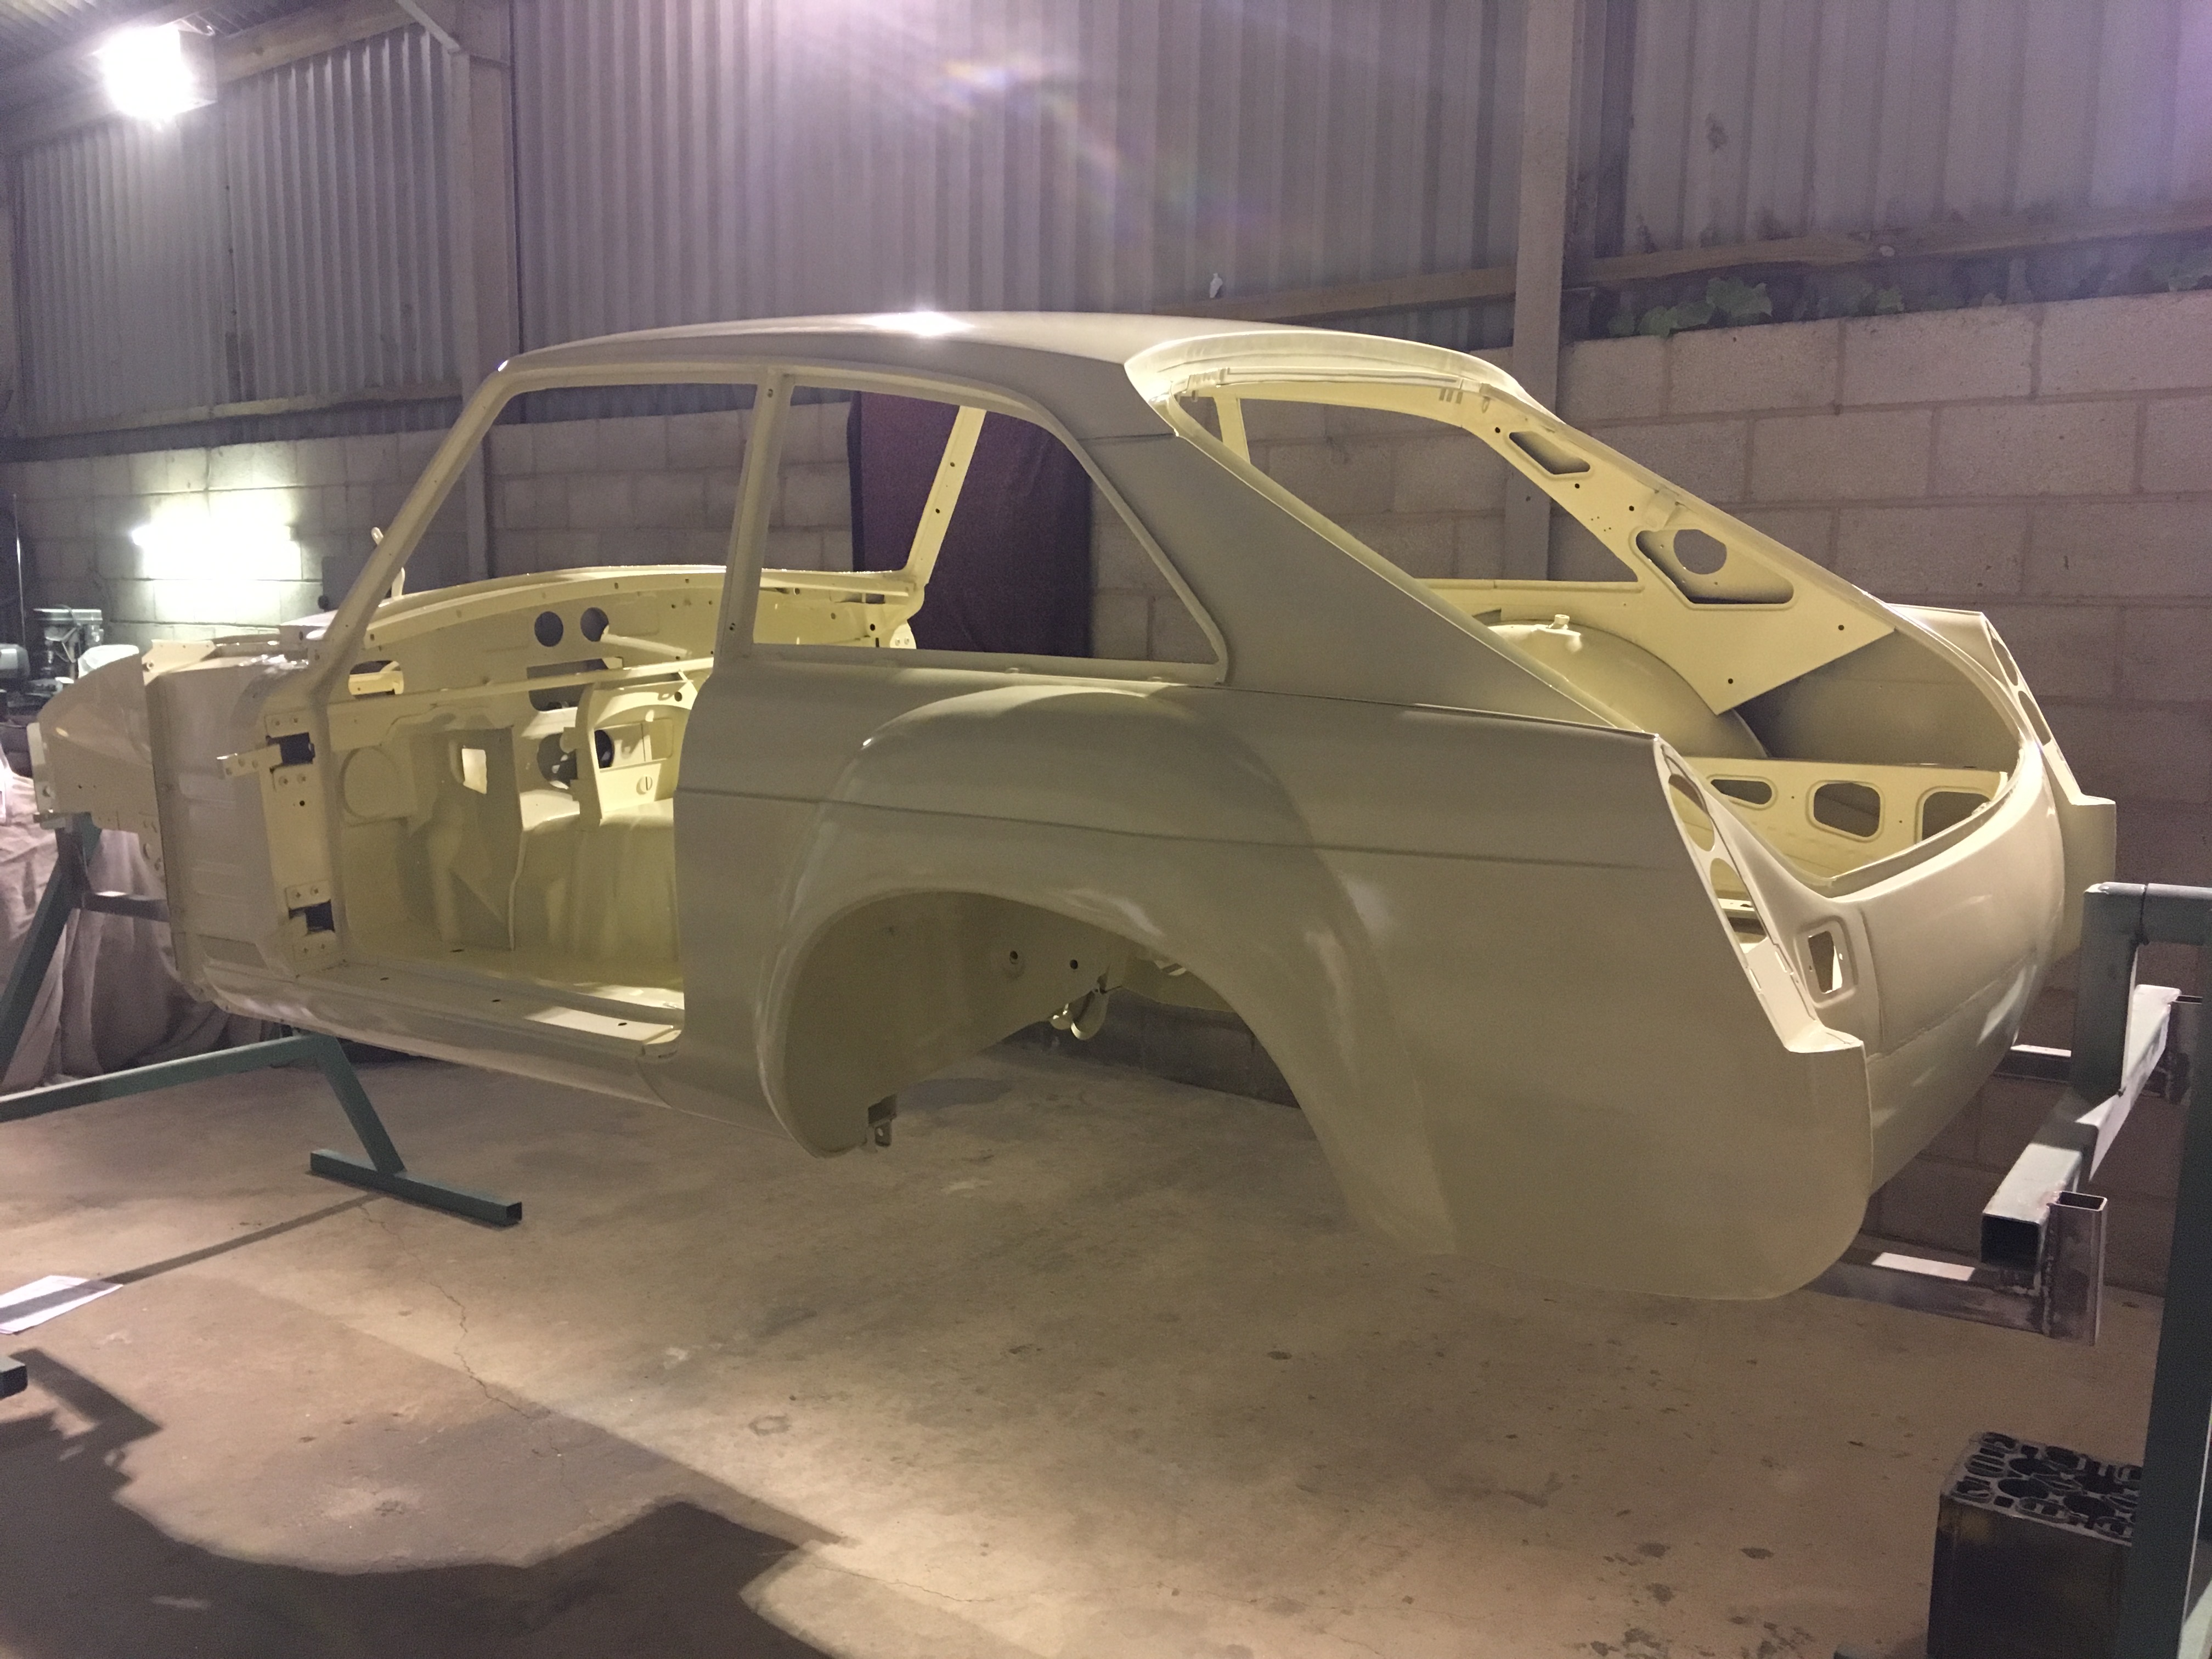
4th April 2020
Sat here with a cup of tea and slice of cake and feel shattered. We used 3.5 litres of Lechler 2k at a 4:1 ratio to do the inside and underneath. There’s just so much wasted in opening and closing the fan on the spraygun to get coverage of the awkward bits. Really deep lustre and the gloss looks great on this and we’re really pleased how it came out. Should be a good durable finish for a few years to come. Might go in for a beer now

==========================================================
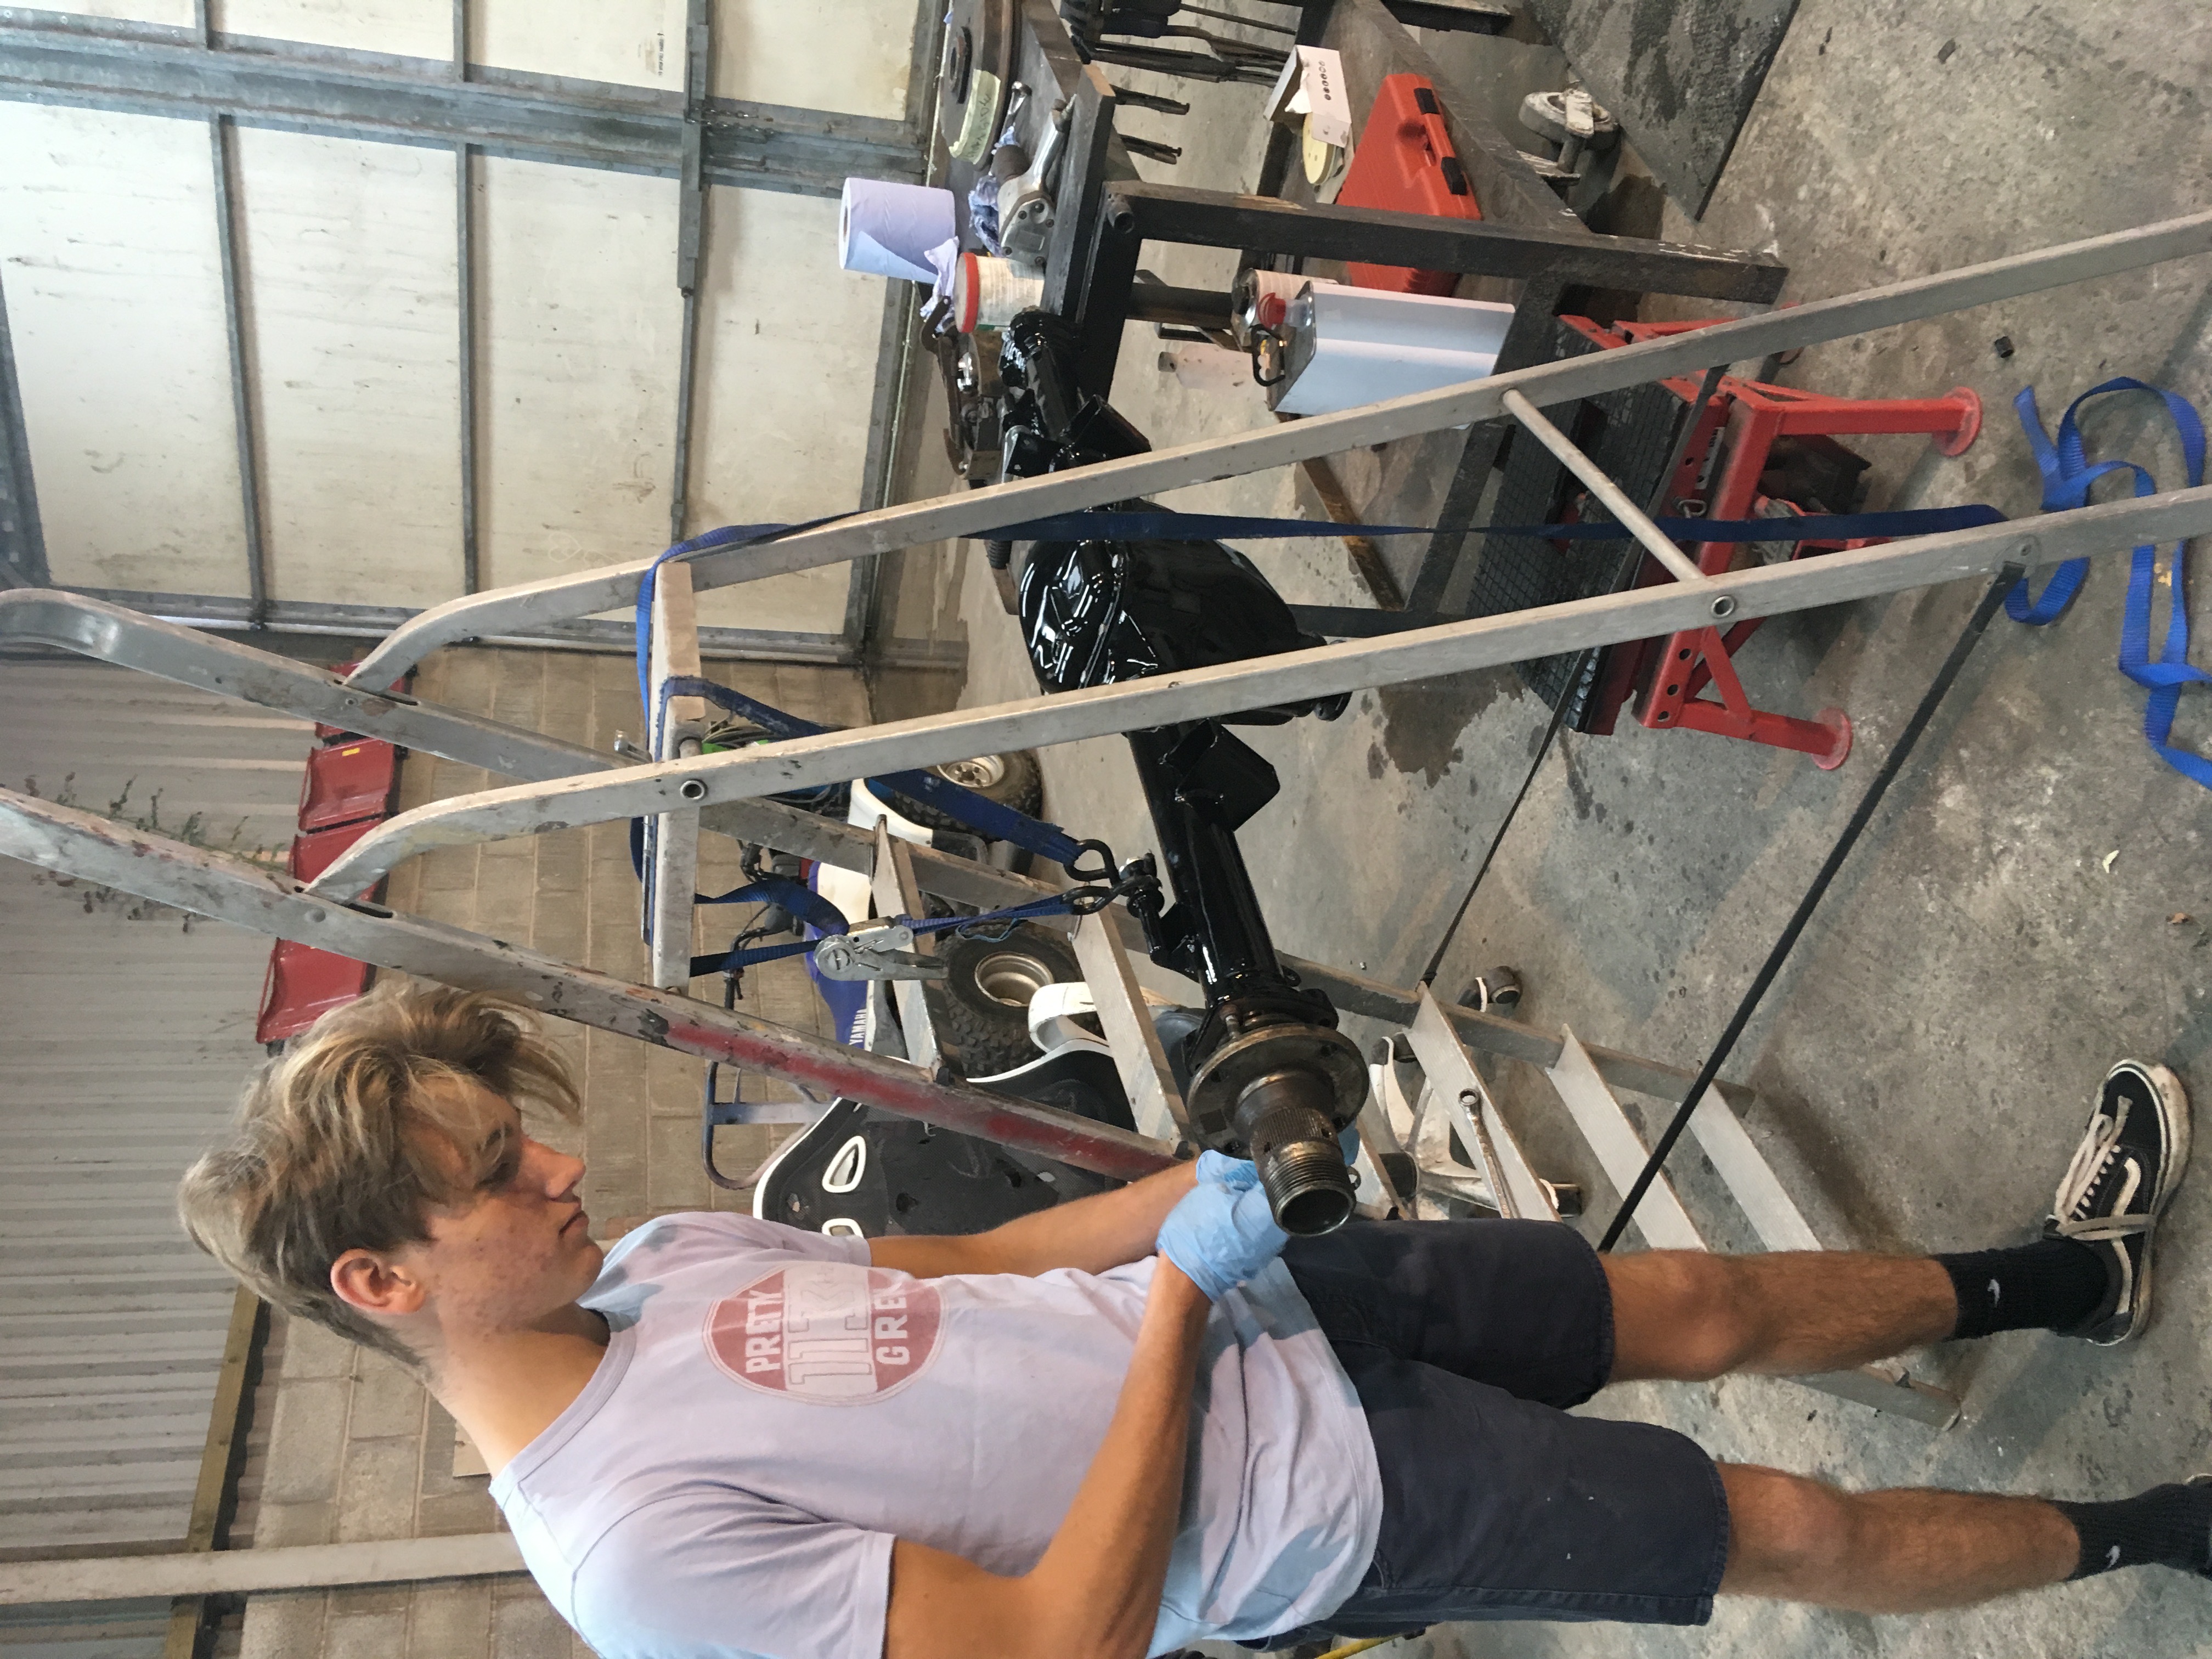
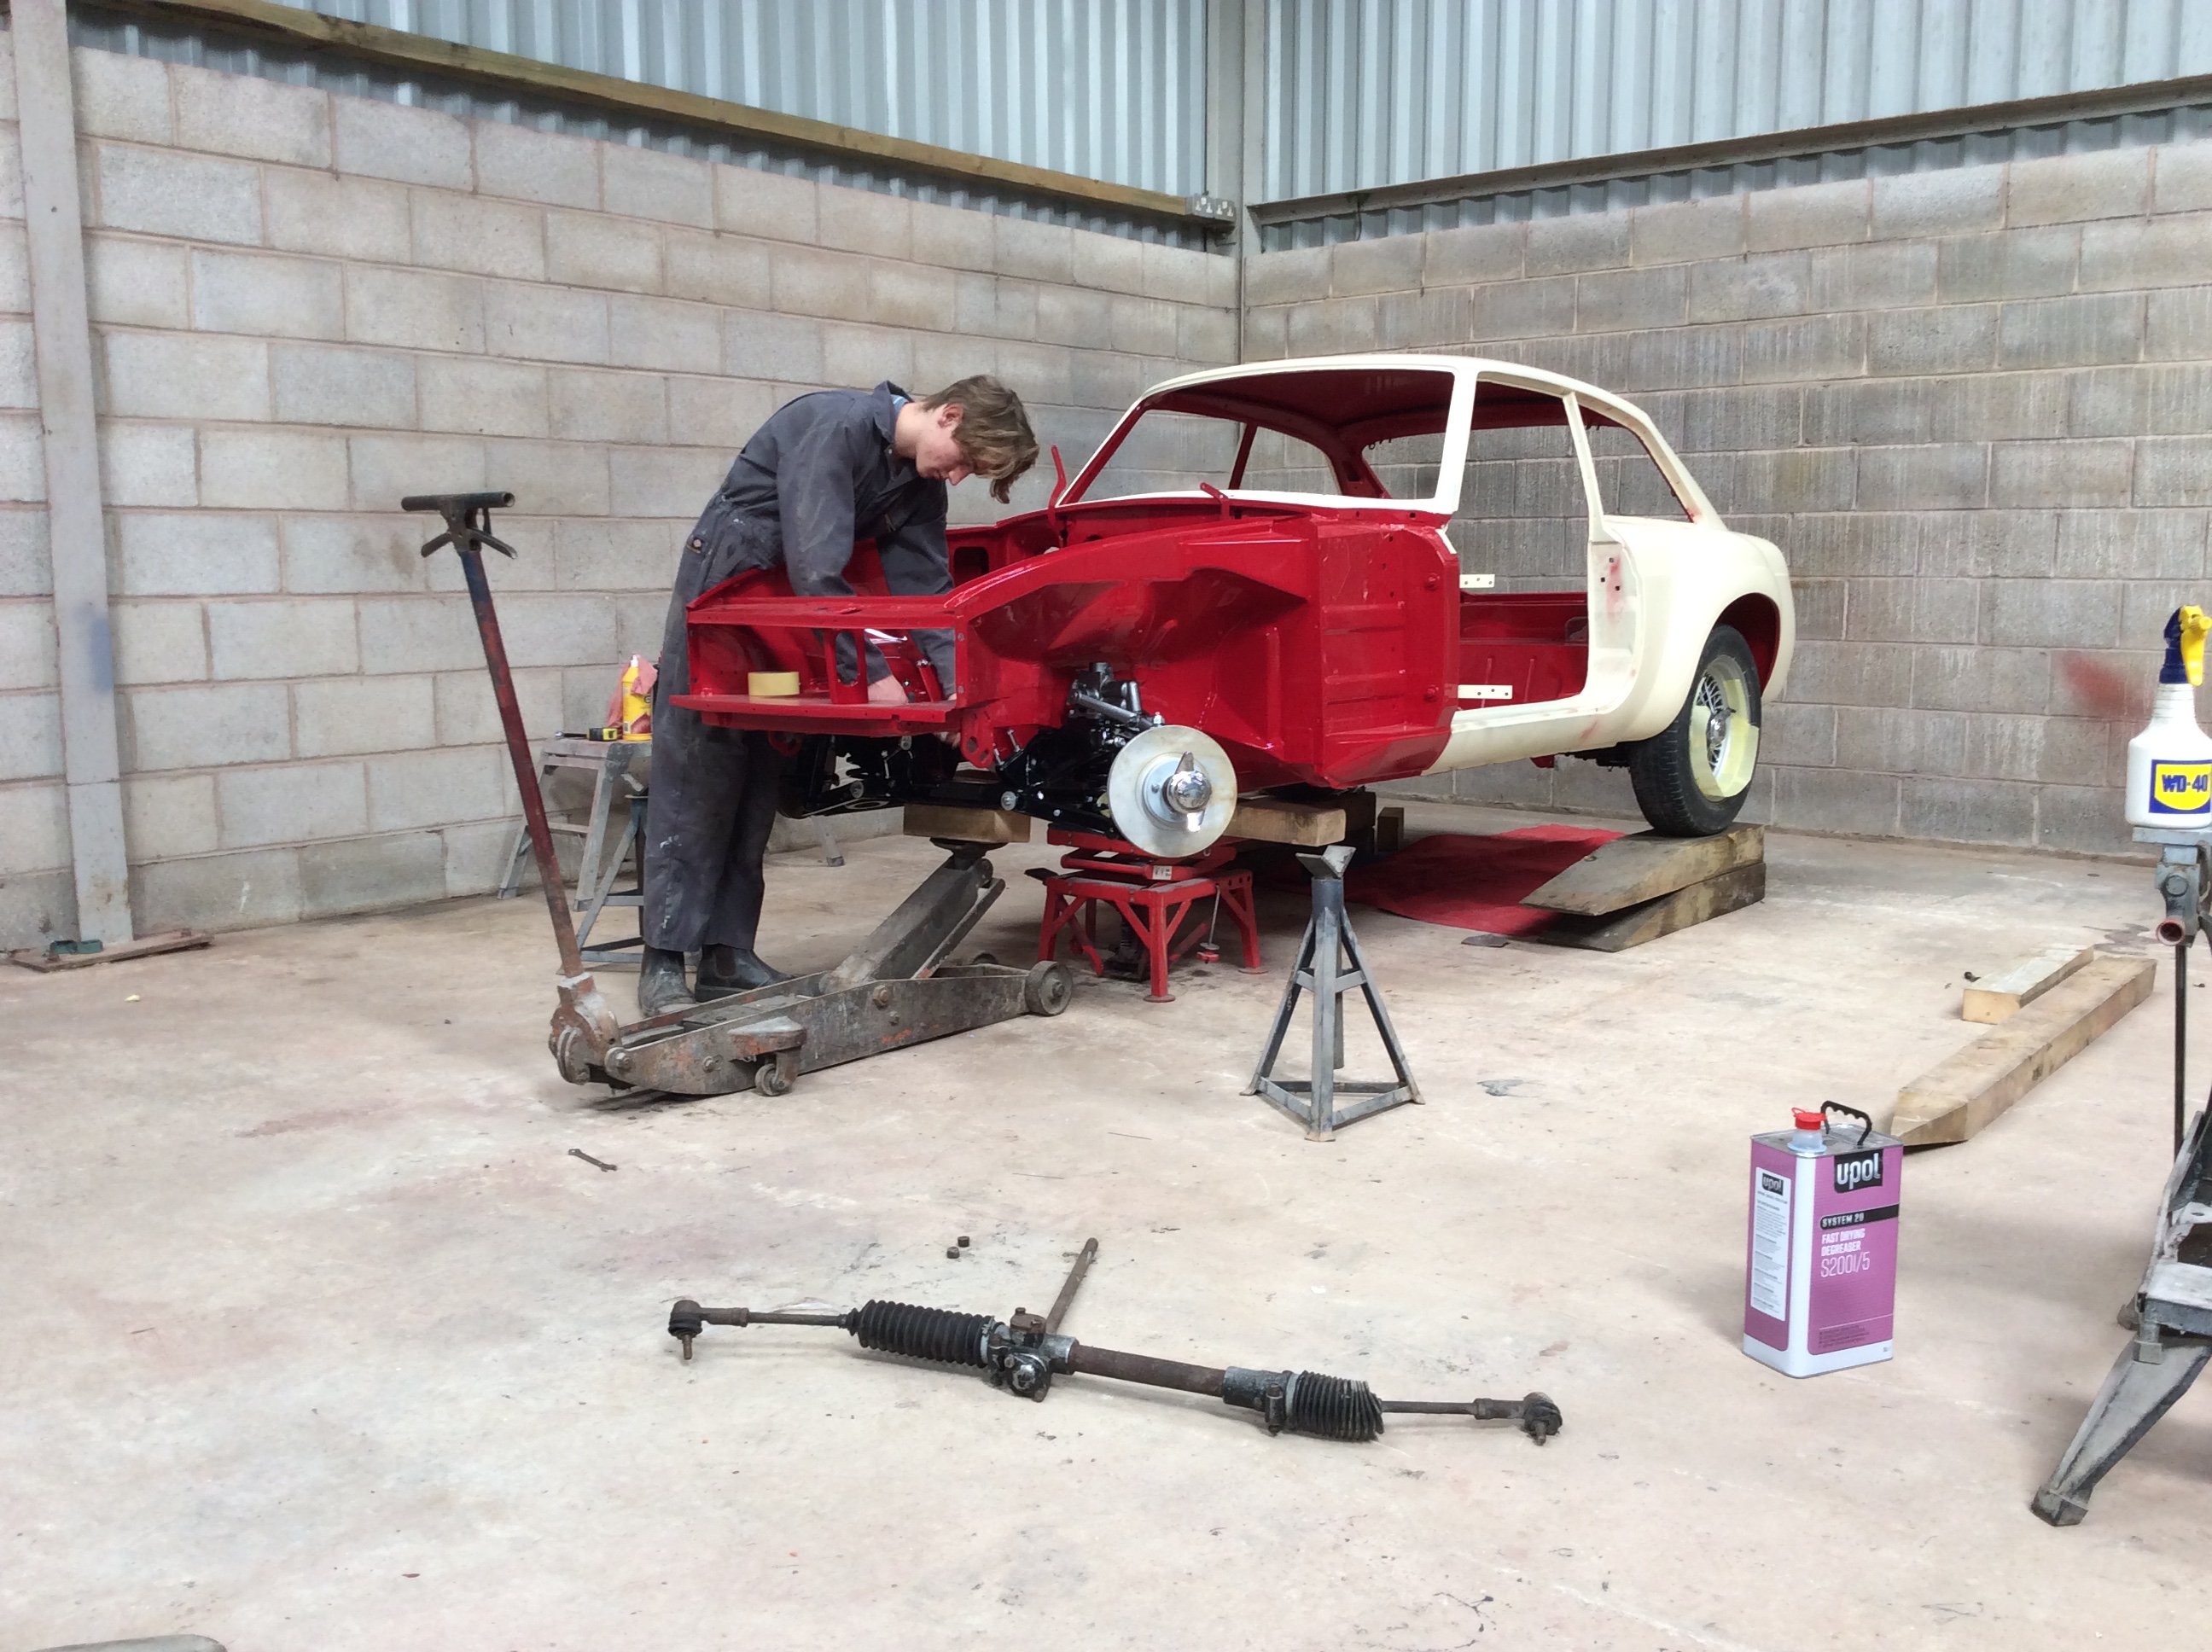
11th April 2020
I have a little hydraulic lift for my motorbike that has come in really useful on Harvey’s car. We used it here for lifting the front crossmember up to the chassis legs for bolting that in place. Fiddly thing that seems to be in getting the front 2 x pins up through the location housings. We put some thin lock wire around the top thread of each bolt / stud and fished them through as we raised the crossmember.
Front section of the rotisserie is now unbolted and we’re popping the old steering rack on so the fro t wheels aren’t going to be poking any which way they like. The strange looking thing around the rear wheel is how wide they’re going to be.
=============================================================
27th April 2020
Harvey got the heater box stripped and prepped on Sunday so I got that painted after dinner. It turns out the parts car he’d bought ages ago had a brand new oversize heat exchanger fitted inside it’s very scabby casing...... it pays to look inside things doesn’t it. I almost threw it on the scrap pile, but pleased we had a quick look.
A new seal kit and fittings has it all back together and inside the engine bay. Fitting this wasn’t so difficult as we’d read about. We put electrical tape over any parts that may get scratched and also a bit of thin cardboard behind the little tab on top to stop that marking anything, but no real drama in fitting it at all. He sprayed on some cavity wax that we have in an aerosol to where the heater sits on the bulkhead and also a few points inside the actual casing during assembly. There’s stacks of other little bits gone back on, but it doesn’t look like much has been done.
A new wiring harness got fitted - a doddle of a job on a bare bodyshell, plus a new brake master cylinder too. We bought an assortment of UNF nuts, bolts and washers which is handy. I know we’re going to end up with loads left over, but it’s a real pain when you can’t fit something because of a simple fixing.
============================================================
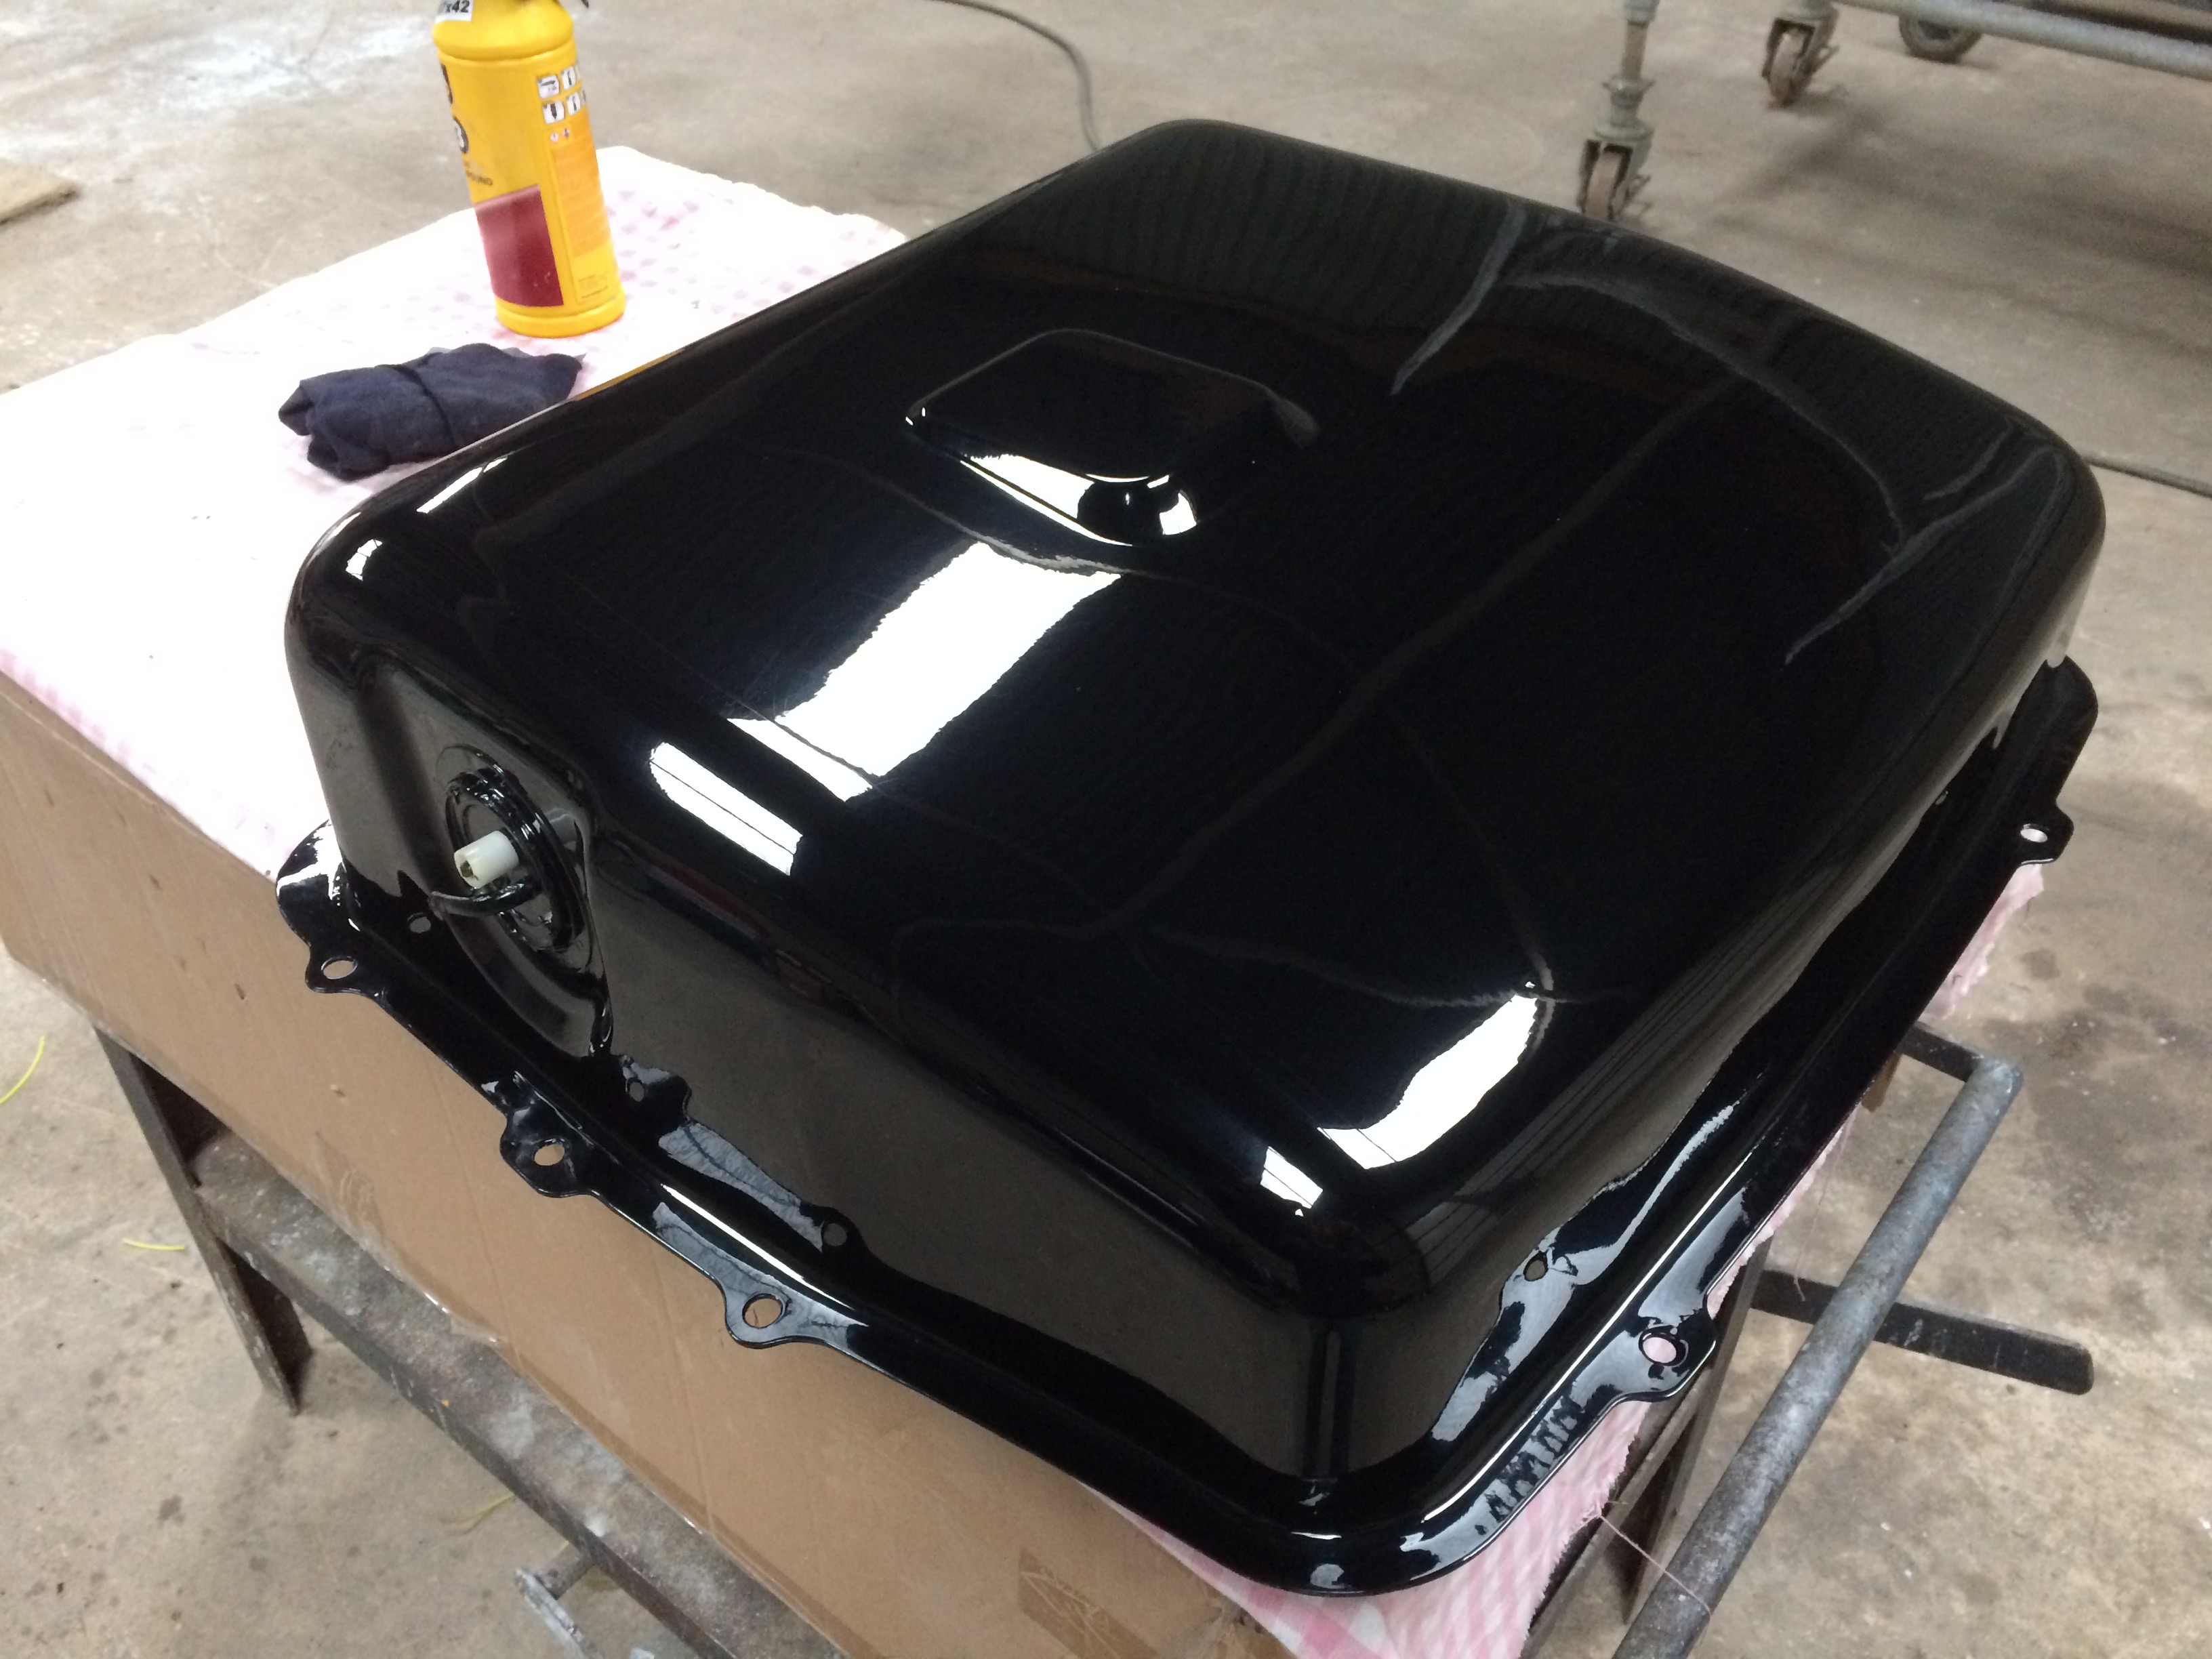
3rd May 2020
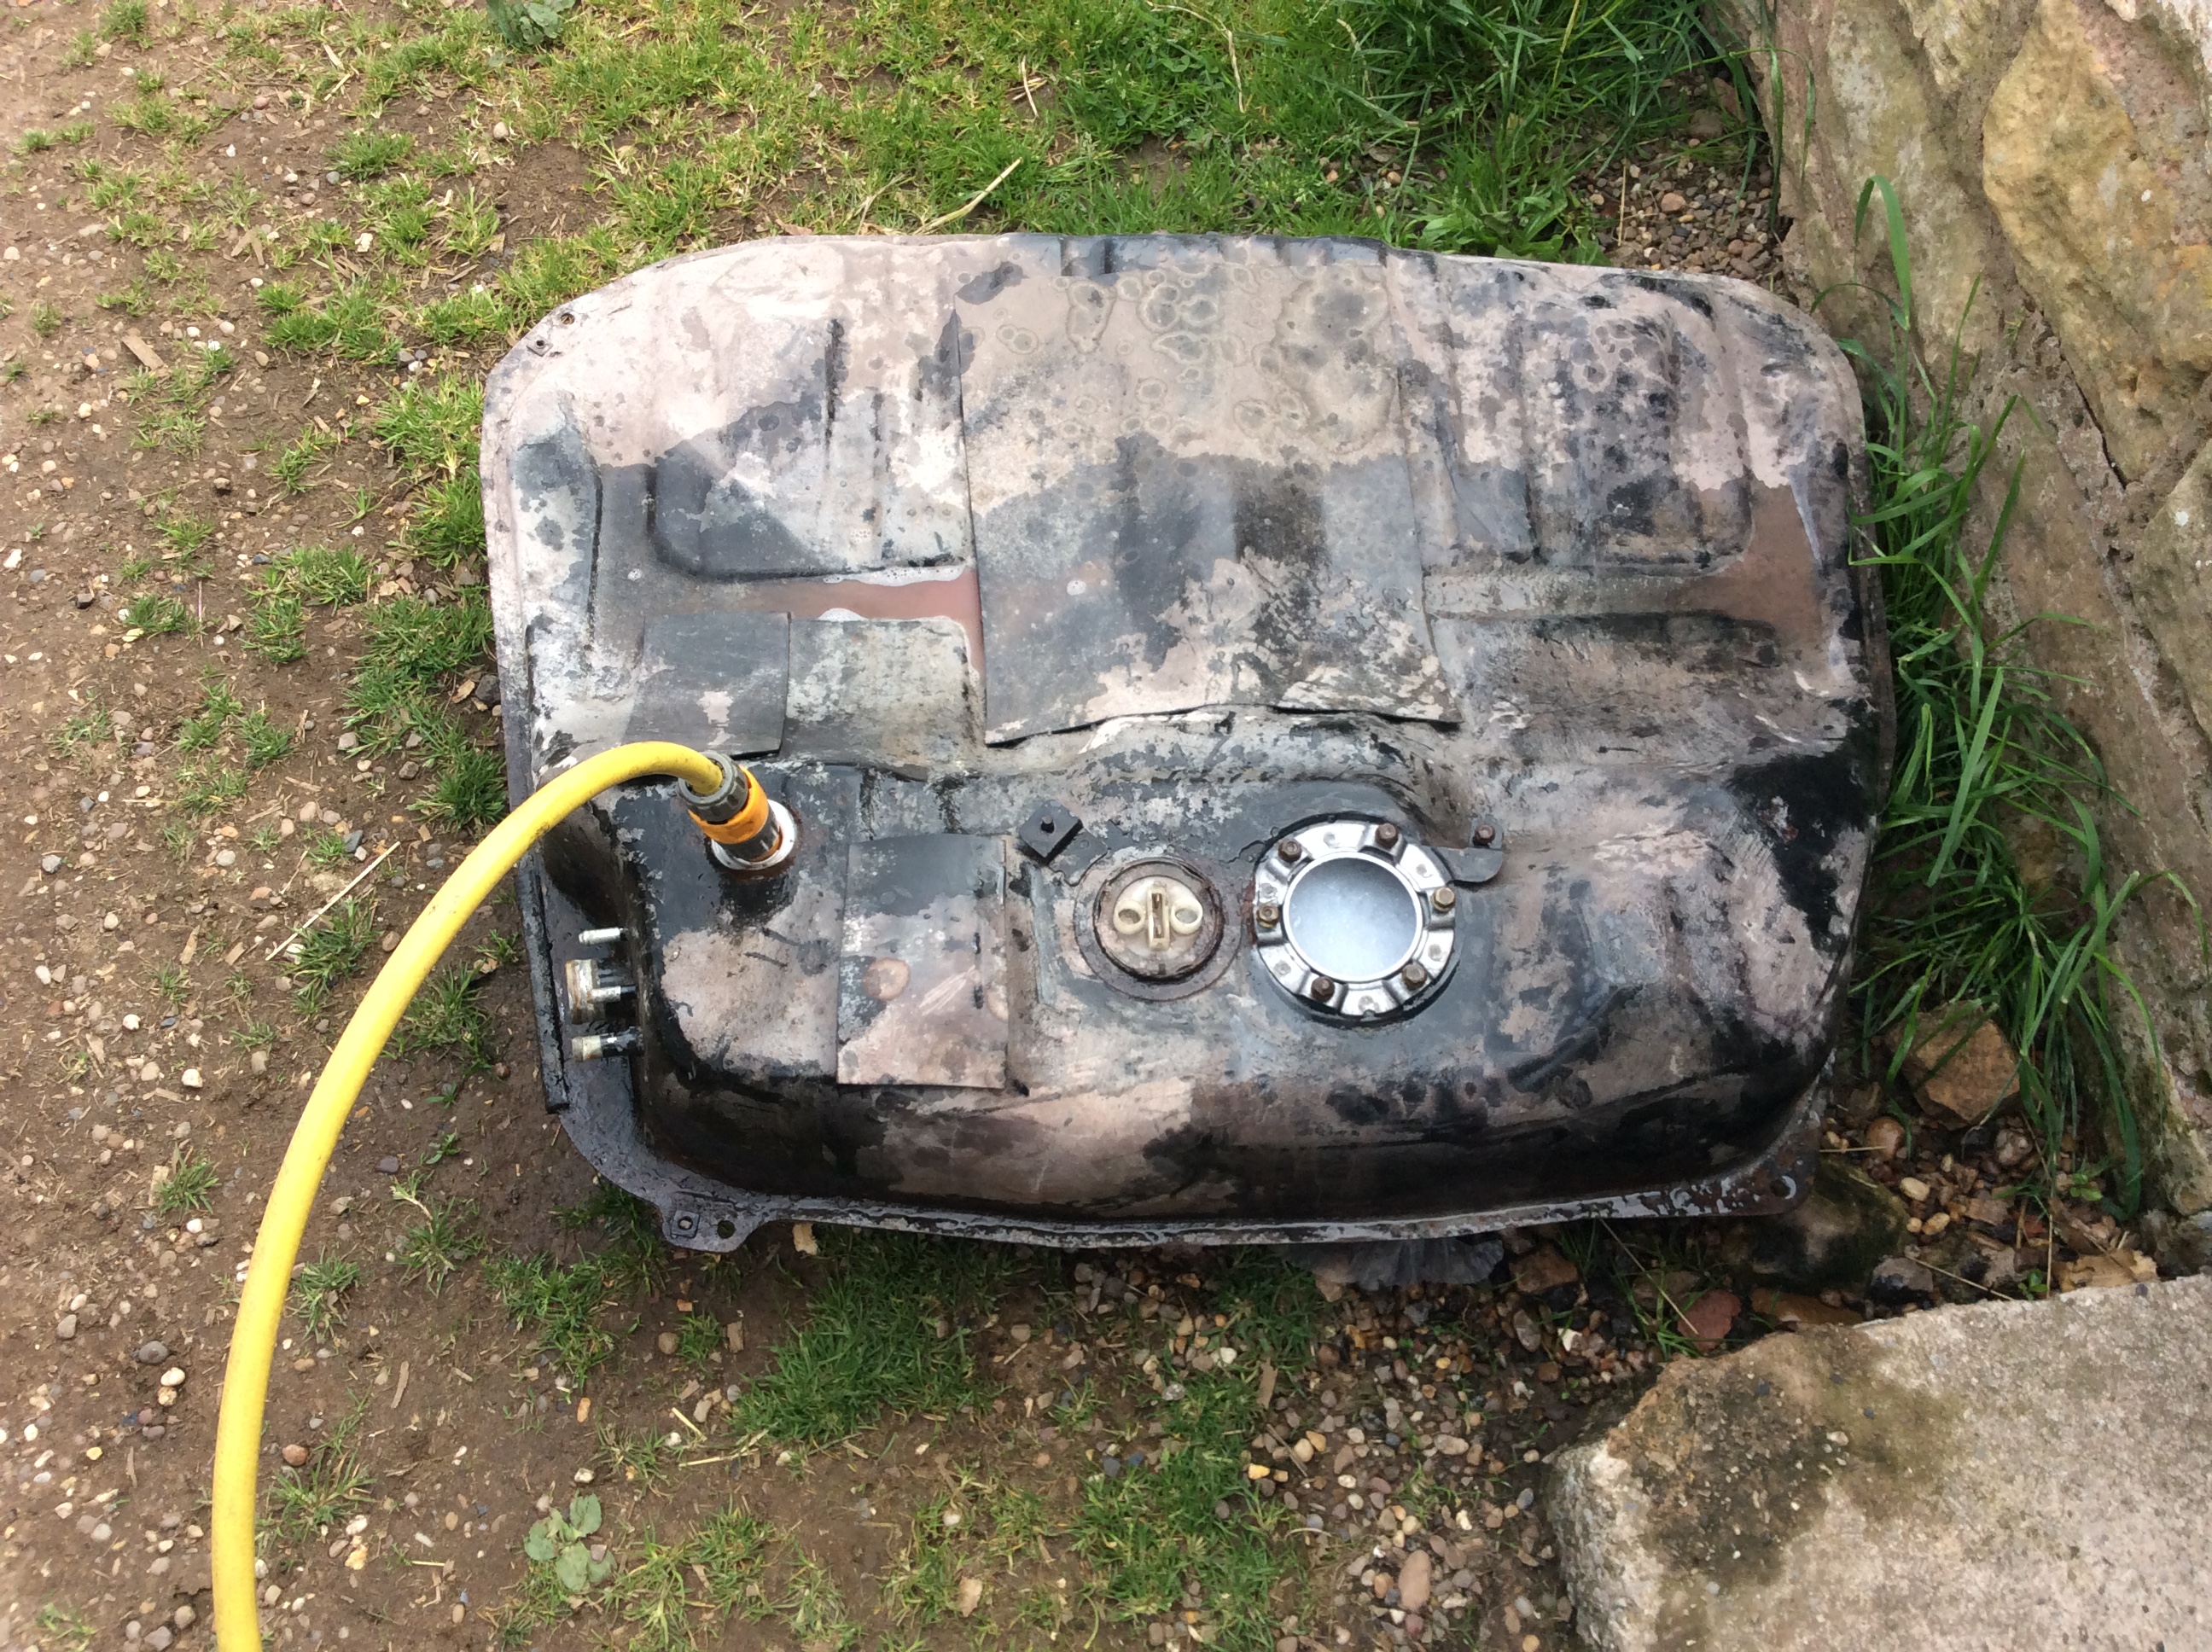
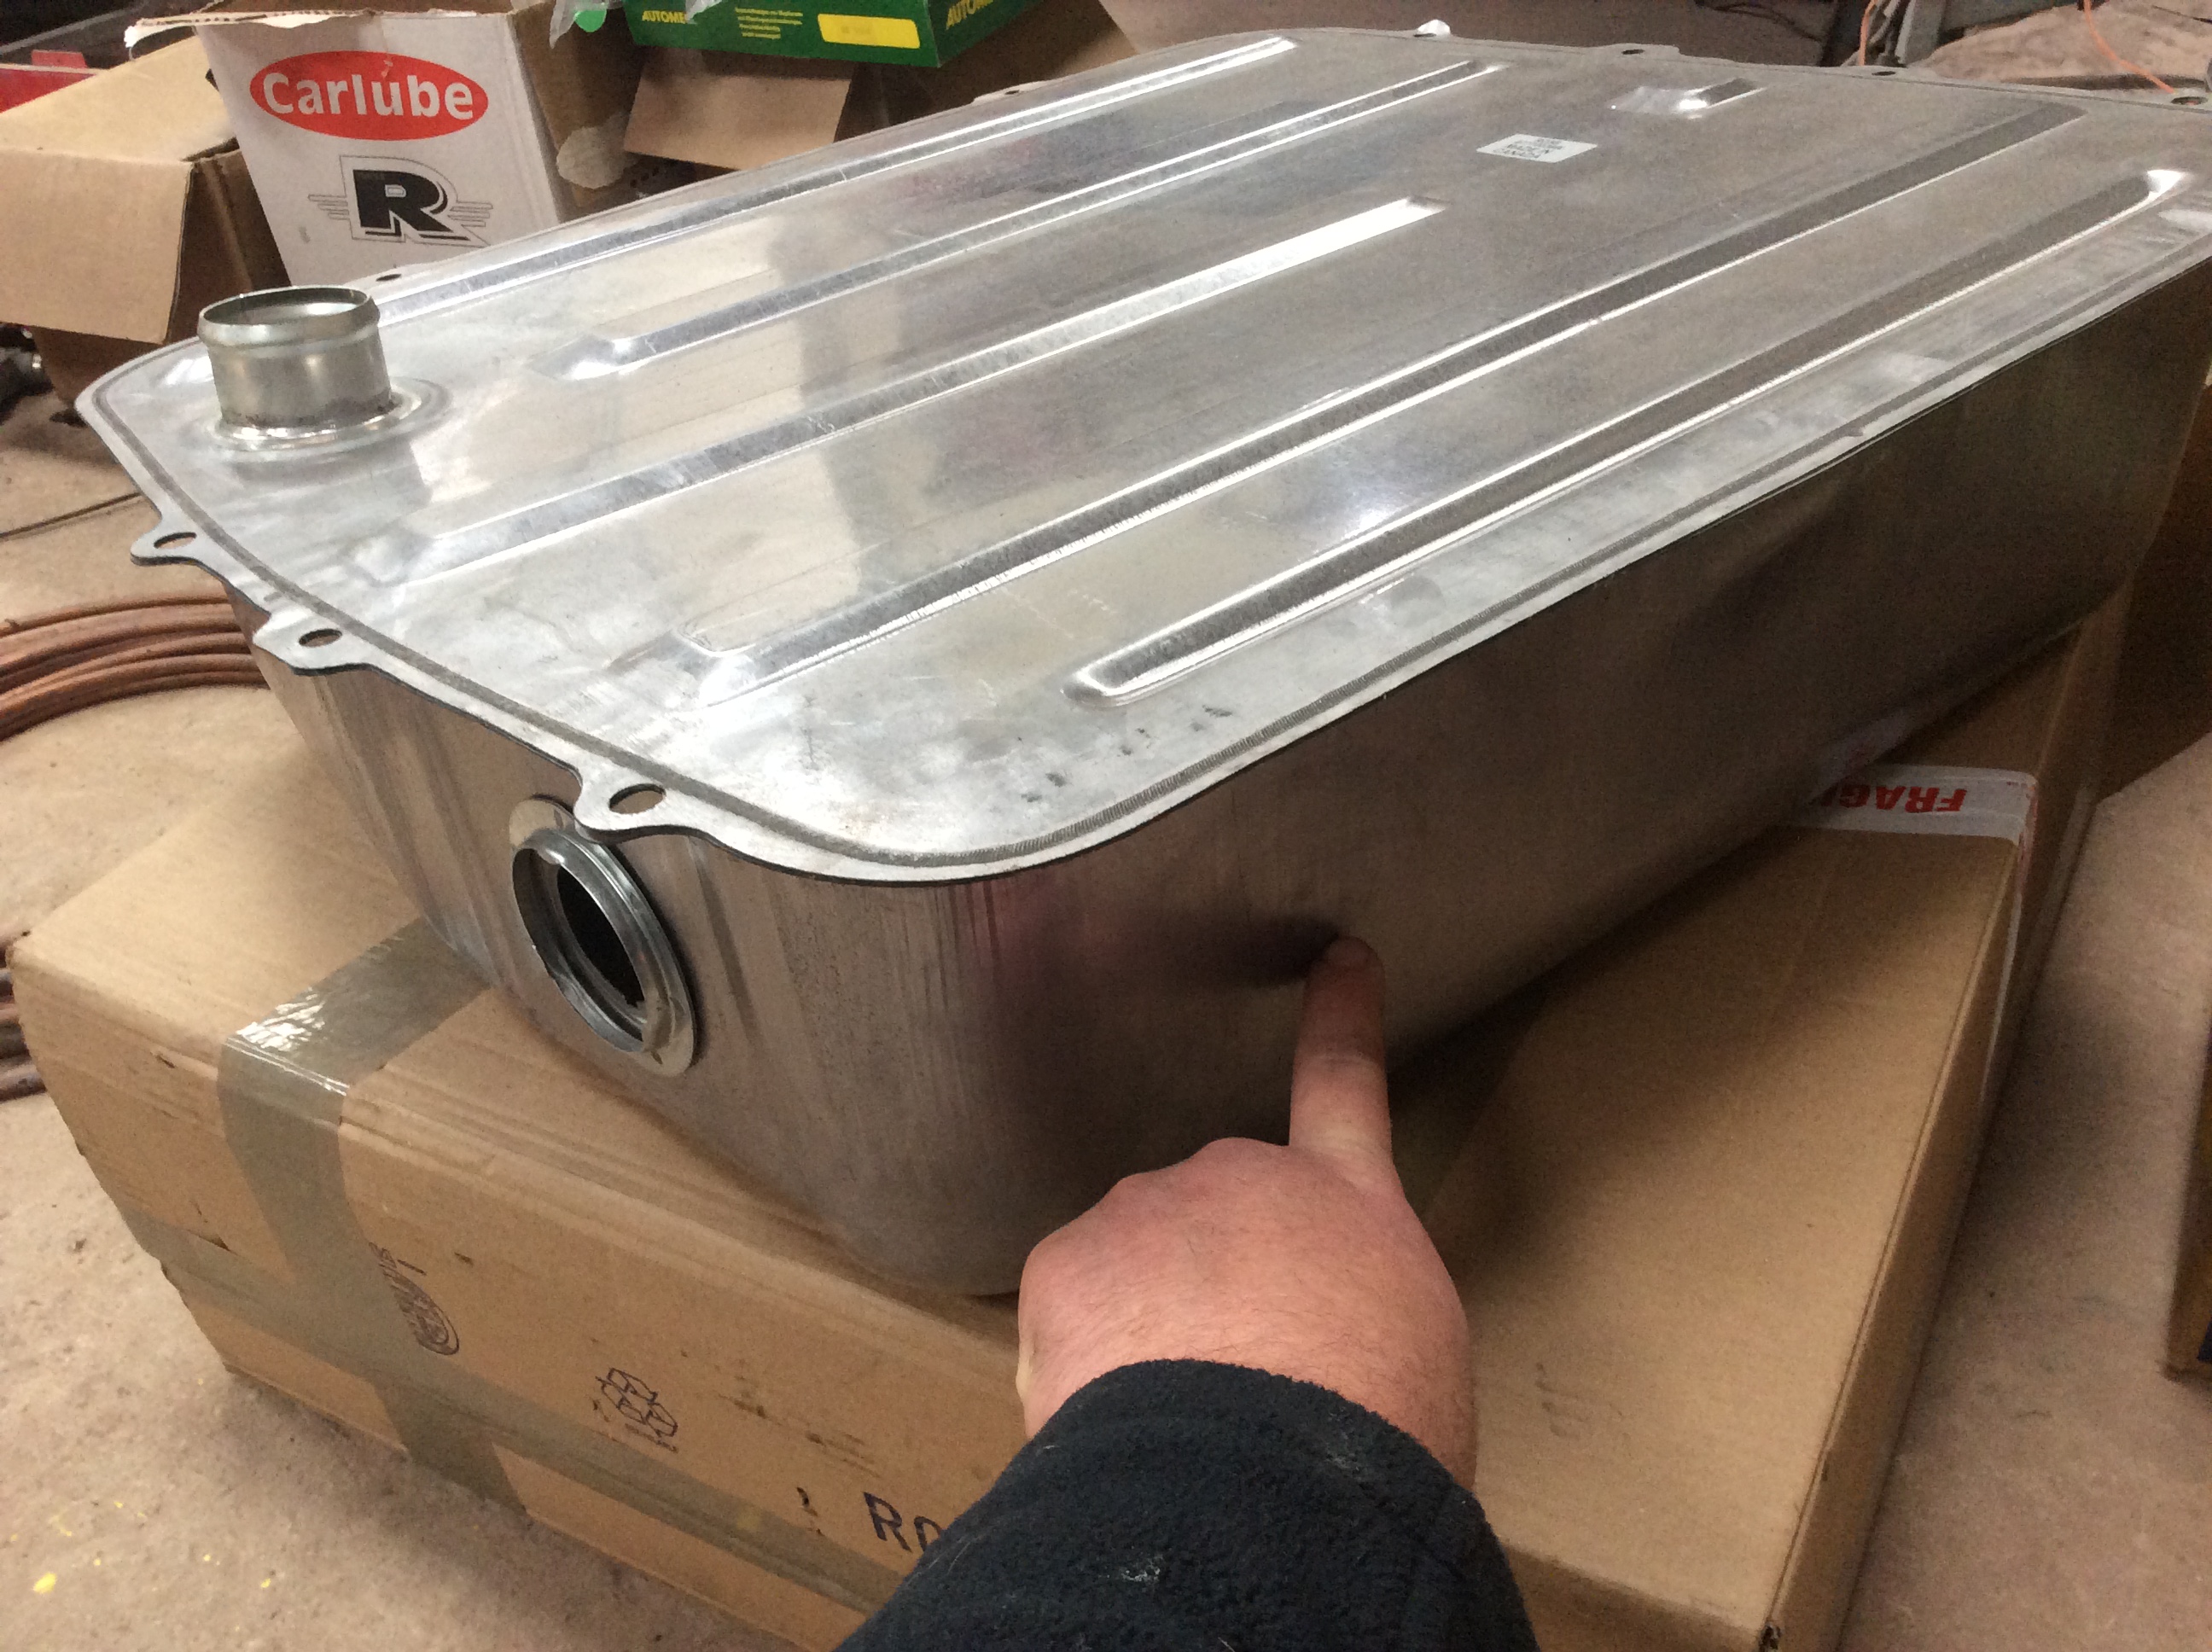
The round bit from this old Rover petrol tank is getting grafted onto the new MGB tank where I’m pointing with my finger. We re-painted the old tank that came on Harvey’s car about two and a half years ago, but we weren’t planning for an engine conversion then. As a project, it’s been much more involved than we initially planned too, so we bought a new tank for it. Would almost be a shame to put an old tank back on.
Rinsed the old Rover tank out a few times with detergent and water, so this section which the fuel pump bolts onto can be cut off and trimmed ready for welding onto the new MGB tank.
=============================================================
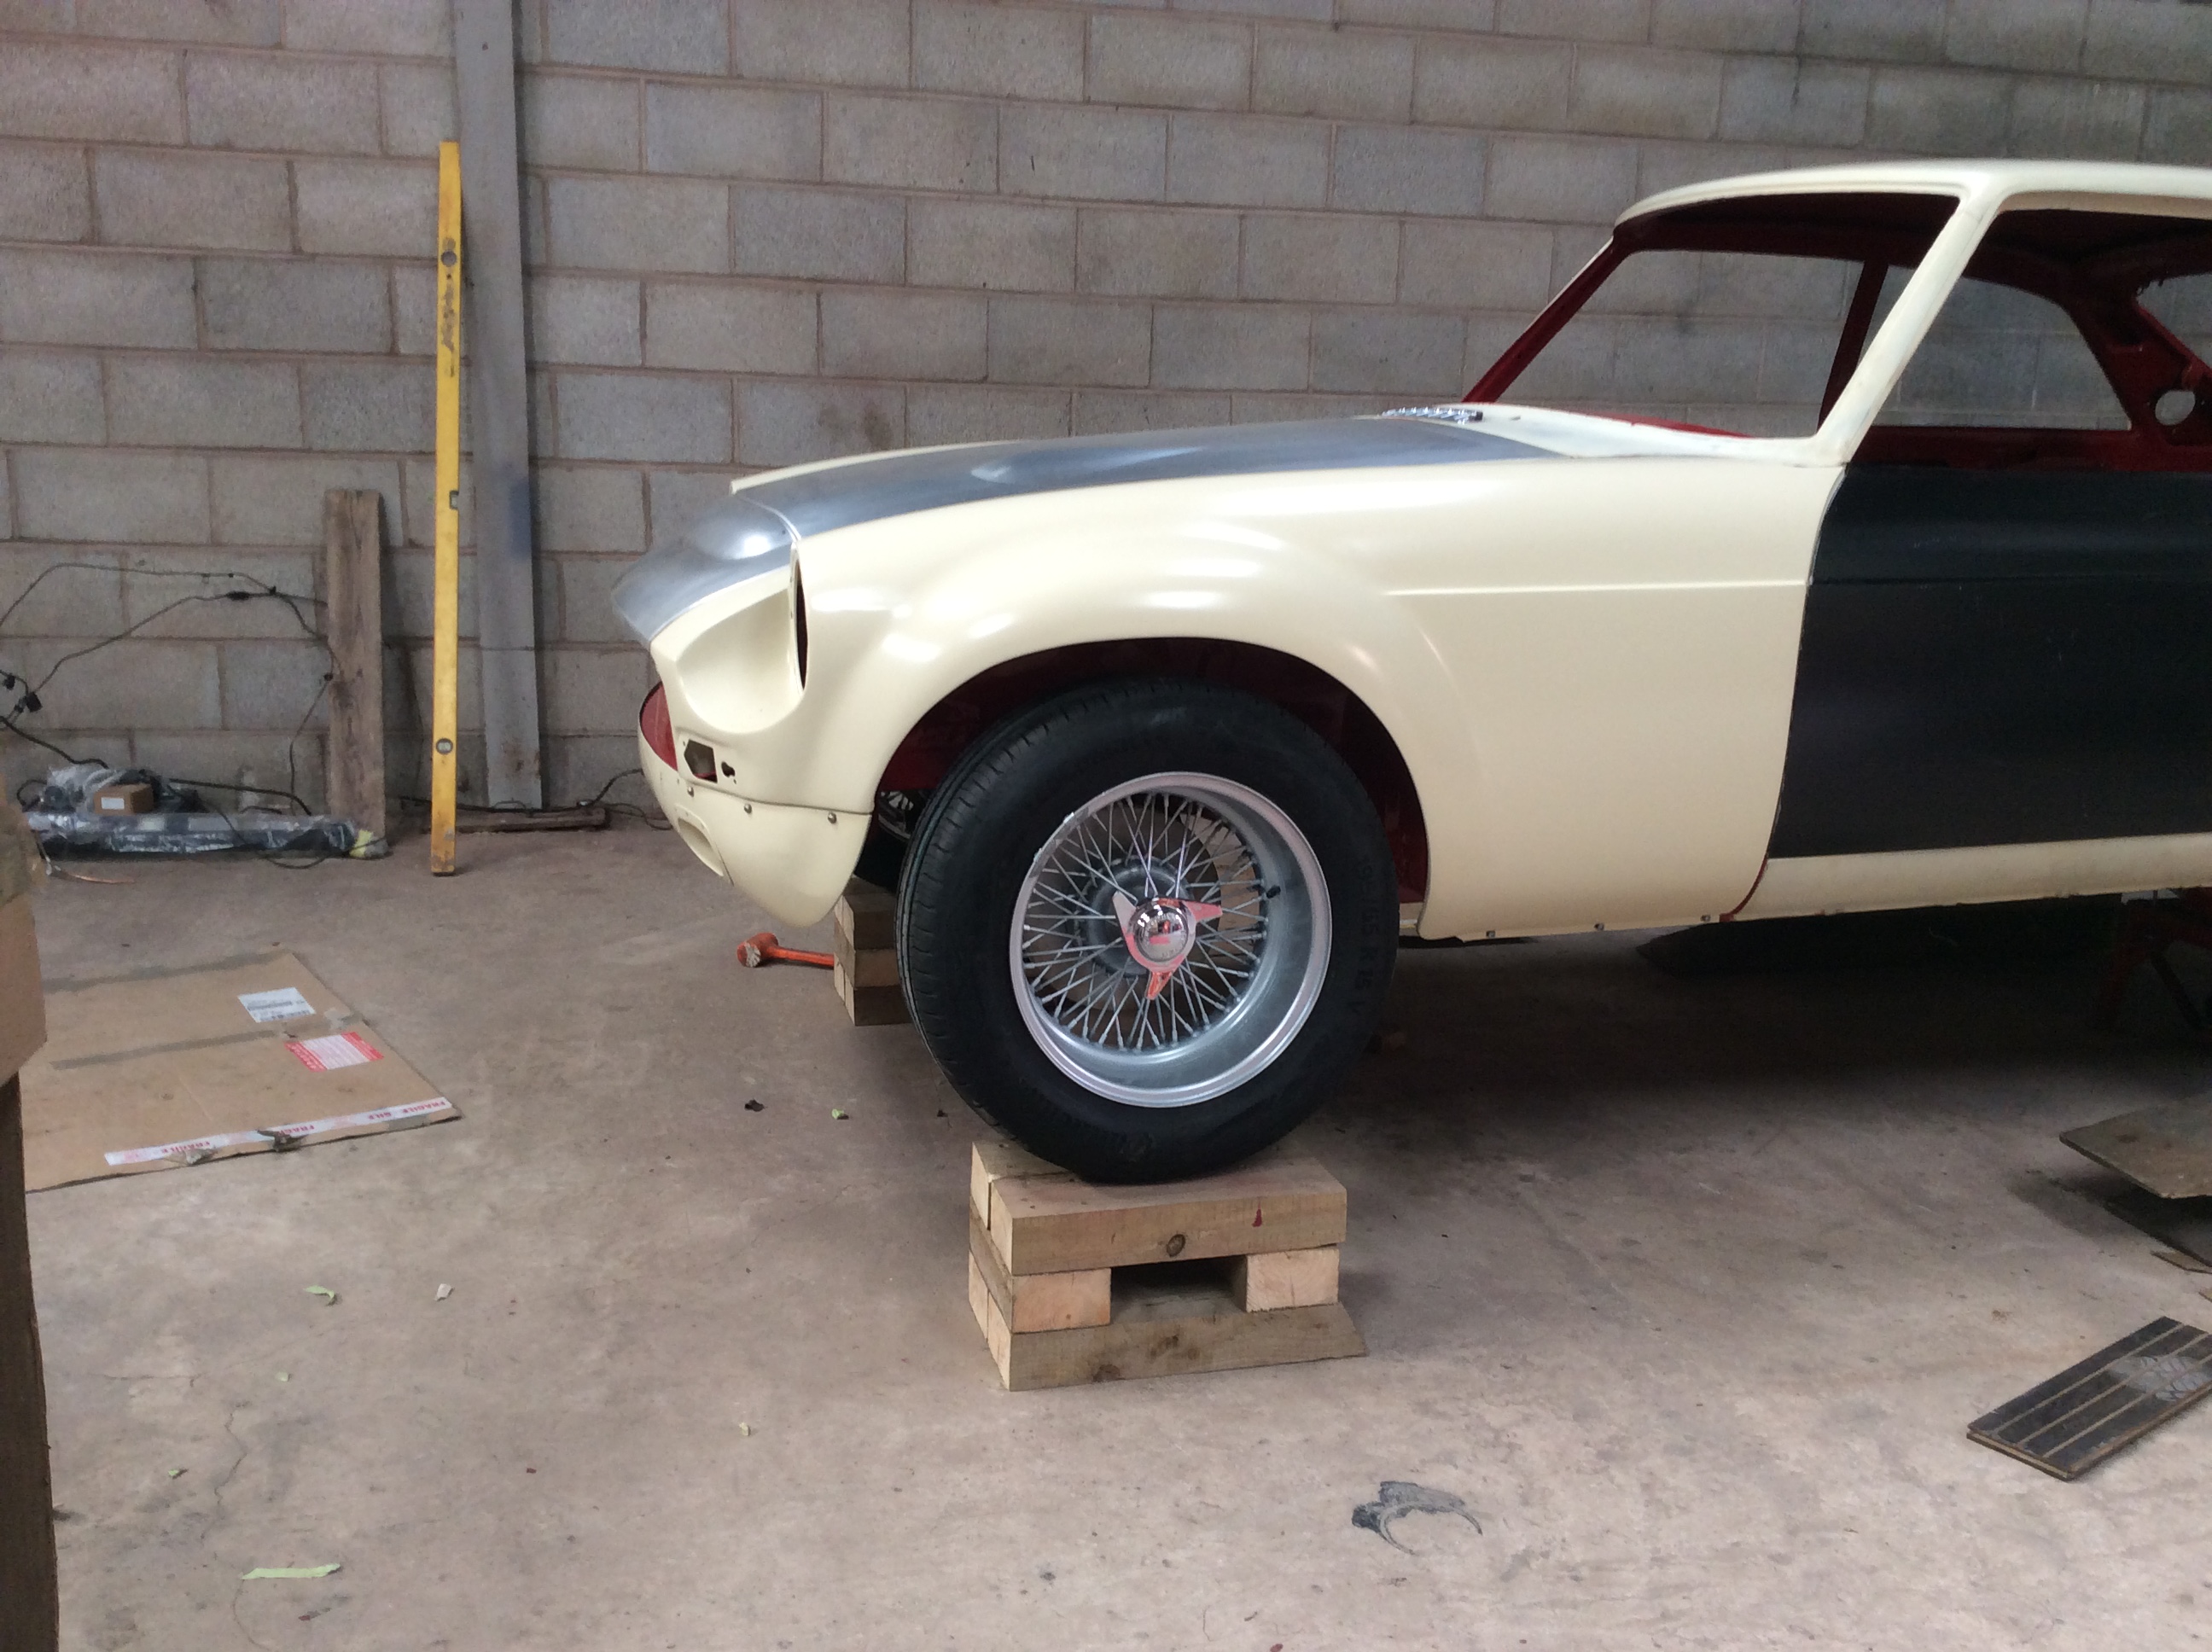
5th May 2020
Meanwhile, we have a pair of front wheel & tyres fitted with 3 eared centre caps. I cheated and got them powder coated, but they had an etch coating before a dusting of wheel silver and it’s not thick at all. No thicker than if I’d sprayed them and they look brill. 195 /65 15 on the fronts and 215 /60 15 Continentals for the rears which will be fitted tomorrow.
===============================================================
7th May 2020
All wheels and tyres sorted and fitted now. I wanted to check the ride height on the front to make sure both front wheels didnt interfere with the valance, but a few timbers spanned from the front crossmember with the equivalent weight of the engine and gearbox from some tractor weights did the job.
Another job needing doing is to fit new clutch and also brake lines. I don’t have a flaring kit and the simplest route was to buy the ore-made kits. Having the originals still to one side helps with positioning of bends and where they are clipped up too. I’ve got a small pip bender that is handy but you could do this with your hands.
Brasso came out before pipes going on finally though .

==============================================================
10th May 2020
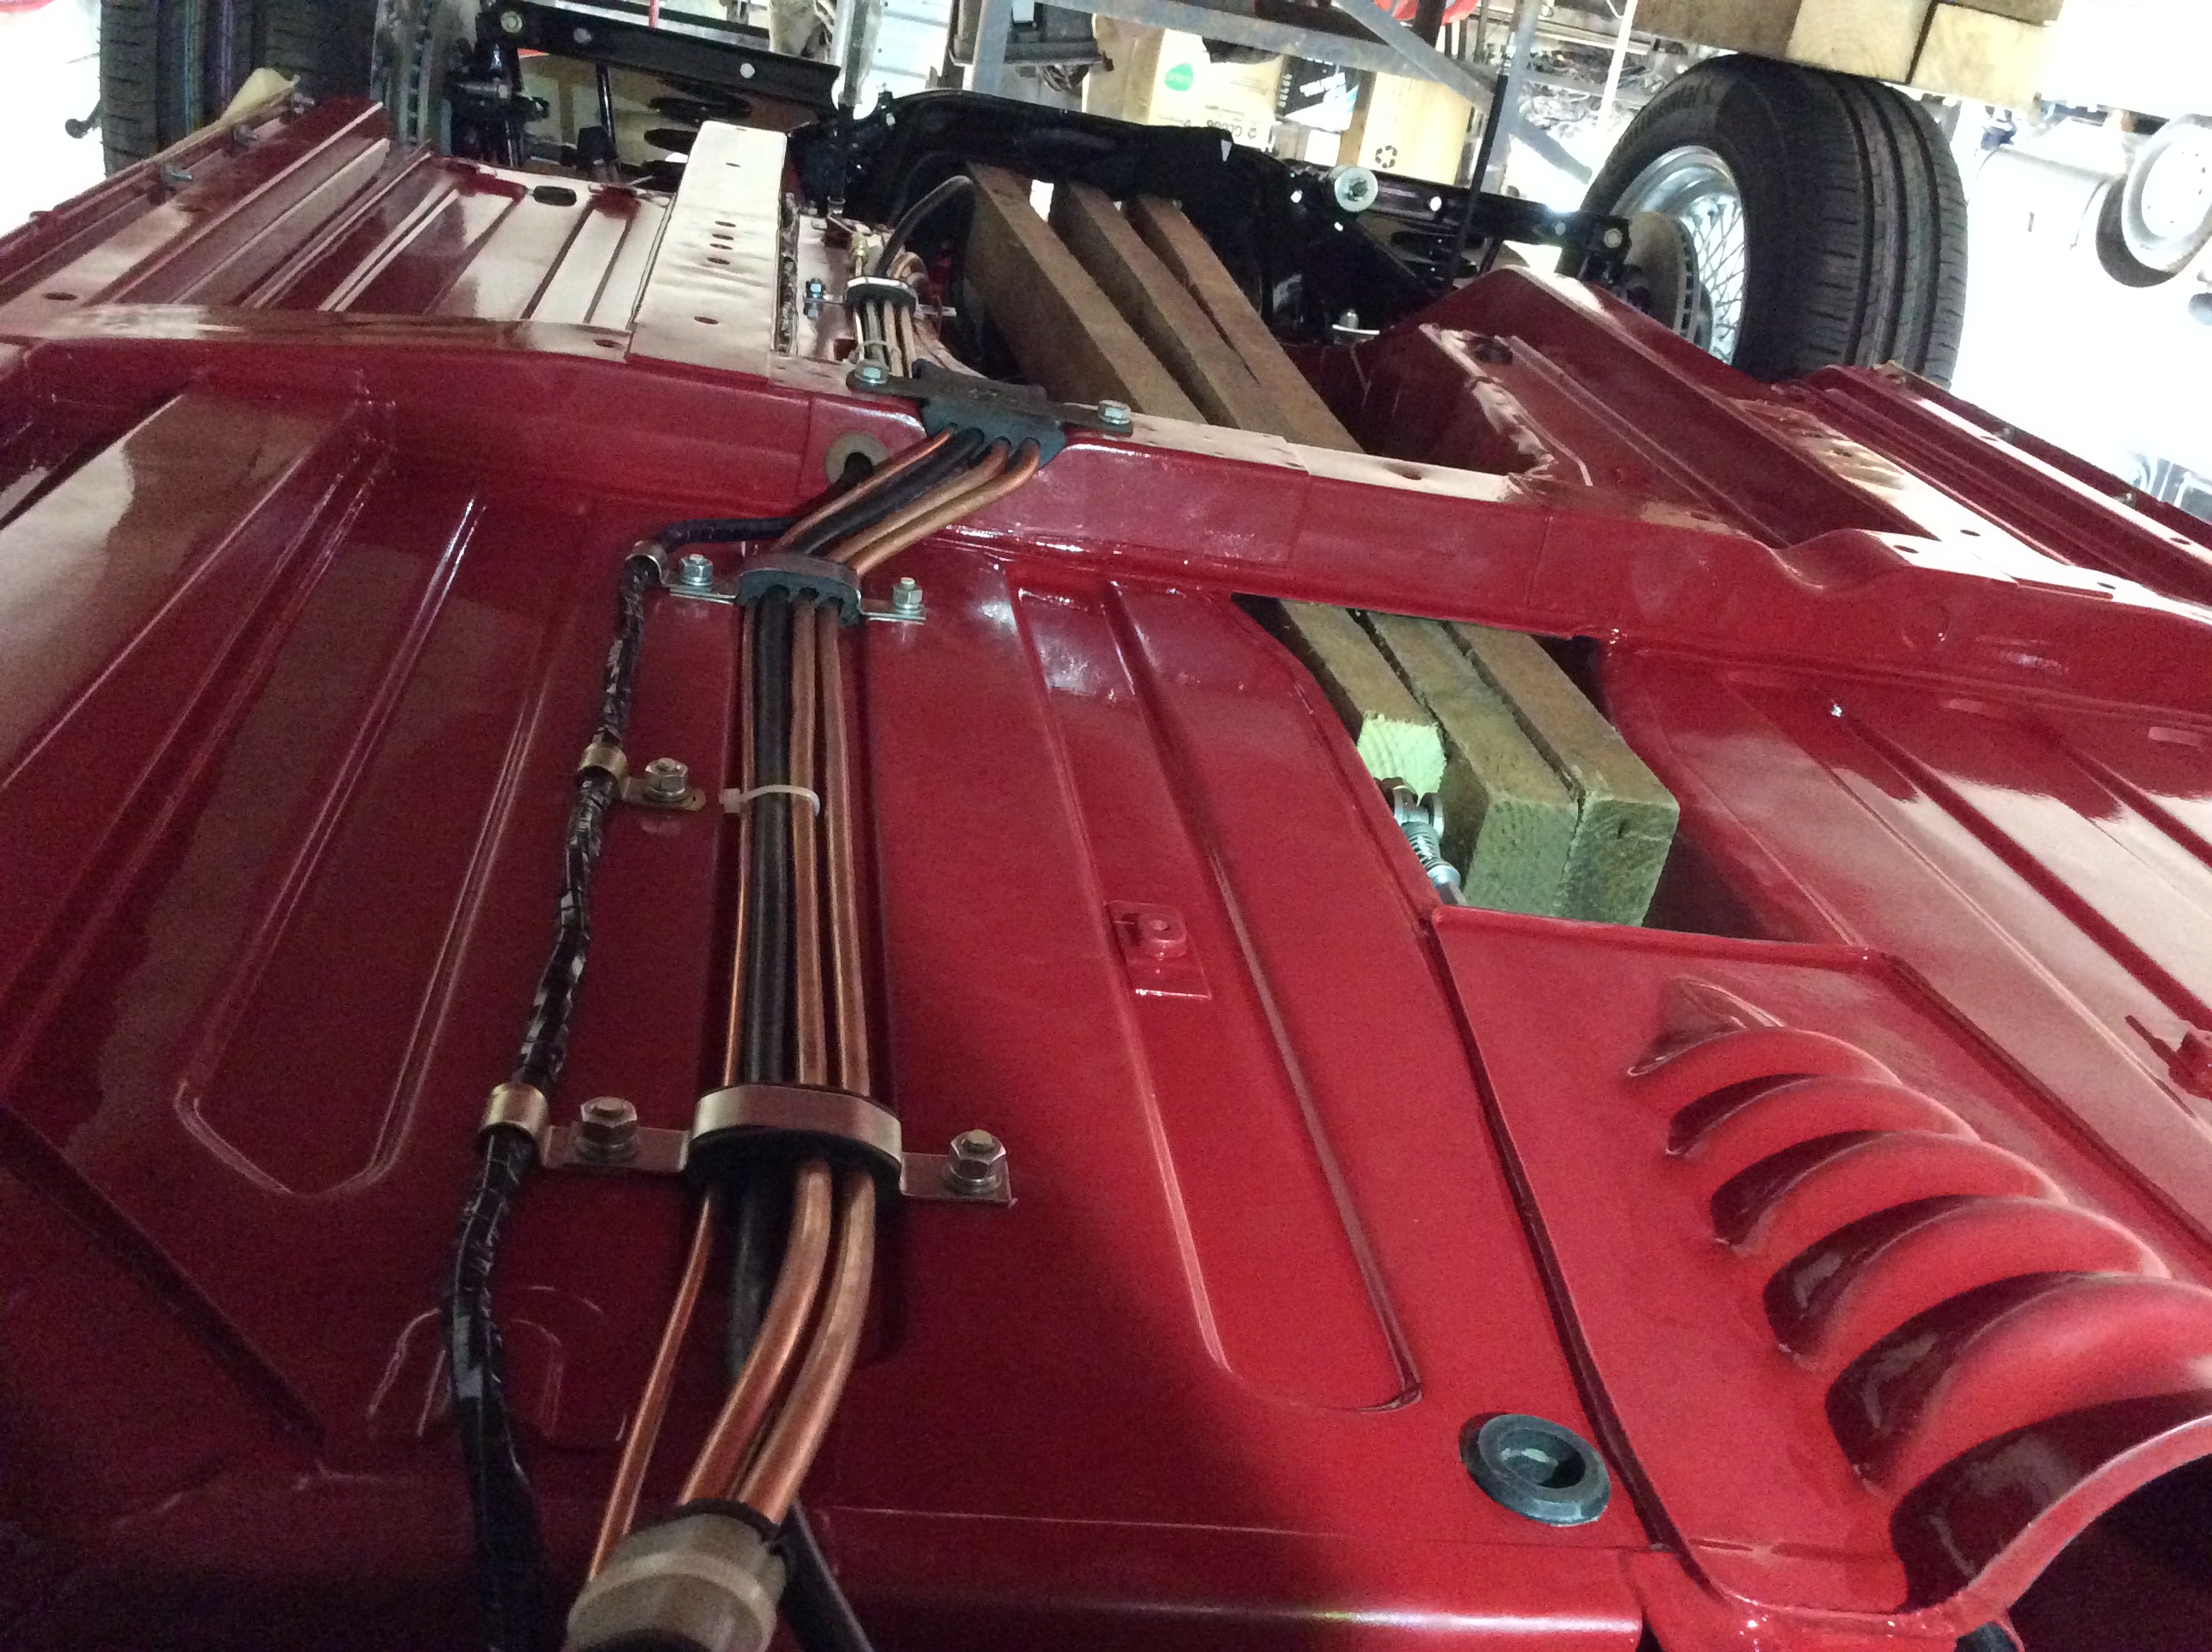
A pair of 5/16 (but says 8mm on the packaging) fuel lines now fitted to the underside, along with the brake pipe, starter motor cable and also wiring harness. Harvey ordered a kit from Ashley Hinton where the brackets are stainless and really good quality - we just need a new flat piece that spans the centre crossmember and this is another job done.
A bit of patience needed in getting the two fuel lines bent parallel to each other as they run through the hollow in the crossmember, but they fit rather well and it looks as neat under here as I can get it. I’ll be on #2 fuel tank in the next few days, but am going about it slightly differently. I looked at a swirl pot option for feeding the fuel injection system, but it would be a low and high pressure pump with a 2 litre pot - but like a low loss header really. From my understanding, the low pressure pump supplies the pot and then the high pressure pump shunts over to the fuel rail. There’s a pressure reducing valve as a factory thing on the Rover engine already, so the return back to the swirl pot is then lower pressure.
I think the pump in the tank is a neater option and not wanting to cave into defeat, will be going to town on the next attempt.
Been trying to do relatively clean jobs this week as I started with an eye infection last Monday and have been struggling with it - fortunately getting much better now, but it’s been a real pain. Nothing compared to what so many are enduring at the moment, but hinders progress when you want to crack on.
Can see we’re a bit agricultural with the sawn down timbers to support the weights from my tractor to pre-load the suspension. Really wanted to get the engine in, but this did the job for now.
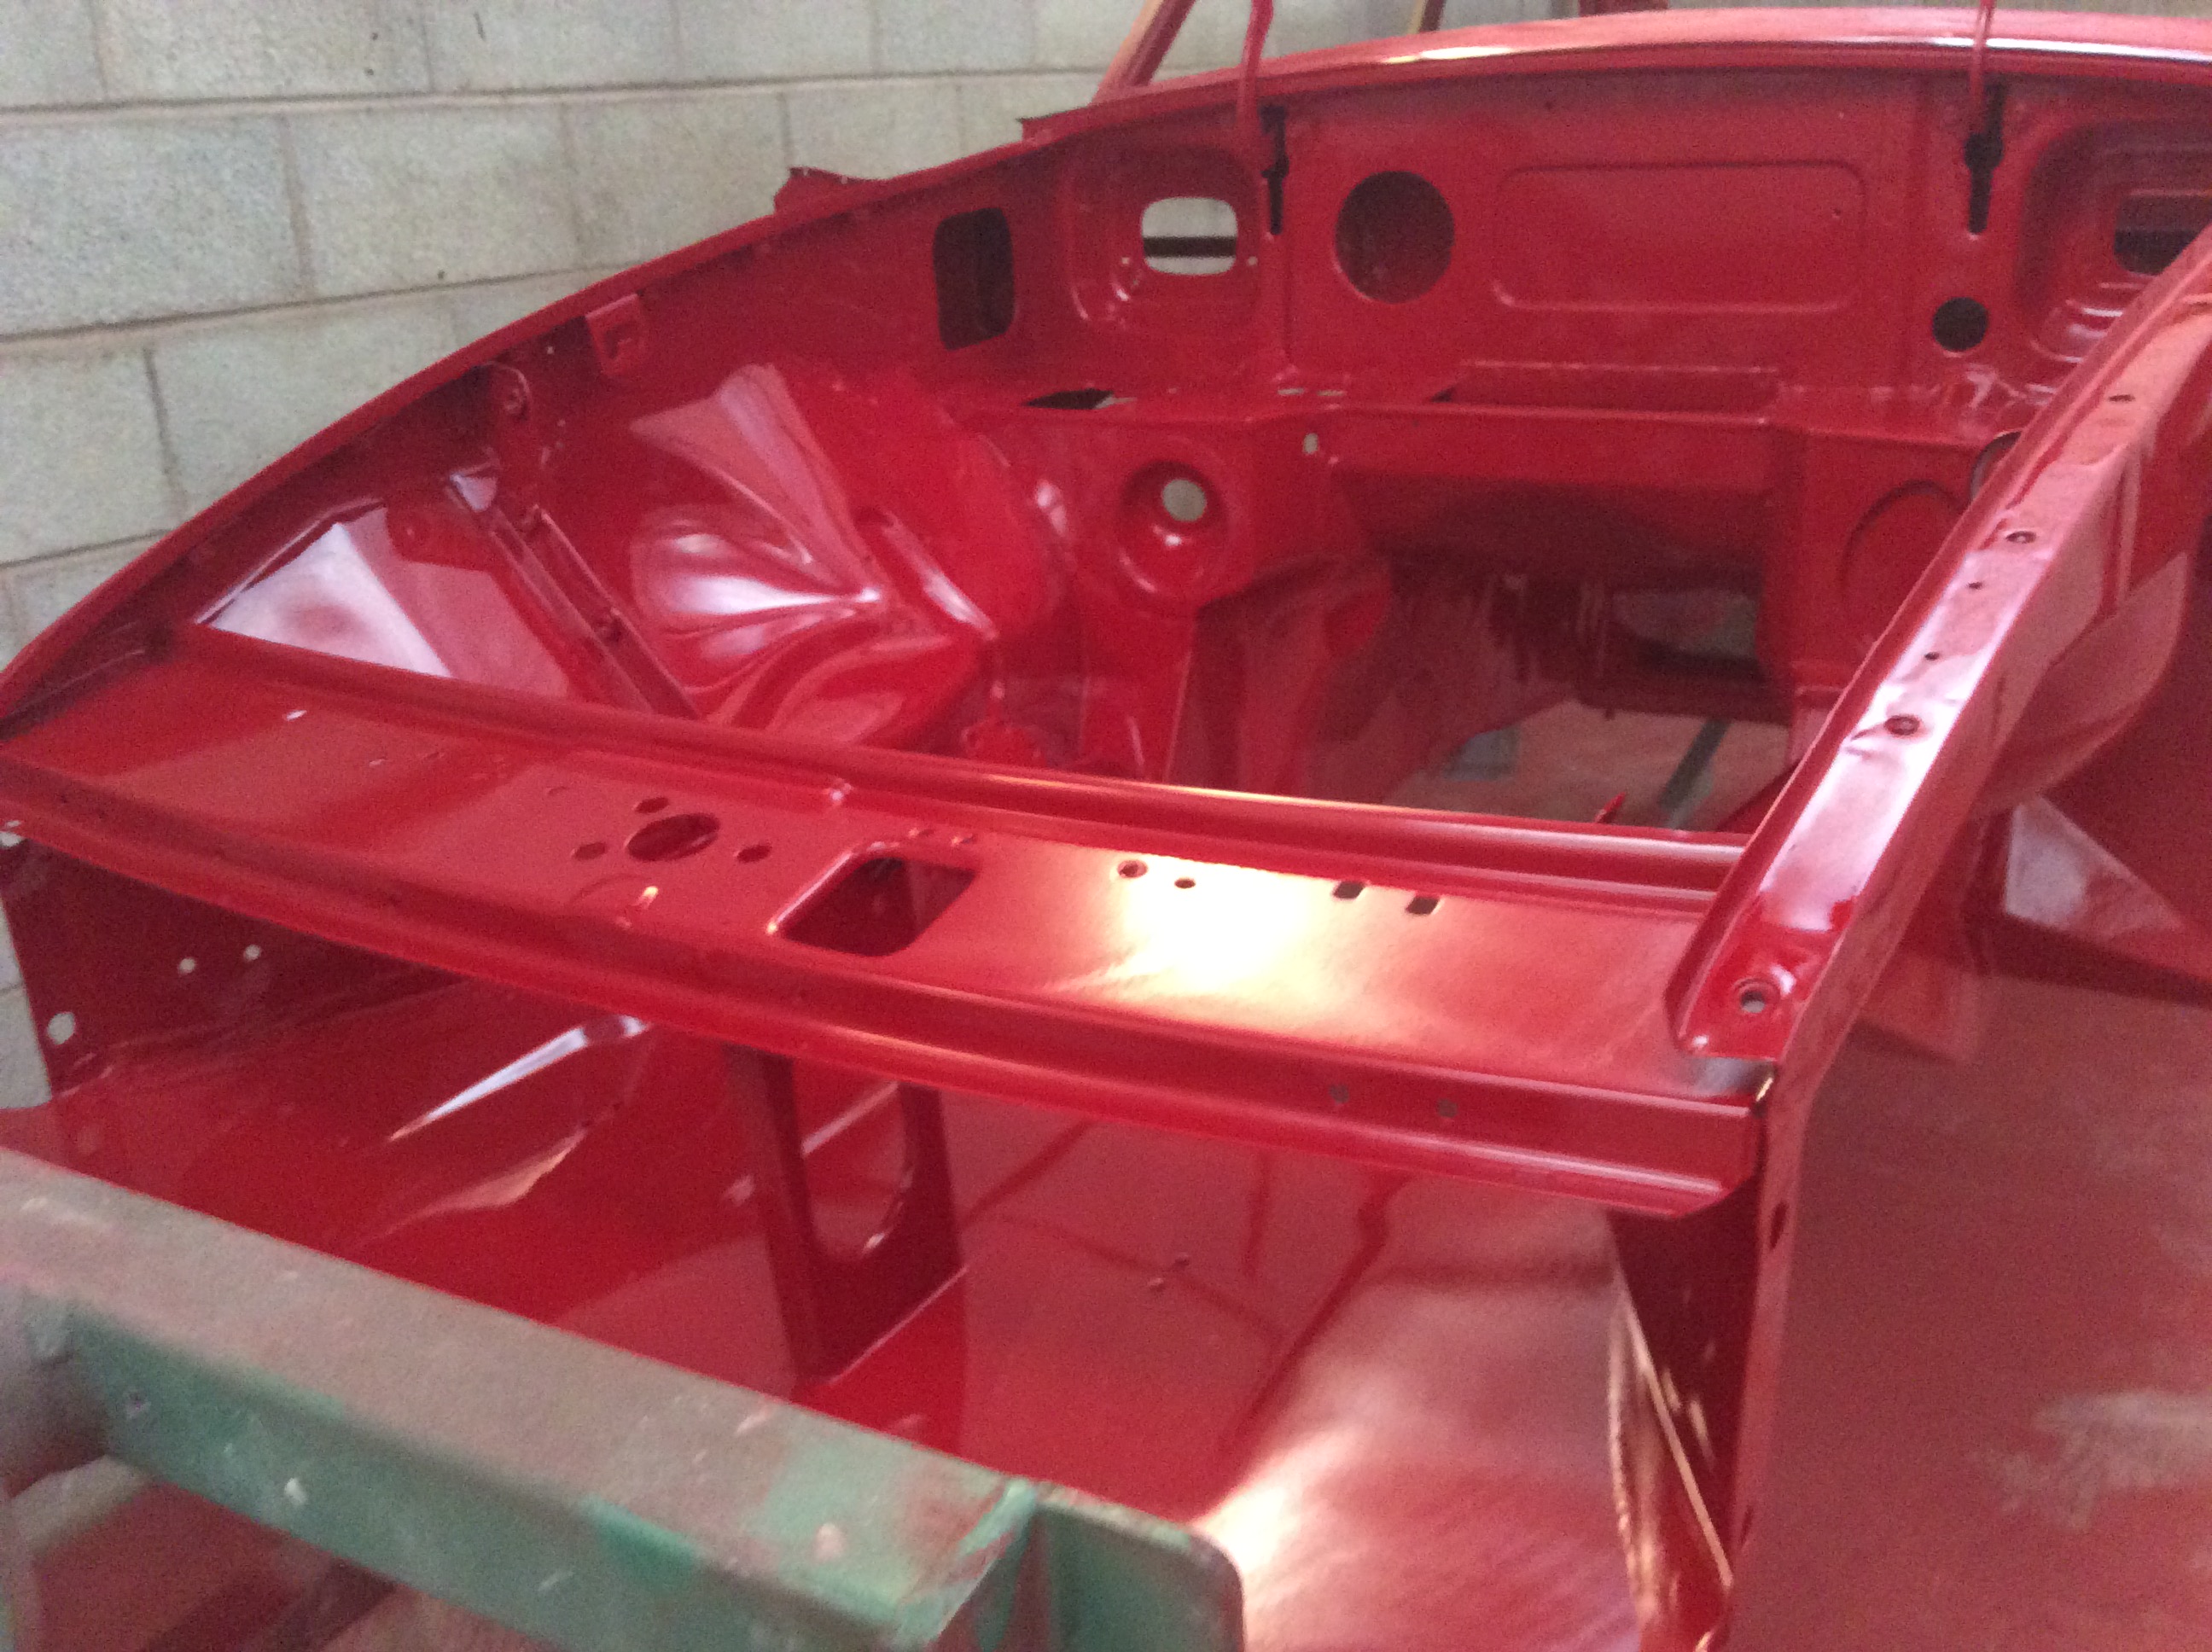
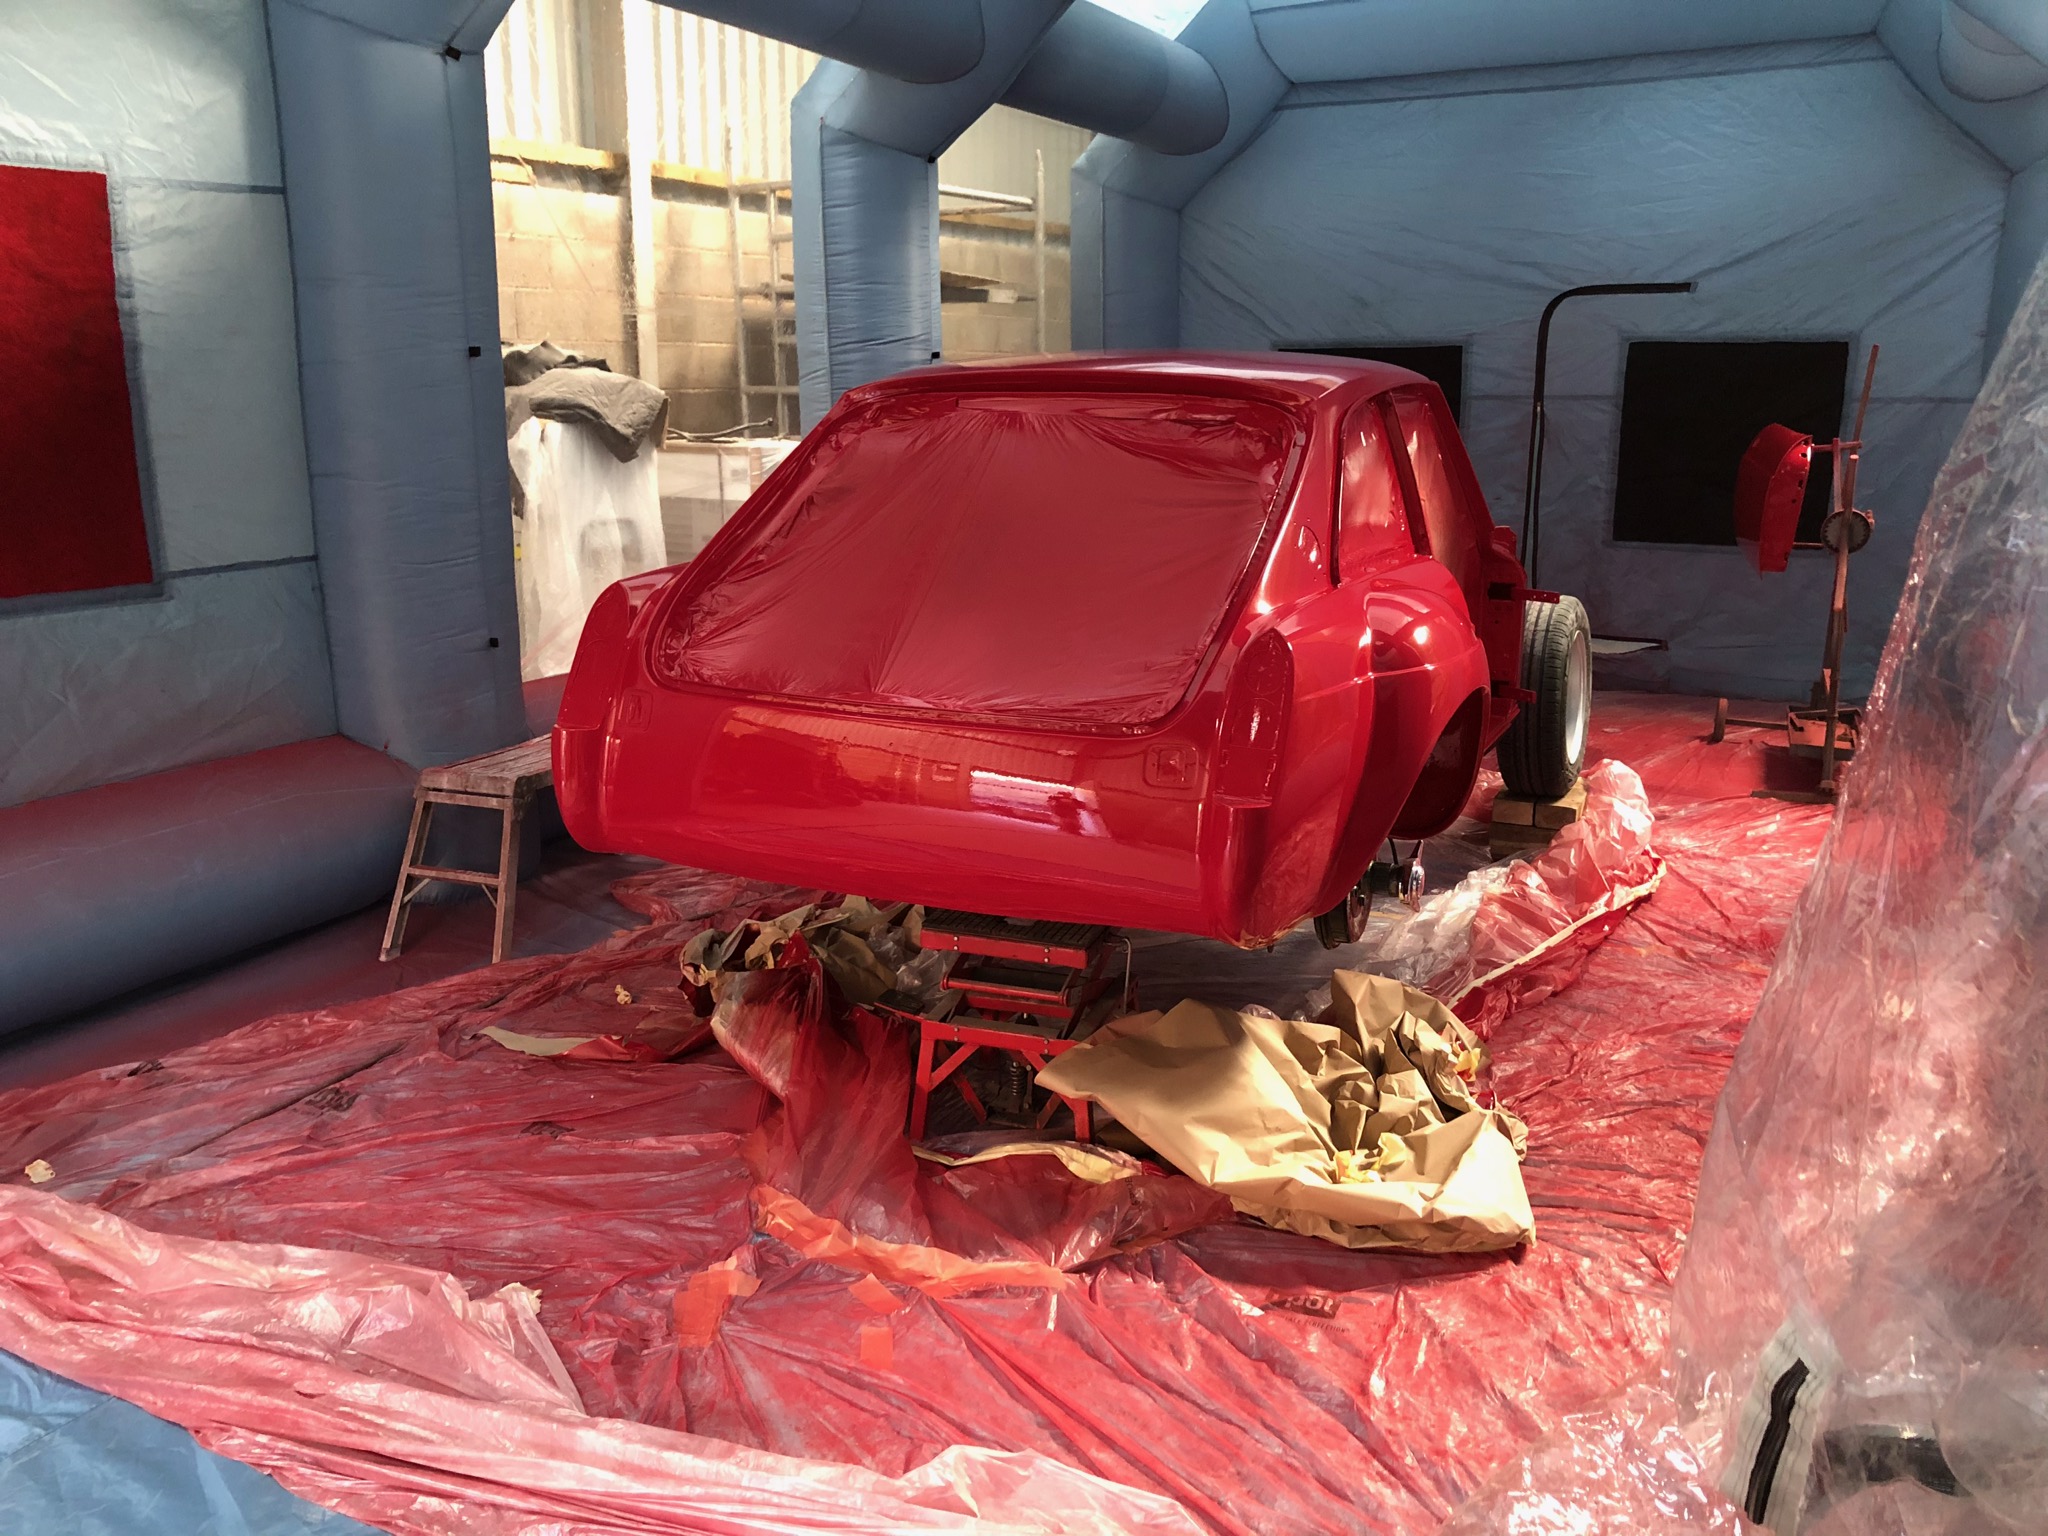
Here it is after 3 coats of direct gloss 2k in Tartan Red. The doors also got painted at the same time and although this would look nice after a nibb and polish - or colour sanding as our American friends call it, although it’s nothing to do with colour.... it just means sanding down with 2000 grit paper to remove any dirt or orange peal and machine polishing. Buffing is what it is really and the car at this stage would buff up nicely.
Anyway, we’re not doing that and it’s going to be left for a week before being blocked down with 800 grit wet and dry - whoever uses it dry I don’t know, but it’s with water all the time with ‘wet and dry’ paper. Then, it’s getting a couple of light coats of solvent based basecoat and 2K clearcoat. Sounds a bit like an extreme way of painting a car, but the difference in finish is worth it.
Front wings, bonnet and tailgate need to get painted tomorrow and we can start the final stage for painting next weekend. In the meantime Harvey can pull the engine out of the scrap front end and we can fit that into his car.
3.5 litres of paint and 1.7 litres of activator used to do the shell as you see it masked up, the doors and the inside of the front wings. I need to order another 2 litres of this paint and then 3 litres of basecoat plus 5 litres of lacquer.
Remote oil filter kit and a couple of other little bits and this can be bolted back onto the MGB gearbox. Looking forward to getting it fitted into the car
A little job yesterday meant we couldn’t get the engine in - one new engine mounting was supplied black and the other side grey. Harvey sanded them both down and they got painted in 2K black, so to fully cure they needed leaving overnight.
Fitting the clutch was straightforward as I picked up a universal alignment tool that centred the clutch plate into the pressure plate rather than the regular spigot types. New bolts with spring washers and after torqueing it down, the gearbox slipped on a treat.
New bushes got fitted onto the gearbox around the crossmember area and various fittings electroplated or new nuts and bolts. Those universal packs of different sized UNF nuts, bolts and washers save so much hassle and I’d recommend ordering them, even for convenience sake.
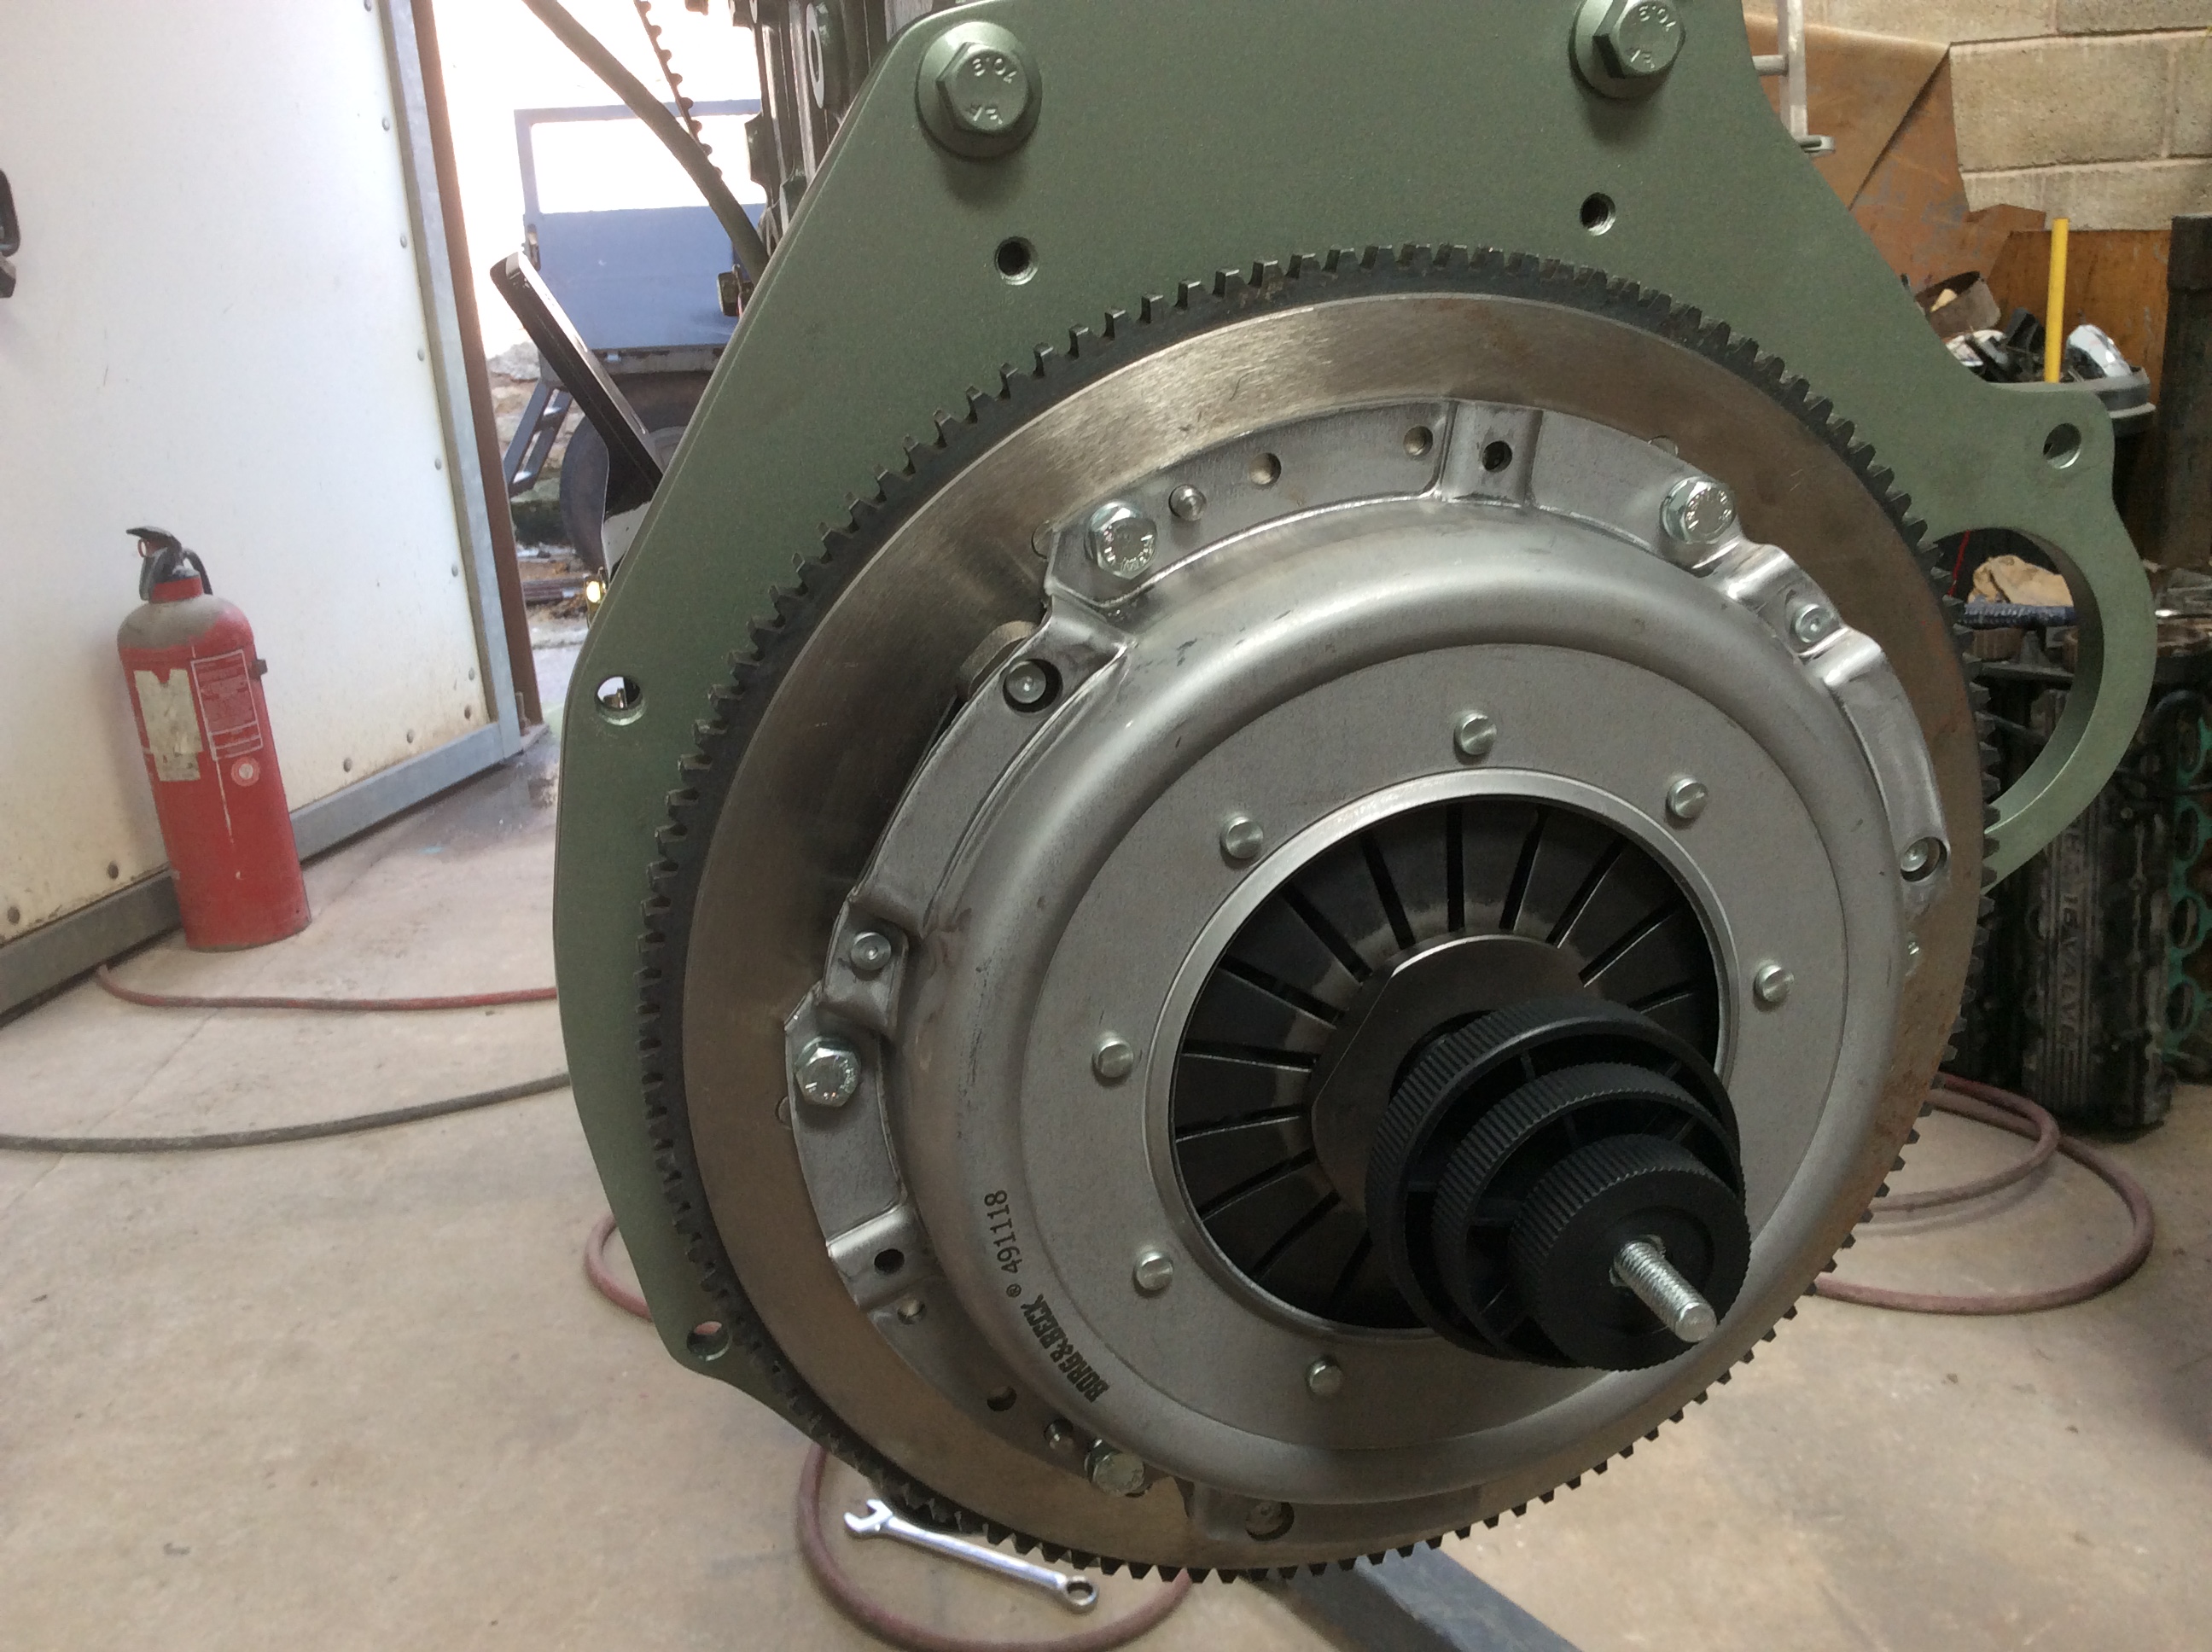
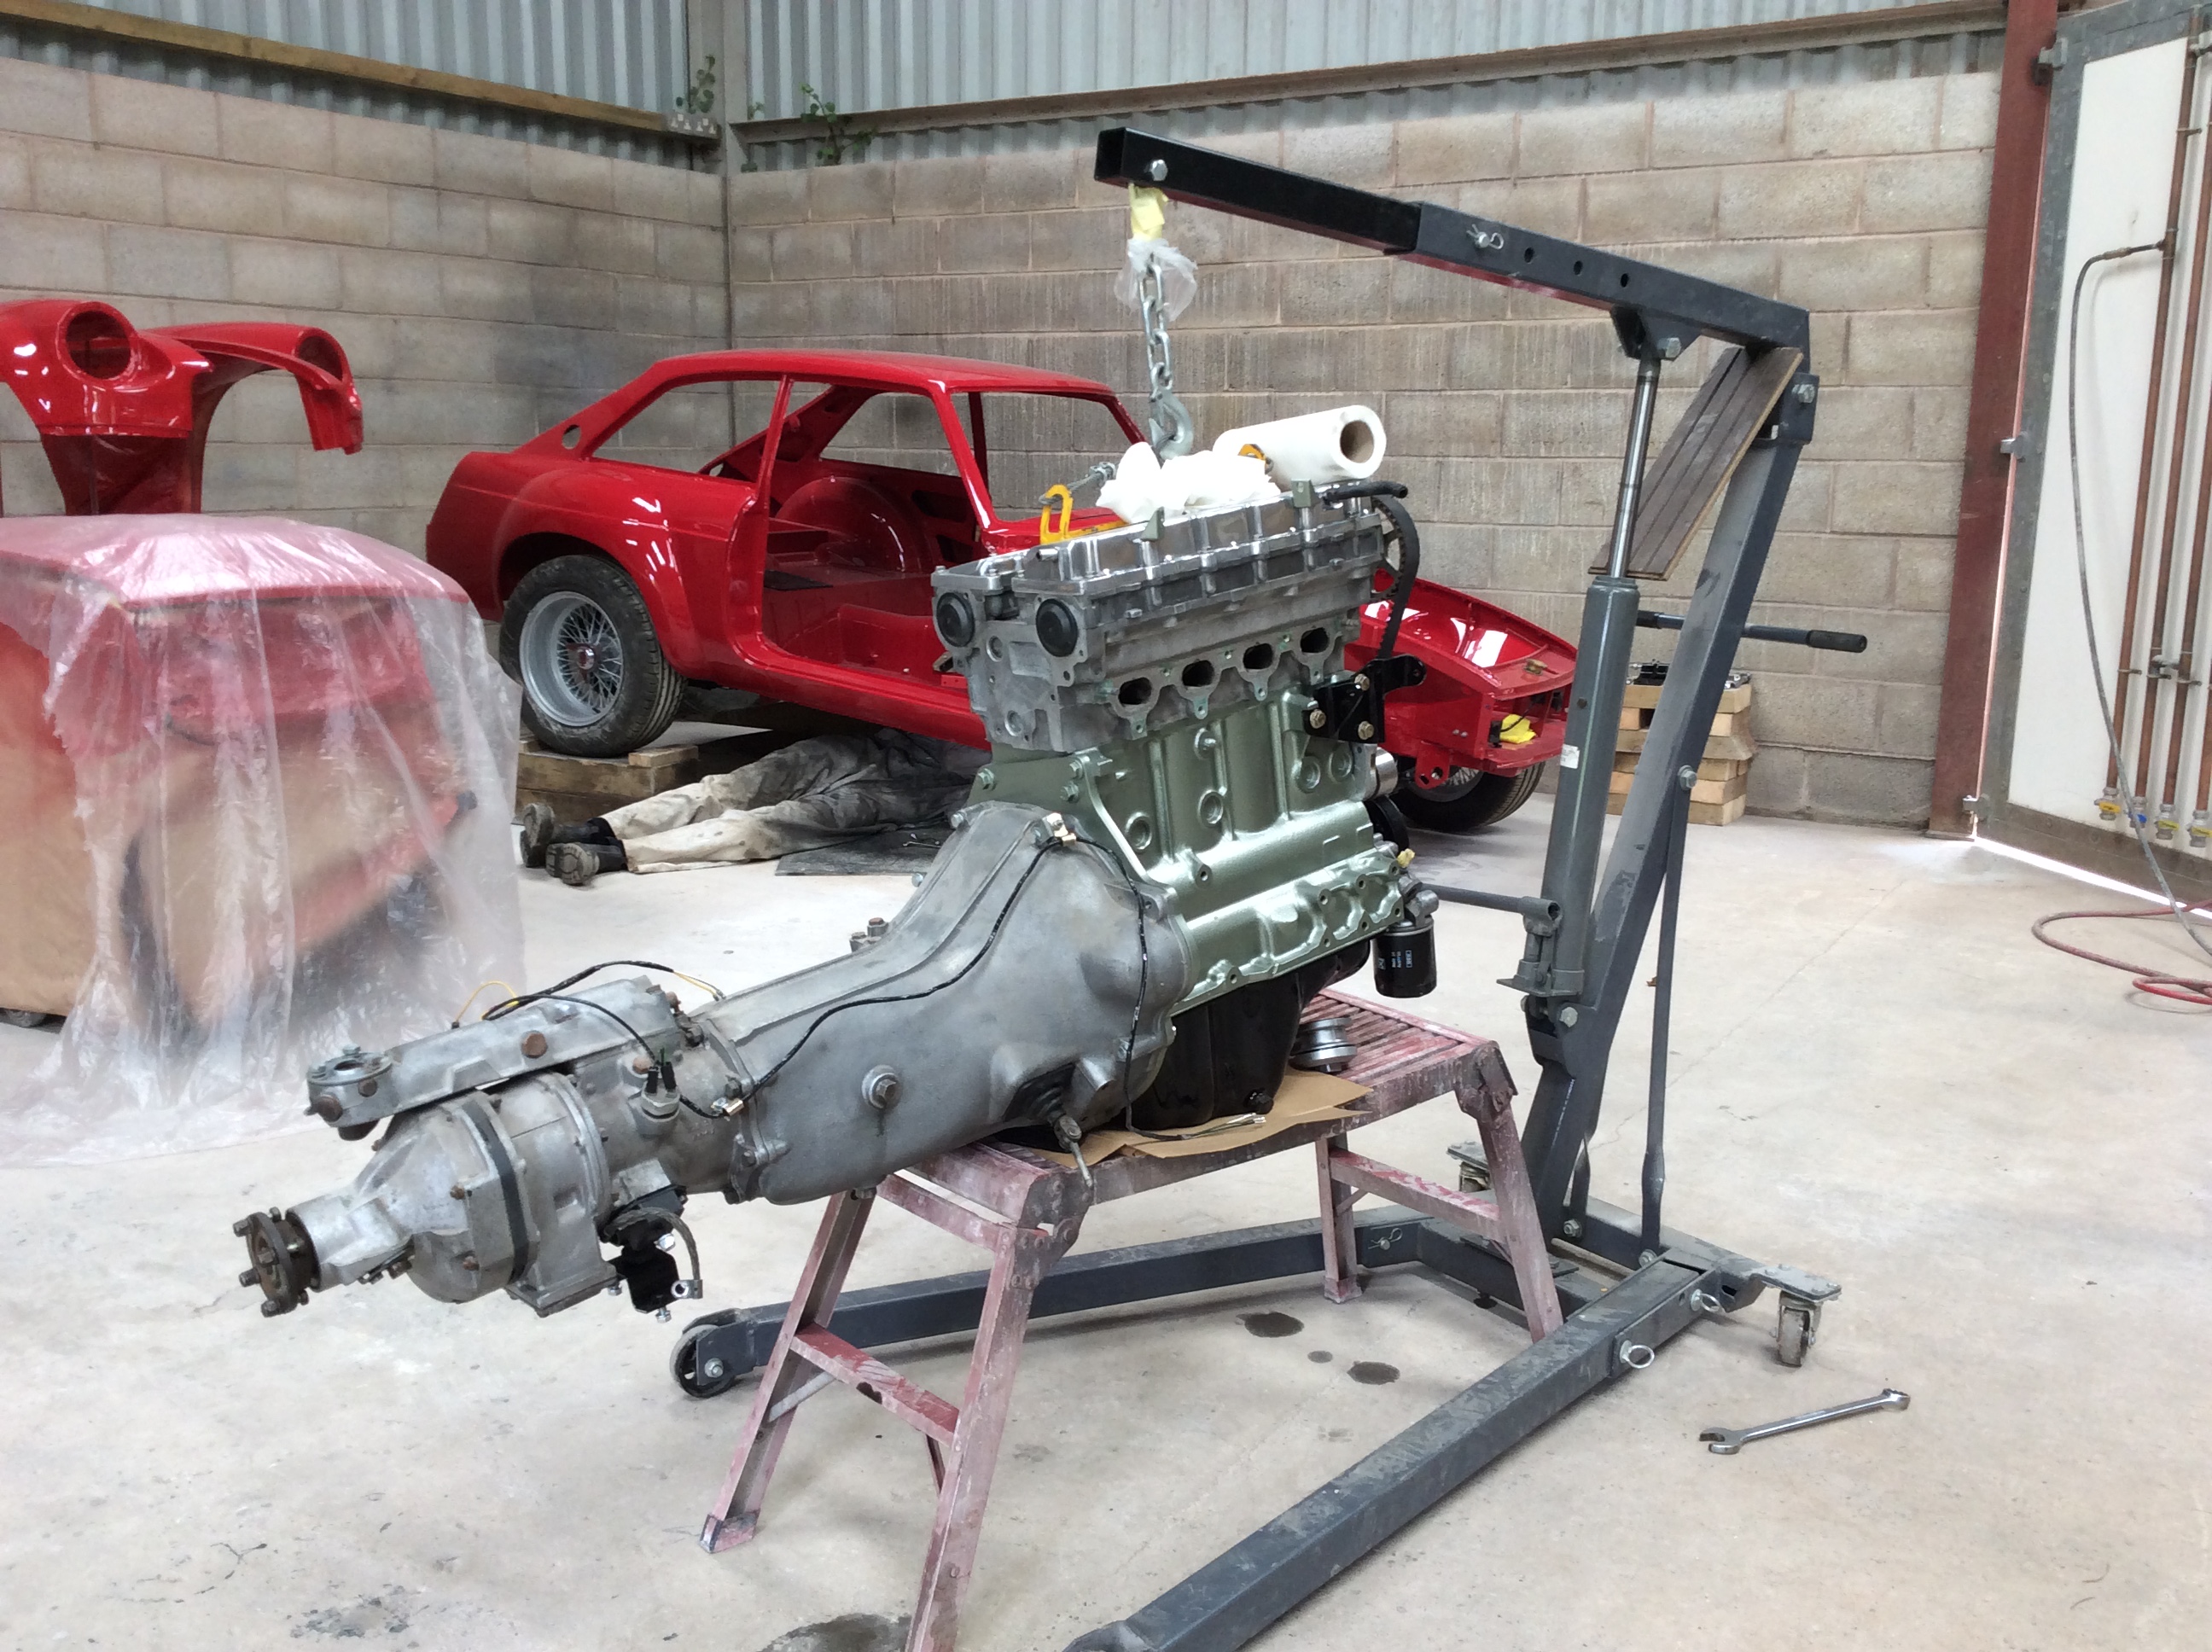
No dramas in fitting the engine for the first time in the actual car it was adapted to fit. We raised the back of the car which made the process of installing the engine and gearbox really straightforward. Everything lined up and bolts just slotted straight in, so mocking up in that scrap front end was spot on.
A new prop shaft had been sanded down and re-coated with the same paint we’ve used on everything else. There’s just the thinnest layer of black paint on these and they will rust in no time, so it was worth the extra protection.
That modification to the gearbox crossmember is a massive improvement and makes life loads easier - definitely worth doing that job.
Cheeky BMC decal on the inlet cover that Harvey bought.
===========================================================
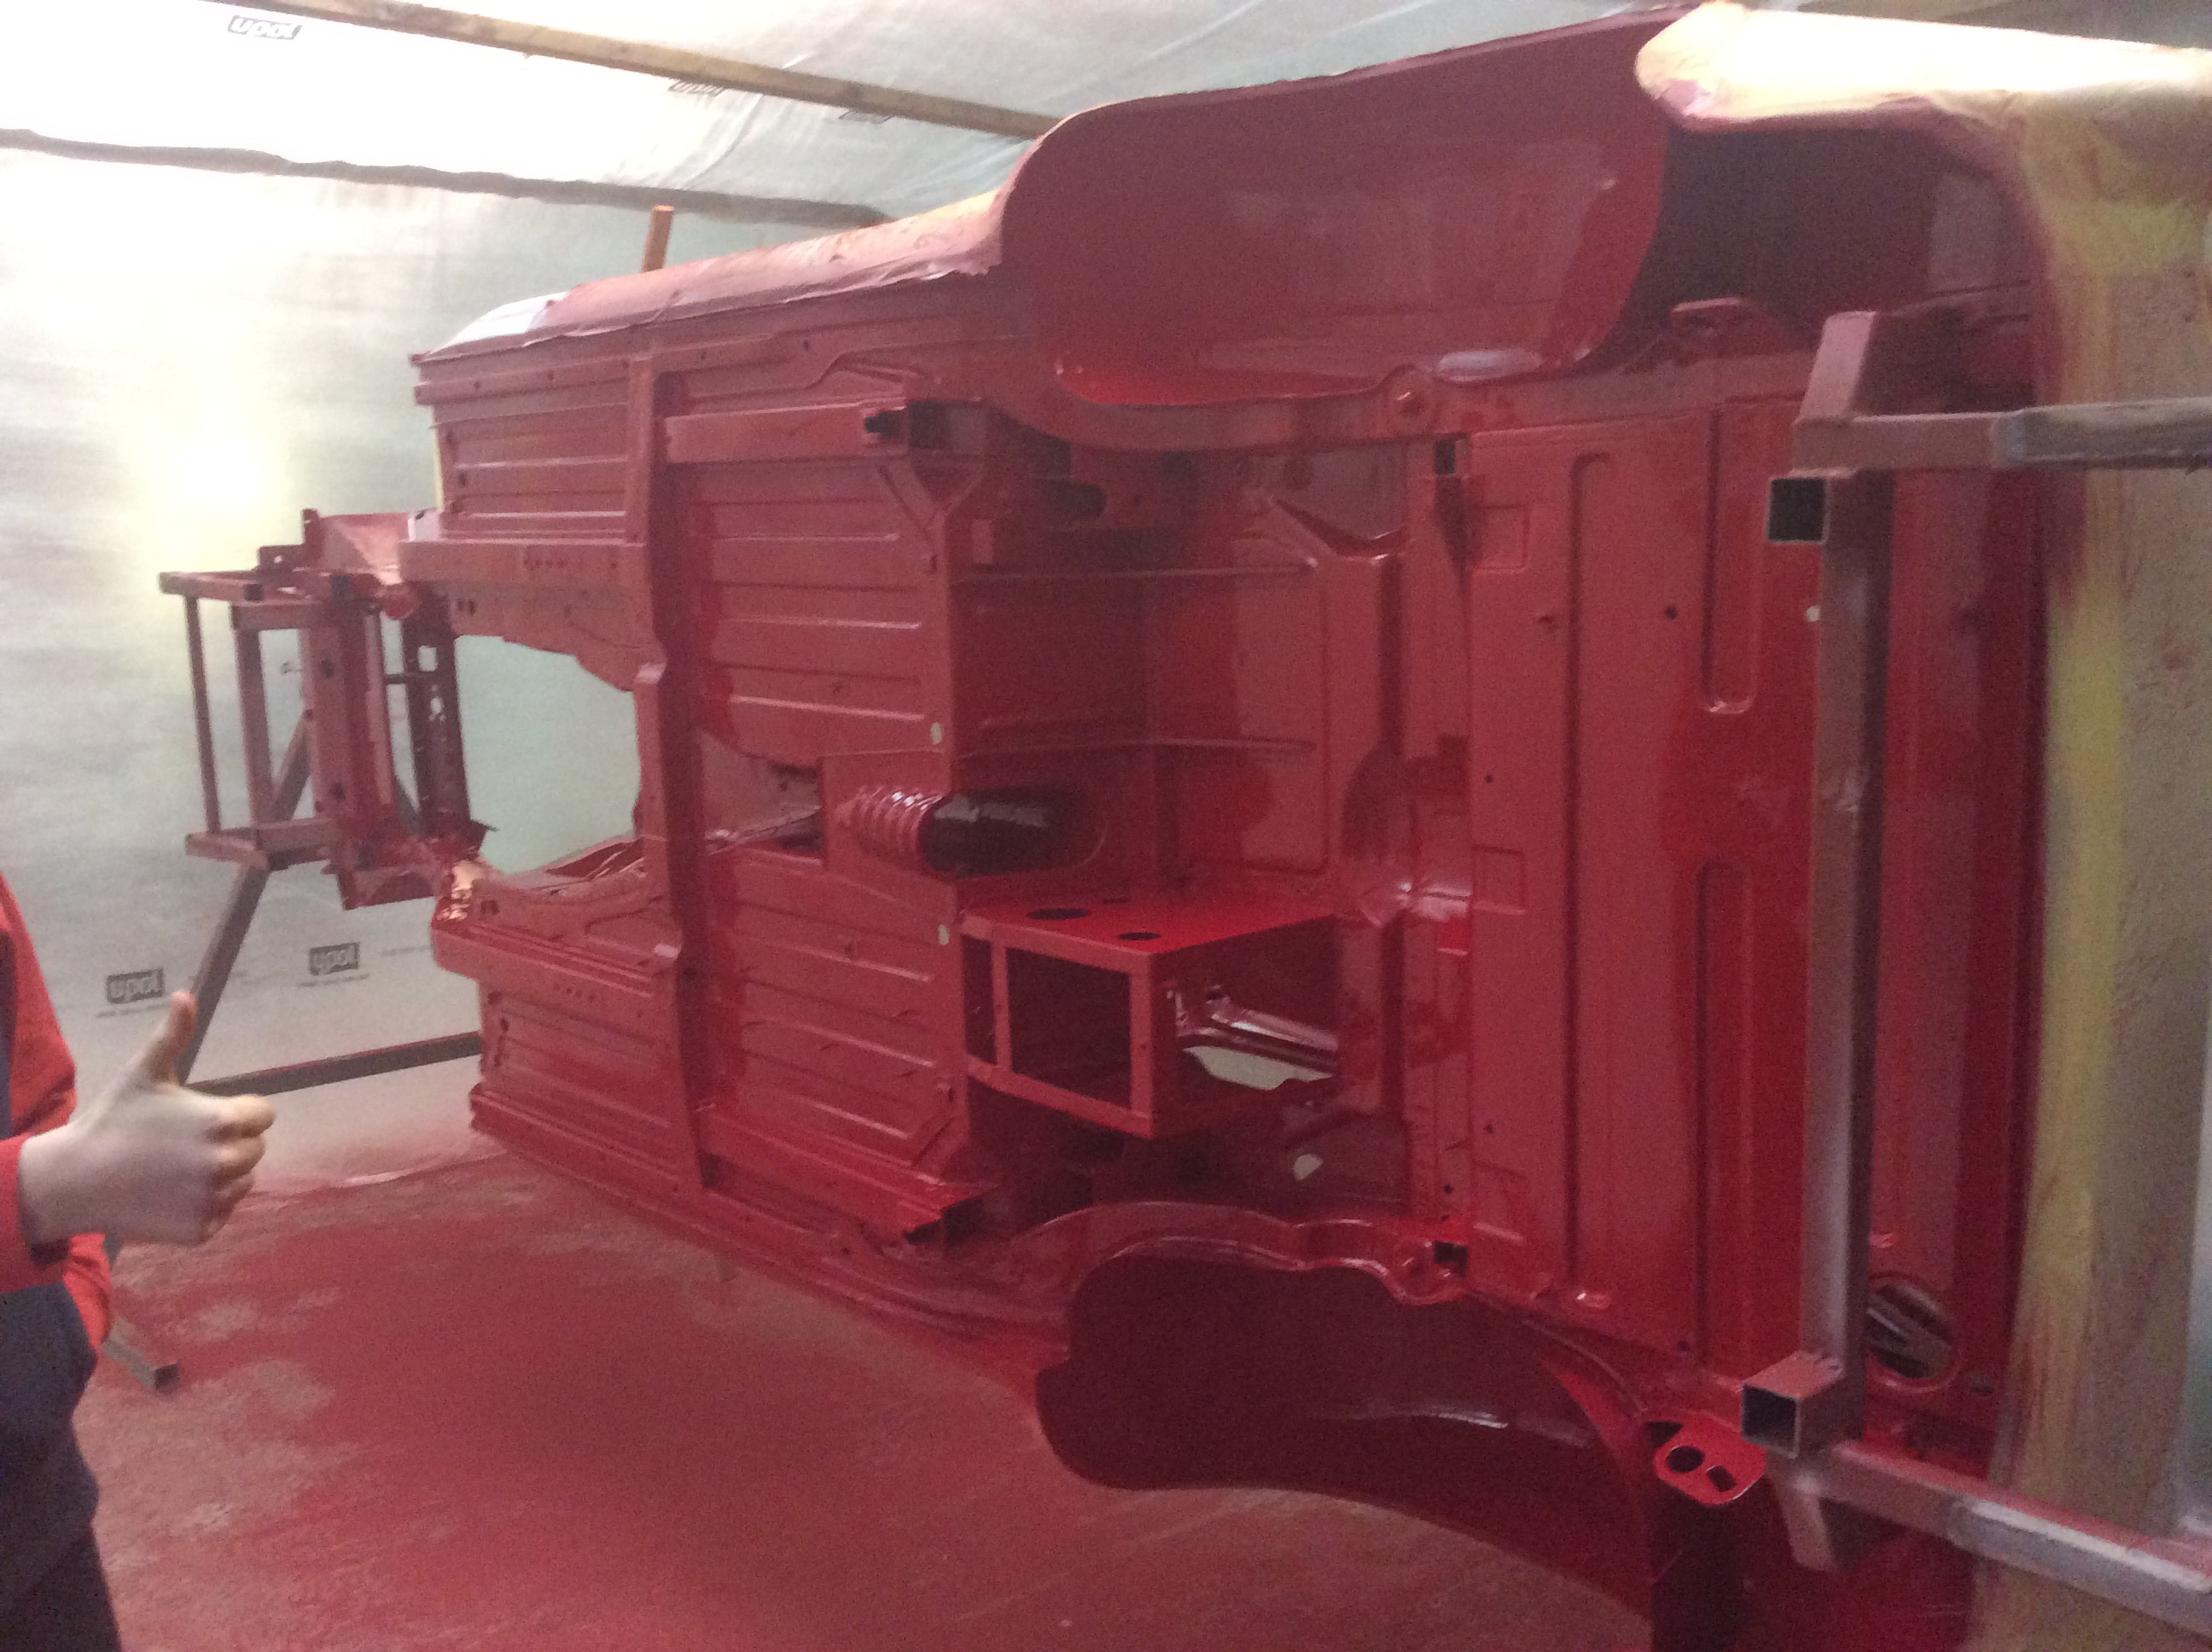
4th July 2020
And it’s finally done. No more painting to do, just needs a block down with some 2000 grit superfine paper and a good machine polish. That’s our job for tomorrow as this lacquer is fully cured after just 8 hours.
Quite a relief having this finished, but still plenty to do with fitting bits back on.
=============================================================
16th August 2020
These aluminium trims came out nice. Harvey sanded them down with some 600 grit paper and buffed them up on the bench grinder with a polishing wheel attached. These got done ages ago and where all wrapped up before being put away somewhere safe. The rear quarter glass surrounds had a bit of work as there are small ‘L’ shaped brackets that are tapped out and these hold the entire outer trim in place. Just about every screw in these sheared off and the little brackets were shot so he made a new set with stainless machine screws. I’ll show these when the glass goes in as they’re a nice little job to do.
The trims that fit below the rear quarter lights are stainless and came up like new. We sprayed on some cavity wax onto the inside edges of the alloy gutter trims before fixing them back on plus on these rear quarter panel trims. I’d got some stainless rivets, so these also got a dab of wax before the trims. Rivets went snugly back into the original holes with a bit of a wriggle, but it’s nice to have some shiney stuff back on it.

=============================================================
6th September 2020
Well I found that you couldn’t string the front screen in as I imagined, but had to put the seal around the frame on the car first. There’s so much play on the seal that it wasn’t too bad to get the glass in then. Missing the locking bead and trims for the front screen, so not got any further on this bit. Worth giving the new seal a wipe over with something first though as it’s got mould release stuff and all sorts in its channels.

===============================================================
6th September 2020
Harvey bought some 3mm hardboard to make a new top for the dash, so used the old one as a template and just cut it out. We’d also bought a leather hide as you do, so used a piece from this and glued it on with the same aerosol contact adhesive left over from doing the other bits. You need to coat around the heater vent holes with some black paint on the dash top and also around the holes cut out of the new hardboard pad otherwise you can see the board and body colour paint when peering through the windscreen otherwise. We didn’t think it would need doing, but it does.
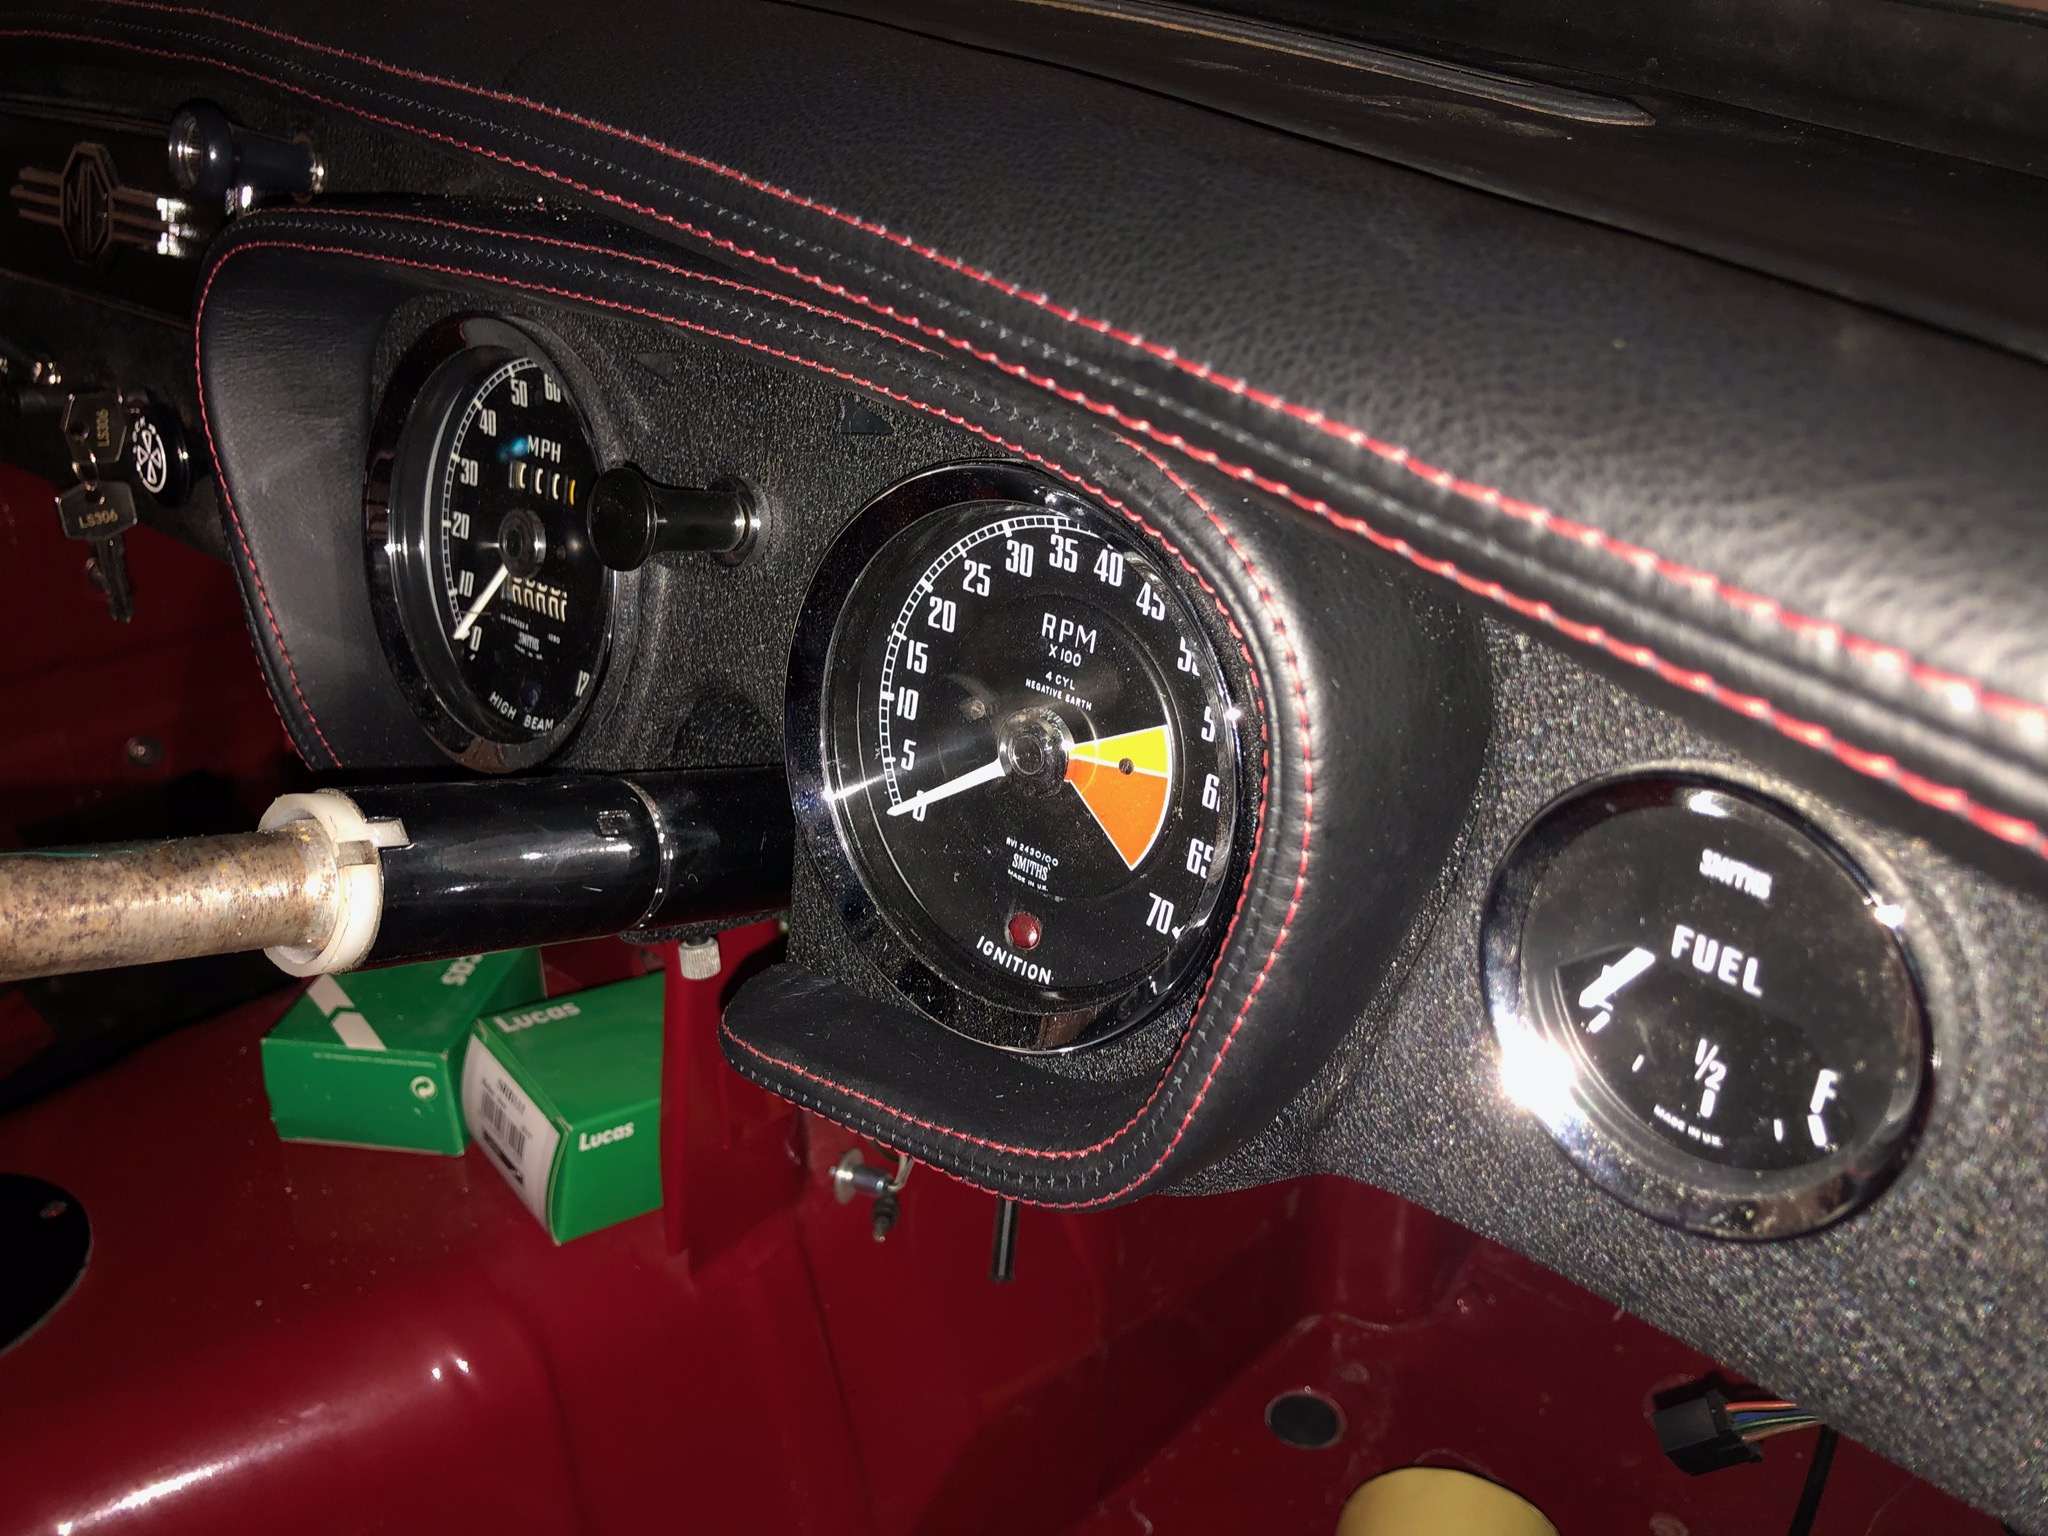
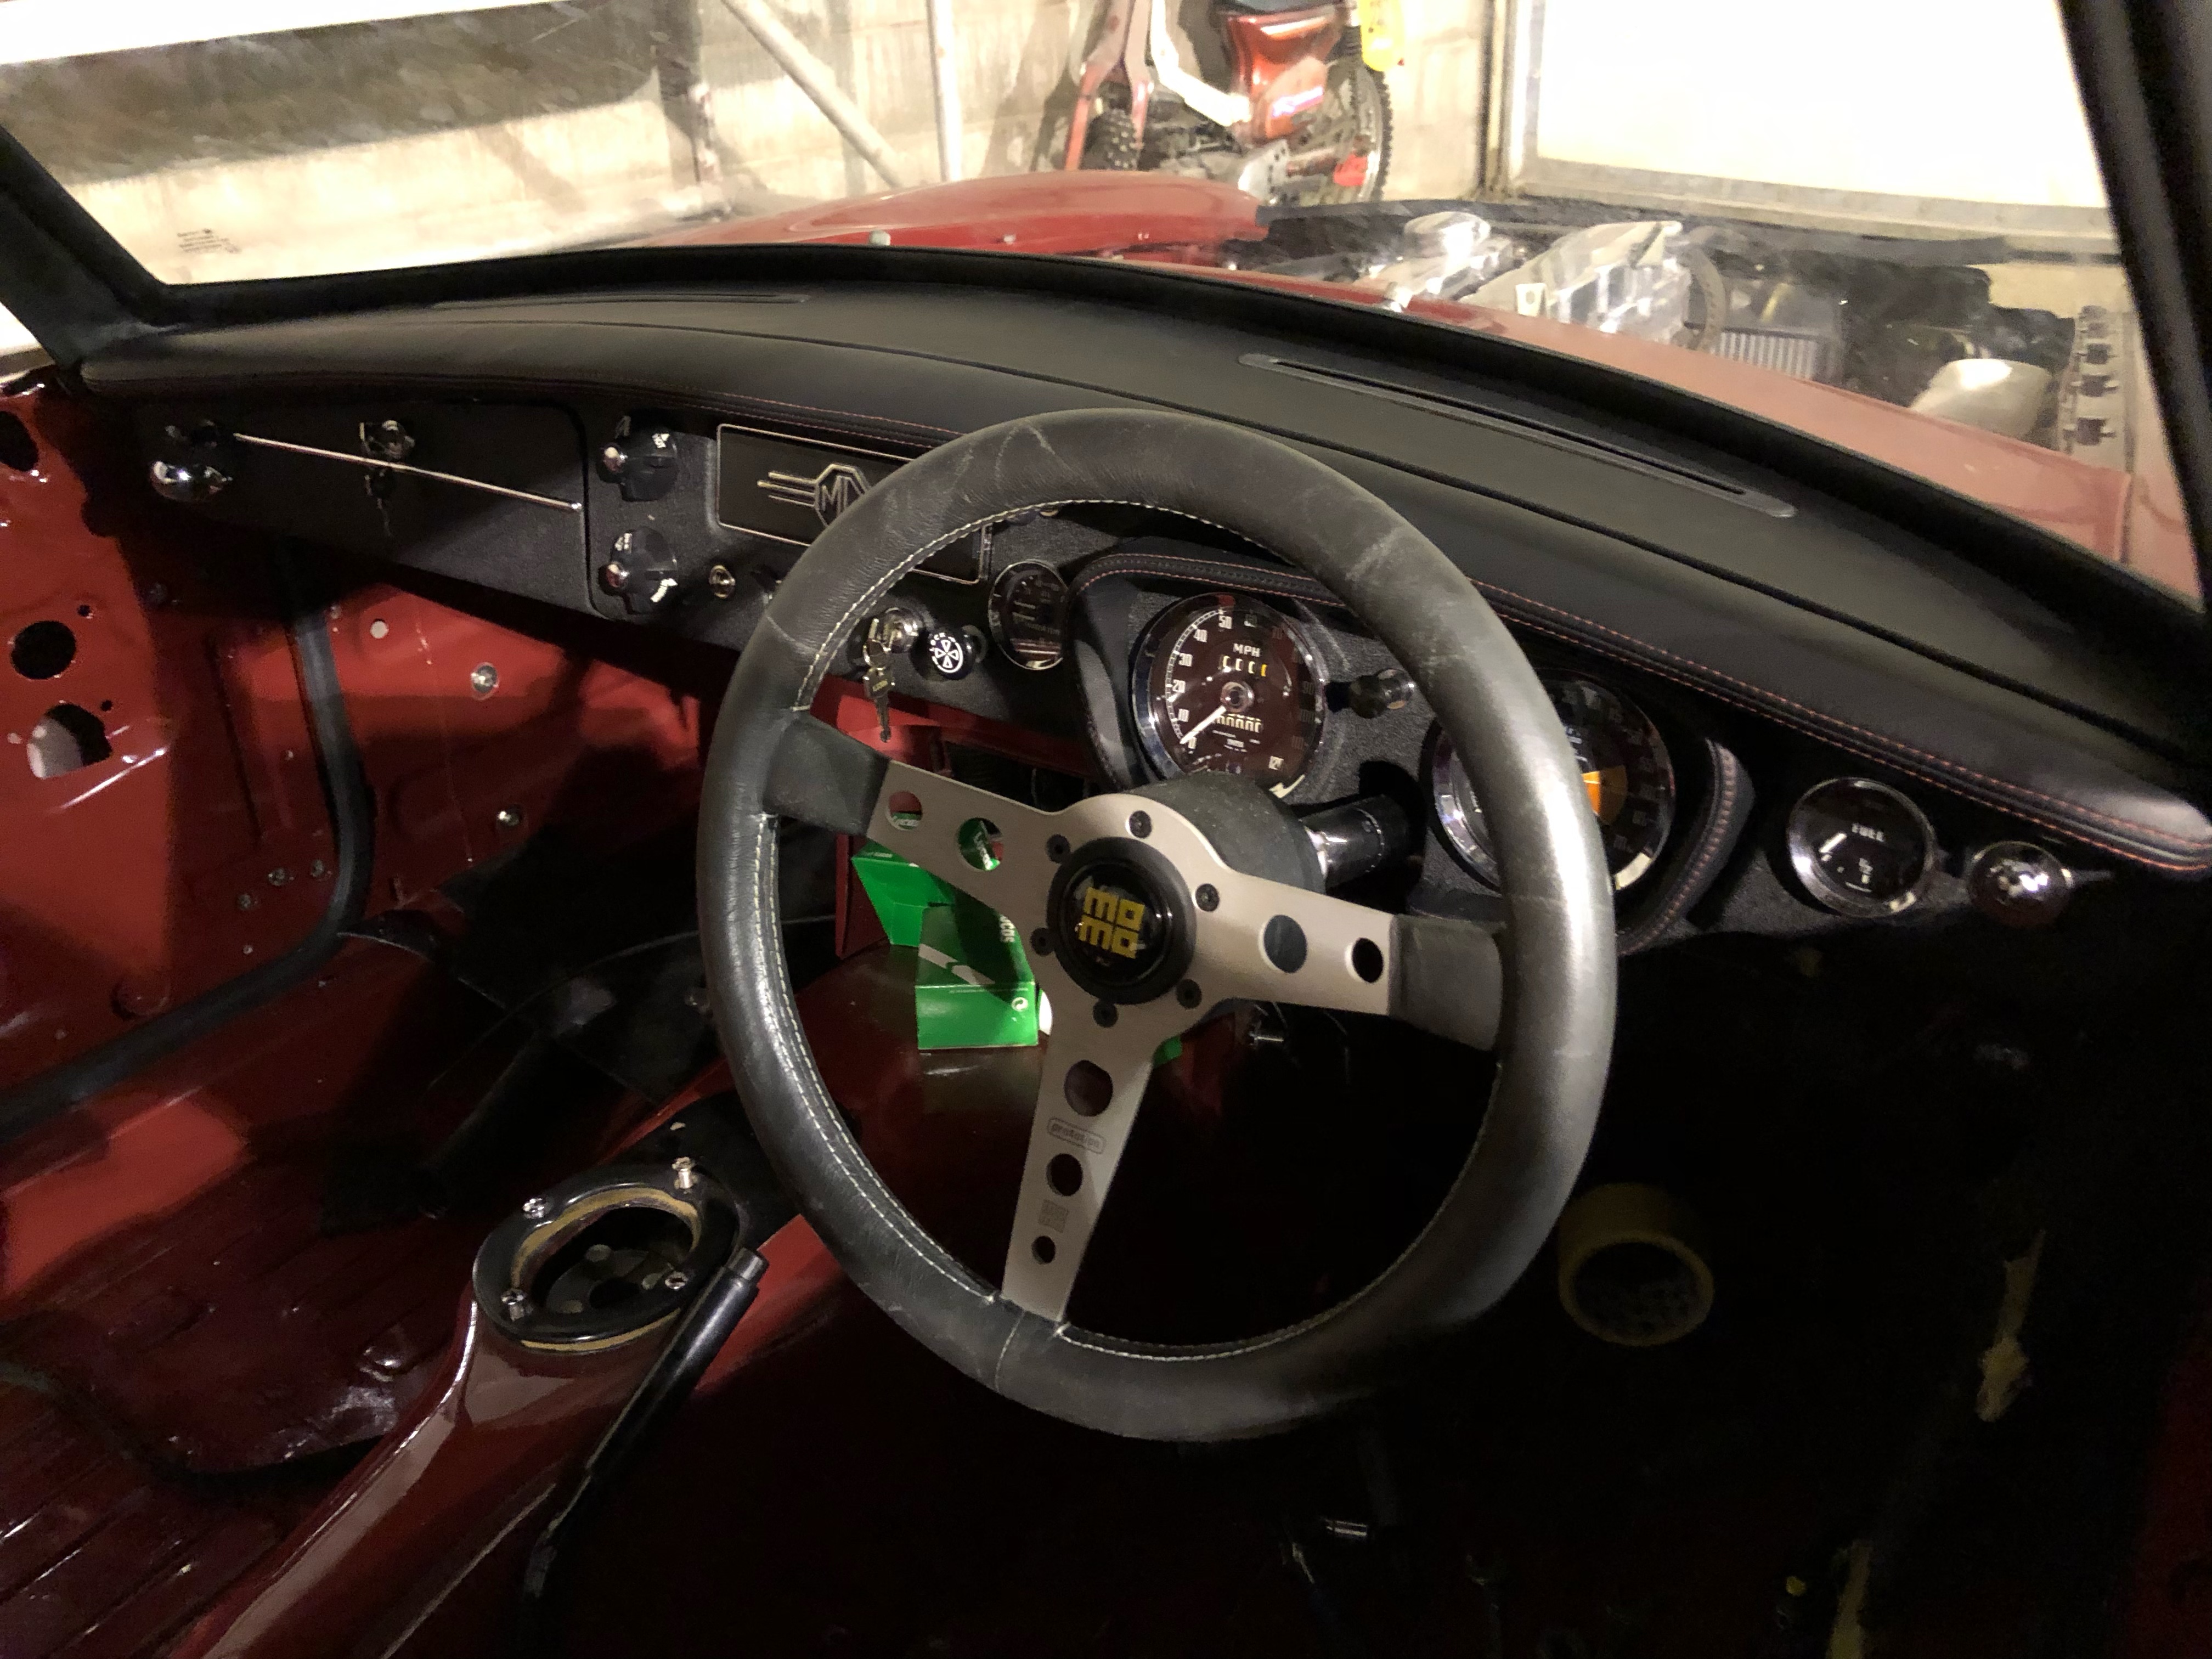
Out came the dashboard from Harveys bedroom, but the new overdrive switch snapped off on its stalk - I think it is a weak thing as I’m sure that I’ve heard people saying similar for theirs. The dashboard itself is one of the exchange types you can get where it’s powder coated with wrinkle finish already. It seems to be a really hard surface on the coating and I think it should stand up to wear a bit better than the wrinkle paint option.
Frontline have the binnacles wrapped and stitched in alcantara which looks smart so we got an auto trimmer to do similar but in leather for Harveys. The crash pad got done at the same time too and was less than £150 for both parts which wasn’t bad. Just needs some beading on the back of the crash pad but the dash is in now. It’s really fiddly getting behind this area though.
Not sure if the steering wheel boss we have is correct as that’s not sliding all the way down where it needs to go - steering feels nice and not too heavy..... I expected it to be heavy with those tyres on, but it’s not bad at all.
=============================================================
24th October 2020
To line the badge up we ran some tape across the rear of the car and used to top of each reversing lamp as a point for reference. The bottom of the tailgate is slightly curved, so this gets the badge sat level and with a vertical piece of tape at 90 degrees, the badge just needs lining up to this. A quick gentle warm up with a hot air gun gets the adhesive really sticky on the tape and it’s bonded on really well.
A mock up with the M and G letter soon showed what border was needed around the edge for clearance and with a bit more masking tape for guidance on application of these, it’s done.
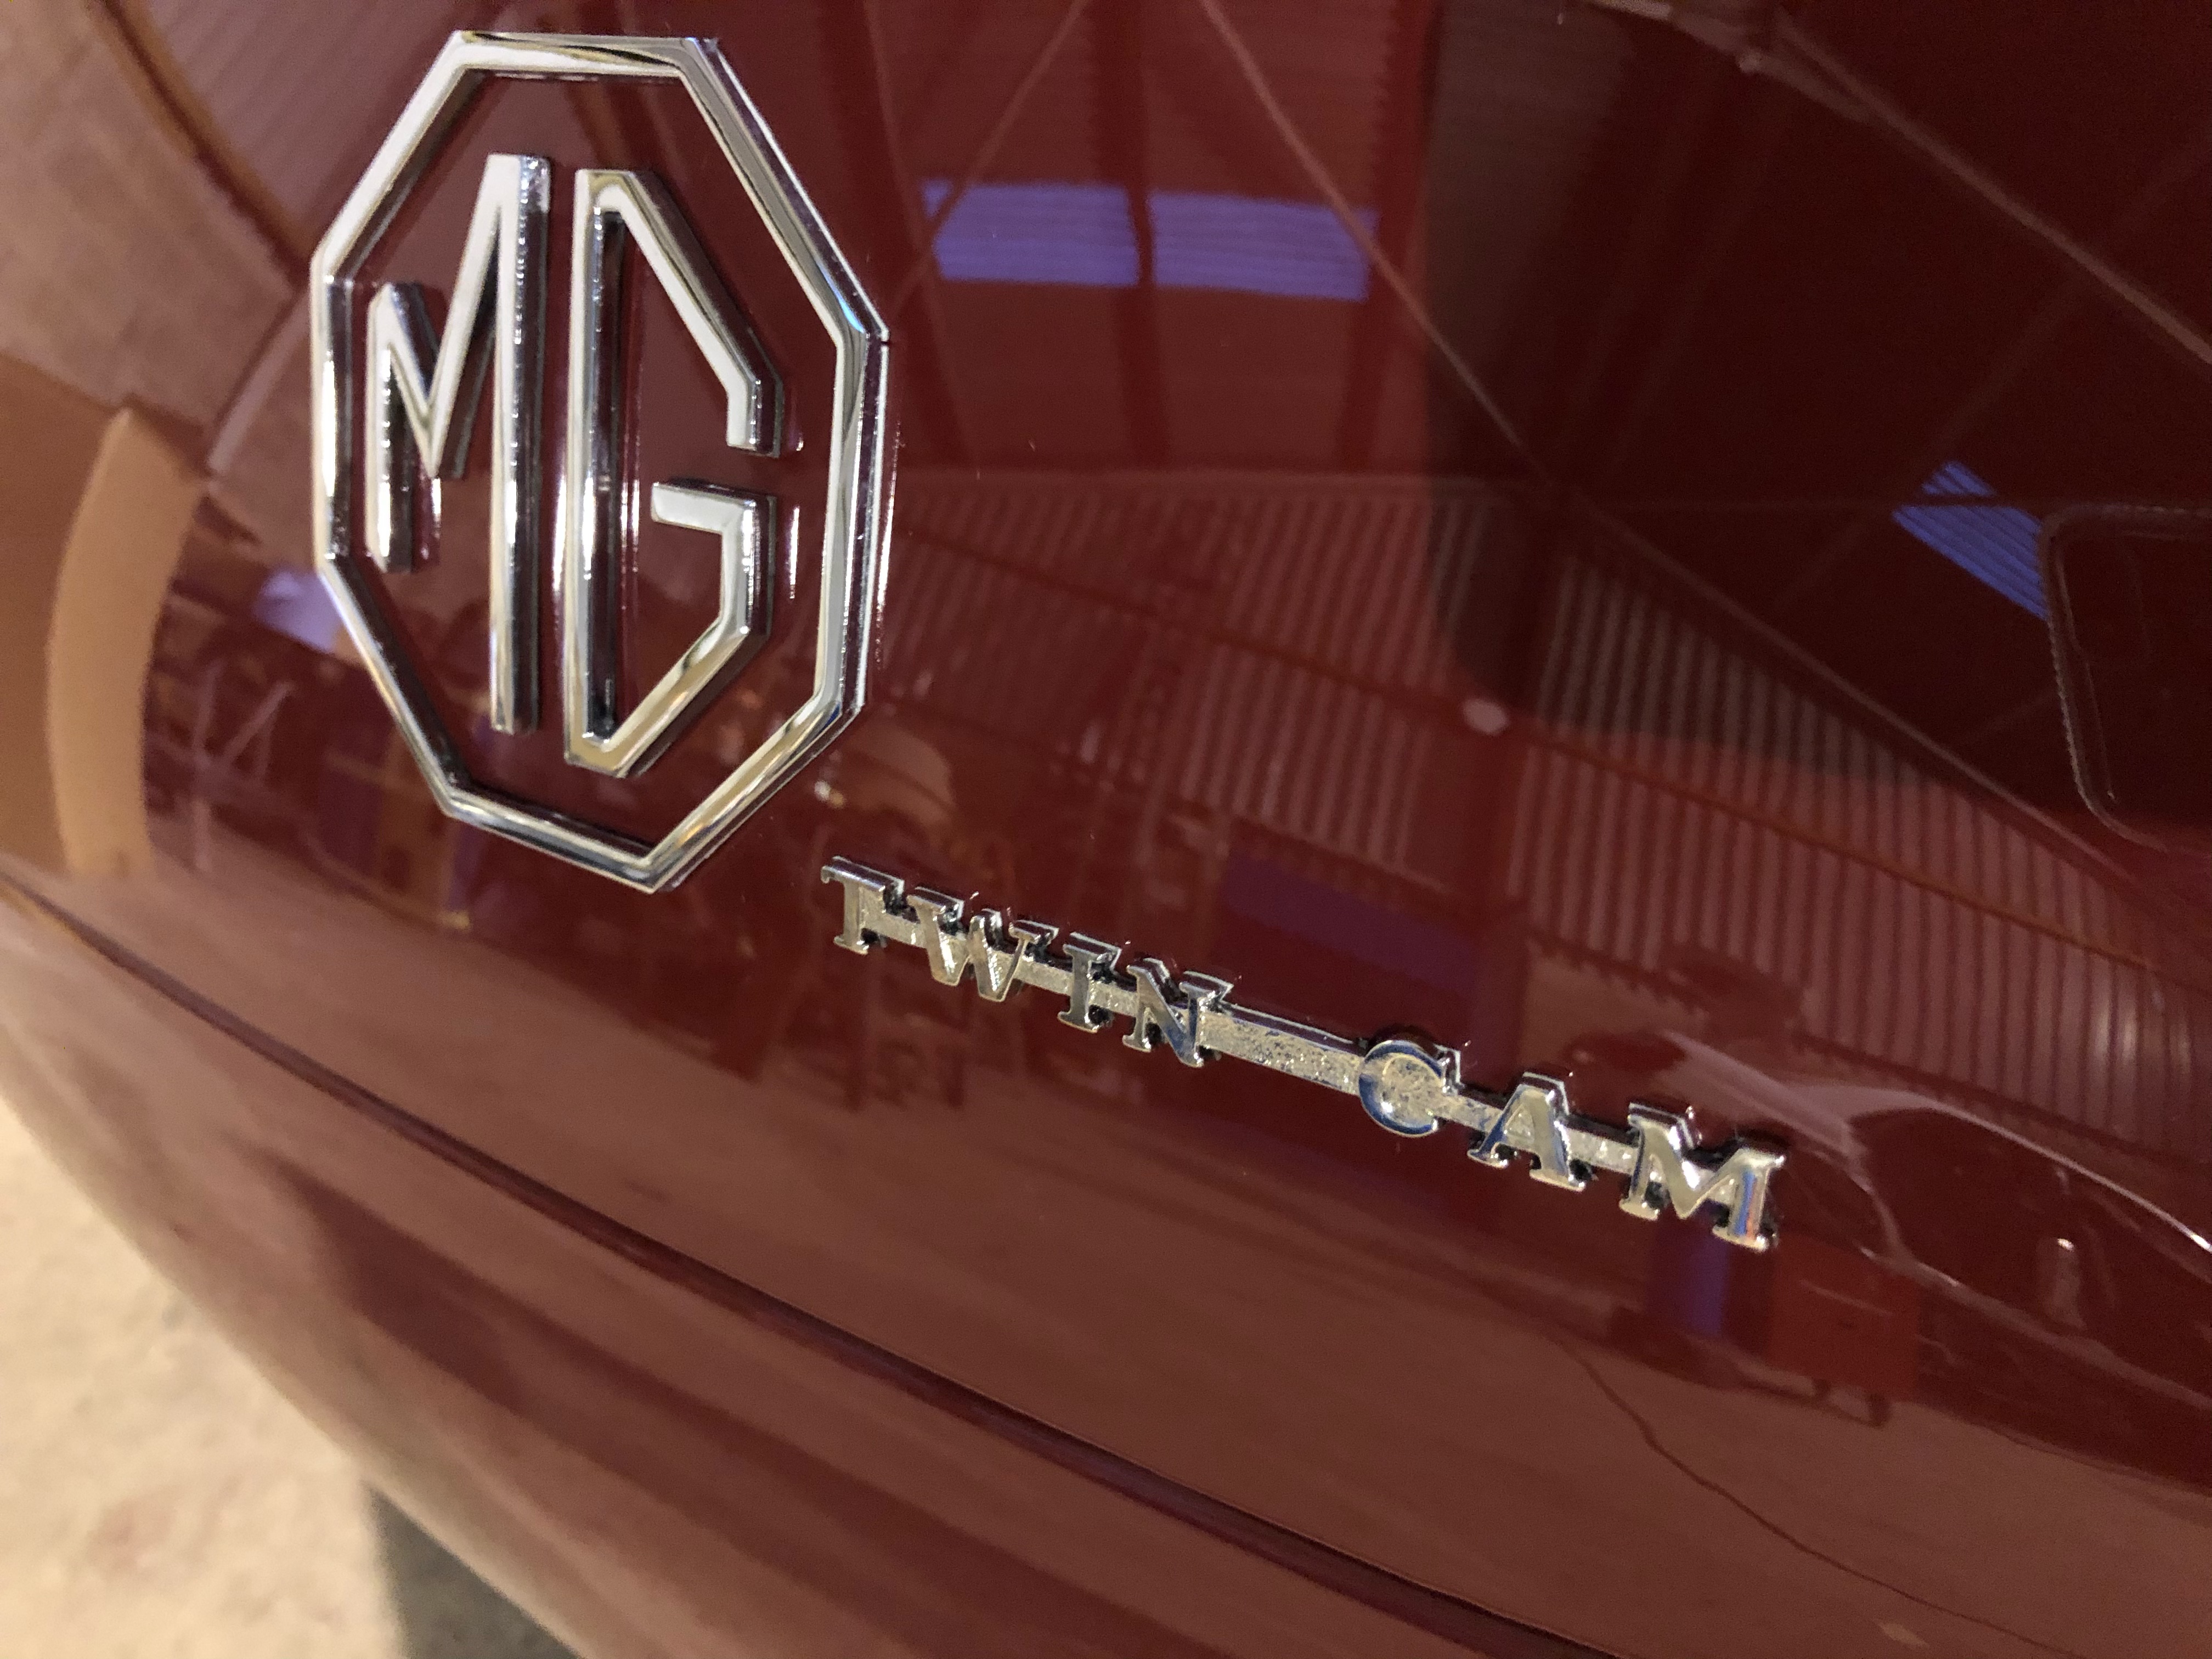
Harvey picked up an MGA Twin Cam badge, so this went on with the same method.
==============================================================
21st April 2021
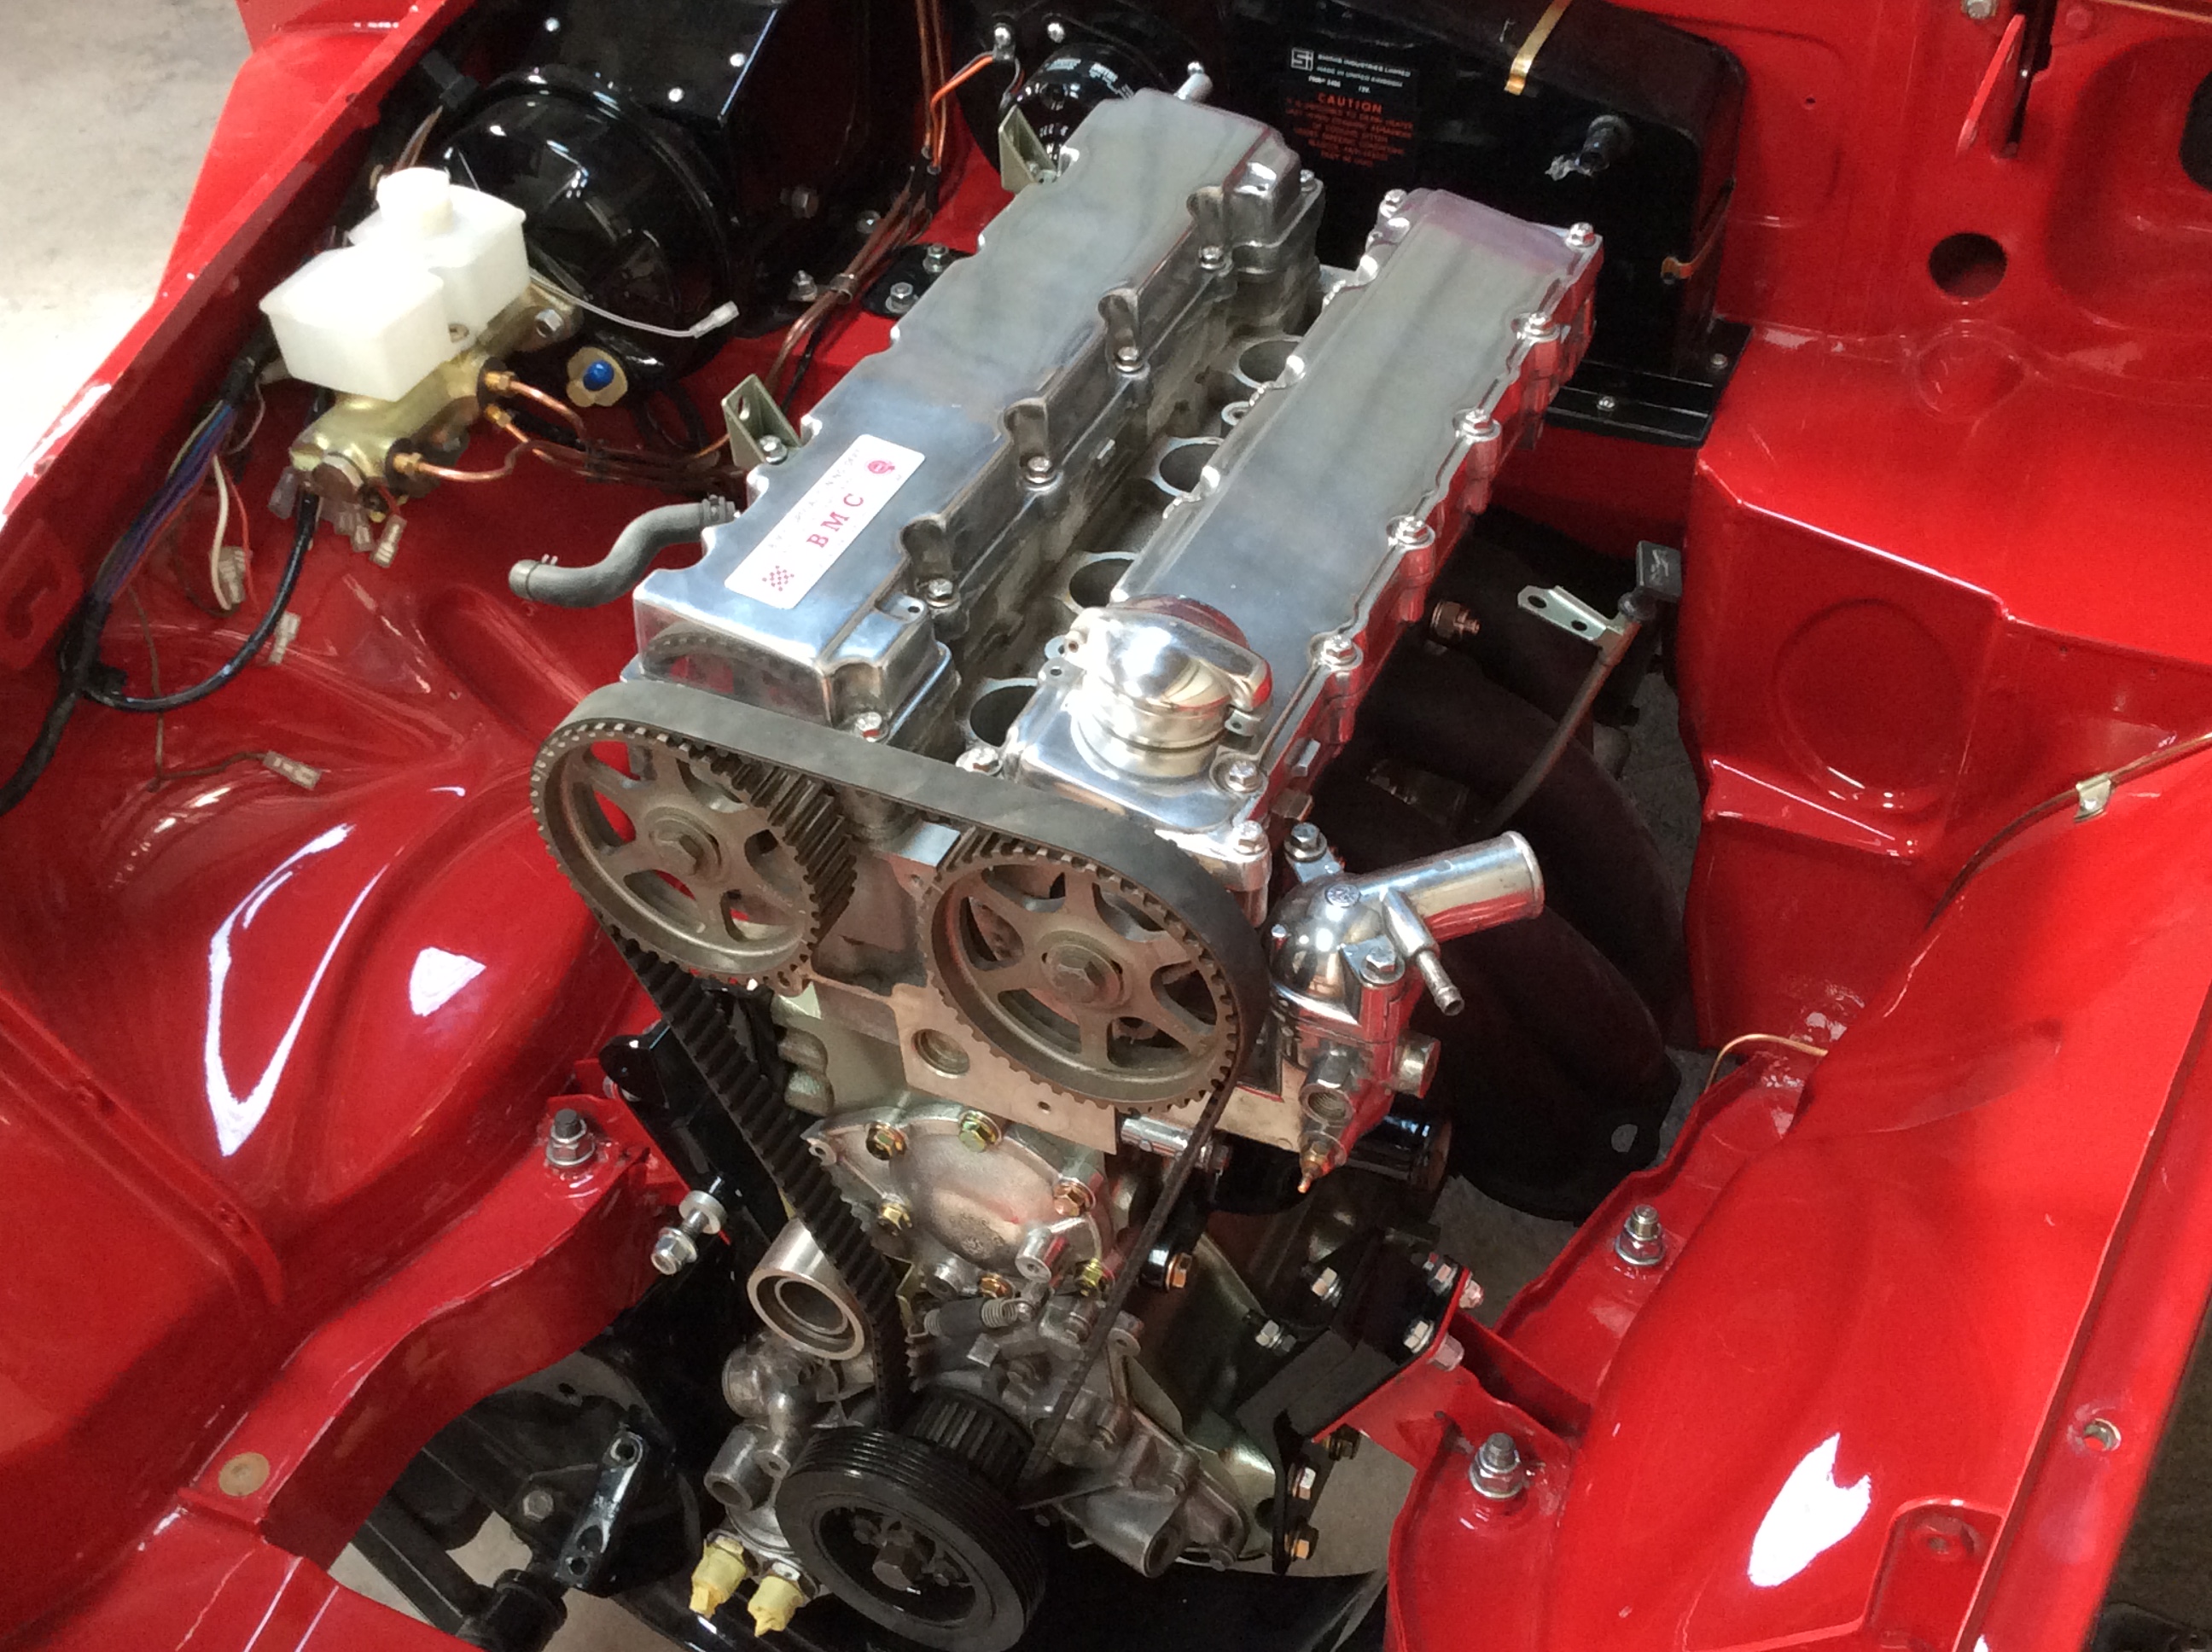
Engine harness is very next job and then it’s fluids going in for a start up. Really can’t wait for that, especially with the exhaust made.
I rigged up some extra lighting in the barn and it’s surprising how a better lit up area encourages you to do a bit more.
================================================================
24th February 2021
spent 4 hours yesterday evening cleaning all the plugs and wires on the engine loom before I could start taping it all up. What a time consuming job that is taping a harness. The coil pack being placed further away didn’t cause any problems with wires being too short so that was handy.
Had to lay the loom back onto the engine again just to set it all out in order to be sure each plug goes to each connection without being too tight once it’s bound up with tape. Don’t forget it’s throttle body is at the other end of the engine now, but like the coil pack it wasn’t such a problem.
There’s a really convenient support that fits under the inlet manifold for attaching the engine loom so this has been re-furbished and being re-used. It keeps everything away from the steering column, so a neat thing to have.
K&N Air filter slipped onto the intake pipe nicely and is secure with the large jubilee clip it came with.
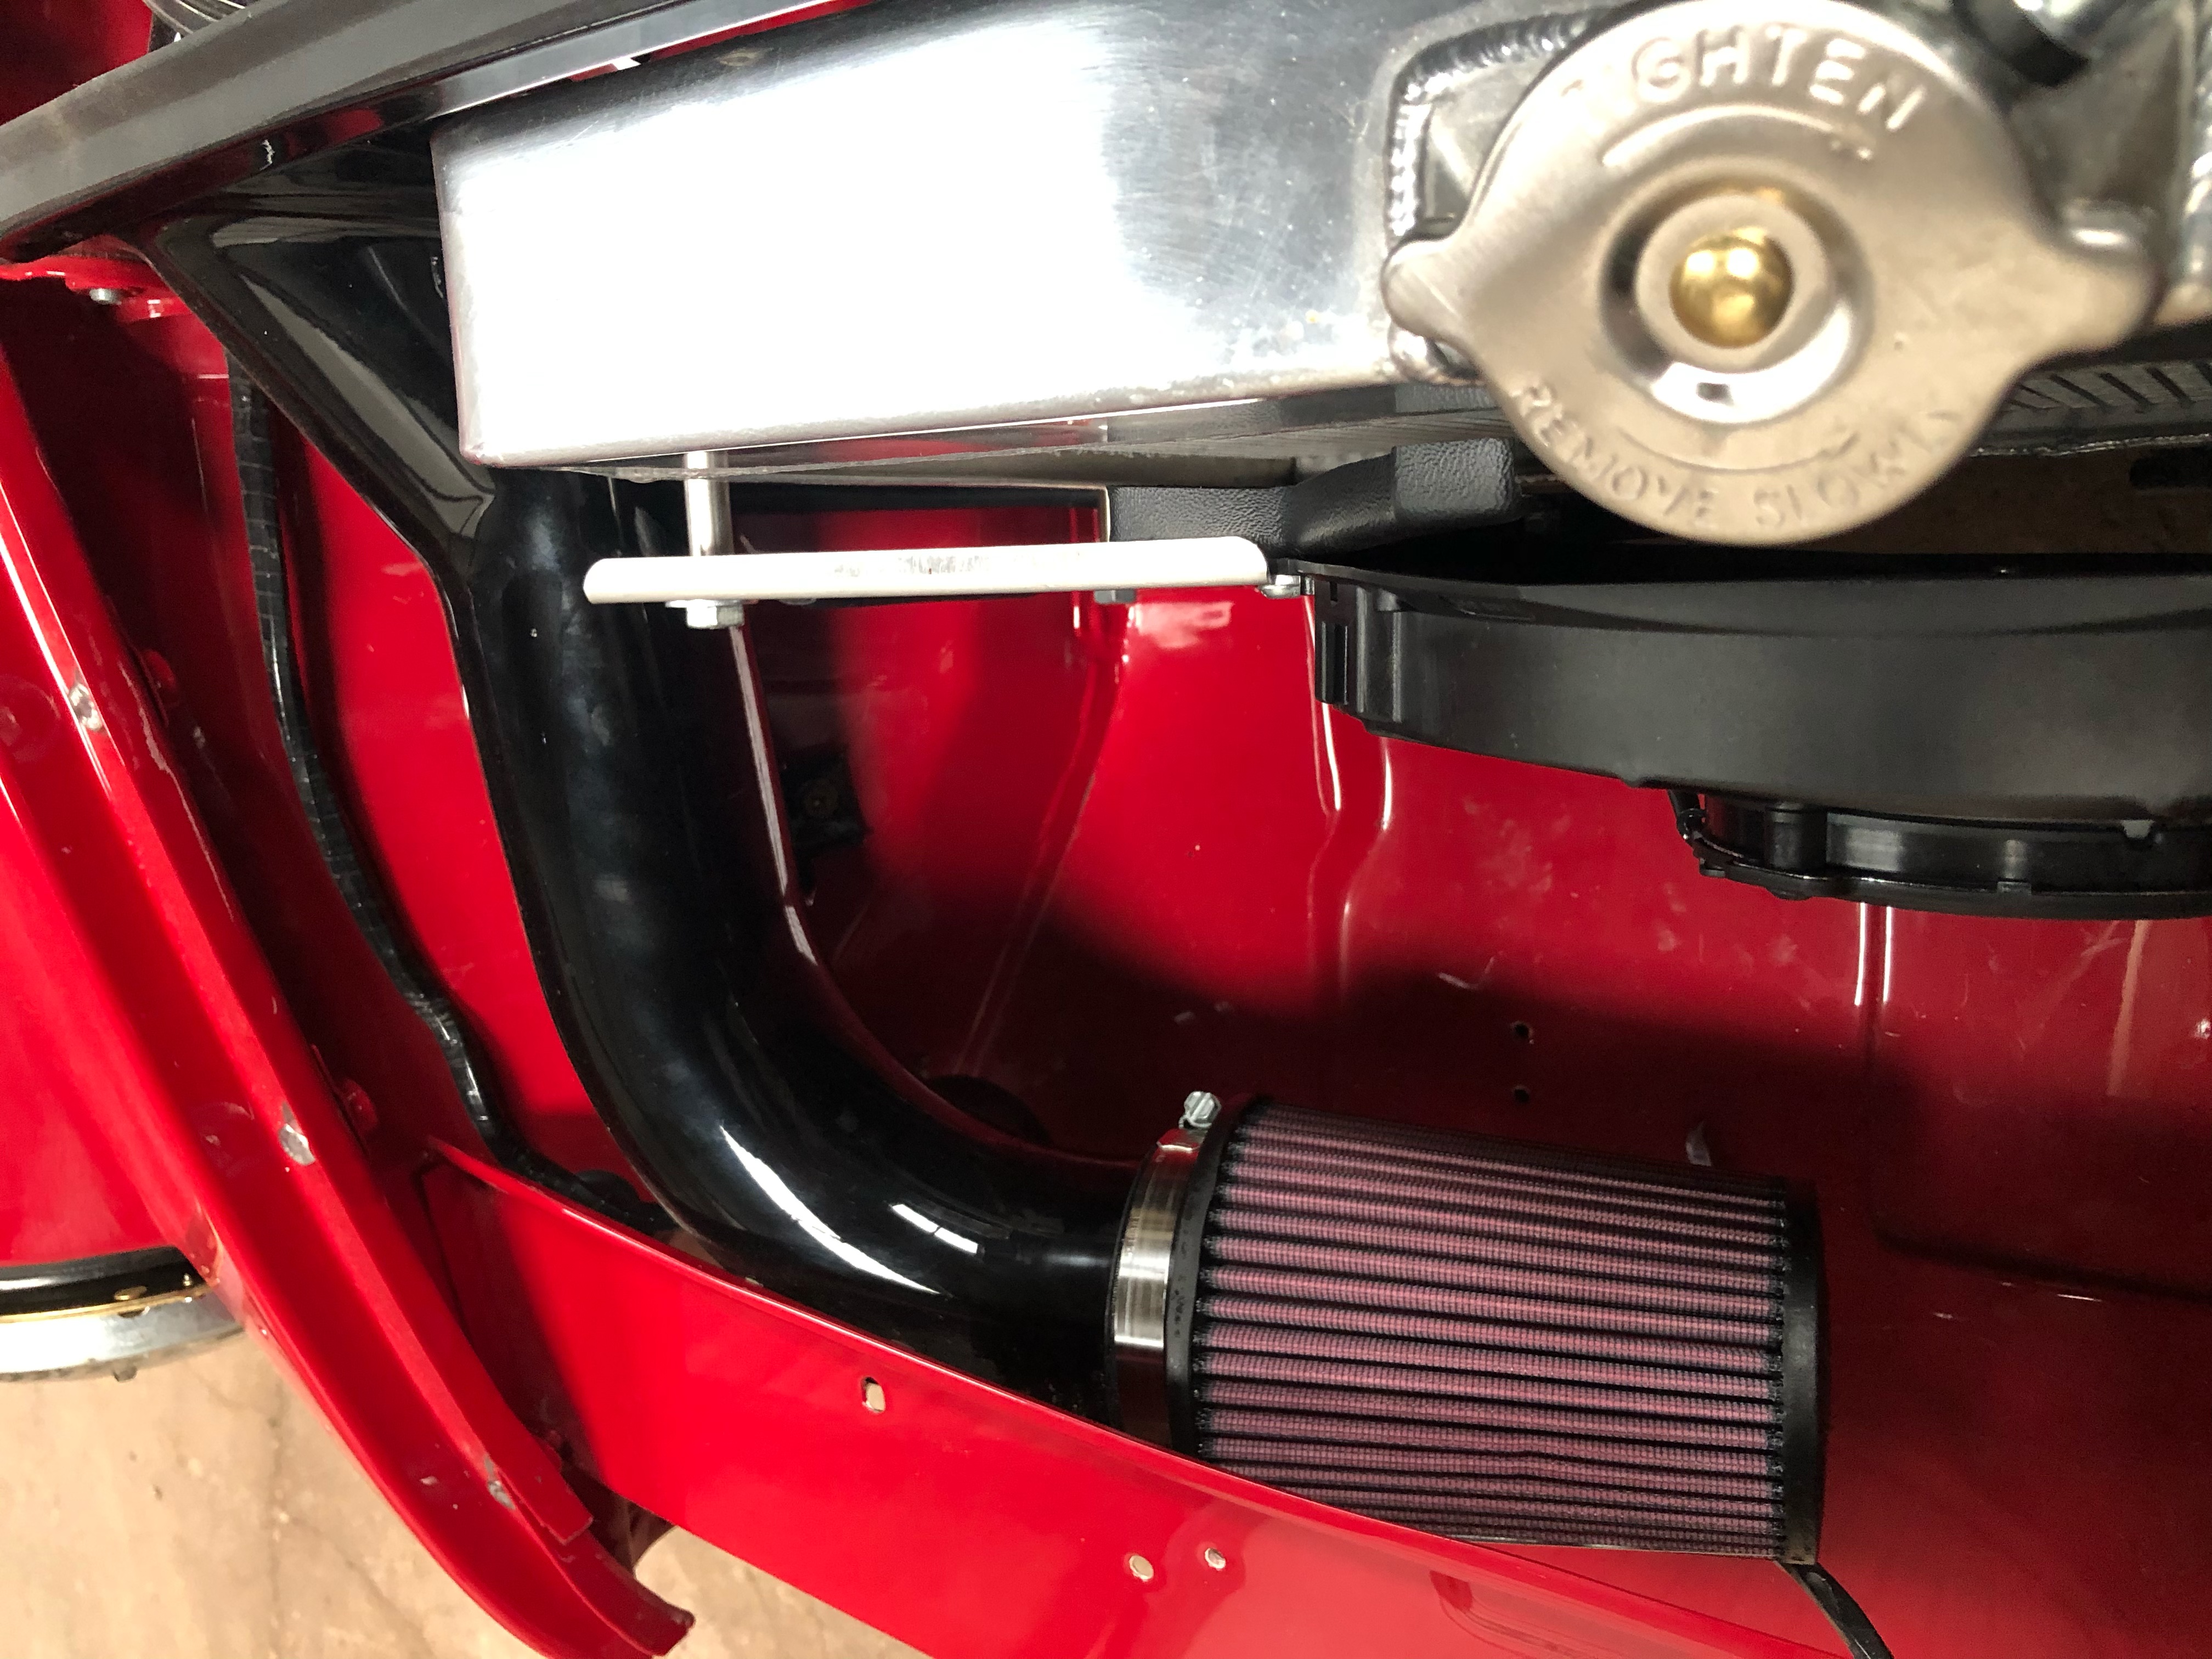

Harvey is back home for Easter so we may drive it outside the barn, but we will take some more video footage. Just a couple of things to do since getting it running - we need to fit a non return valve on the fuel line to stop petrol siphoning back into the tank. It did that overnight on Saturday, so when we came to start it again on Sunday the ignition key needed turning ‘on’ a few times to prime up to the fuel rail. The pump only comes on for a few seconds otherwise, so won’t do this if you keep cranking. The bit doing the cranking is the MGB wiring whereas the ECU is just providing the spark and fuel.
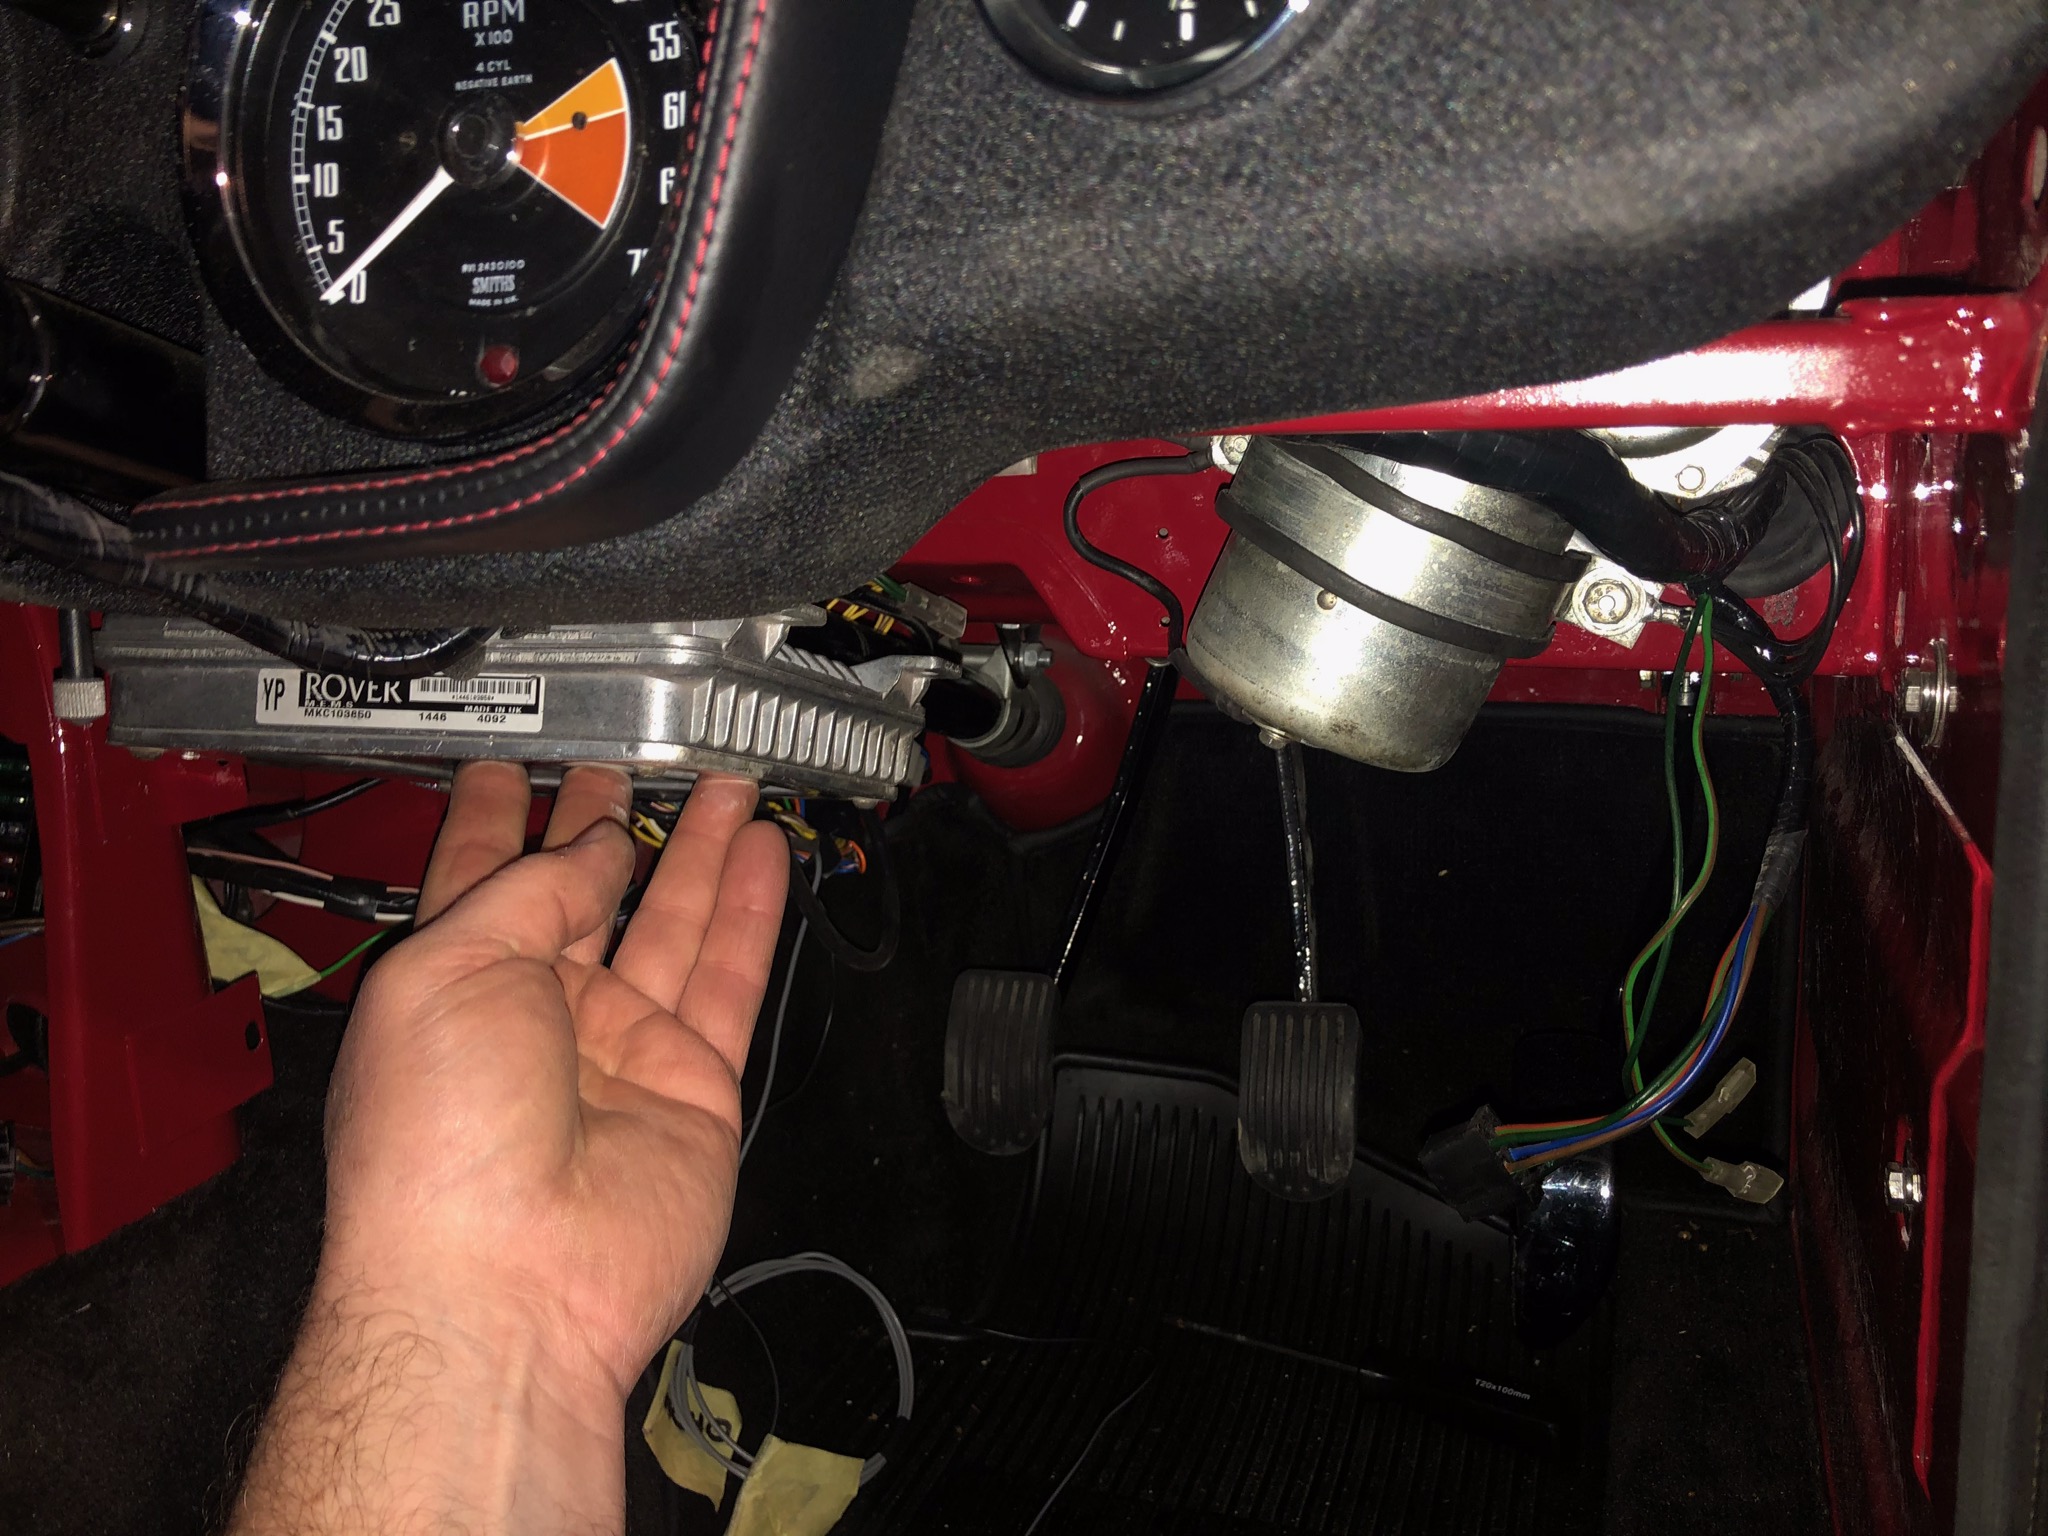
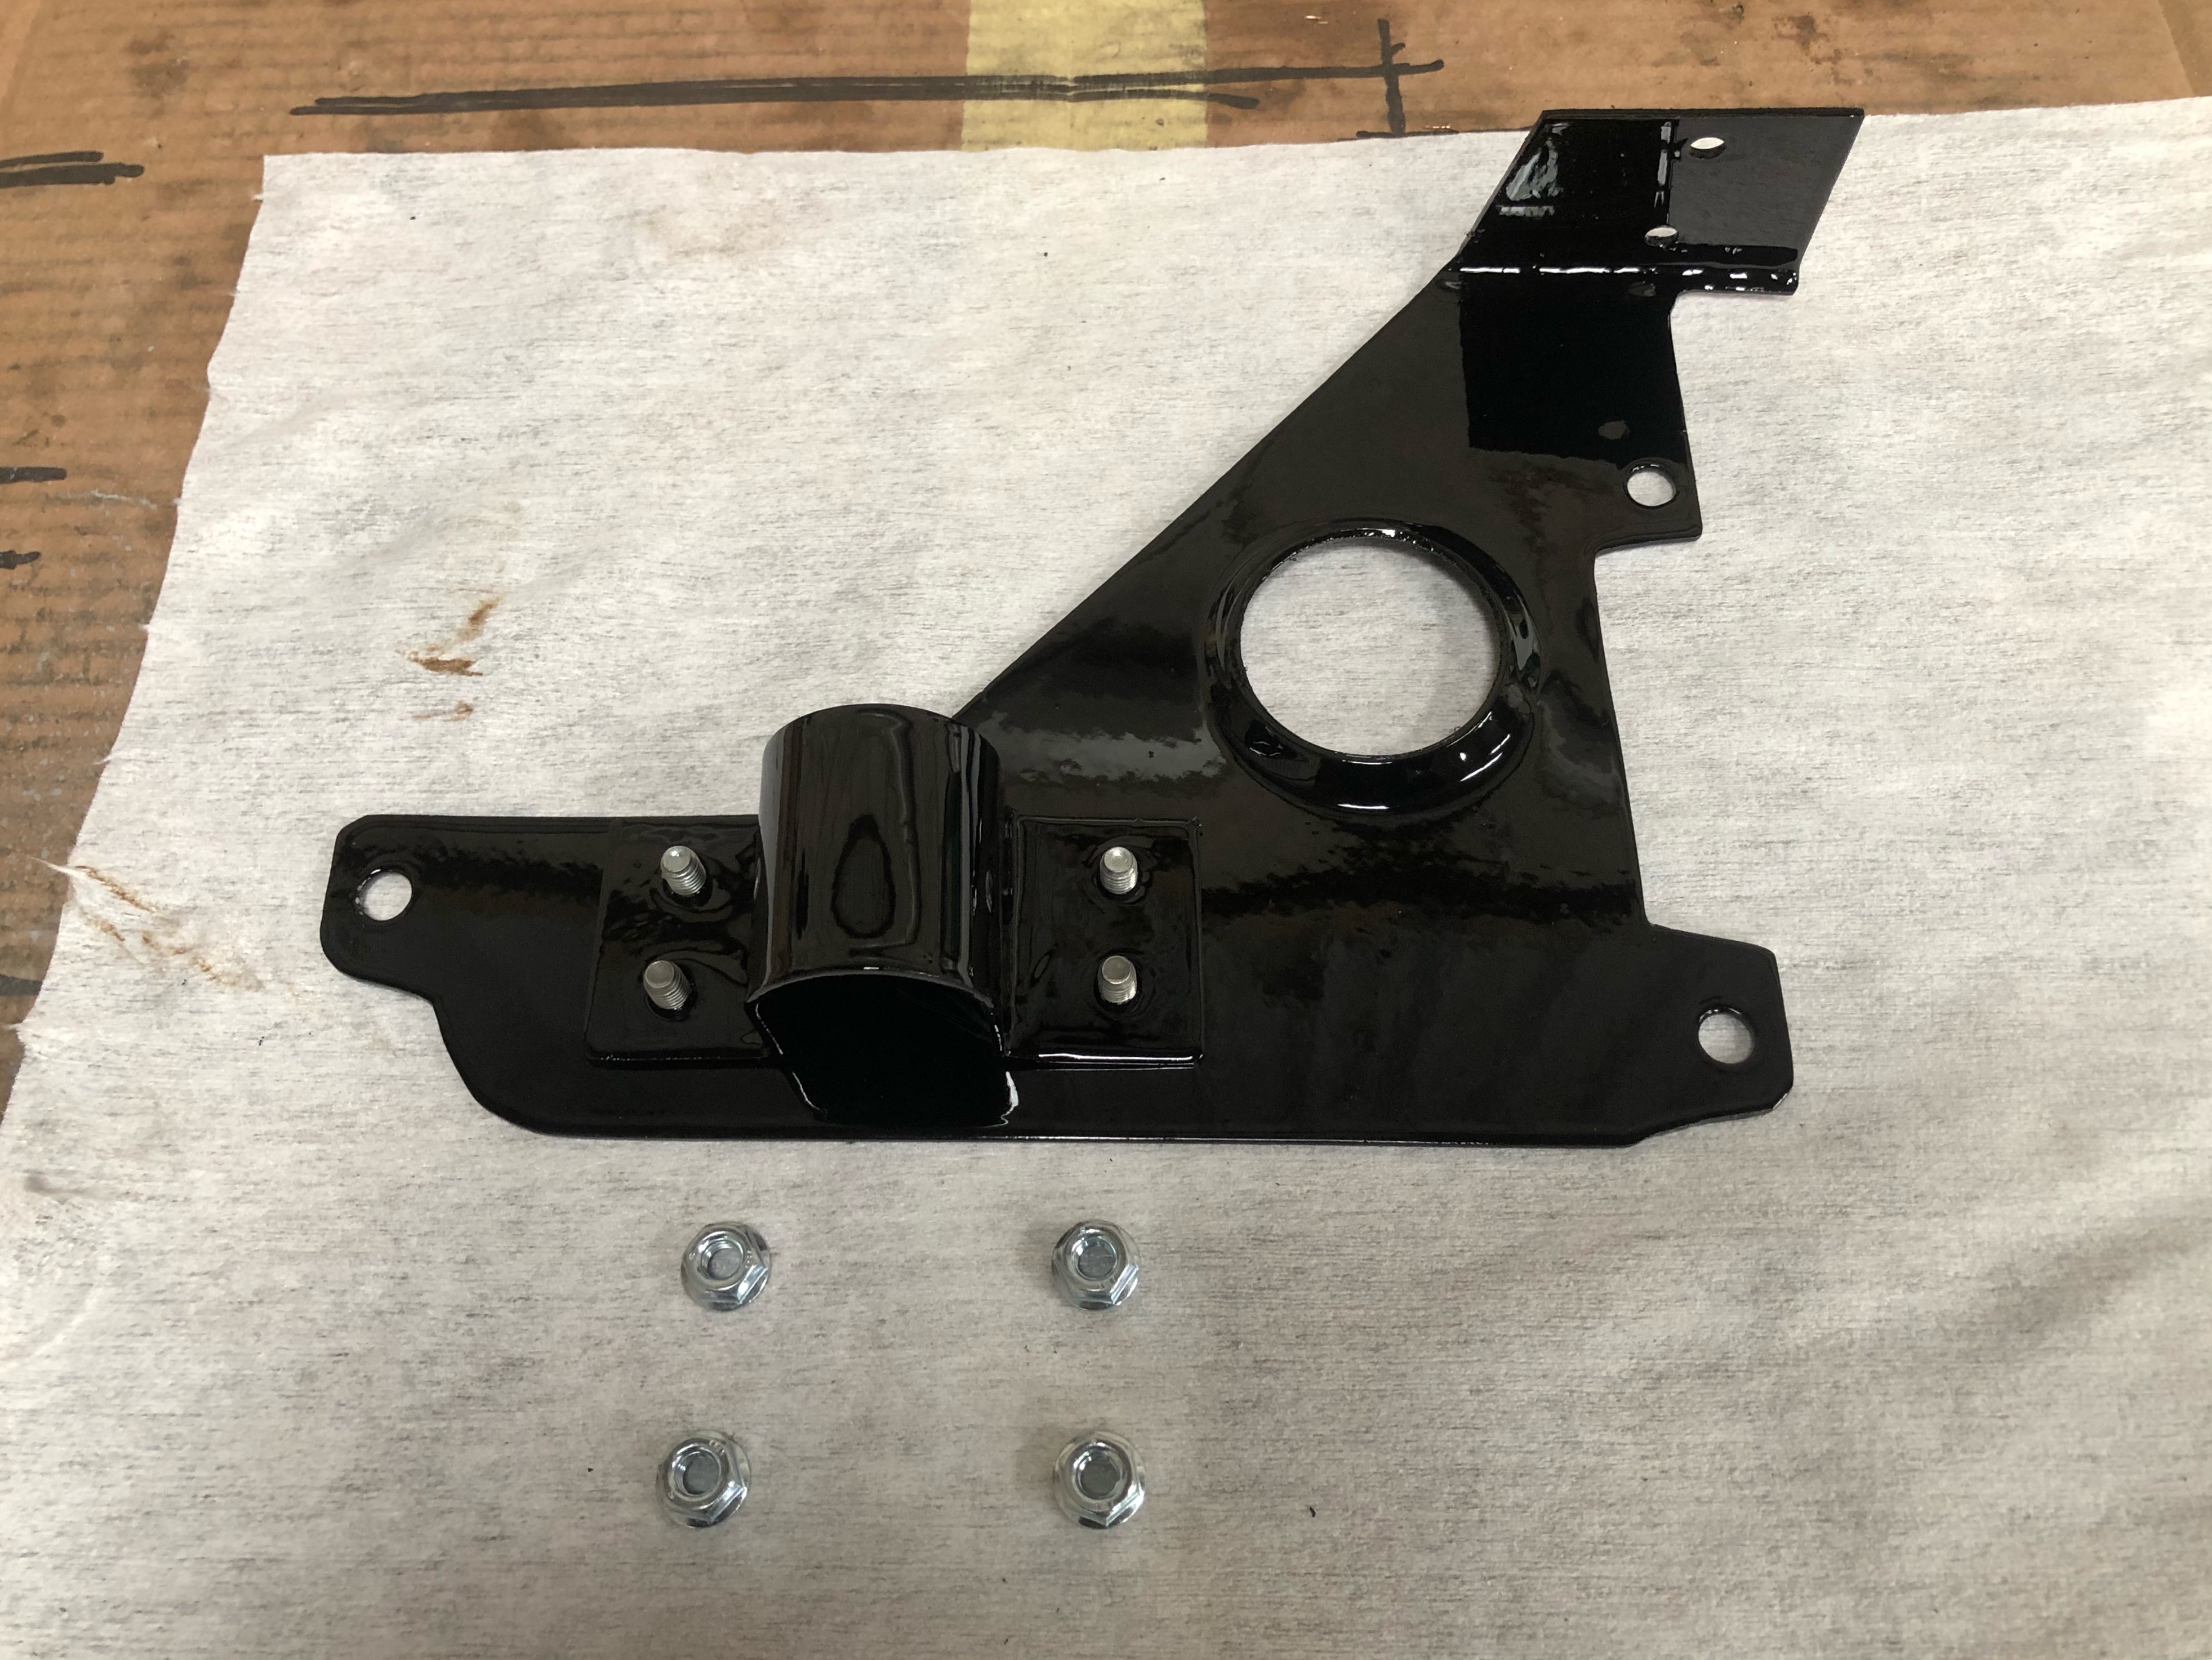
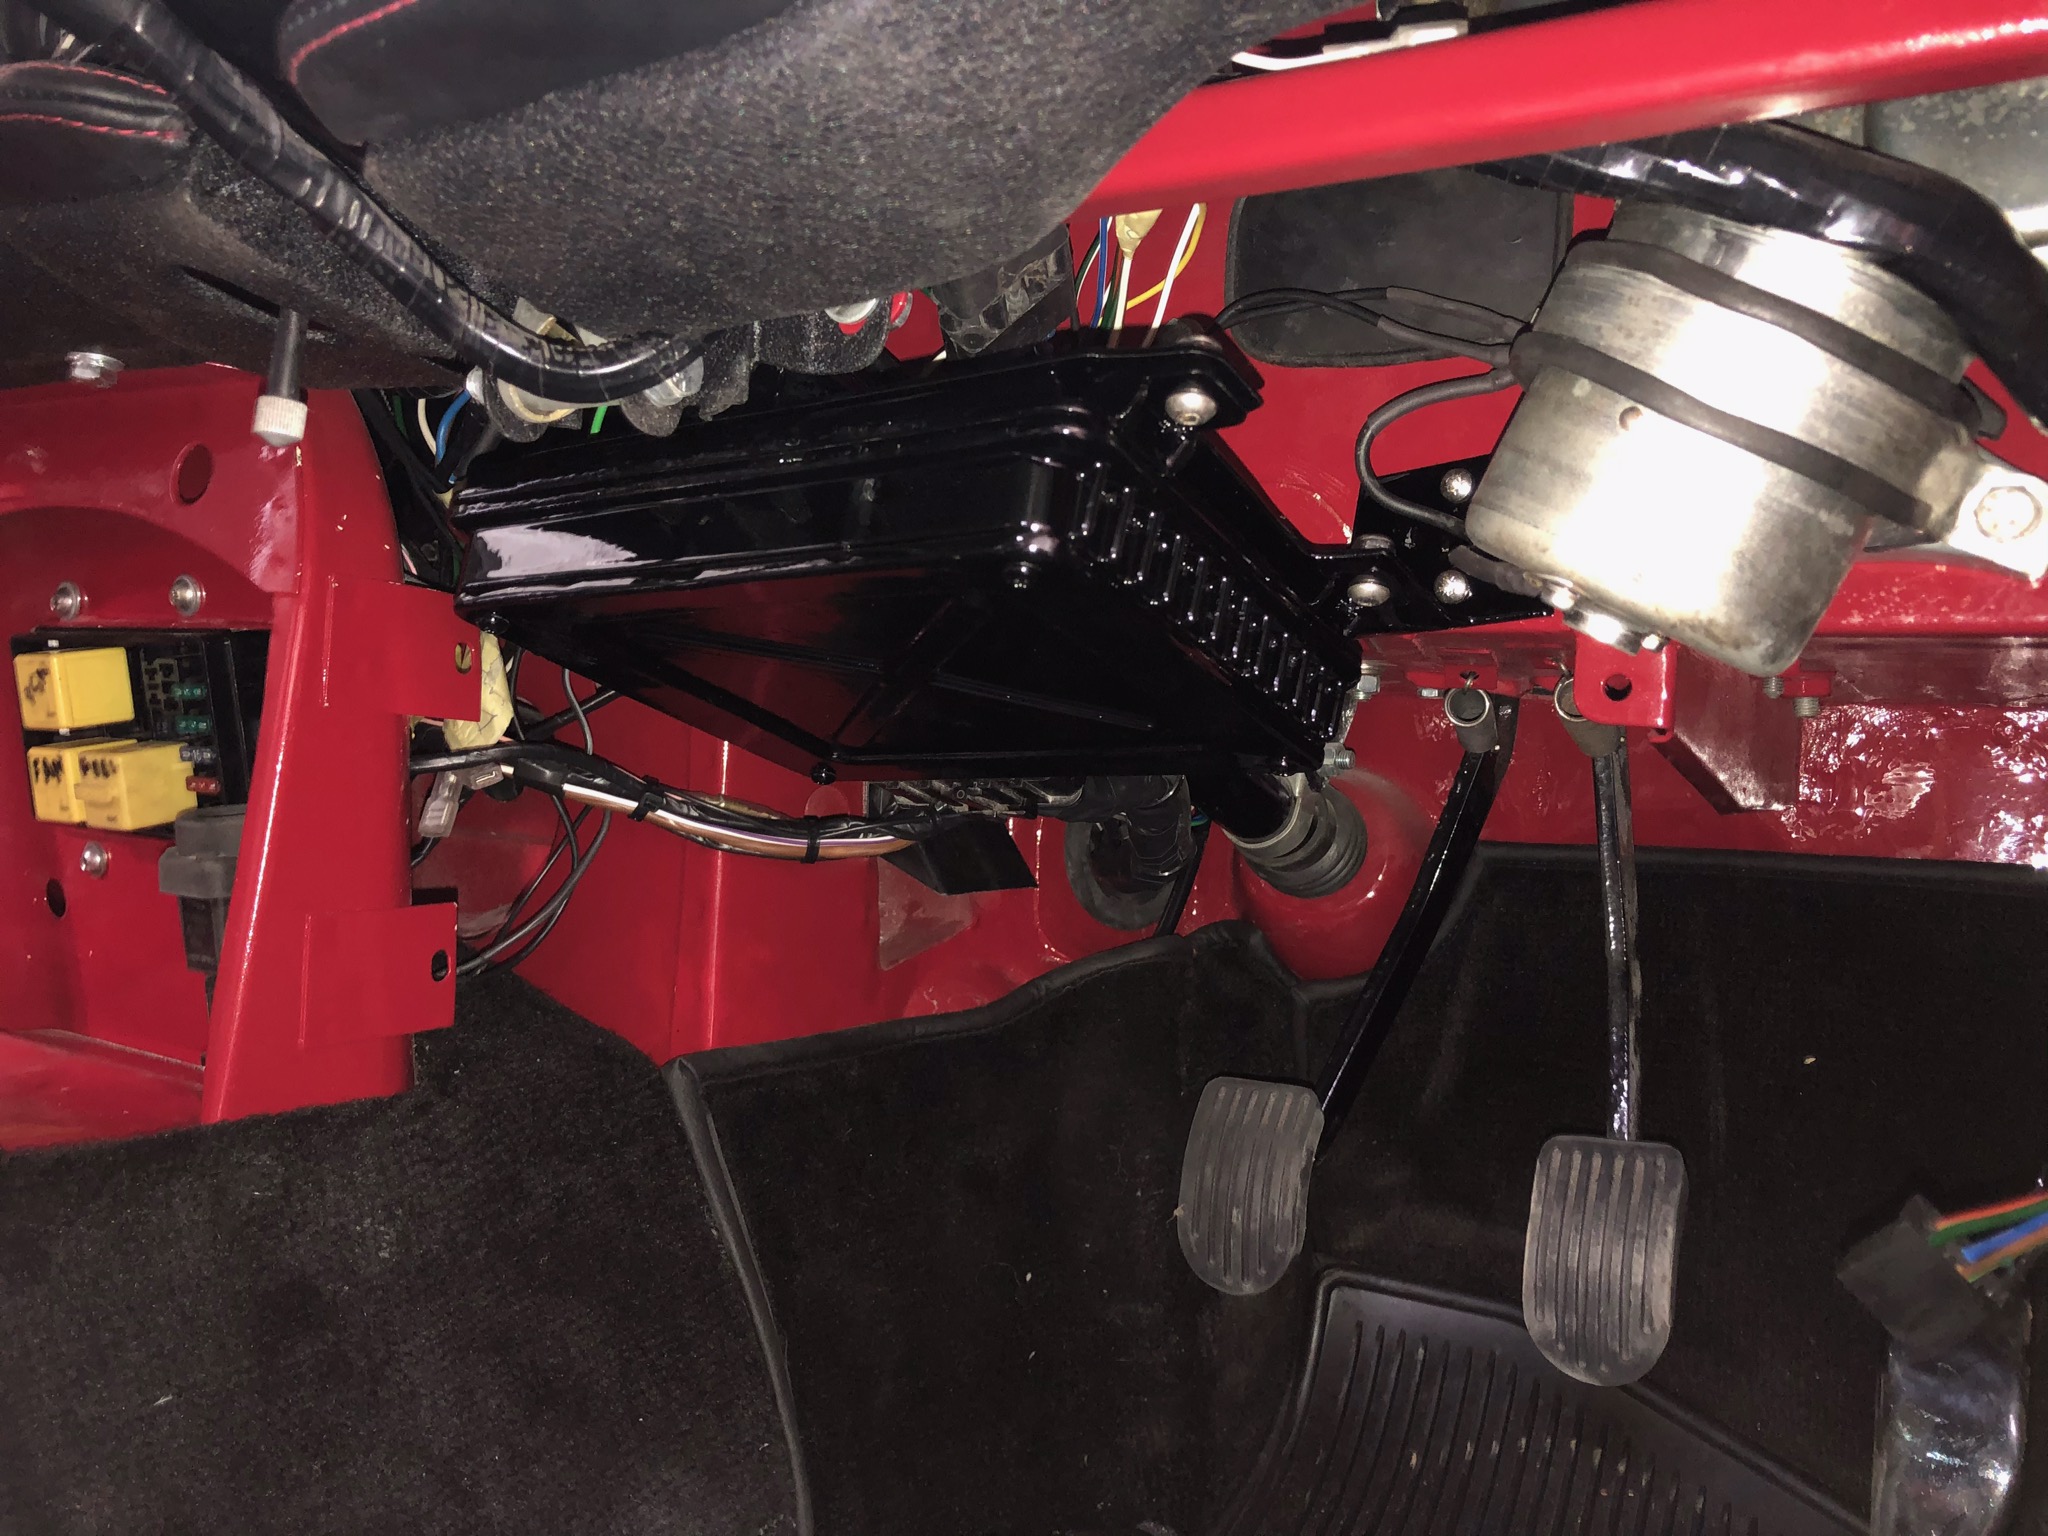
We fitted the fuse and relay housing into the car yesterday and I’ve now got the task of making a mounting for the ECU to fix just under the steering column. It’s pretty limiting where this can go and i think some black wrinkle paint on the actual ECU should disguise it nicely
============================================================
21st March 2021
A couple of coats of etch primer, which you an buy pre-thinned in a 1 litre tin for a spraygun or aerosol only needs 15 to 20 minutes and you can go straight on with top coat. Really quick painting bits like this and the finish will last for years.
Finally fixed into position and it’s as neat as we could come up with. I ran through options (there weren’t many) with Harvey and he’s happy with where it’s mounted. It’s odd working on the car while he’s not here.
We have a spare ECU that will be put somewhere safe, but side by side it looks better painted black. There was a bit of 3M textured stone guard left over from when we did the underside of the car and as the cover was a little dented it had a couple of coats before top coat went on. It can hide a multitude of sins and made the bottom cover which faces the footwell area look a lot better.

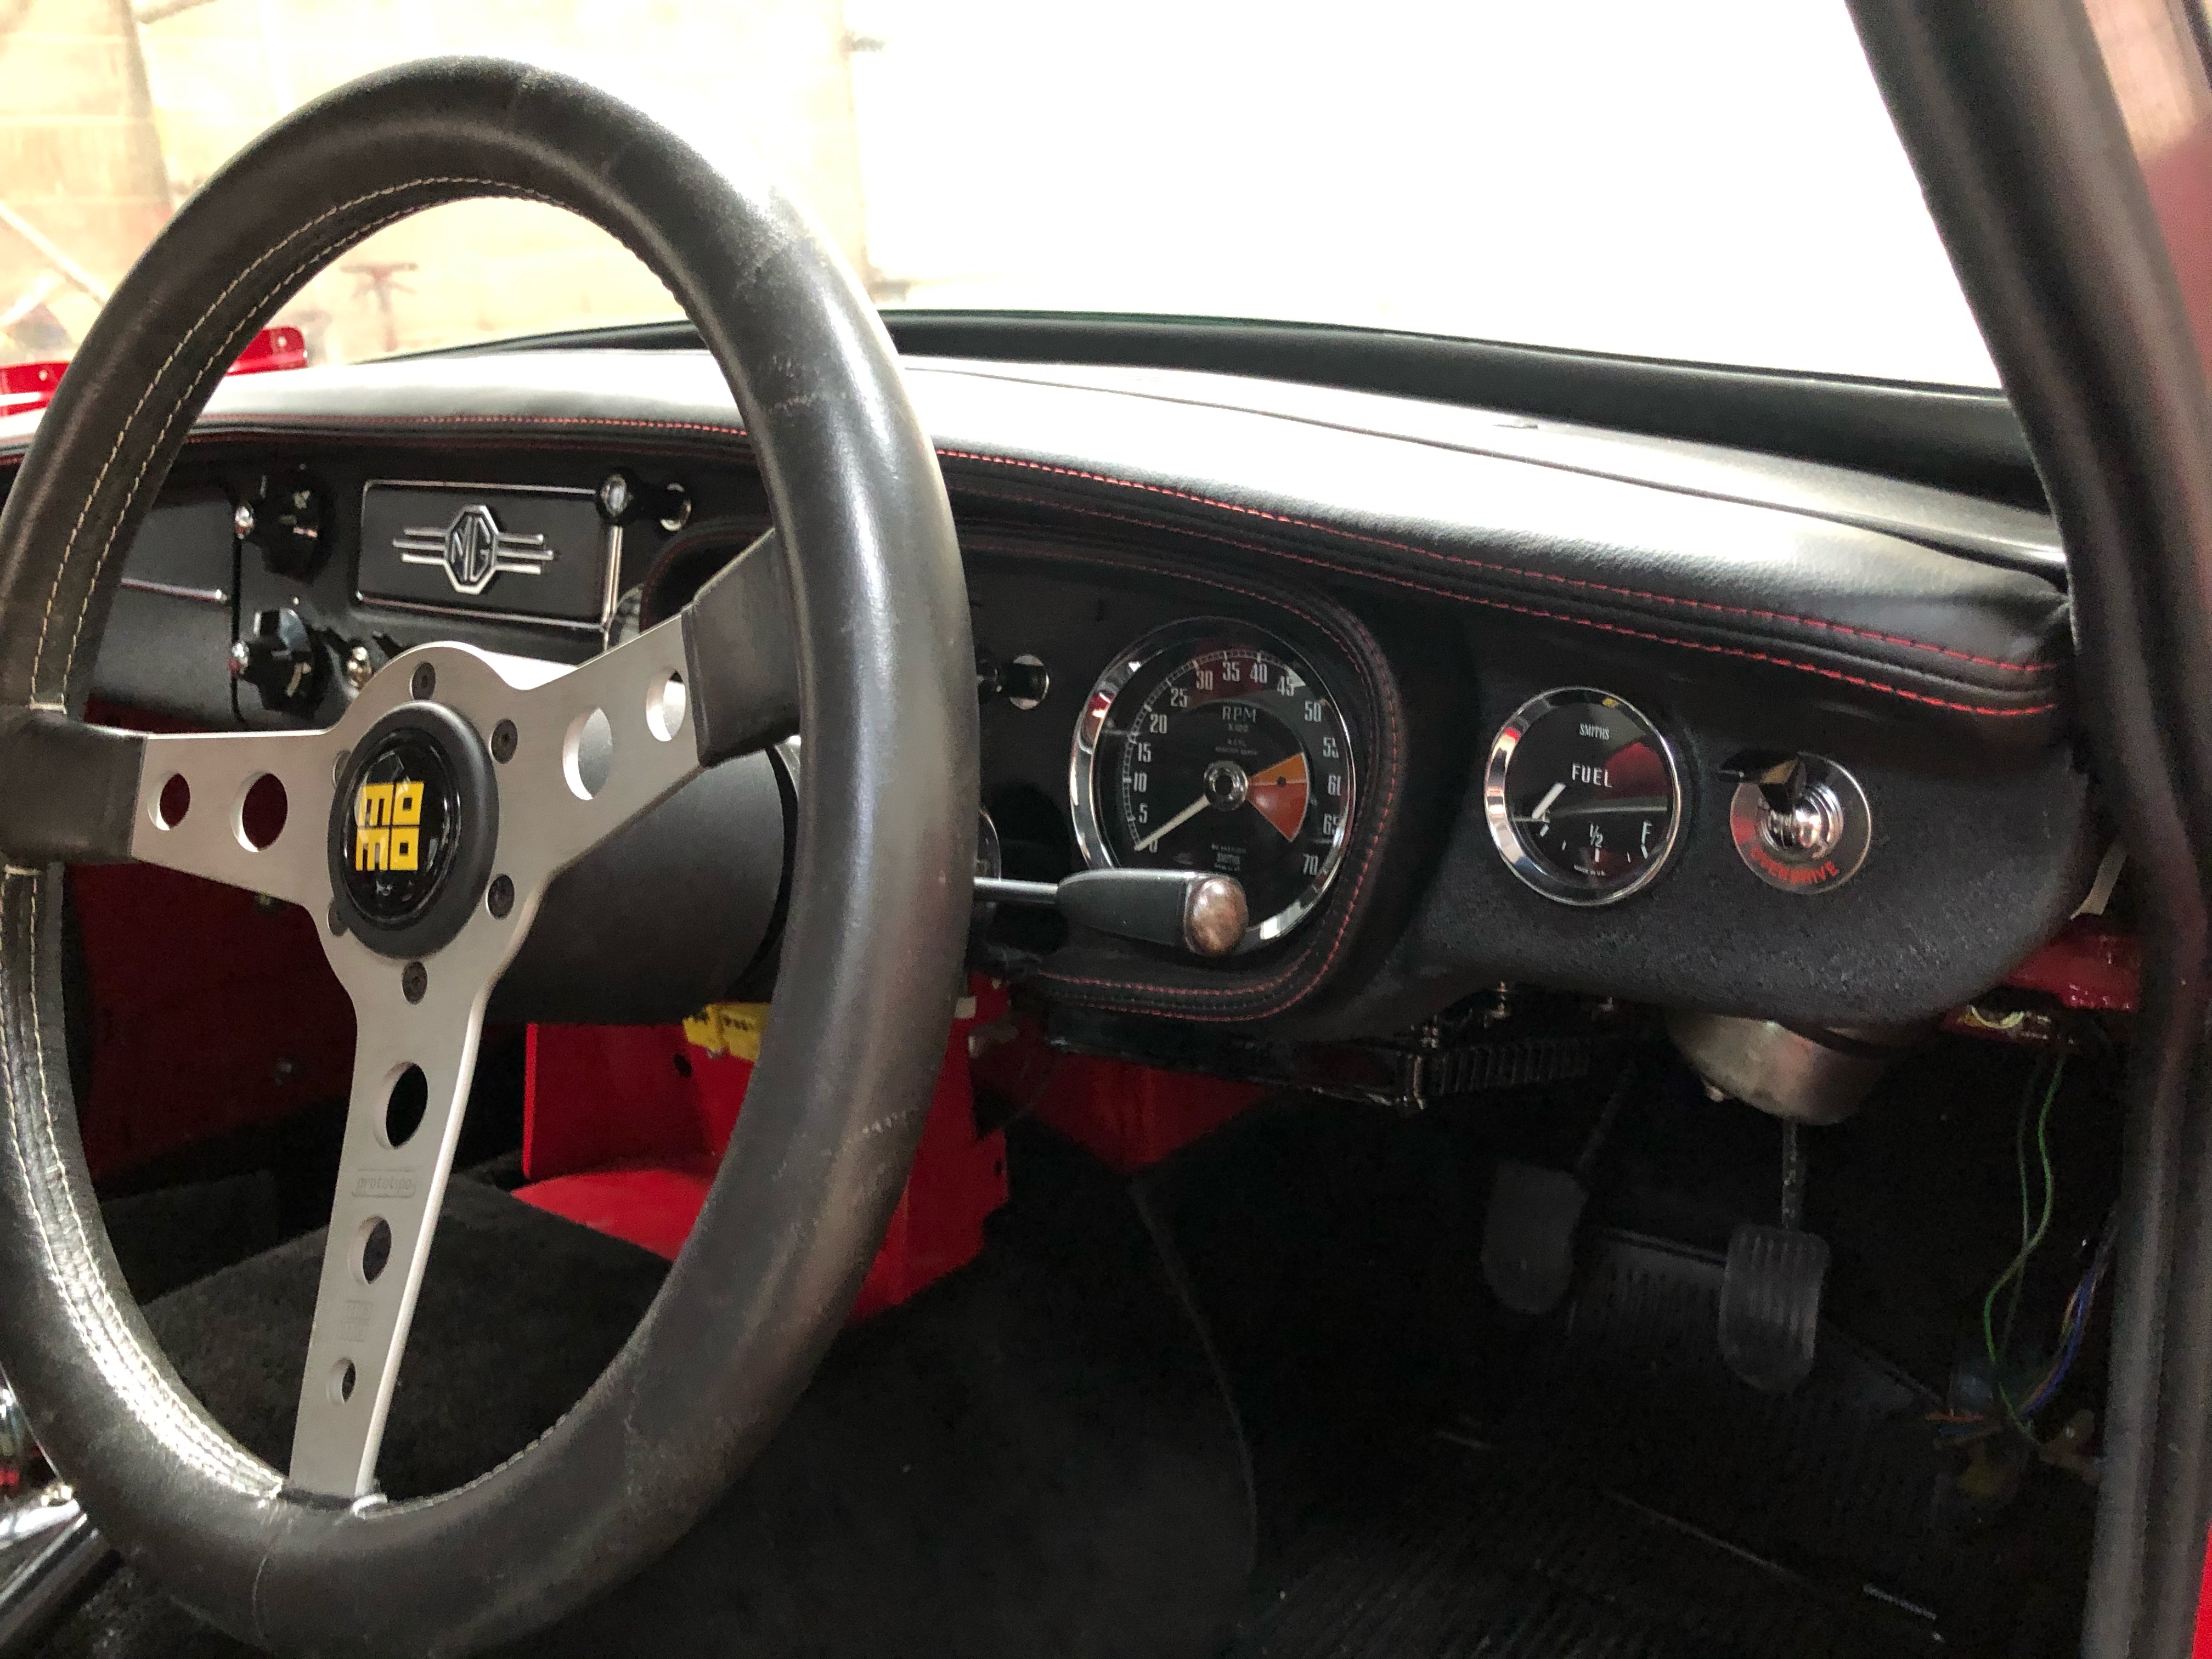
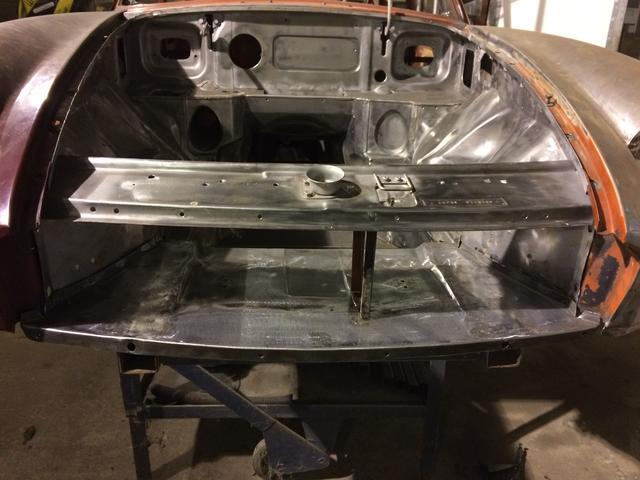
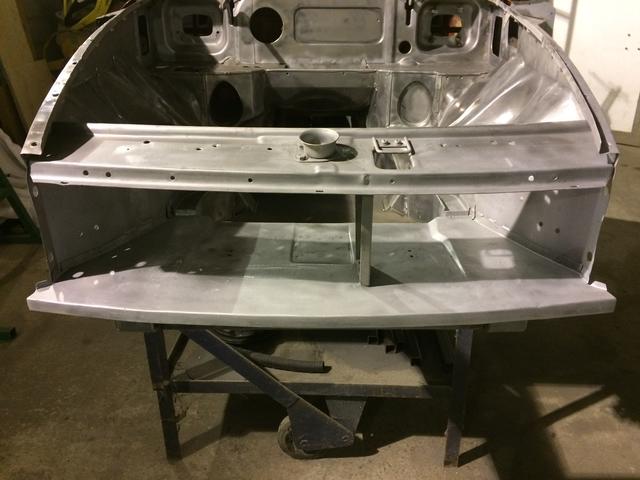
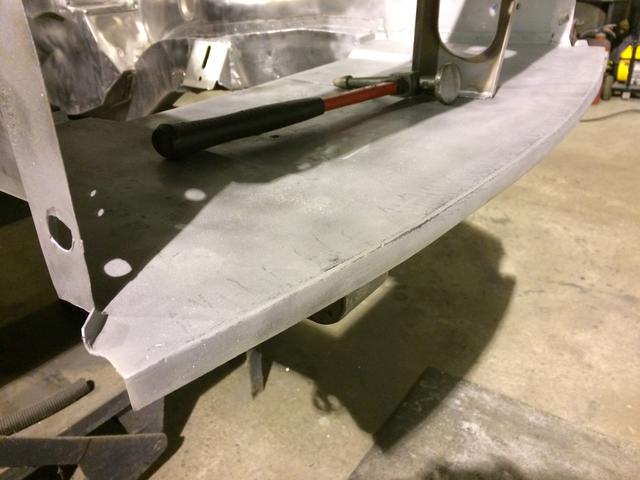
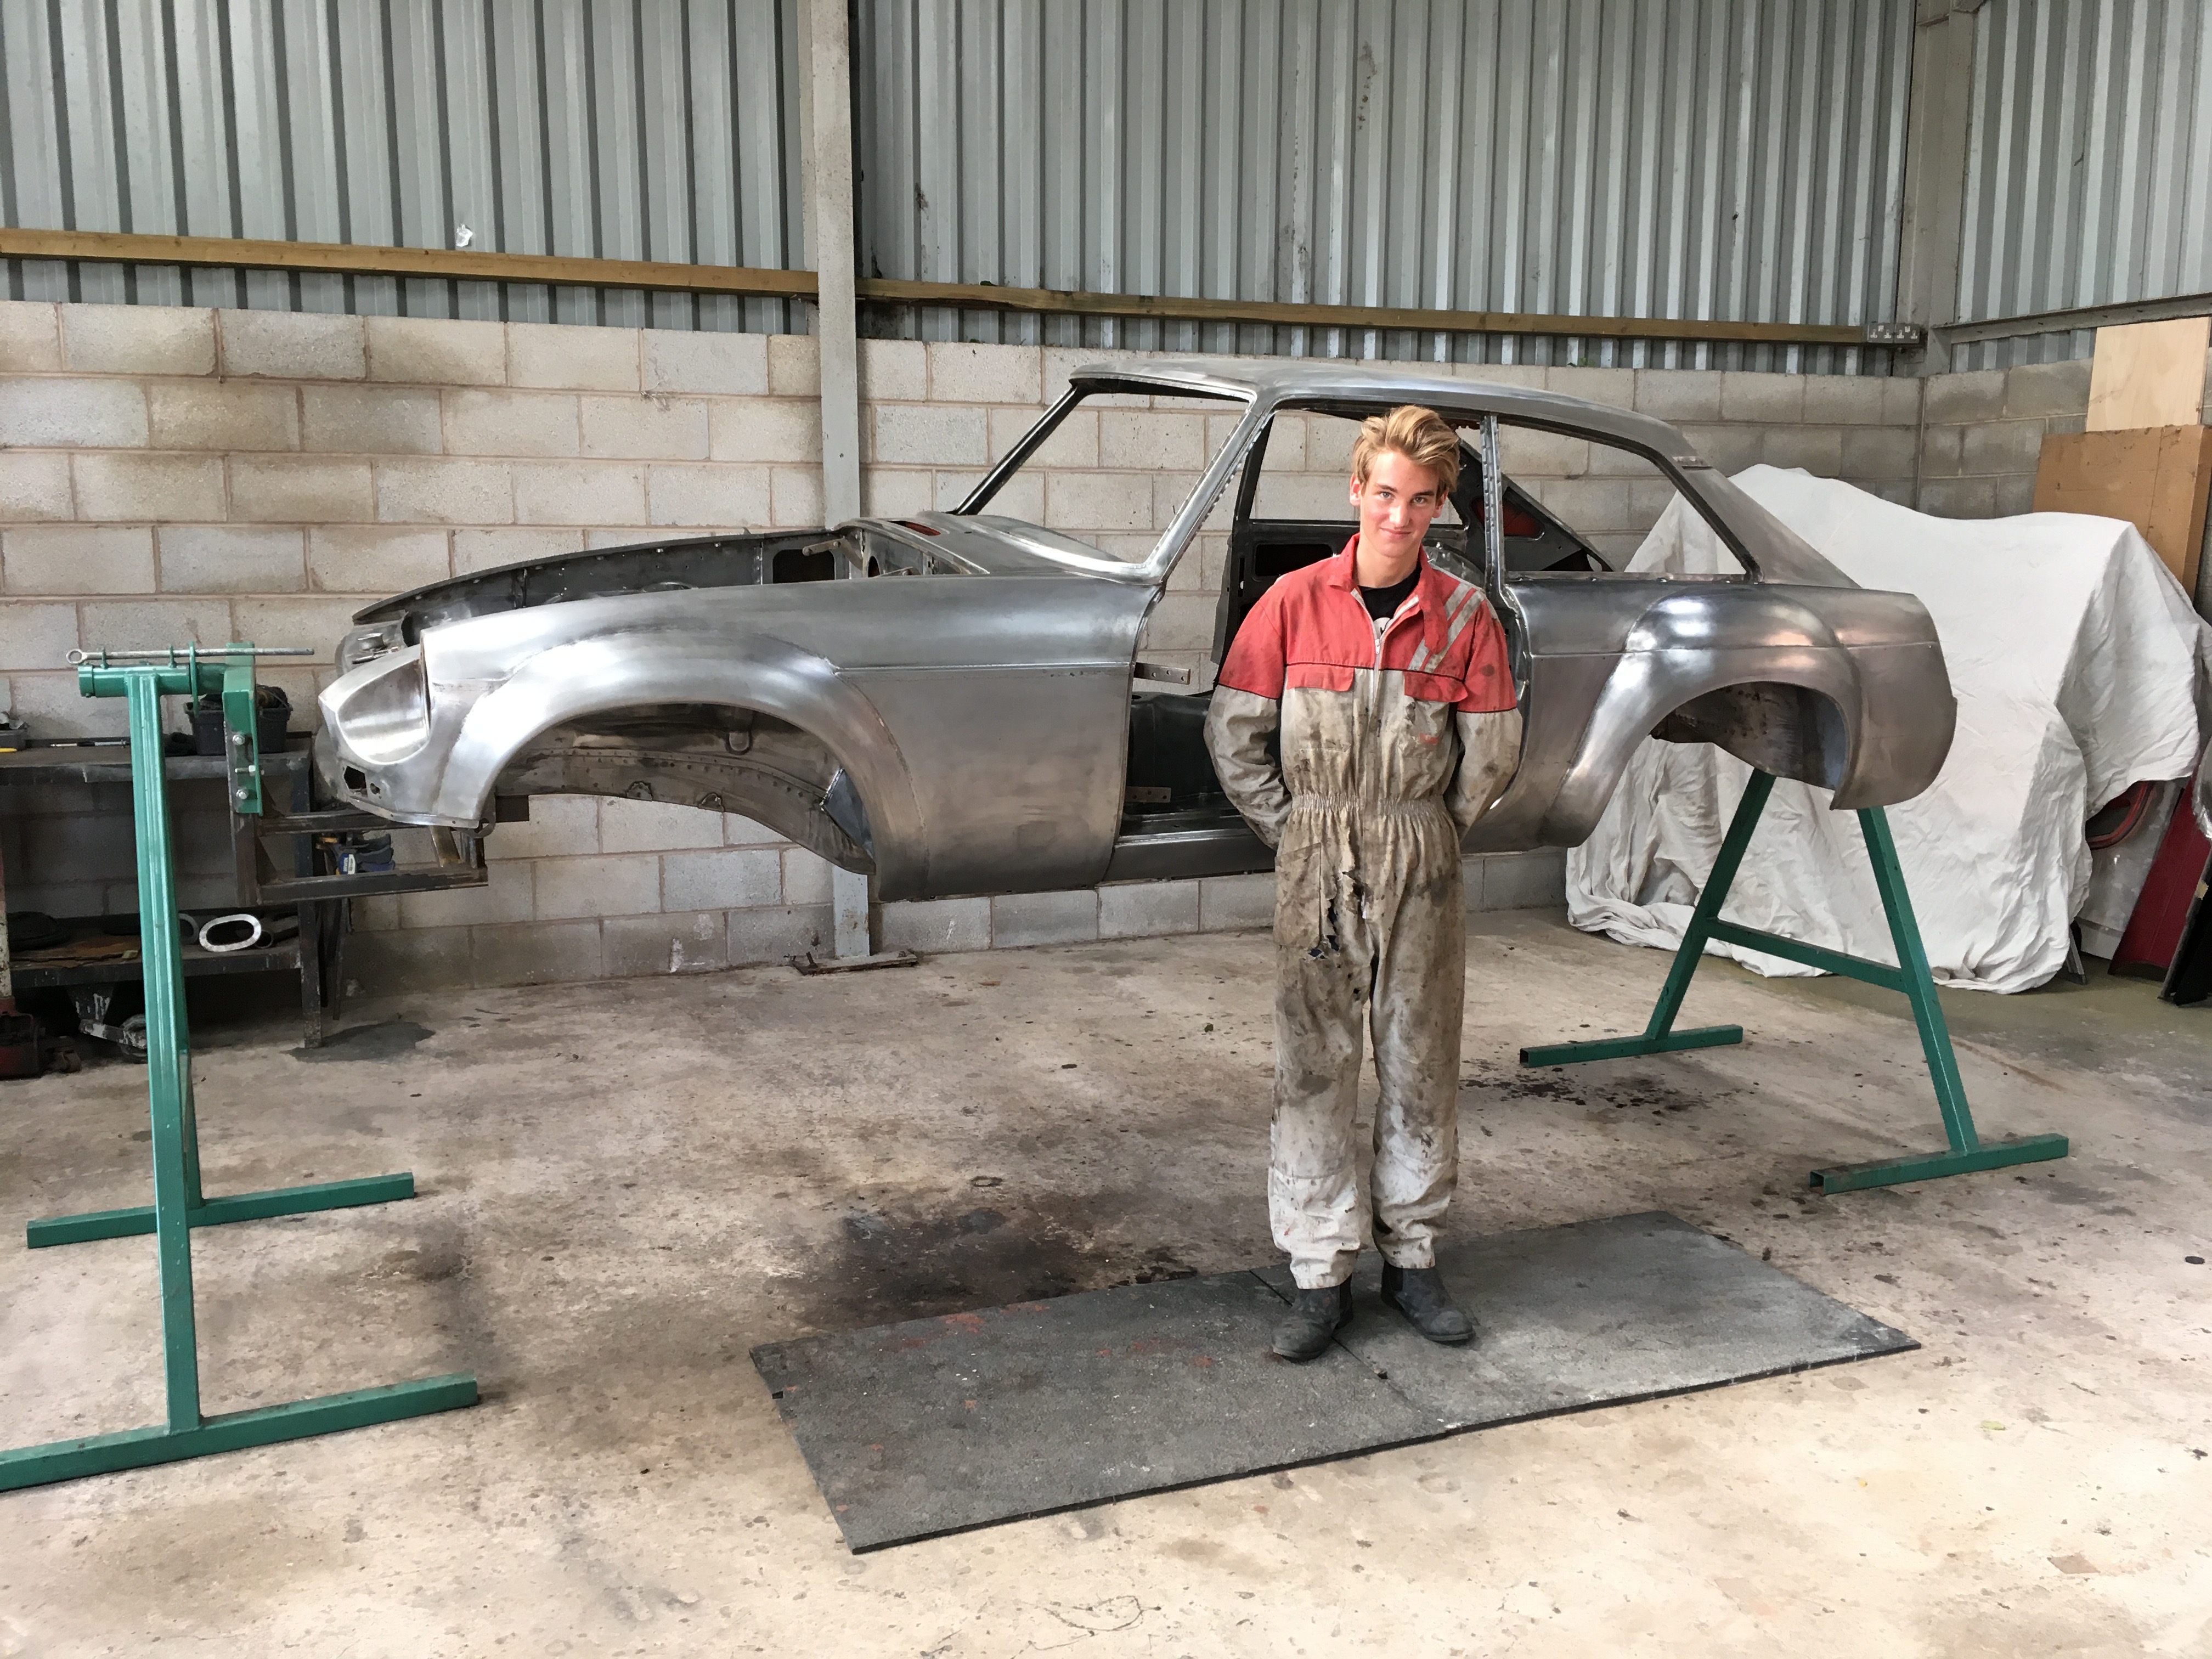
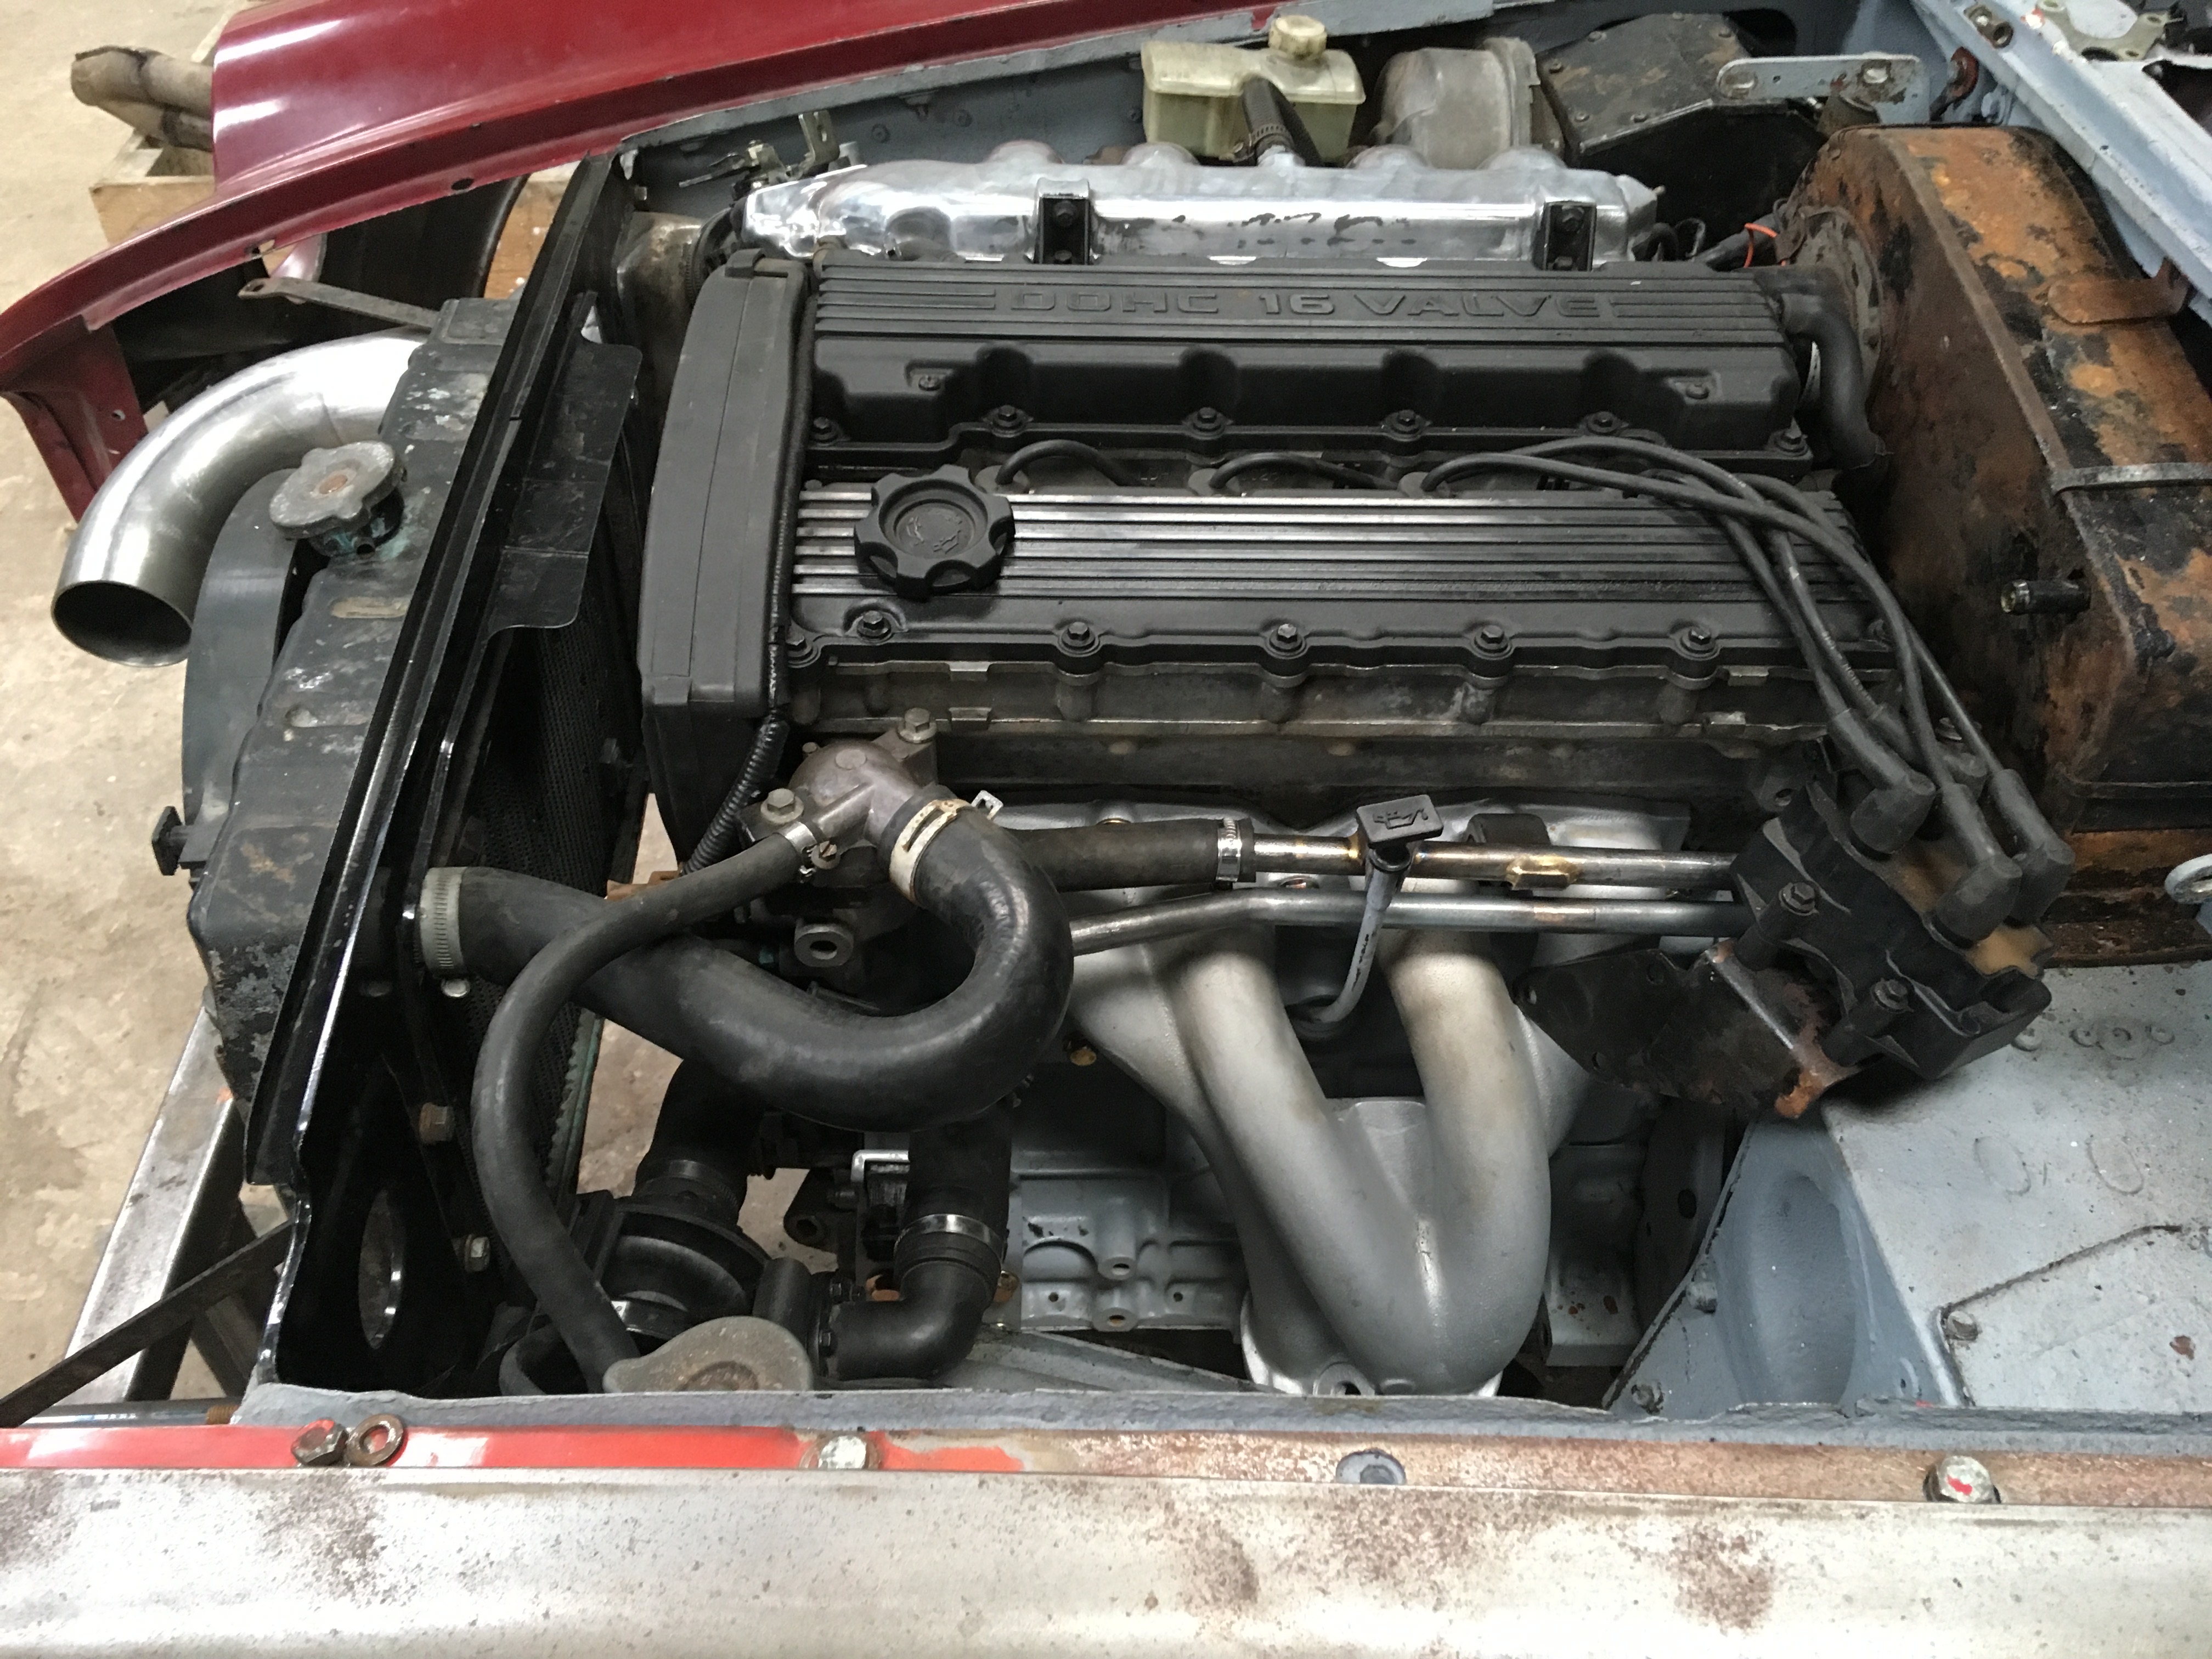
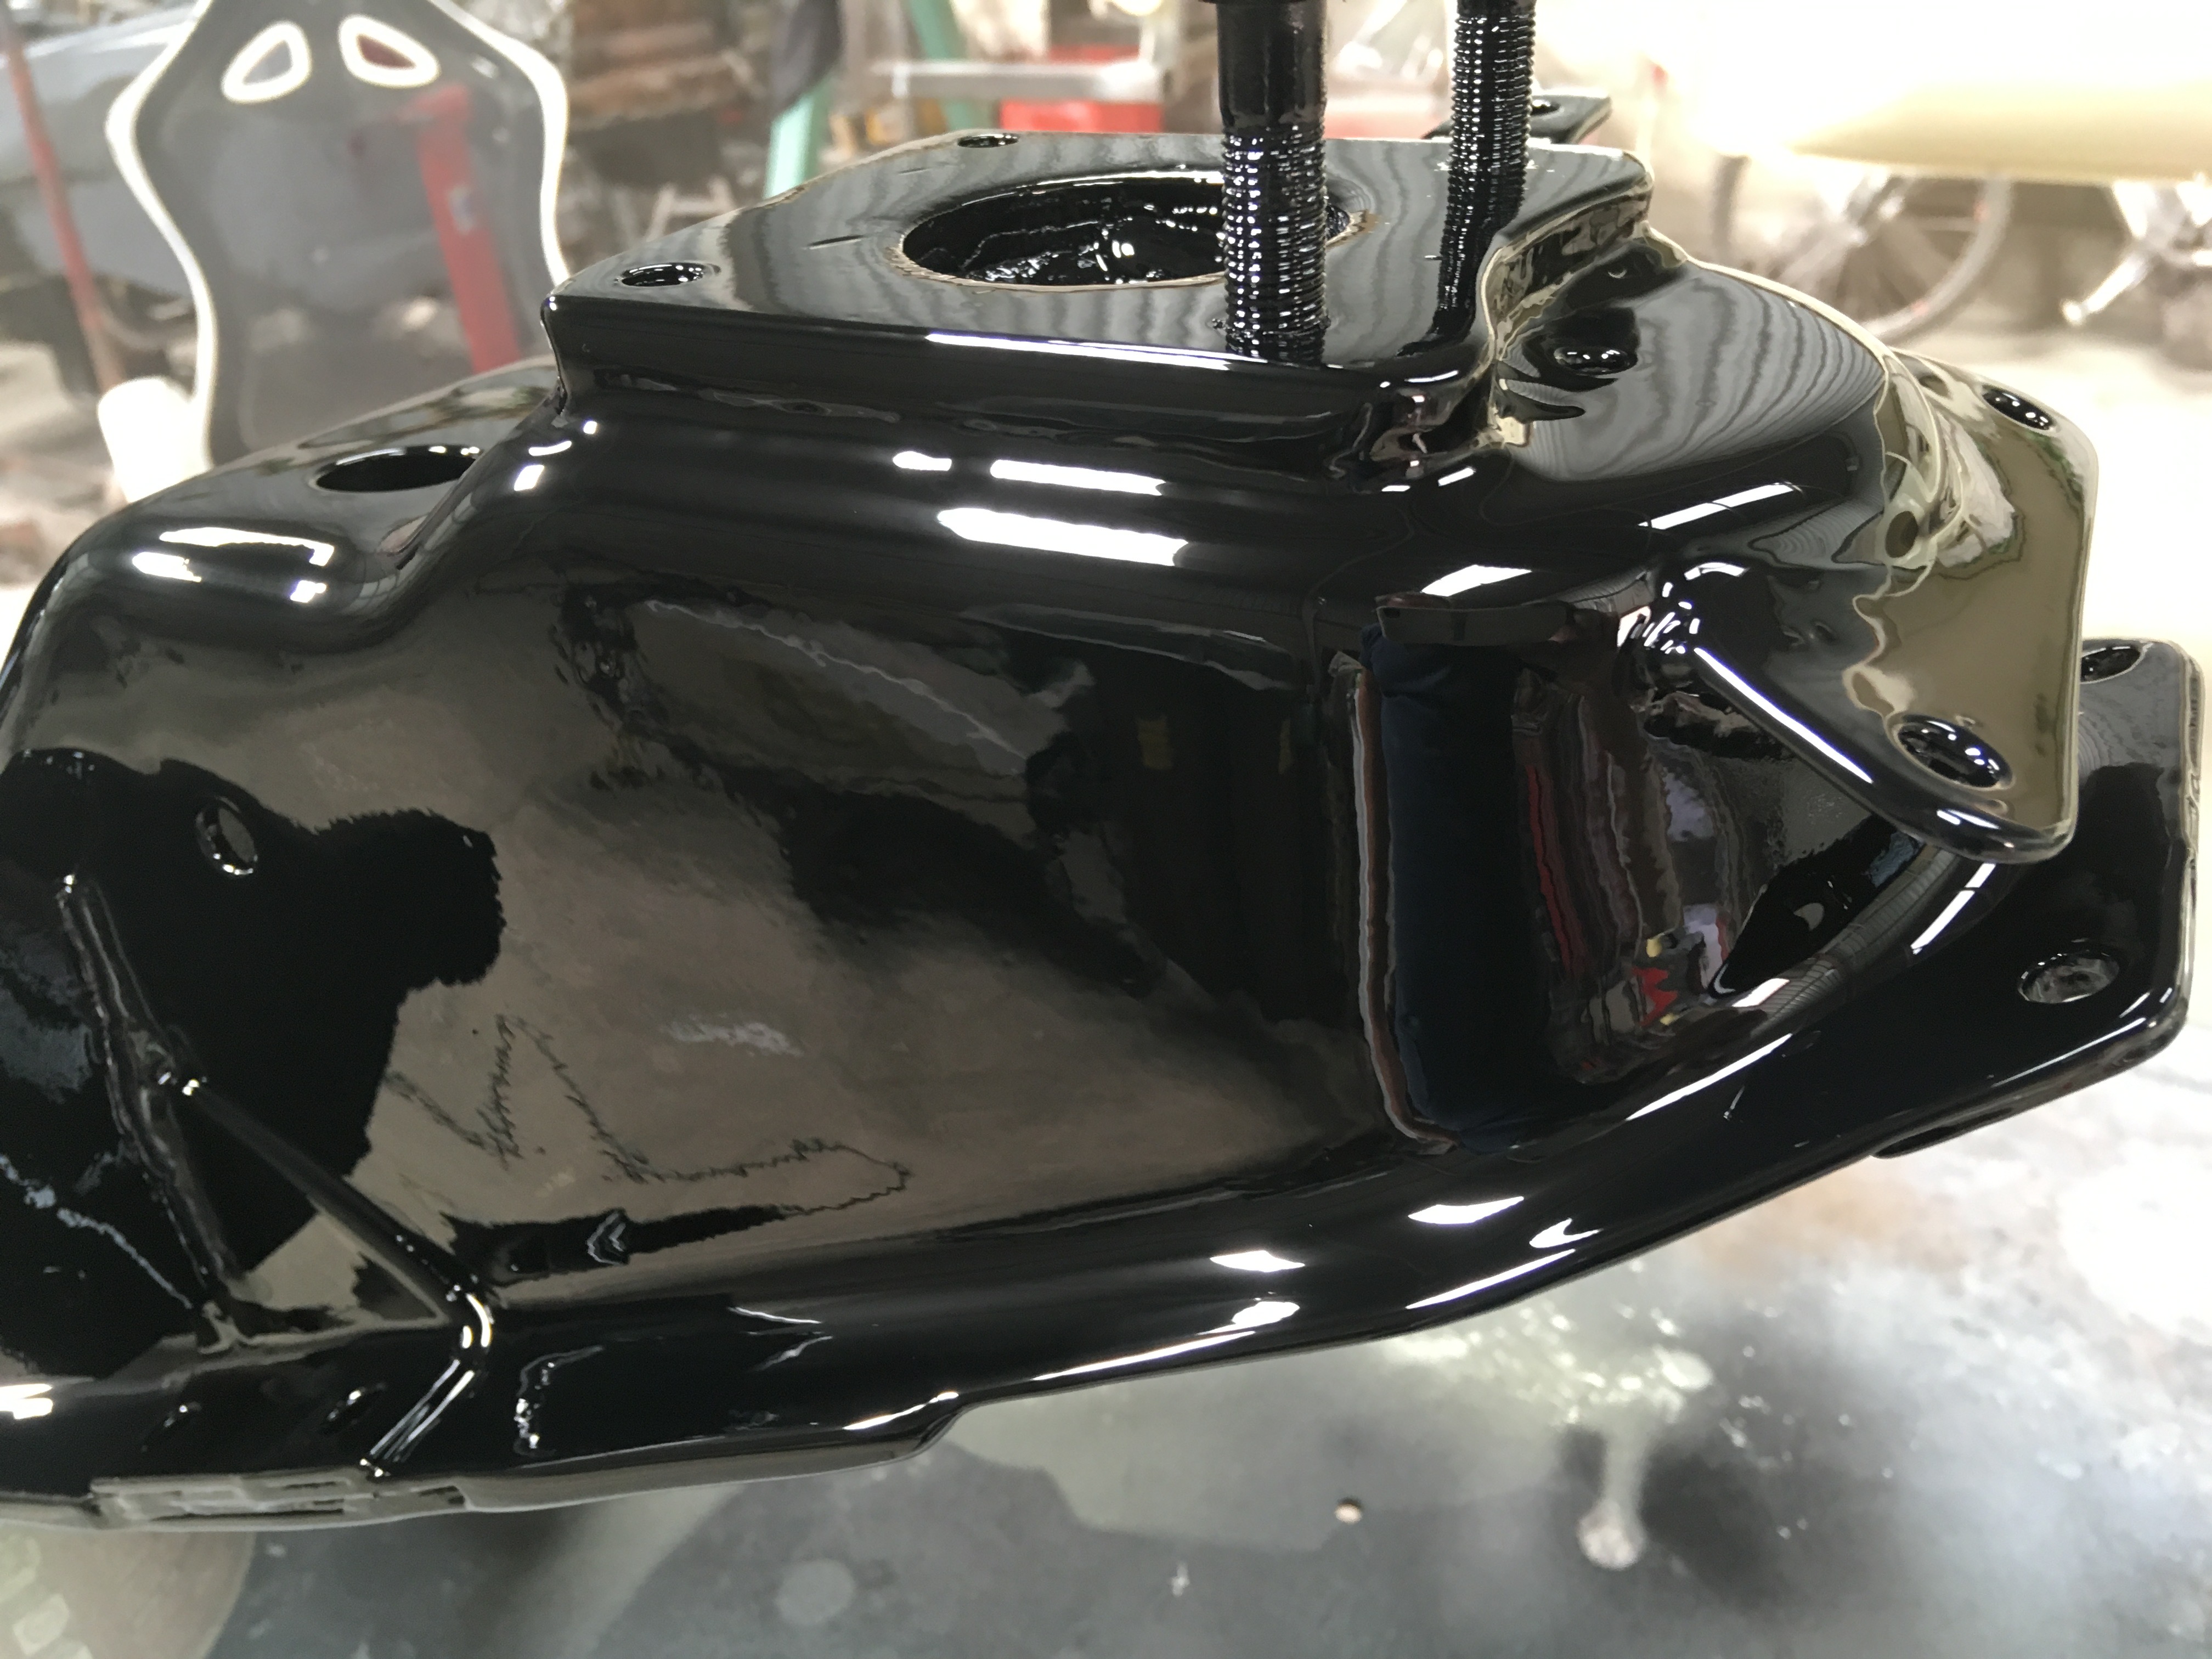
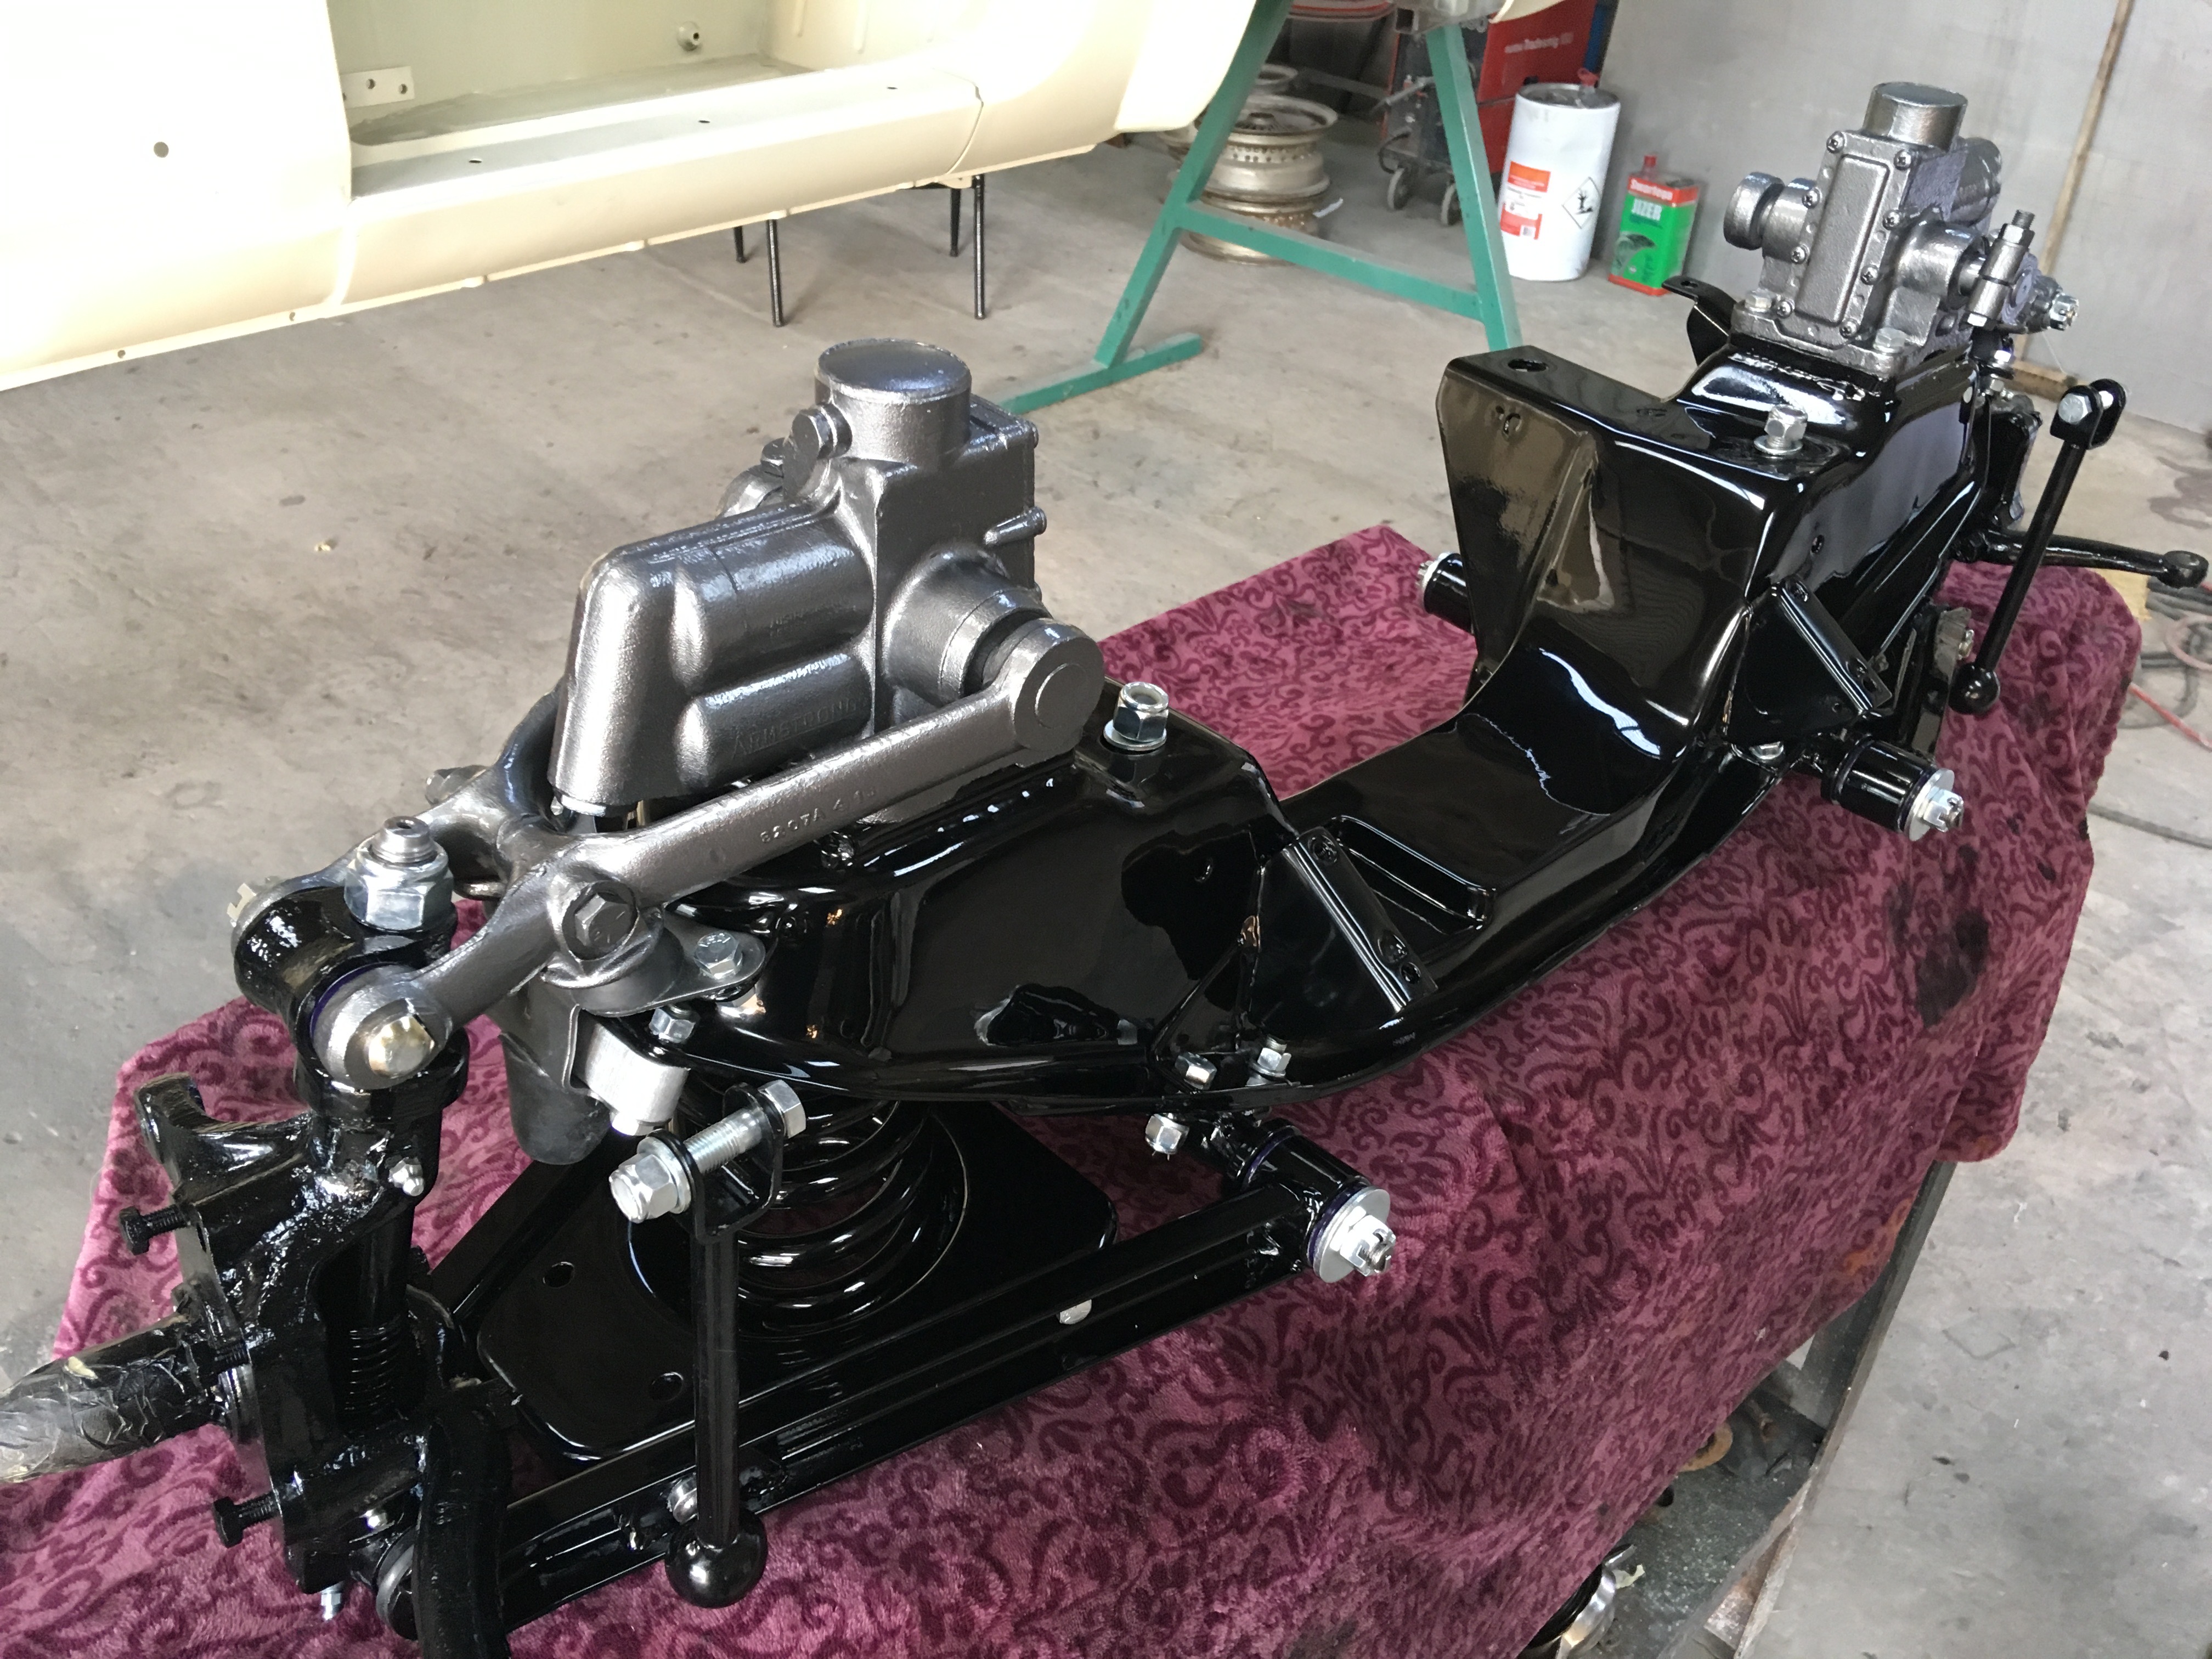
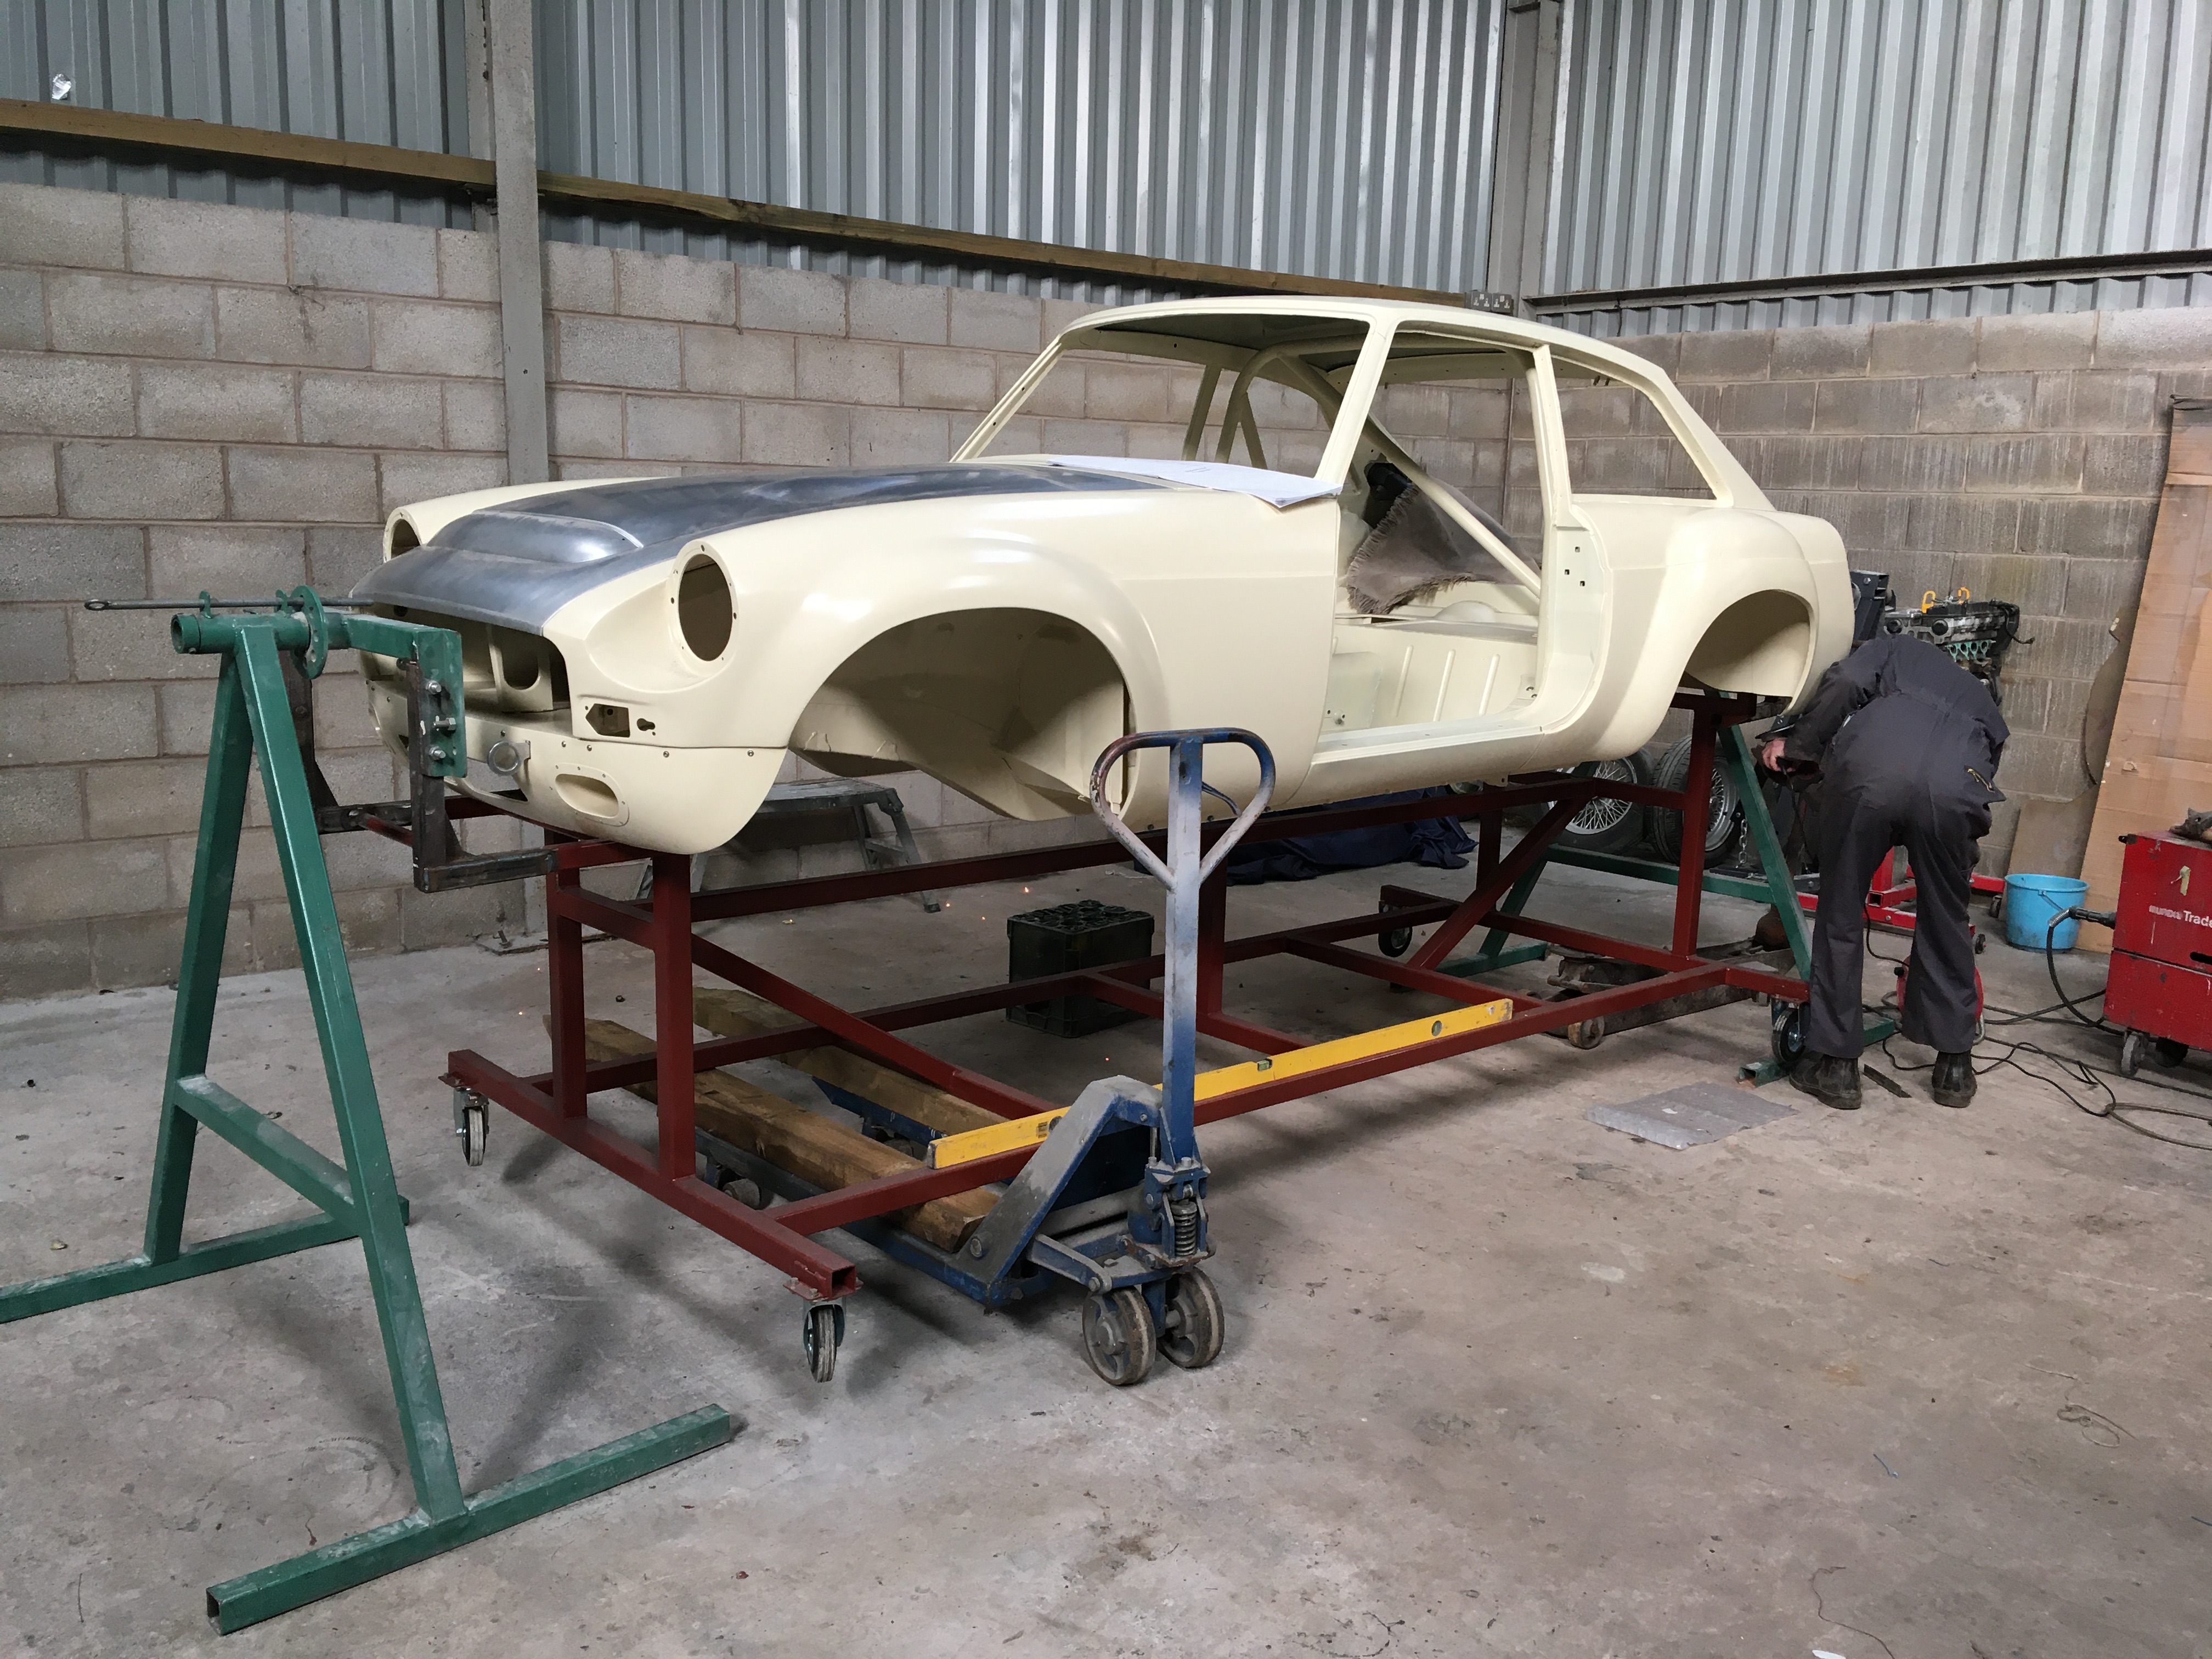
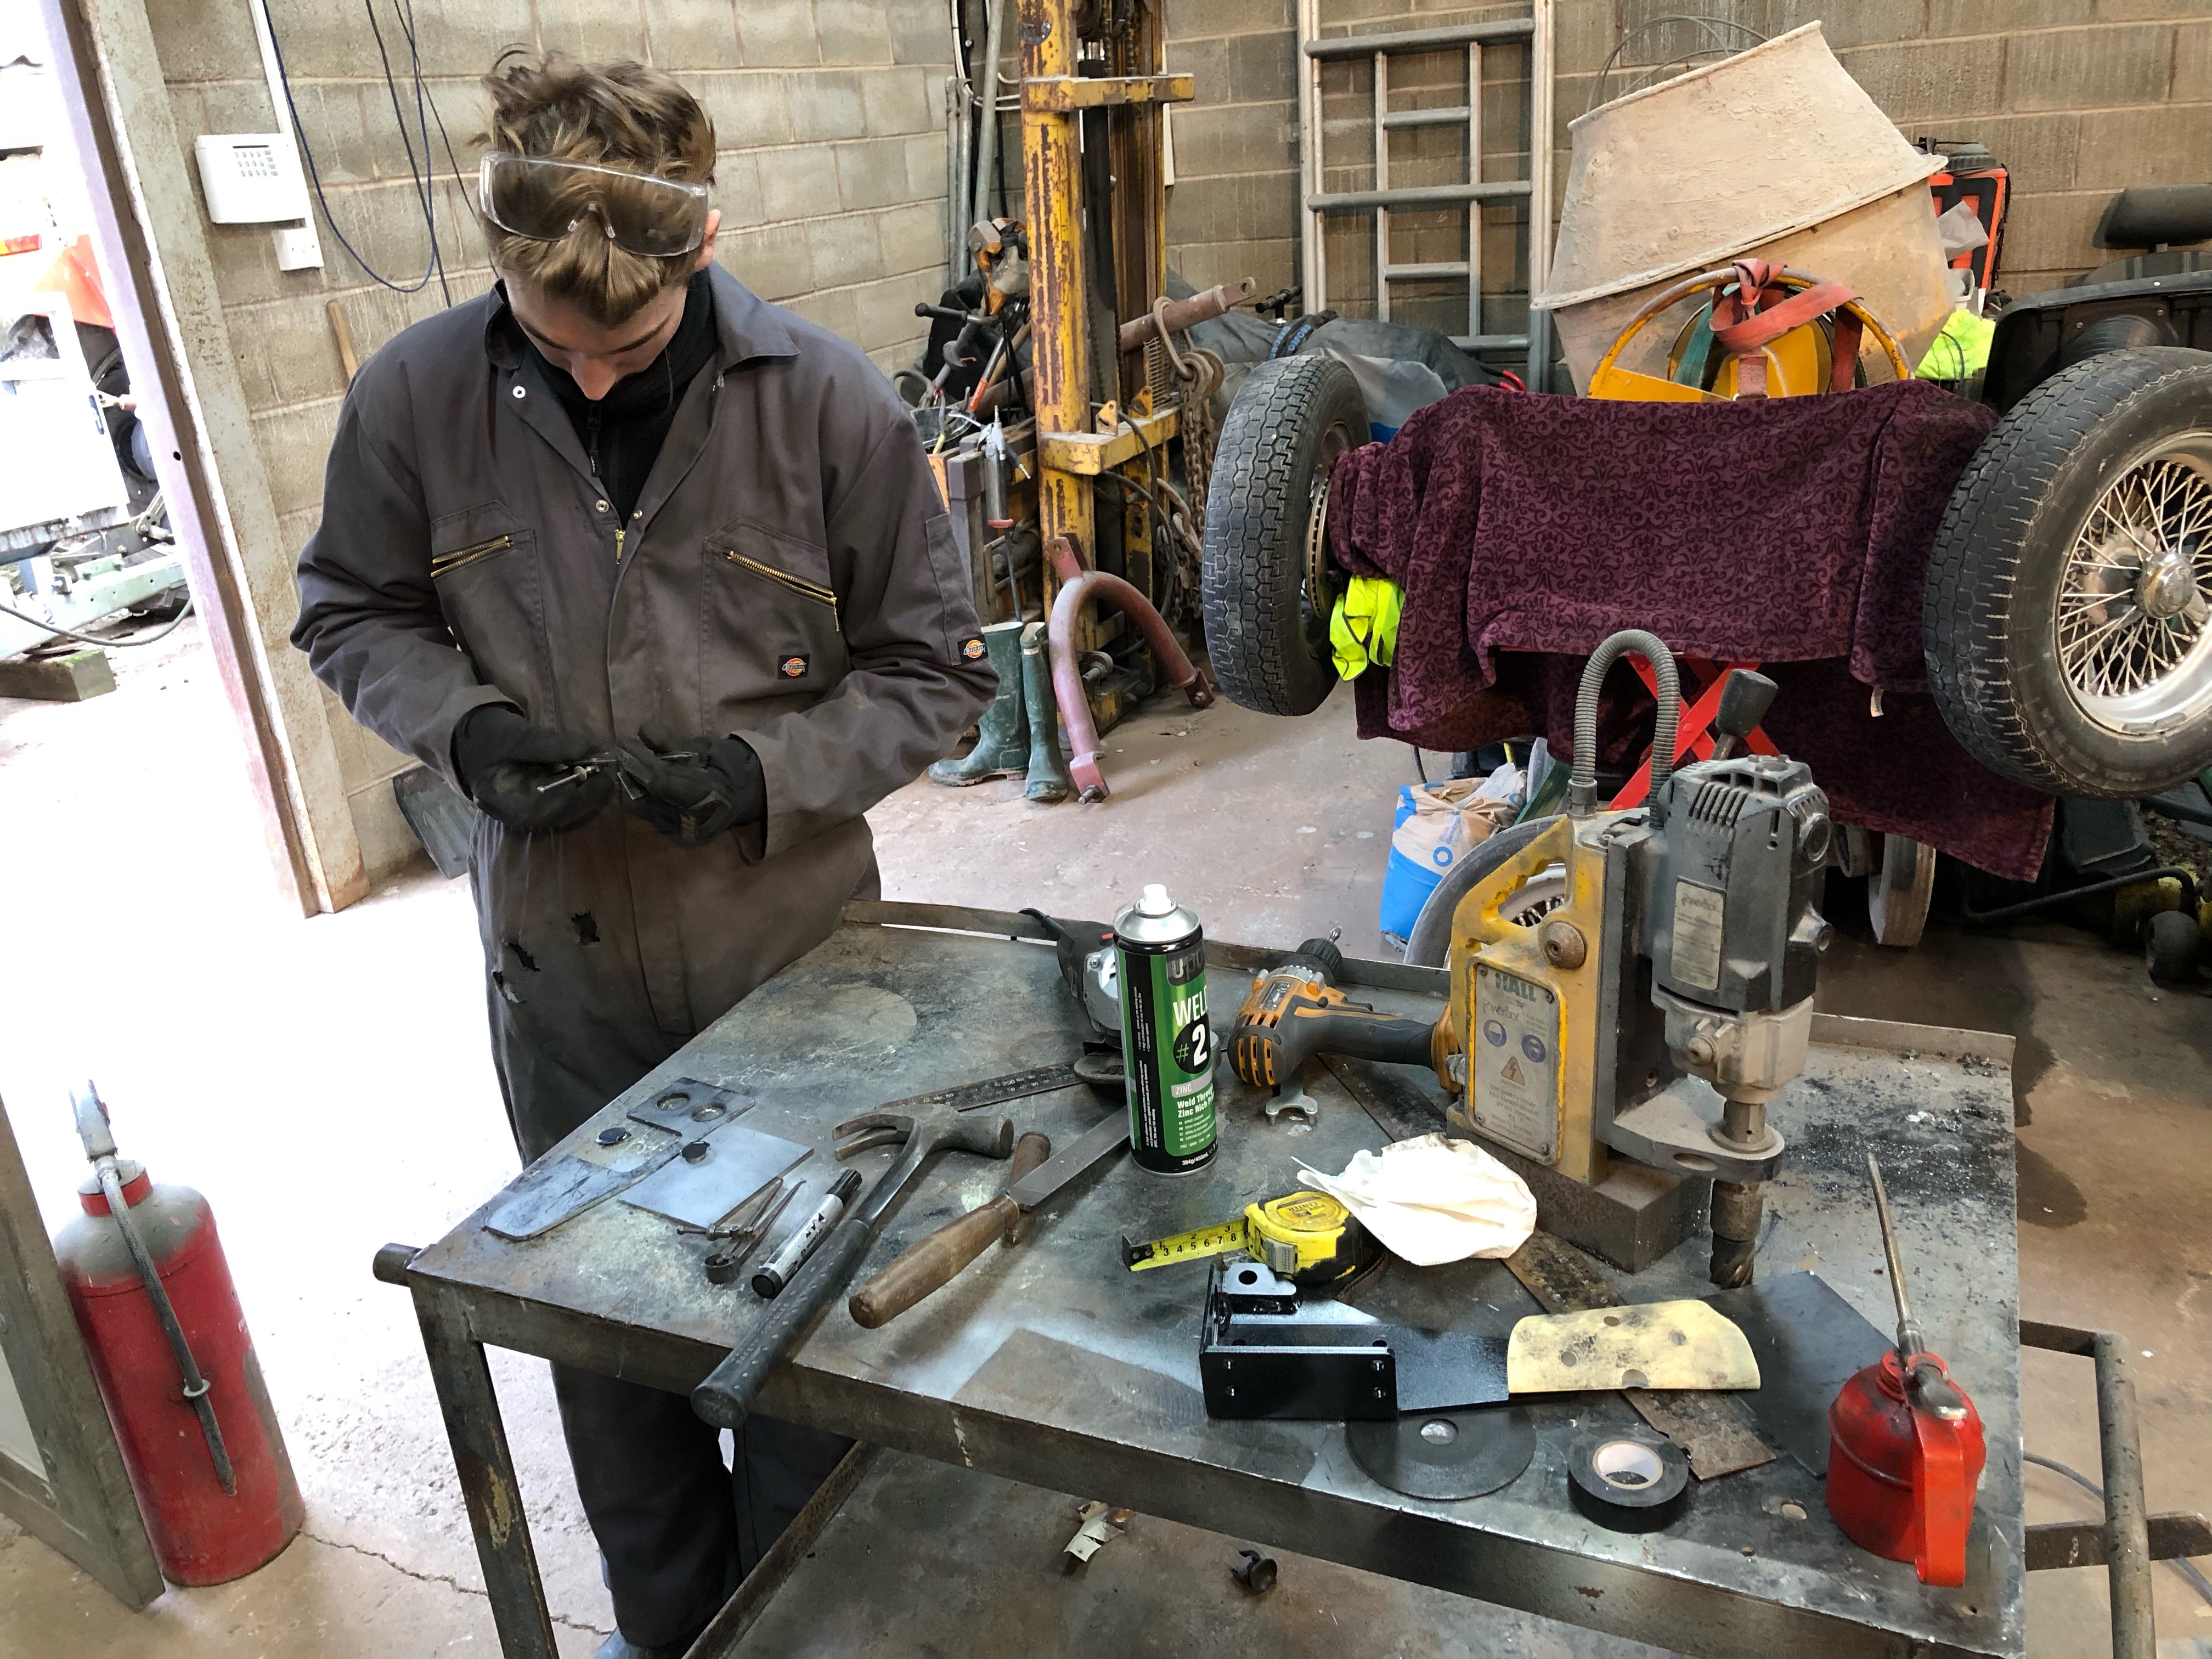
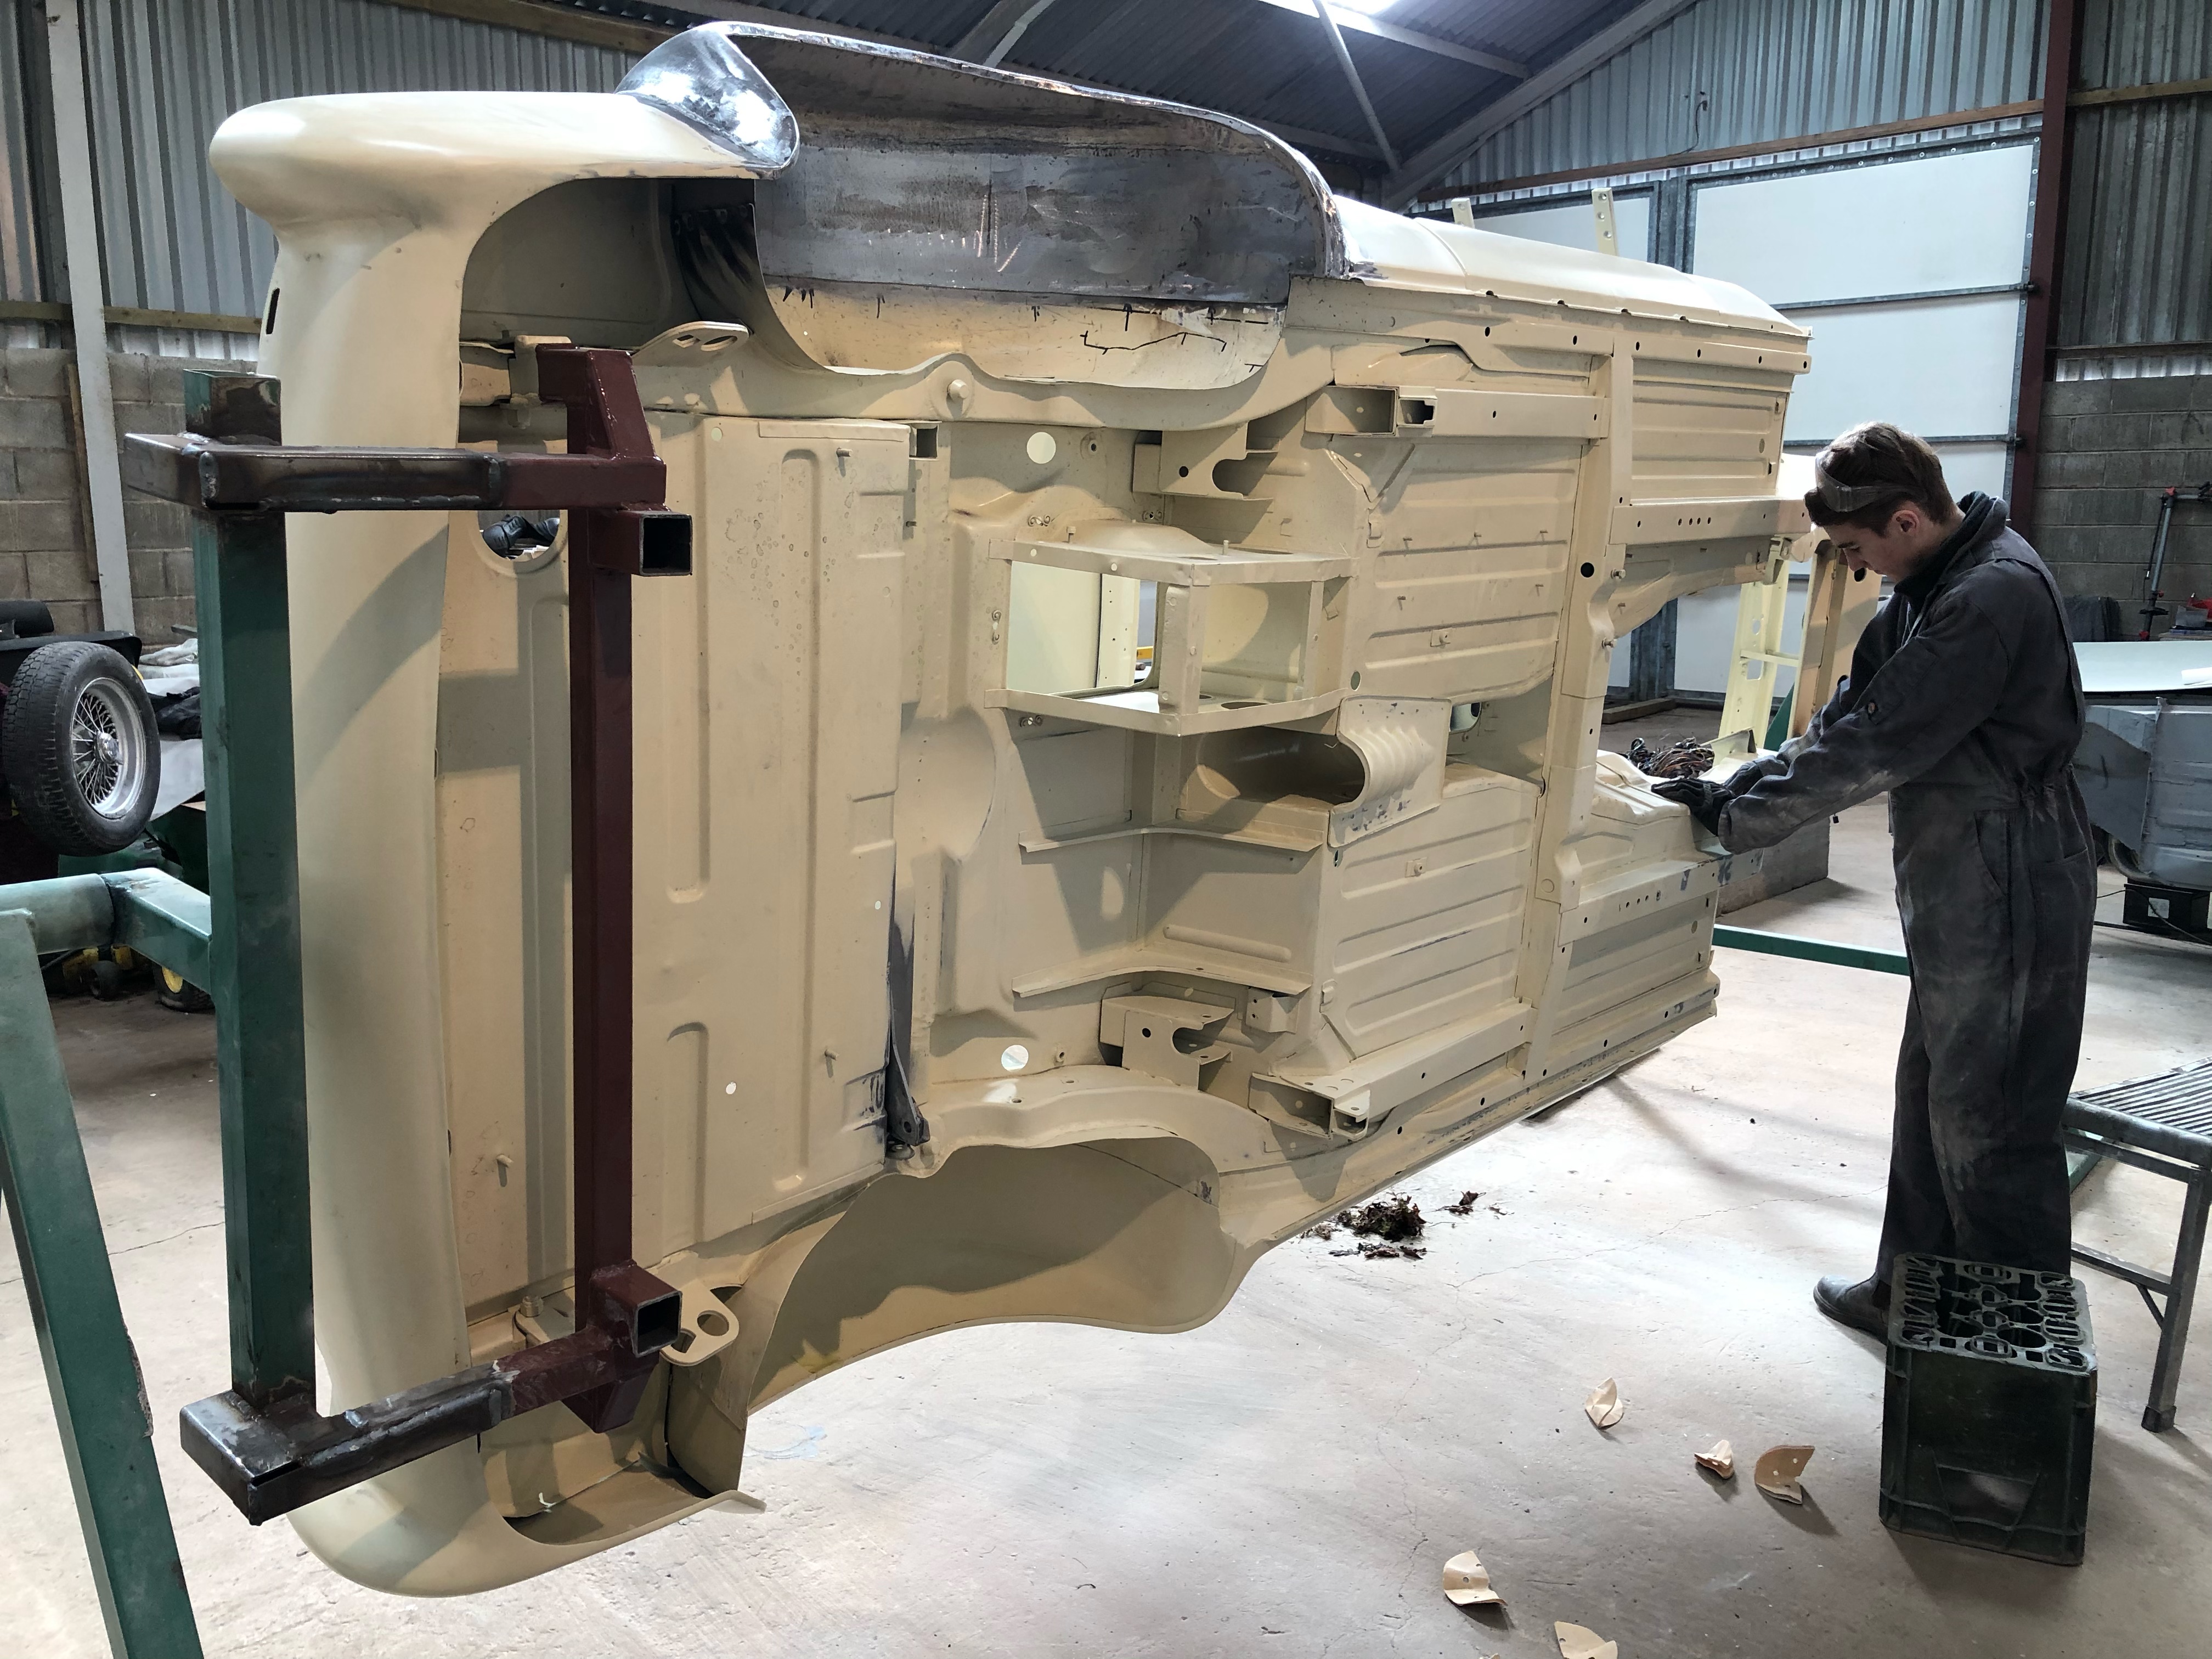
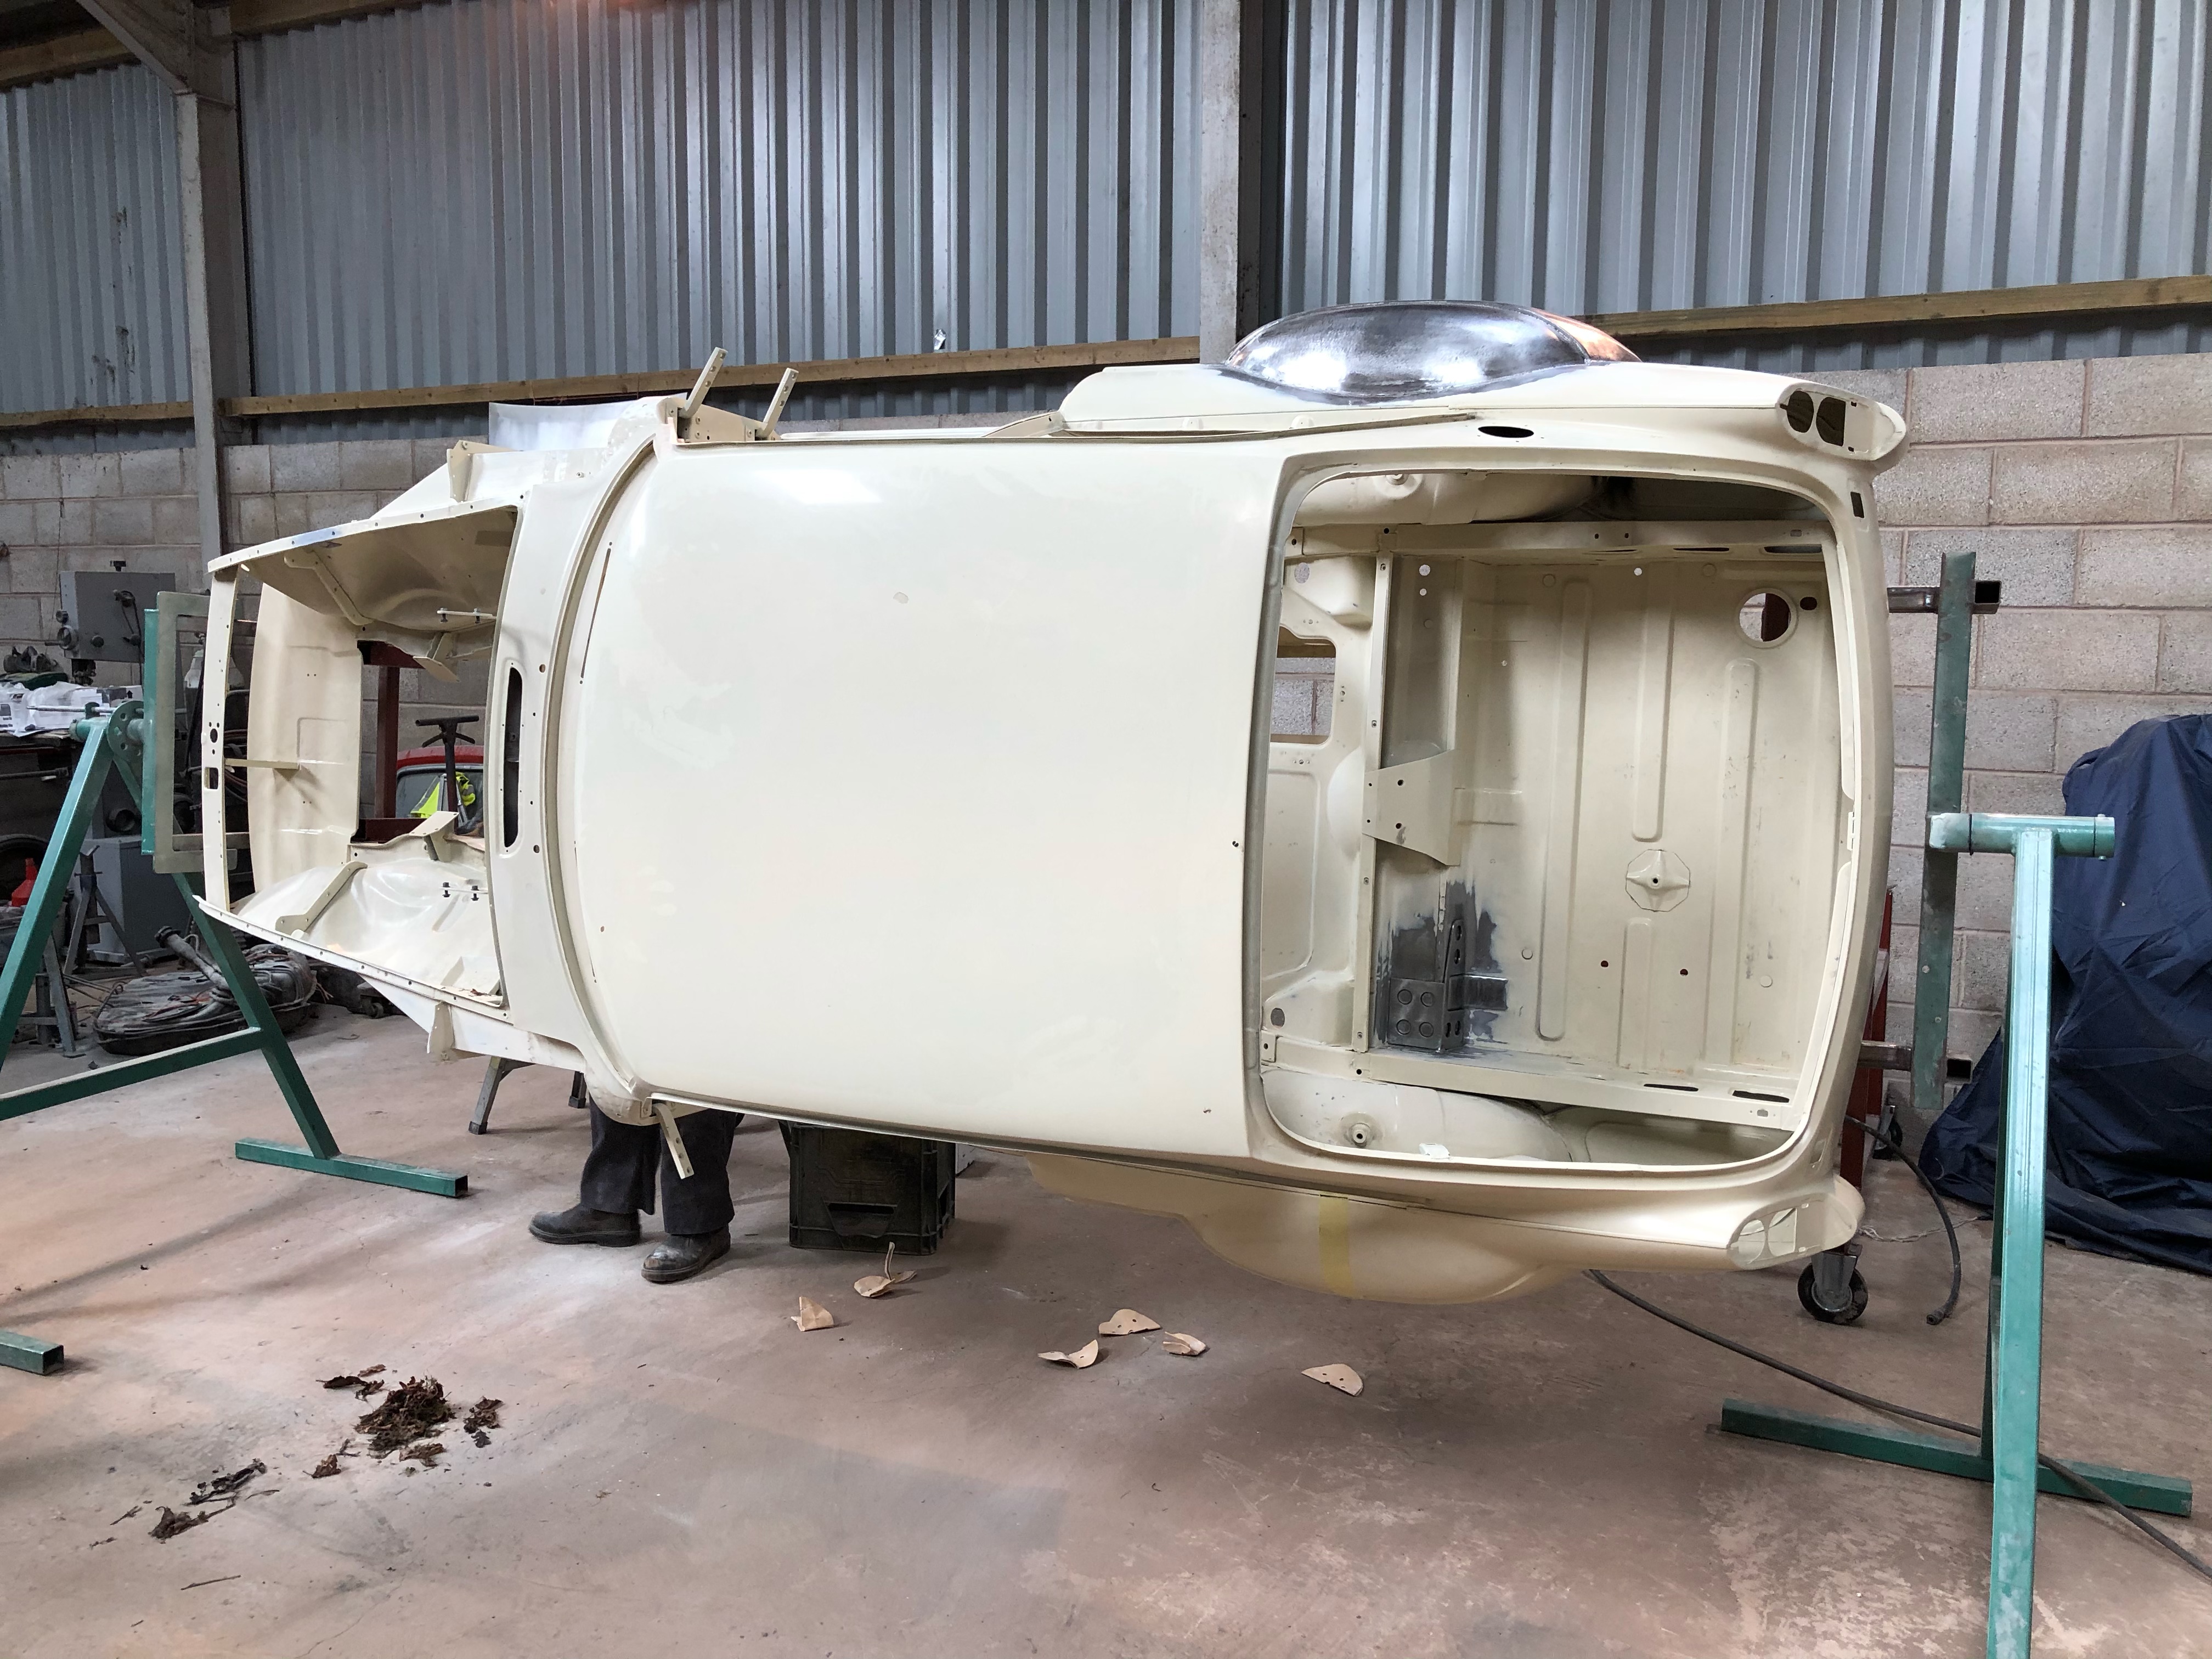
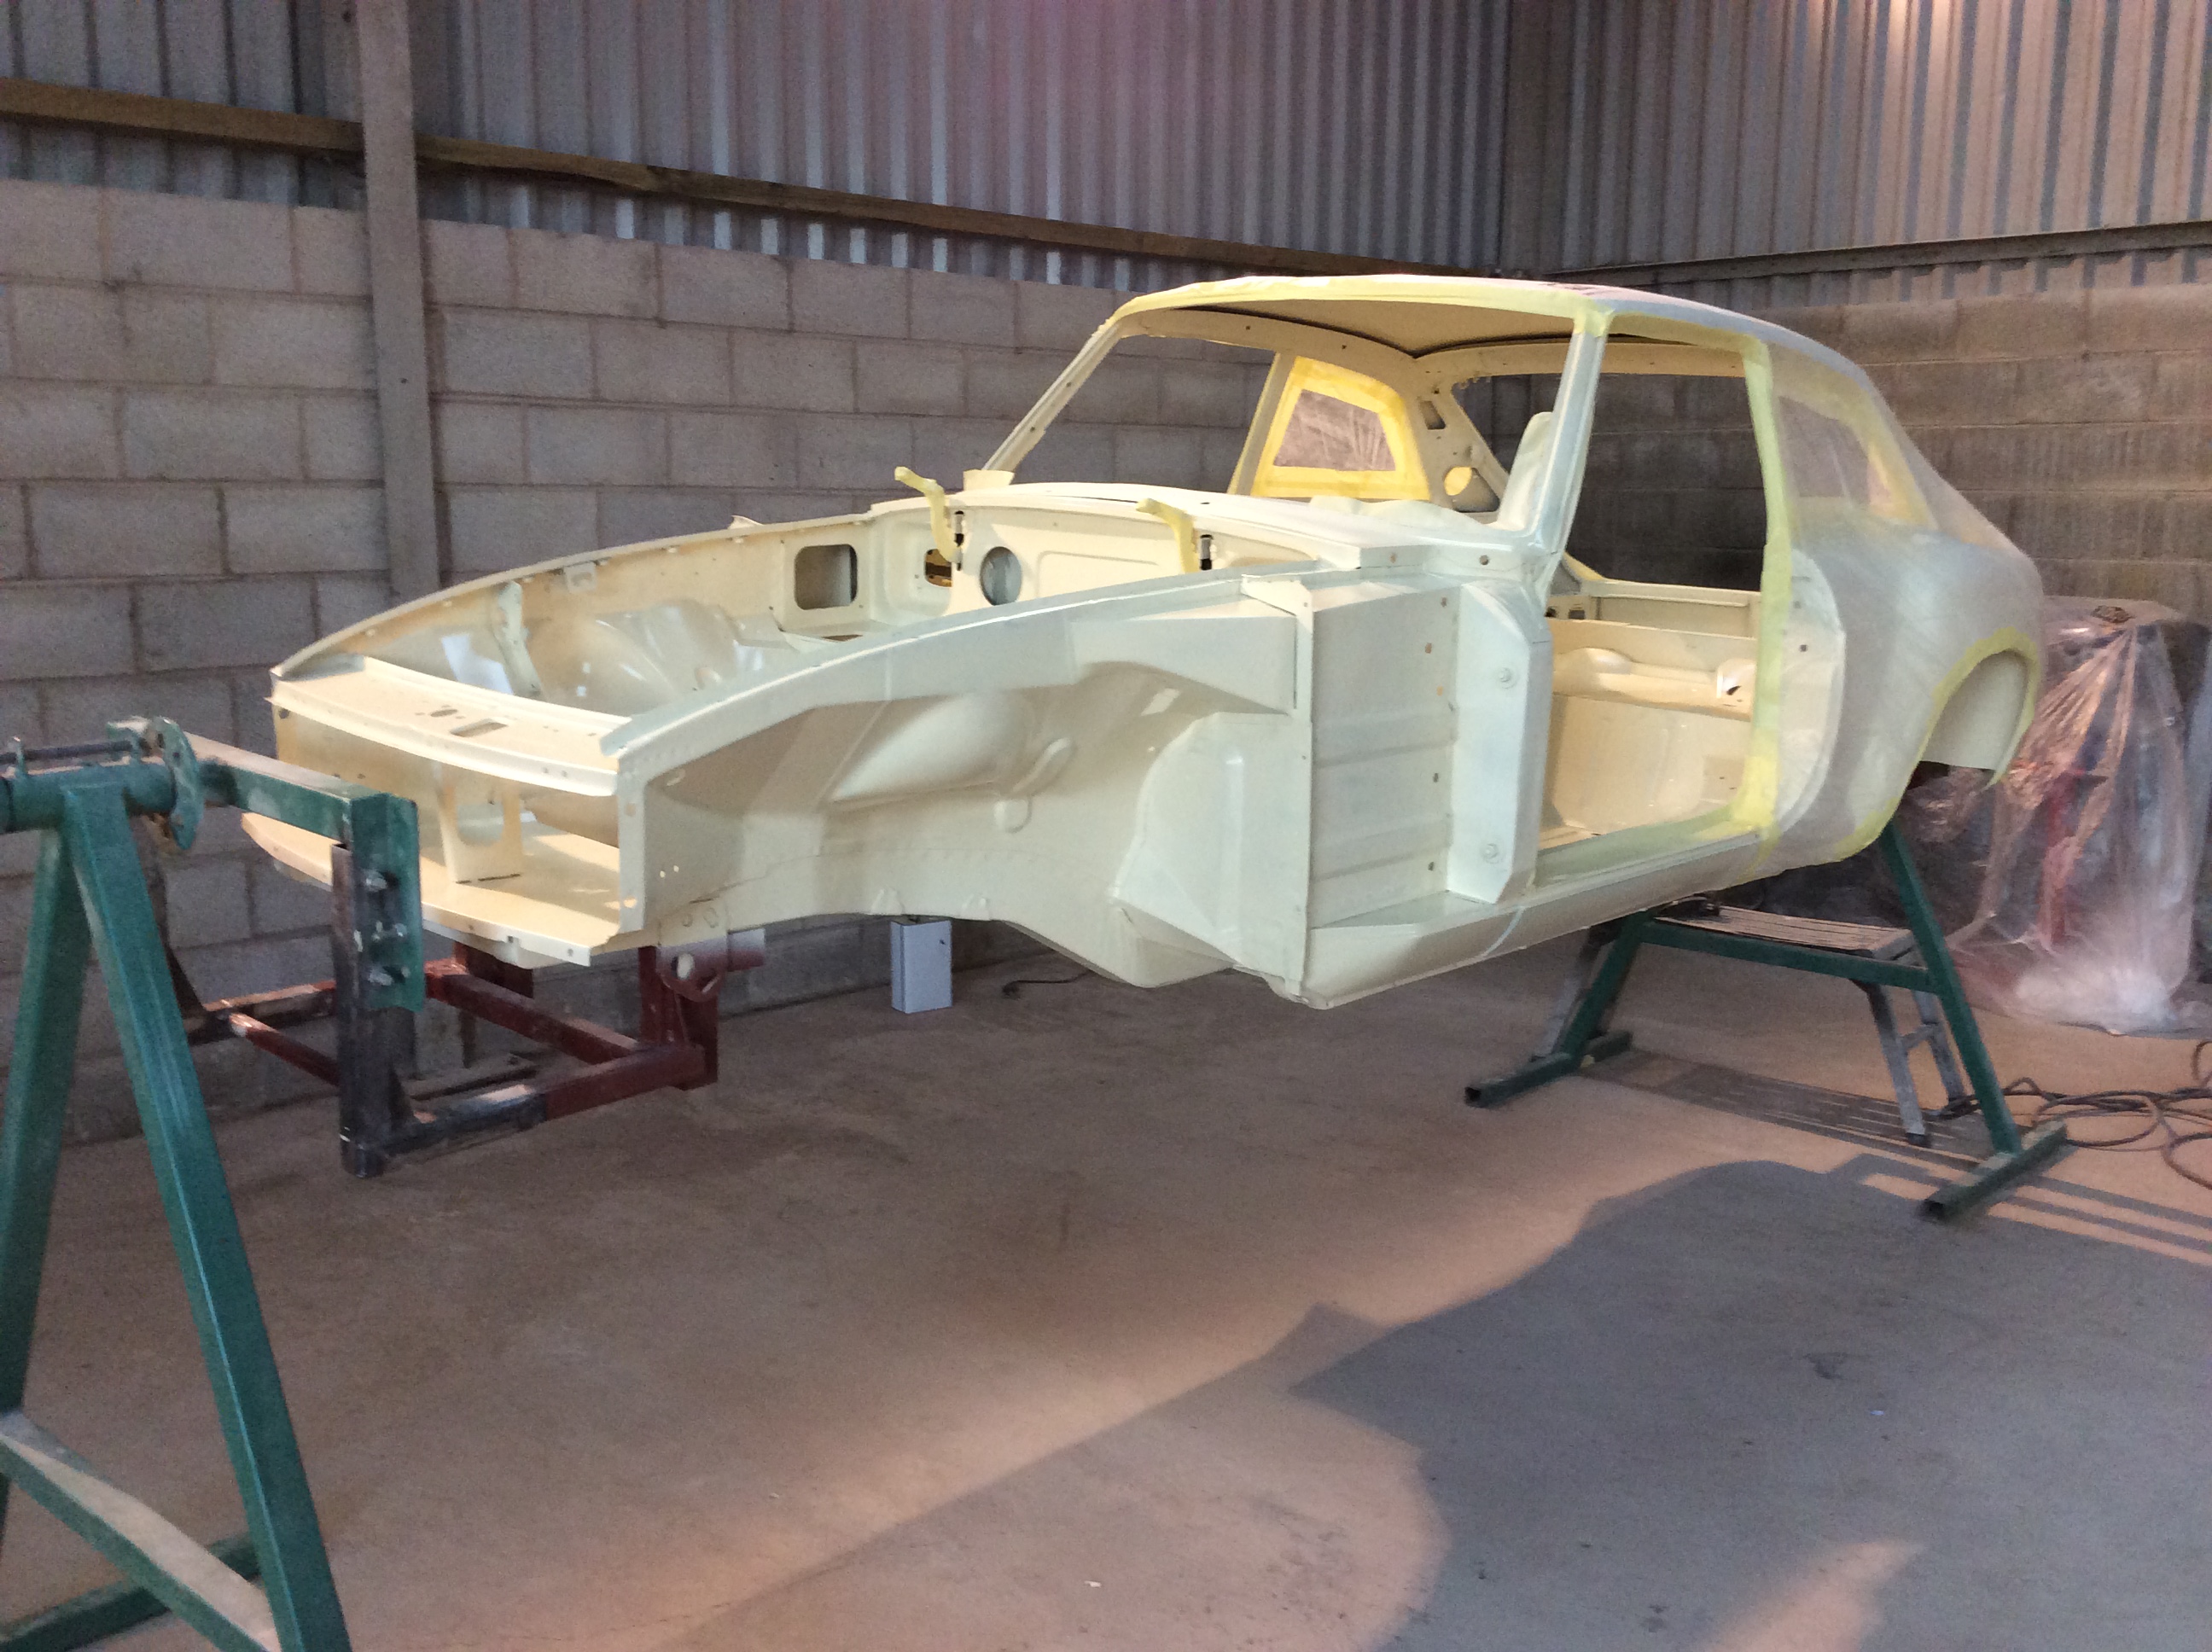
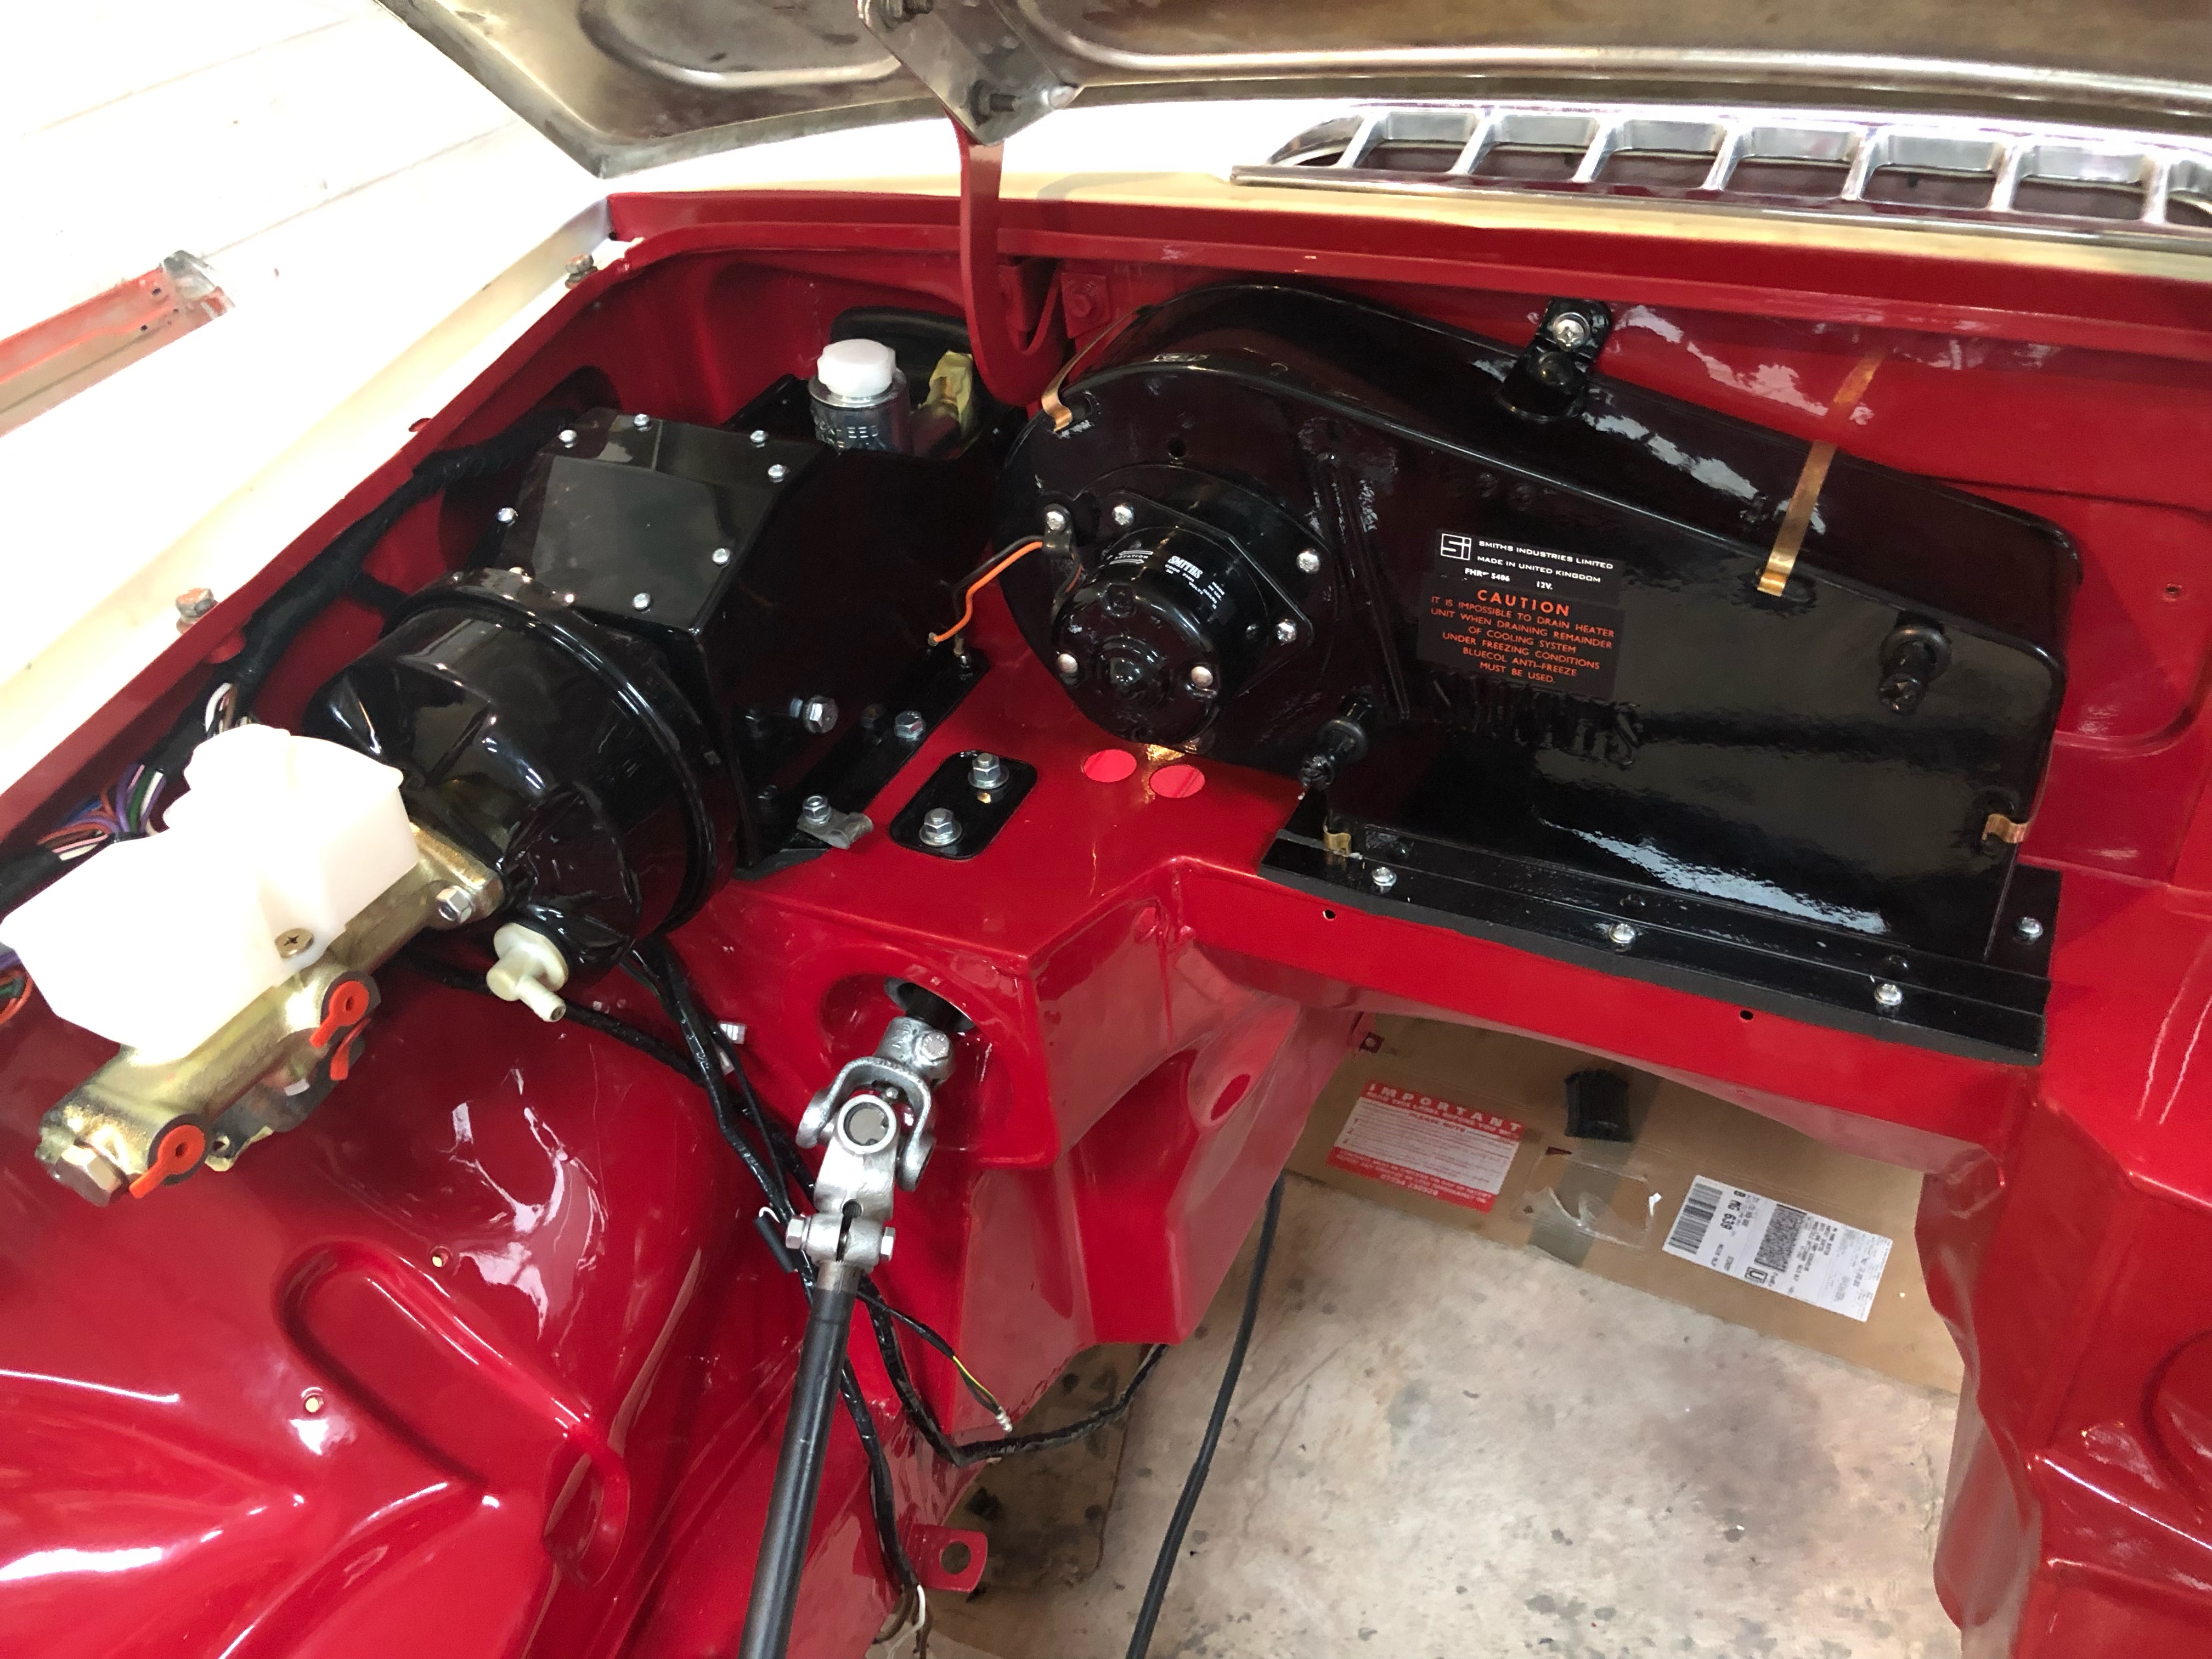
These are the last pictures taken and they have been included to give some idea of the attention to detail Mark and Harvey have taken to make this car so good. Harvey is devestated by the damage to his amazing car but the members of te MG Owners Club are rallying round to help the lad.
A quick dummy run to see how the spare T16 engine would go in, went smoothly. I know roughly where it sits from looking at other pictures, but the engine plates look straight forward enough to make. I’ve had a think about how to get these looking like ‘standard brackets’ so will pick up some 4mm plate.